Windows 10 Error: Unable to Display Current Owner [Complete Fix]
Windows 10 was presented by Microsoft as its latest and greatest operating system and although it does provide some better and futuristic features, it feels miles behind on being the greatest in terms of user experience. A lot of users have been recently complaining about the Unable to Display Current Owner error which is shown while trying to change the permissions of a file in place of the “Owner:” name.

However, there isn’t any need to worry as we have compiled this comprehensive guide to combat this issue on Windows 10 and through this, you should be able to completely get rid of this issue on your computer.
What Prevents the Current Owner from being Displayed?
We feel that it is important that you are also made aware of the causes behind this particular error so you are able to better understand the troubleshooting measures that we are about to implement on our computer.
- Authenticated Users Access: It is possible that you might not have granted access to the file to the authenticated users on your computer, not doing so can prevent the file ownership from being claimed by a particular user and this way, the unable to display current owner message will be shown in place of the owner’s name.
- Disk Check: If you Disk driver contains errors or bad sectors, it will not properly display the owner names for some files because of storage failures and improper resource allotment. Therefore, performing a disk checkup that gets rid of any such issues is always a good idea.
- PC Ownership: The ownership of the computer is usually allotted to the main administrator account or to the trusted installer account on the computer which basically means that all the files on the computer can be accessed by that user. However, if this ownership isn’t defined or has been granted to another user or entity, the unable to display current owner error will be seen.
- Folder Locks: Folder Locks is a third-party application that provides some folder locking and encryption services but it has been seen recently, that if this app is installed on the computer, the error message is displayed in place of the owner’s name due to some permission allotment errors.
Now that you are better aware of the reasons behind the Unable to display current owner error, we can move on towards implementing the fixes.
Before we start:
- Press “Win + I” keys simultaneously on the keyboard to open the settings and select “Update and security”.

Click on Update and Security - From the left pane, select “Troubleshoot” and click on the “Run the troubleshooter” button associated with “Shared Folder”.

Run the troubleshooter


Fixing the Unable to Display Current Owner Error on Windows 10:
Solution 1: Grant full control to authenticated users
- Right-click on the faulty file and select “Properties” from the pop-up menu.
- Navigate to the “Security” tab and click on the “Advanced” button.

Choose Advanced Settings - Now proceed to the “Permissions” tab and click on the “Change Permission” button at the bottom-left of the screen.
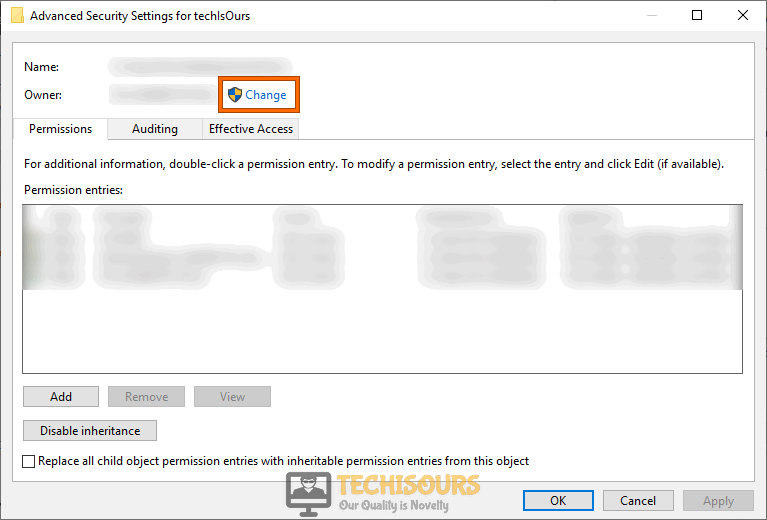
- Now click on the “Change” button parallel to “Owner”.

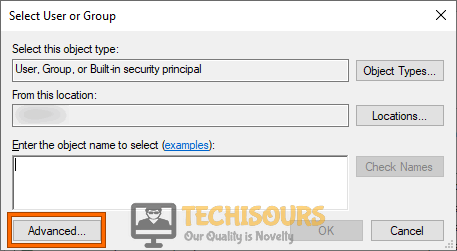
Changing Permissions - Click on the “Advanced” button and then click on “Find now” to search for the owners you can grant permission to.

Click on “Advanced” - Now choose “Authenticated user” from the list of users displayed at the bottom of the window.

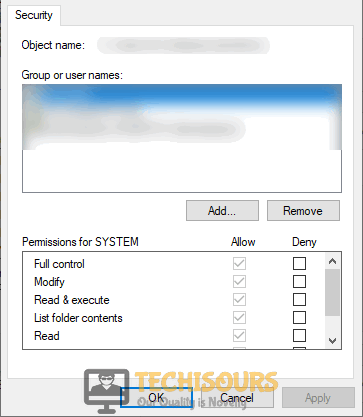
Select “Authenticated user” - Now move back to the “Security” tab in the properties window of the folder and click on the “Edit” button.

Click on the “Edit” button - Now check the “Allow” option parallel to “Full control” and save the settings.

Allowing Full control - Now restart the PC and check whether the unable to display current owner windows 10 issue is rectified.


Solution 2: Check your disk using command prompt
- Click on the search button located on the taskbar and type “cmd”.
- Right-click on “Command Prompt” and select “Run as administrator”.

Run Command Prompt - Now type the following commands, one by one, in the prompt, and hit enter to execute them.
Note: Replace XXXX by the exact location of the faulty file or folder.cd XXXX chkdsk /F
- Hit “Y” on the keyboard to proceed if you are asked for permission to check the disk, and restart your computer if “This volume will be checked the next time the system restarts” message is displayed on the screen.
- Hopefully, after undergoing this process, your problem would be resolved but if you still encounter the issue, kindly proceed to the next potential fix to this solution.

Solution 3: Enable the built-in Administrator account
- Click on the search button located on the taskbar and type “cmd”.
- Right-click on “Command Prompt” and select “Run as administrator”.
Run Command Prompt - Now type the following command in the command window and hit enter to execute it:
net user administrator /active:yes
- After the execution of the command, you would be automatically logged out of your user account.
- Click on the “Administrator” account displayed on the screen and proceed to access the faulty file or folder to check if the error persists.
- After performing your tasks, disable the built-in administrator account by executing the following location in the elevated command prompt.
net user administrator /active:no
Solution 4: Grant folder/file ownership to all Administrators
- Click on the search button located on the taskbar and type “cmd”.
- Right-click on “Command Prompt” and select “Run as administrator”.
Run Command Prompt - Now type the following commands, one by one, in the prompt and hit enter to execute them.
Note: Replace XXXX by the exact location of the faulty file or folder.takeown /F XXXX /a /r /d y icacls XXXX /grant administrators:F /t
- After the successful execution of these commands, try to access the troublesome folder and see whether the unable to display current owner windows 10 error persists.
Solution 5: Take ownership of the PC using Registry Editor
- Press the “Win + R” buttons simultaneously on the keyboard to open the Run box and search for “regedit” command.

Typing “regedit” - Now navigate to the following location and right-click on the “shell” folder. Select “New > Key” and name it as “runas”.
Computer\HKEY_CLASSES_ROOT\*\shell

Creating new key - Now open the “runas” folder from the left pane and double-click on the “(Default)” located at the right side of the window.
Select Default Folder - Type “Take Ownership” in the text field related to “Value Data” and click on the “OK” button to save the changes.

Take Ownership - Now right-click on an empty space on the right pane, select “New > String Value” and name it as “NoWorkingDirectory”.
- Now right-click on the “runas” folder located on the left pane. Select “New > Key” and name it as “command”.
- Afterward, open the “command” folder from the left pane and double-click on the “(Default)” located on the right side of the window.
- Type the following text in the text field related to “Value Data” and click on the “OK” button to save the changes.
cmd.exe /c takeown /f \"%1\" && icacls \"%1\" /grant administrators:F
Edit “Value Data” - Now right-click on an empty space on the right pane, select “New > String Value” and name it as “IsolatedCommand”.
Choose IsolatedCommand - Now double-click on the “IsolatedCommand” entry and type the following text in the text field related to “Value Data”.
cmd.exe /c takeown /f \"%1\" && icacls \"%1\" /grant administrators:F
Edit Value Data - Now navigate to the following location from the right pane of the registry editor and repeat the steps 2-10 to make new entries in the respective folder.
Computer\HKEY_CLASSES_ROOT\Directory\shell
- Make sure you type the following path in the value data of “(Default)” and “IsolatedCommand” that you have created in the new location.
cmd.exe /c takeown /f \"%1\" /r /d y && icacls \"%1\" /grant administrators:F /t
- Now right-click on the troublesome file or folder and select “Take Ownership” from the pop-up menu and see if the error has been terminated.


Note: If you want to revert the changes, just delete the runas key that you created, from both of the locations.
Solution 6: Disable third-party antivirus software
- Click on the “^” button located at the bottom right of the taskbar and then right-click on the Avast icon.
- Hover over the “Avast Shield Control” and select the “Disable Permanently” option to disable your antivirus software.

Disable antivirus

Note: If you have any other Anti-virus installed on your system, like AVG or BitDefender, disable it by following the same steps as indexed above.
Solution 7: Uninstall Folder Locks
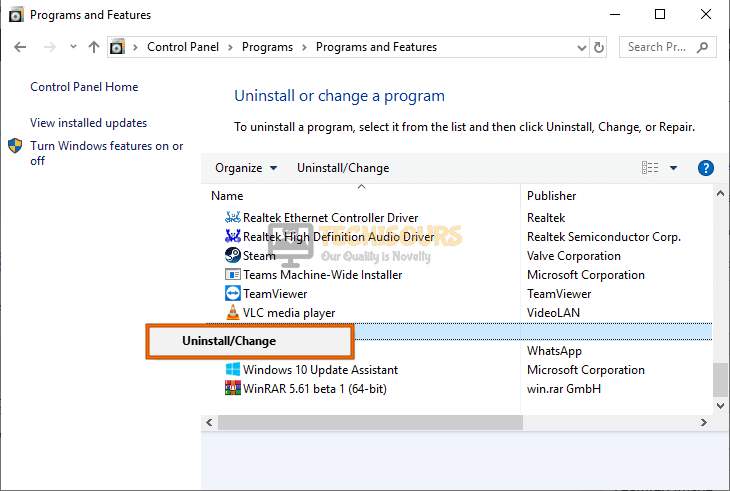
- Press “Windows key + I” keys simultaneously on the keyboard to open the run box and search for “appwiz.cpl” command.
Typing “appwiz.cpl” - Now right-click on any software that you use to lock your folders or files and select “Uninstall” to uninstall that application completely from your PC.

Uninstall Folder locks

Solution 8: Test in safe mode
- Press “Win + R” keys simultaneously on the keyboard to open the run box and search for “msconfig” command.

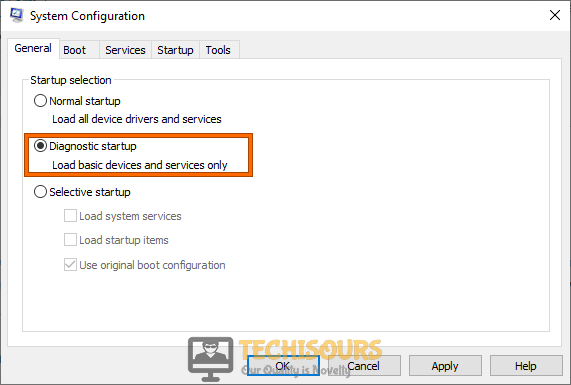
Typing in “Msconfig” - Under the “General” tab, check the box parallel to “Diagnostic startup” and click on the “Apply” button.

Diagnostic startup - After applying the settings, restart your computer to boot in safe mode and try to access the folder or file you were having trouble with.
- If the error persists, click on the search button located on the taskbar and type “cmd”.
- Right-click on “Command Prompt” and select “Run as administrator”.
Run Command Prompt - Now type the following command in the prompt and hit enter to execute it.
net user administrator /active:yes
- After the execution of the command, you would be automatically logged out of your user account.
- Click on the “Administrator” account displayed on the screen and proceed to open the “Control Panel”.
Open Control panel - Select “Large Icons” from the drop-down list parallel to “View By” located at the top-right of the screen and click on the “User Account” option.

Click User Account - Here, click on the “Change User Account Control settings” option located at the bottom of the screen.

Change User Account Control settings - Now scroll the slider to “Never Notify” in order to disable the UAC.

Choose Never Notify Option - After disabling the UAC, proceed to access the file or folder you were having trouble with.
- After carrying your task out, open the command prompt again with administrative privileges, and execute the following command.
net user administrator /active:no
- Now that you have disabled the built-in administrator account, open the Control panel again and revert the changes you made to disable the “UAC”.
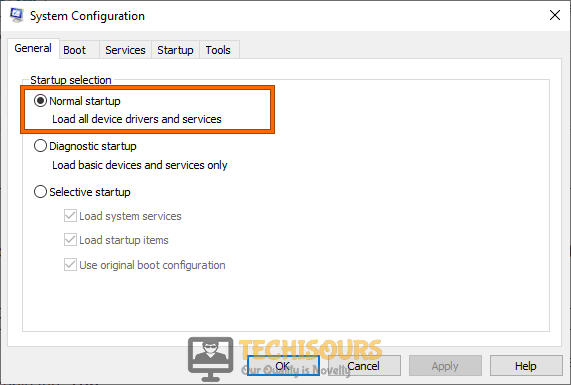
- Now open the “System Configuration” again and check the box parallel to “Normal Startup”.
Click Normal Startup - Click on the “Apply” button to save the settings and reboot your computer back into the normal mode.


Hopefully, the error might have gone by now but if you need further assistance, contact here.