How to Fix Error 0xC1900223 while Applying Feature Update to Windows 10, version 1903 [Fixed Completely]
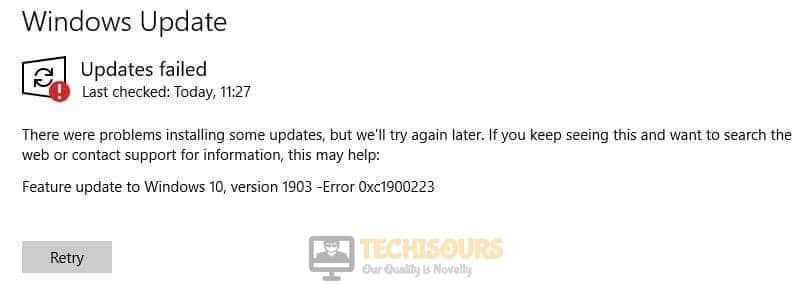
Windows is a GUI based Operating System that is preferred and used by the majority of users all around the globe. It gained its popularity because of its user-friendly environment and a plethora of unique and efficient features. However, users have reported that they have encountered “Updates Failed: There were problems installing some updates, but we’ll try again later. Feature update to Windows 10, version 1903 – Error 0xC1900223″ message while trying to install the latest Update of Windows on their computer. If you are also unable to upgrade to the latest Windows version due to Error 0xC1900223, don’t worry because we have gathered some efficient solutions for you to rectify this error completely from your computer.
What Causes the Error 0xC1900223 while Updating Windows 10?
After receiving numerous complaints from the users, we decided to look into the Error 0xC1900223 and found out some major triggers that might be the potential culprits behind this error.
Windows Update Services:
You might encounter Error 0xC1900223 if Windows Update Services are not enabled on your computer or if they are enabled but are not functioning properly due to certain reasons. So, to get around this problem, disable all the services and re-enable them by following the steps indexed in Solution 2.
Corrupt System Files:
There are some essential files in your system’s directory that are crucial for your computer to install a new Windows update. Sometimes these files get corrupted and trigger the Error 0xC1900223 while updating your Windows. So, scan for these devices and fix them by following the procedure explained in Solution 3.
Pi-hole ad-blocker utility:
Pi-hole is an advertisement blocking application that functions just like a DNS sinkhole, intended for use on a private network. Most of the users have reported that they eliminated Error 0xC1900223 from their computer by disabling Pi-hole. If you have pi-hole enabled your computer, disable it by referring to the steps explained in Solution 4.
Corrupt DNS cache:
DNS cache is a type of temporary database that maintains a record of recently visited sites. You might encounter Error 0xC1900223 while trying to update your Windows via Internet if your DNS cache contains some corrupted files. So, flush your DNS cache in order to rectify this error by following the steps listed in Solution 5.
Virus and threats:
Your computer has much higher chances to get infected by a virus if you download different applications from the internet’s unknown sources. You might encounter Error 0xC1900223 if your computer has a virus that prevents you to install the latest Windows update. So, to eliminate this error, scan your system for viruses and threats by following the steps indexed in Solution 6.
Enabled Firewall or anti-virus software:
Windows Firewall or any third-party antivirus software is responsible to filter the data coming to your system from an external source in order to protect your system from viruses and threats. These Softwares must be active all the time to ensure full-time protection. However, sometimes these Softwares block several features of your system that prevent you to install a Windows update properly. So, as a solution, disable these Softwares in your computer by following the steps listed in Solution 7 and Solution 12.
Wrong Date/Time settings:
If you are using Media Creation Tool or Windows Update Assistant to update your operating system, then your computer’s date/time settings must be synchronized with the internet’s time server. If your date/time settings are not synchronized with the internet’s time server then you might encounter Error 0xC1900223. So,to terminate this issue, follow the steps indexed in Solution 8.
Less space on the hard drive:
A 32-bit version of Windows and a 64-bit version of Windows require 16 GB and 20 GB of free space for the installation, respectively. You might encounter Error 0xC1900223 if you are trying to install Windows update on a computer with less than 20 GB of free space. So, make sure to free up some space before installing the update, refer to the solution.
Metered internet connection:
Metered internet connection allows the user to have more control over the data usage in case the data plan is limited. Many users have reported that if this feature is enabled on Windows, there are higher chances for Error 0xC1900223 to occur while installing a new Windows update. Therefore, to terminate this error, follow the steps listed in Solution.
Enabled developer mode:
Windows developer mode is an environment created in Windows that assists you to create and test your apps more easily. You might face trouble while updating your Windows to the latest version if Windows developer mode is enabled on your PC. If this is the case, disable this feature by following the steps indexed in Solution 11.
Before We Start:
It is always recommended to get the little things out of the way before you proceed to adopt any major solution to fix Error 0xC1900223. Follow the steps to carry this task out.
- Take the power adapter of your router out of the socket and wait for it to completely shut down.

Removing the Plug from the socket - Meanwhile, change the place of the router where it can get a better signal strength. Also, move other electronic devices away from the router that might interfere with the signals.
- After waiting for a couple of minutes, reinsert the power adapter of the router back into the socket, start it and wait till it acquires complete network signals.
- Now detach all the removable hardware components from your computer, such as USB or printer, etc.
- Before you proceed to update your Windows, make sure that there is enough space in your hard drive so that Windows update can be installed successfully.
- Check if you can now install the Windows Updates.

Fixing the Error 0xC1900223 on Windows 10:
Solution 1: Run Windows Update Troubleshooter
- Press “Win+I” on your keyboard to open “Settings” and navigate to “Update and Security”.

Update and Security - From the left pane, navigate to the “Troubleshoot” tab and click on “Windows Update” from the right side of the window

Windows Update troubleshooter - After the troubleshooting process is completed, check if the Error 0xC1900223 is terminated.


Solution 2: Reset Windows Update services
- Press the “Win + R” keys on the keyboard to open the Run box. Type “cmd” and hit the “Shift + Ctrl + enter” keys on the keyboard simultaneously to open it as administrator.

Open Command Prompt as admin - Now type the following commands one by one and hit enter to execute them.
net stop wuauserv
net stop cryptSvc
net stop bits
net stop msiserver
Ren C:\Windows\SoftwareDistribution SoftwareDistribution.old
Ren C:\Windows\System32\catroot2 Catroot2.old
net start wuauserv
net start cryptSvc
net start bits
net start msiserver
- After resetting the services, check if the Error 0xC1900223 persists.

Solution 3: Fix corrupted system files
- Press the “Win + R” keys on the keyboard to open the Run box. Type “cmd” and hit the “Shift + Ctrl + enter” keys on the keyboard simultaneously to open it as administrator.
Open Command Prompt as admin - Now type the following commands one by one and hit enter to execute them.
sfc /scannow
DISM.exe /Online /Cleanup-image /Scanhealth
DISM.exe /Online /Cleanup-image /Restorehealth
DISM.exe /online /cleanup-image /startcomponentcleanup
chkdsk /scan
- After the repair process is finished, check if the Error 0xC1900223 is terminated.
Solution 4: Disable Pi-hole Adblocker utility
On your PC:
- Press the “Win + R” keys on the keyboard to open the Run box. Type “cmd” and hit the “Shift + Ctrl + enter” keys on the keyboard simultaneously to open it as administrator.
Open Command Prompt as admin - Type the following commands one by one in the prompt and hit enter to disable pi-hole on your computer.
pihole
pihole disable
- After disabling the pi-hole, proceed to update your window and check if the error is removed.
- If you don’t encounter this error, enable pi-hole after updating your Windows by executing the following commands in the command prompt.
pihole
pihole enable
On your Router:
- Press the “Win + R” keys on the keyboard to open the Run box. Type “cmd” and hit the “Shift + Ctrl + enter” keys on the keyboard simultaneously to open it as administrator.
Open Command Prompt as admin - Type the following commands in the prompt and hit enter to disable pi-hole on your computer.
ipconfig
- Scroll down until you see a setting for “Default Gateway” under Ethernet or Wi-Fi.

Default Gateway - Copy the router’s Default Gateway IP Address and paste it in your browser’s search bar to open your “Internet Settings”.
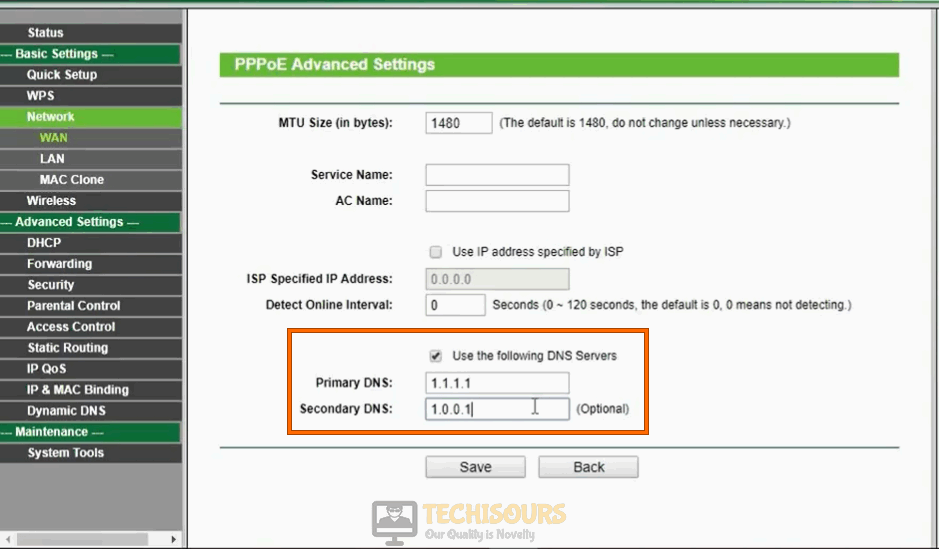
- From the left pane, navigate to the “Network” tab and select “WAN”.

Select WAN - Now check the box parallel to “Use the following DNS server” and enter “1.1.1.1” and “1.0.0.1” in the “Primary DNS” and “Secondary DNS” text fields respectively to switch to “Cloudflare server”.
Switch to Cloudflare server - Now save the settings and check if the error is removed.


Solution 5: Rename your Host files and flush your DNS
- Open the file explorer and navigate to the following location in your directory.
C:\Windows\System32\drivers\etc
- Select the file named “hosts” and rename it to “hosts.old”. Now save the changes and close the file explorer.

Rename your Host files - Press the “Win + R” keys on the keyboard to open the Run box. Type “cmd” and hit the “Shift + Ctrl + enter” keys on the keyboard simultaneously to open it as administrator.
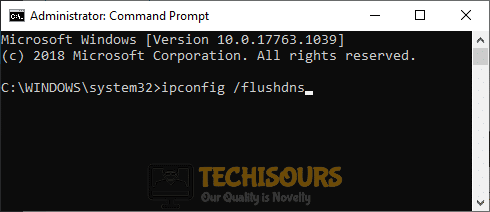
Open Command Prompt as admin - Now type the following commands hit enter to execute it.
ipconfig /flushdns
ipconfig /registerdns
ipconfig /release
ipconfig /renew

Flushing DNS - After the DNS cache is flushed, rename “hosts.old” back to “hosts” and check if the error persists.

Solution 6: Scan your system for viruses
- Press “Win+I” on your keyboard to open “Settings” and navigate to “Update and security”.
Update and Security - Navigate to “Windows Security” from the left pane and select “Virus and threat protection” from the right side of the window.
Virus and threat protection - Now click on “Scan options” and check the box parallel to “Full scan”.
- Click on “Scan now” and check if the Error 0xC1900223 is rectified after the scan is completed.

Perform a full scan


Solution 7: Turn off Windows Defender Firewall
- Press the “Win + R” keys on the keyboard to open the Run box and search for “Control Panel”.
Control panel - From the top-right corner of the screen, set the “View by:” option to “Large icons” and click on “Windows Defender Firewall”.

Windows Defender Firewall - Now select “Turn Windows Defender Firewall on or off” from the left pane.

Turn Windows defender firewall on or off - Now check the box parallel to “Turn off Windows Defender Firewall” under both “Private network settings” and “Public network settings” sections.
Turn off Windows defender firewall - Check if doing so fixes the Error 0xC1900223 on your computer.


Solution 8: Modify the system’s date and time
- Press the “Win + R” keys on the keyboard to open the Run box and search for “Control Panel”.
Control panel - From the top-right corner of the screen, set the “View by:” option to “Large icons” and click on “Date and Time”.

Date and Time - Navigate to the “Internet Time” tab and click on “Change settings”.

Change settings - Check the box parallel to “Synchronize with internet time server” and click on “OK”.

Synchronize with the internet time server - Apply the settings and check if the Error 0xC1900223 is eliminated.


Solution 9: Use disk cleanup to free some space
- Press “Win+R” on your keyboard and search for “cleanmgr”.
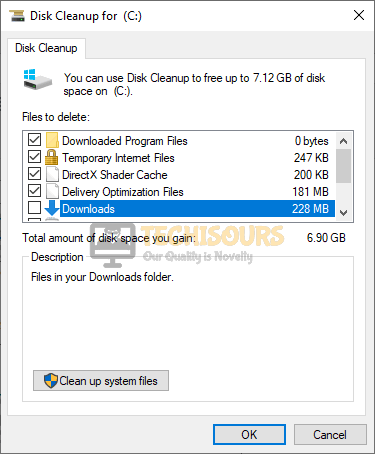
cleanmgr - Now select the disk partition from the drop-down list and click on “OK”.

Select the disk partition - Check the box parallel to every option instead of “Downloads” and select “OK”.

Delete files - Now click on “Delete Files” and check if the Error 0xC1900223 persists.

Delete Files


Solution 10: Switch to Google’s DNS
- Press the “Win + R” keys on the keyboard to open the Run box and search for “Control Panel”.
Control panel - From the top-right corner of the screen, set the “View by:” option to “Category” and click on “Network and Internet”.
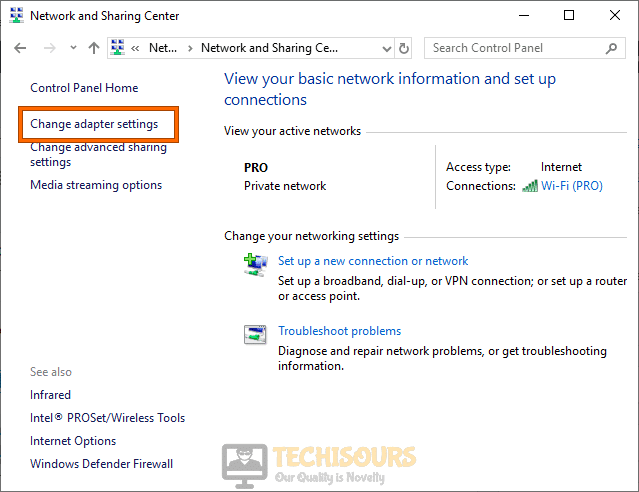
Network and Internet - Now navigate to “Network and Sharing Center” and click on “Change Adapter Settings” from the left pane.
Change Adapter Settings - Right-click on the Internet you are connected to and select “Properties”.
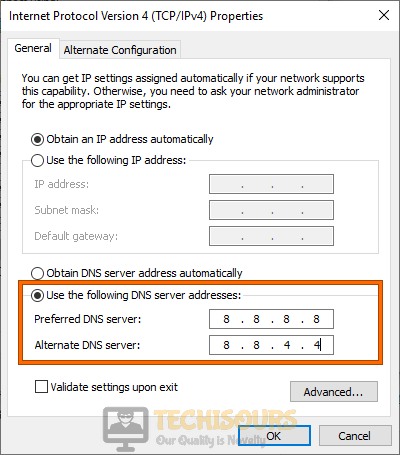
- Now check the box parallel to “Internet Protocol Version 4 (TCP/IPv4)” and click on “Properties”.

Internet Protocol Version 4 (TCP/IPv4) - Now check the box parallel to “Use the following DNS server addresses” and set the “Preferred DNS” and “Alternate DNS” as “8.8.8.8″ and “8.8.4.4″ respectively.

Use the following DNS server addresses - Click on OK, try to update and check if the Error 0xC1900223 is fixed.


Solution 11: Tweak metered internet settings
- Press “Win+I” on your keyboard to open “Settings” and navigate to “Network and Internet”.
Network and Internet - From the left pane, navigate to “WiFi” and click on your local internet connection from the right side of the window.

WiFi - Now disable the toggle button associated with “Set as metered connection”.
Disable Set as metered connection - Now go back to the settings menu and select “Update and security”.
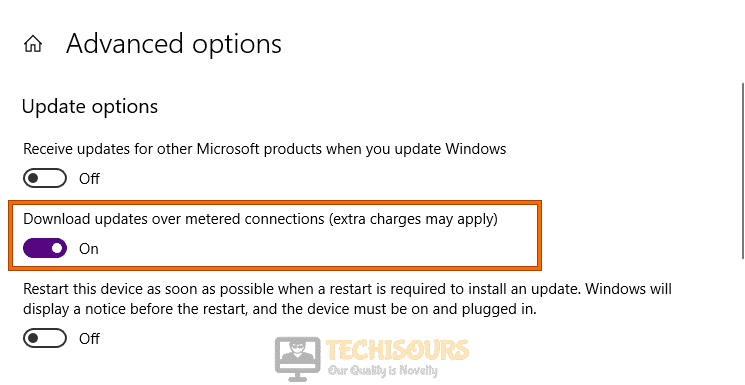
Update and Security - From the right pane of the window, locate and select “Advanced options”.
Advanced options - Now disable the toggle button associated with “Download updates over metered connections (extra charges may apply)”.

Download updates over metered connections - Check and see if the Error 0xC1900223 is fixed.


Solution 12: Disable VPN and anti-virus software
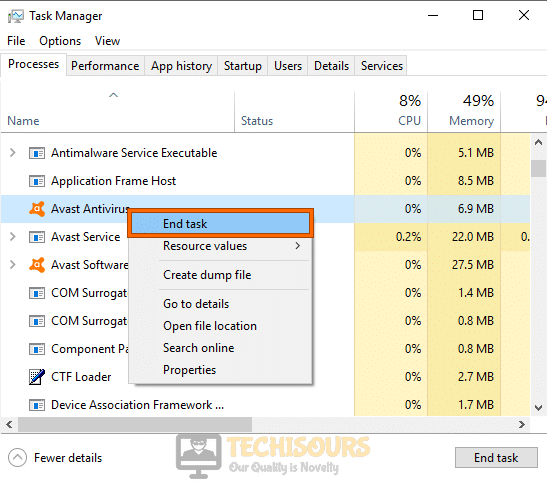
- Press “Ctrl+Shift+Esc” from the keyboard to open “Task Manager”.
- Under the “Processes” section, select all the entries associated with your Antivirus and VPN, one by one, and click on “End Task”.

Disable VPN and anti-virus software - Check and see if disabling the VPN and Antivirus fixes the Error 0xC1900223.
Solution 13: Disable Windows Developer Mode
- Press “Win+I” on your keyboard to open “Settings” and navigate to “Update and security”.
Update and Security - From the left pane, navigate to the “For Developers” tab and click on the box parallel to “Sideload Apps” from the right side of the window. Click “Yes” to confirm.
Sideload Apps - Now go back to the settings menu and select “Apps”.
Apps - Click on “Manage optional features” and select “Windows Developer Mode”.
Manage optional features - Now click on “Uninstall” and again click on “Yes” to confirm.
- Now restart your computer and check if the Error 0xC1900223 is rectified.


Solution 14: Secure Erase your SSD from BIOS
- Restart your computer and press the BIOS “Boot Key” as soon as the logo appears on the screen, to enter the BIOS settings. (Note: Different computers/Laptops have different boot keys)
- Once in the BIOS menu, navigate to the “Security” tab from the menu bar located at the top of the screen.
- Now choose “Hard Drive Utilities” and select “Secure Erase” to open the tool.
- Now follow the on-screen instructions to secure erase your SSD and restart your computer to check if the error persists.
Solution 15: Check for Windows updates
- Press “Win+I” from the keyboard to open “Settings” and select “Update and Security”.
Update and Security - Navigate to the “Windows update” tab from the left pane and click on “Check for updates” from the right side of the window.
Check for updates - Now, wait while your computer checks for updates and install if there is any available.

Solution 16: Update via Media Creation Tool
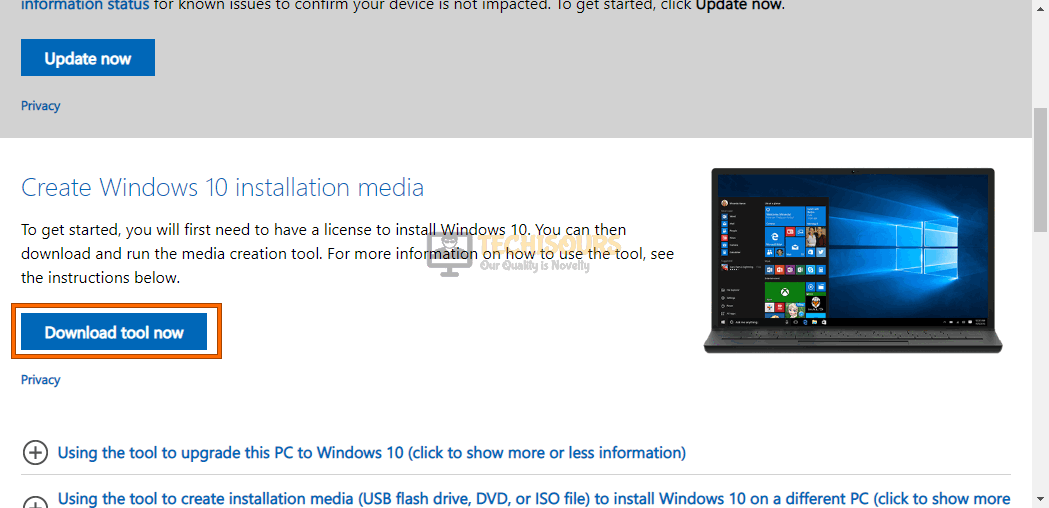
- Launch your favorite browser and download the Windows Media creation tool by Microsoft.

Media creation tool - Now double-click on the downloaded executable to run the Media Creation Tool.
- “Accept” the user agreement and select “Upgrade this PC now”. Now click on “Next”.

Upgrade this PC now - Now click on the “Install” button to update your Windows to the latest version.

Installation in progress


Solution 17: Update via $getcurrent folder
In some computers, if the “WU component” was unable to update the necessary installation files, then you will not be able to perform the steps indexed below.
- Open the file explorer and navigate to the following path.
C:/$getcurrent
- Now double-click on the “Media” folder in the directory and select the “Start” executable file.
- Now follow the on-screen instructions to update your Windows with the help of this dedicated executable.
- After the installation. restart your computer and check if the error is terminated.
Solution 18: Update via Microsoft Update Catalog
- Right-click on “This PC” and select Properties. Under the “System” section, note down the “System type”.

System type - Now launch your favorite browser and go to Microsoft Update Catalog. From the search bar at the top right corner of the screen, search for “4522355”.
- Now locate the correct version corresponding to your system type and click on the “Download button”.
- Now click on the link generated on the confirmation page to initialize the download.

Download File - After the completion of the download, double-click on the “.msu installation package” and follow the on-screen instructions to install the Windows update.
- After the installation. restart your computer and check if the error is eliminated.


Solution 19: Update via Windows Update Assistant
- Launch your favorite browser and download the Windows Windows Update Assitant by Microsoft.
Windows Update Assistant - Double-click on the downloaded executable file to run it and wait for it to check for updates.
- Now click on the “Update now” button and follow the onscreen instructions to update your Windows.

Update now - The Error 0xC1900223 should now be fixed.


Solution 20: Reset your PC
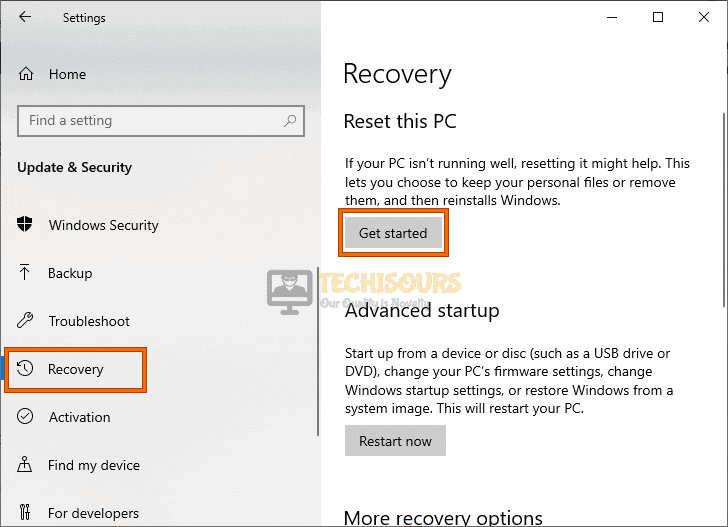
- Press “Win+I” from the keyboard to open “Settings” and select “Update and Security”.
Update and Security - Navigate to the “Recovery” tab from the left pane and click on “Get Started” under the “Reset this PC” section.
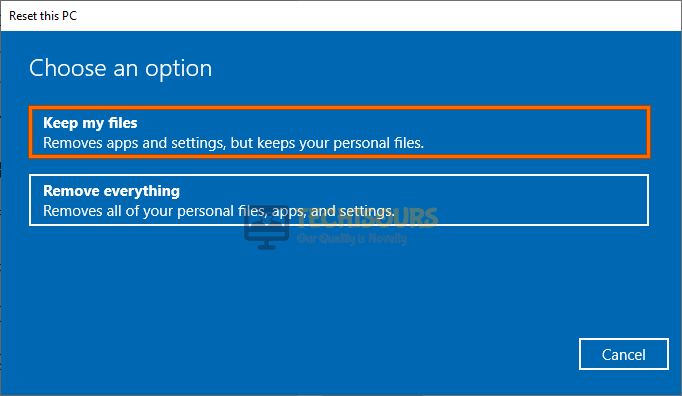
Reset this PC - Now click on “Keep my files” and follow the on-screen instructions to reset your Windows.

Keep my files - After the Windows Reset, check to see if the Error 0xC1900223 is fixed.
Solution 21: Clean install
Create installation media:
- Launch your favorite browser and download the Windows Media creation tool by Microsoft.
Media creation tool - Insert a USB drive into your PC and format it.
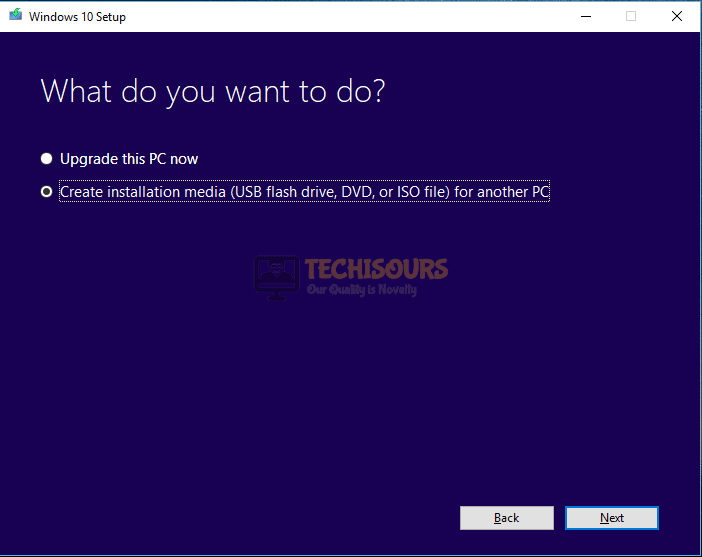
- Now double-click on the downloaded executable to run the Media Creation Tool.
- “Accept” the user agreement and select “Create installation media (USB flash drive, DVD, or ISO file for another PC”. Now click on “Next”.

Create installation media (USB flash drive, DVD, or ISO file) for another PC - Now un-check the box parallel to “Use the recommended options fort his PC” and set your language, edition, and architecture.

Use the recommended options for this PC - Now check the box parallel to “USB flash drive” and click on “Next”.

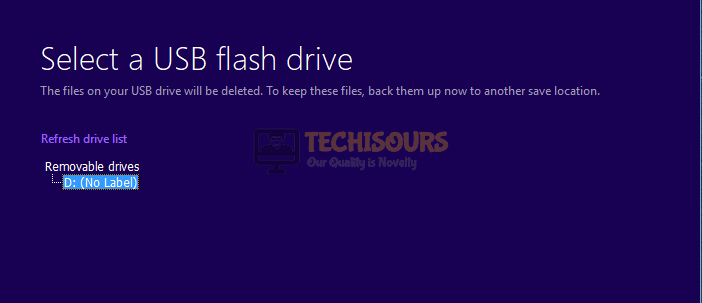
USB flash drive - Now select the USB in which you want to burn the installation media and click on “Next”.

select the USB - Wait patiently while the Media creation tool downloads Windows 10 and installs it on the USB drive.
Installation in progress


Clean install Windows:
- Insert the USB in your system and restart it.
- While the computer is restarting, press and hold the ESC button to enter the BIOS settings. (Note: Different computers have different buttons to enter BIOS settings e.g, ESC, F2, F12 or Delete)
- In the Bios, set the USB key as the first boot priority and restart your system.
- Boot from the installation media to start the installation process.
- Now click on “Install now” and type the authorized product key.

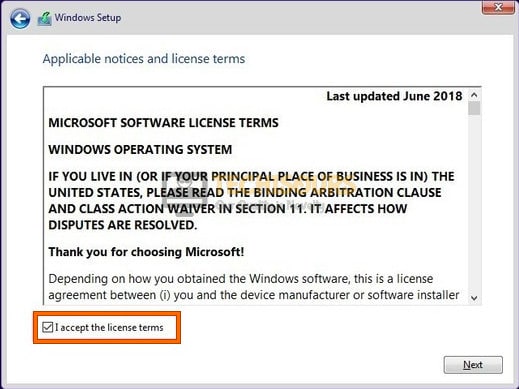
Type the authorized product key - Click on “Accept the license term ” checkbox and choose “Next”.Accept the license term

Accept the license term - Now select the partitions that were previously created and delete them to reallocate the available memory space.

Delete partitions that were previously created - Now follow the onscreen instructions to clean install Windows 10 on your computer.
- Check and see if the Error 0xC1900223 is fixed.


If you are still unable to fix this issue, you can contact us for any further assistance.