Easily Fix HP LaserJet P1102w not Printing
A lot of users have been getting the ‘HP LaserJet P1102w not Printing’ issue with their HP printers and we have gotten into this issue and have fixed it completely using some solutions that are very efficient in getting rid of printing errors and are commonly used as troubleshooting measures.
Make sure that you try out some basic troubleshooting steps such as restarting the printer or trying to print again. Also, make sure to read through the reasons due to which this error occurs in the first place and then start implementing the solutions.
Why is HP LaserJet P1102w not Printing?
After starting to get into this issue, we concluded that the following must be the most important reasons due to which the error occurs in the first place.
- Connection Issue: It is sometimes possible that the “HP LaserJet P1102w not Printing” error is being shown because of a connection issue that your printer is facing with the USB/Wireless connection that you are using. Therefore, following the solutions that have been mentioned below, try to get to the bottom of the reason due to which the connection issue is being seen.
- Driver Issue: Sometimes the HP Printer drivers might not be properly installed on your computer due to which you are running into this issue. Therefore, we recommend that you try and reinstall the drivers and then check to see if doing so fixes the issue.
- Background Services: In certain cases, background services and applications can end up preventing the printer from working properly and this triggers the “HP LaserJet P1102w not Printing” issue. Therefore, we recommend that you try and block out the background services and then check to see if this error is fixed.
- Paper Jams: The Paper that you have inserted inside the printer might have been clogged due to which it is unable to print properly. Therefore, we suggest that you check for any possible paper jams in your printer following the solution below.
- Firewall: The Firewall installed on the computer can sometimes prevent it from being able to run properly. Therefore, we recommend that you try and check if the Firewall is blocking the printer from being able to print.
- Spooler Files: The Spooler files on your computer might be causing the HP LaserJet P1102w not Printing due to corruption or misconfiguration and this can easily be fixed by clearing out the spooler files as mentioned in the steps below.
Now that you have gone through the reasons due to which it occurs, we can finally start implementing the solutions to completely fix the HP LaserJet P1102w not Printing issue.
Before You Start:
As soon as you encounter this error you can try restarting both your “Printer” and “Home Network” in the first place to get rid of the error instantly. Follow the below-mentioned steps in this regard:
- Turn “OFF” your printer using the “Power” button and unplug all of the cables from the back of your printer.
- Let it stay “OFF” for a few minutes and then simultaneously push the power button on the back of your router to turn it “OFF”.

Disconnect Internet Devices - After a few seconds turn the router back “ON” and then plug in all your printer cables to switch it “ON” too.
- Now check to see if the printer tends to print fine. If not then carry on with some of the advanced troubleshooting tips listed below.

Fixing the hp laserjet p1102w not printing wirelessly issue:
Solution 1: Check Your USB/Wireless Connection
If you use a printer either wired or wireless the first thing to do is to check the connection. And initially, you can try disconnecting/connecting again to see if that solves the error. Whereas wired users can try to plug the USB cable into another port on their computer, preferably the ports at the back. They can also try switching between USB 2.0/3.0 to see which works better for them.
Solution 2: Check Device Manager Warning
Whenever any sort of error arises on your PC the device manager will display a warning triangle next to the troublesome application. In order to check for any sort of warning follow this procedure:
- In the search bar near the Start menu type in “Device Manager” and press “Enter”.

Typing in Device Manager - In the pop-up Device Manager window expand the “Universal Serial Bus Controllers” section.
- Now check to see if you find a “Yellow Hazard Triangle” next to your printer.
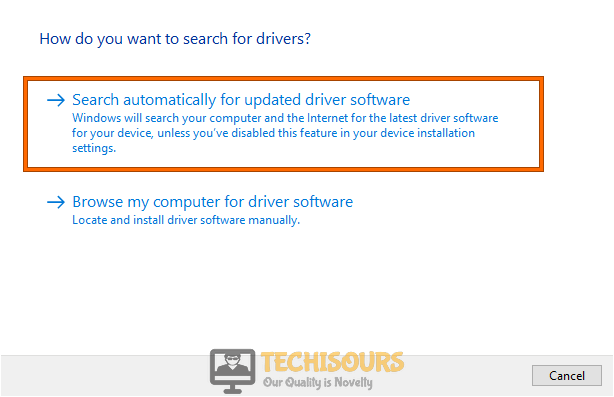
Note: If you see one that means either the USB port that has the printer connection is not working or the printer drivers have failed. In such a case you can try changing ports to check if it solves the issue, else you can update the drivers by the following method: - Right-click on your “Printer” in the USB controllers section and from the drop-down menu click on “Update Driver”.
- In the new pop-up window click to choose the “Search Automatically For Updated Driver Software” option.

Search automatically for updated driver - Once the drivers are found follow the on-screen instructions to install them on your computer.

Solution 3: Perform A Clean Install Of HP Drivers
- Start by disconnecting the “Printer” from your computer and then right-click on the “Start” menu at the bottom left corner of your screen.
- From the drop-up menu select “Settings” and in the following window proceed to select “Apps” to open the “Apps & Features” window.

Choose Apps and features - Then scroll down to locate programs related to the “HP LaserJet Printer”.
- If found click on the program to “Uninstall” it, and make sure to uninstall any program related to the printer.
- Next, in the search bar near the start menu type in “Control Panel” and press “Enter”.
- In the control panel window click on “Hardware And Sound” and then select “Devices And Printers”.
- Here look for all the “HP LaserJet Printer” entries in the Printer section and right-click to “Remove” them.
- Once all entries are removed, on your keyboard press the “Window + R” keys together to open up the “Run” dialog box.
- In the Run prompt type in the following command and press “Enter”:
printui.exe /s
- Now a new window will open up with the following name “Print Server Properties”.
- In this window click on the “Drivers” tab at the top and look for the “HP LaserJet Drivers” and remove them all using the “Remove” button at the bottom.
- Once done open up the Run dialog box again using the “Window + R” keys together.
- Then type in the following command and hit “Enter”:
c:/programdata
- When the window opens up locate the “Hewlett Packard” folder and remove any printer-related folder/files inside and afterward, “Restart” your computer.
- Now head on to the chrome browser and download the latest “HP LaserJet P1102W Drivers” from the HP official website.
- Once downloaded follow the on-screen instructions to install the drivers and then check to see whether the hp laserjet p1102w not printing error still persists or not.

Solution 4: Reset the Printing System
This particular error can occur if the printer is not configured properly and therefore resetting can help fix the error but it will delete any custom driver settings that you’ve made previously. To reset the printer follow the steps below:
- In the search bar near the Start menu type in “Control Panel” and press “Enter”.
- Inside the Control Panel window click on “Hardware and Sound” and then select the “View Devices and Printers” option.

View Devices and Printers - Proceed to the “Printers” section and right-click on the “HP LaserJet Printer” in the list.
- From the drop-down menu choose to select “Reset Printing System” and click on “OK” to confirm your selection, make sure to provide any admin privileges if asked.
- Once done press the “+” sign on your printer and then press “Add”.

Solution 5: Set the USB Connection As Default
For this method make sure the printer is connected via a USB cable to your computer and then follow these steps:
- In the search bar near the Start menu type in “Control Panel” and press “Enter”.
- Next, click on “Hardware and Sound” in the pop-up window and afterward select “View Devices and Printers”.
View Devices and Printers - From here right-click on your “Printer” and select “Properties” from the drop-down menu.
- Then select “Ports”, the port with the USB should be “Set As Default”.
- Right-click on the icon and select “Set As Default Printer”.
- Lastly, proceed to check if the hp laserjet p1102w not printing pdf error got resolved now.
Solution 6: Use HP Print and Scan Doctor
This is a free tool that helps diagnose and resolve printing and scanning issues. And you can download HP Print and Scan Doctor from the official website.
- Once downloaded, install the application by following the on-screen instructions.
- When installed, open the application from your desktop and click on “Start” on the new window.
- Afterward, select your “Printer” and then click on “Next”.
- Now click on “Fix Printing” in the next display and look at the description below to see what all the different marks mean:
1. If after the result you see a Green checkmark, this means the printer has passed the test, Click on Test Printer and then click Skip.

2. If after the result you see a Wrench (Blue), this indicates that an issue was found and repaired, click on Test Printer and then click on Skip.

3. If after the result you see a Yellow exclamation, this indicates the test failed as it required User action and the step was skipped.

4. If after the result you see a Red X, follow the onscreen instruction to resolve the issue.
Solution 7: Disable Start-Up Services
- In the search bar near the Start menu type in “Check For Updates” and press “Enter”.

Check For Updates - In the pop-up Windows Update tab click on “Check For Updates”.
- If updates are found Windows will “Download” and “Install” them automatically.
- Once updated, in the search bar type in “msconfig” and press “Enter”.
- In the System Configuration window click on the “General” tab and from here select “Selective Startup”.

Choose Selective Startup - Then uncheck the “Load Startup Items” checkbox and afterward proceed to select the “Services” tab at the top.
- In here proceed below to check the box in front of “Hide All Microsoft Services” and next click on “Disable All”.
Hide all Microsoft services - Now “Restart” your computer and in the search bar type in “Apps And Features” and press “Enter”.
- In the pop-up window scroll down through the list of “Applications” to find the “HP Software”.
- Click on the “HP Software” and then select the “Uninstall” option.
- Once uninstalled, “Download” the software from the official HP website or the DVD provided.
- After getting it installed follow “Step 4” and then select “Normal Startup” from the “General” tab again.
- Finally “Restart” your computer and check if the error got fixed now.


Solution 8: Clear the Spooler Files and Enable Spooler Service
- On your keyboard press the “Window + R” keys together to open up the “Run” dialog box.
- In the Run prompt type in “services.msc” and press “Enter”.

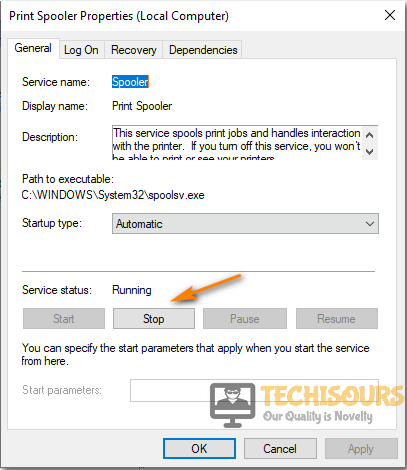
Typing in “services.msc” - In the pop-up Services, window locate the “Print Spooler” option and double-click to select it.
- In the pop-up window select “Stop” from the Service Status and then hit “OK”.

Stop the Printer Spooler Services - Once done close all of the windows and next press the “Window + R” keys together to open up the “Run” dialog box.
- In the Run dialog box type in the following command and press “Enter”.
%WINDIR%\system32\spool\printers
- In the following window “Delete” all of the files inside and follow “Steps 1-3” again.
- On the “General” tab next to Startup type, make sure “Automatic” is selected.
- If the service is not running, under Service status click “Start” and then click on “OK”.
- Lastly, proceed to check if the error got removed or not.

Solution 9: Clear Spooler Files Using Command Prompt
If the above method seems a bit complicated, you can also use the command prompt to clear the spooler files. To do so follow these steps:
- In the search bar near the Start menu search for “Command Prompt” and from the search results right-click on it to select “Run As Administrator”.
- Inside the command prompt window type in the following commands and make sure to press “Enter” after each:
net stop spooler
del /Q "%windir%\system32\spool\PRINTERS\*.*"
net start spooler
exit
- Once done “Restart” your computer and check to see if the hp laserjet p1102w not printing mac error persists or not.
Solution 10: Reset the Wireless Settings
To reset the wireless settings on your printer follow the steps below:
- To start with turn “OFF” your printer.
- Then press and hold the “Wireless” button and the “Cancel” button while turning the printer back “ON”.
- Also don’t leave the buttons until the printer stops making noise.
- Once the printer stops making noise let the button go and print the “Configuration Report”, you must confirm that the “SSID and IP Address” are cleared.
- Next press and hold the “Cancel” button for five seconds to print the configuration report.
- Now verify if you were able to overcome the error successfully.
Solution 11: Hard Reset Your Printer
- Proceed by turning “ON” your printer first and wait until it stops making noise.
- With the printer turned ON, “Disconnect” the power cord from the rear of the printer and then wait for at least a minute.

Disconnect Power Cord of Printer - Then reconnect the power cord back to the rear of the printer.
- Then turn “ON” the printer, if it does not turn on automatically.
- The printer might go through a warm-up period, wait until the warm-up period finishes and your printer goes back to idle.
- Now proceed to check if the problem got solved after resetting the printer.

Solution 12: Perform A System Restore On Your Computer
A new update or install may have messed up with your printer making it unable to work. If your printer worked perfectly before you can try performing a system restore. To do so carry out these steps:
- In the search bar near the Start menu type in “Create A Restore Point” and press “Enter”.
Note: Click on “YES” if asked for any administrator privileges.
Create a Restore Point - In the pop-up System Properties tab proceed to the System Protection tab and click on “System Restore”.
- Afterward, click on “Next” and then click on a “Restore Point” before you experienced the issue.
- Click to select “Next” and then hit the “Finish” button.
Note: To go back to a restore point follow the steps below: - In the search bar near the Start menu type in “Control Panel” and press “Enter”.

Typing in Control Panel - In the Control Panel window search for “Recovery” and click to open it.
- In the following window proceed to select “Open System Restore” and then click on “Next”.
- Choose the “Restore Point” related to the app/update and then click on “Next”.
- Finally, click “Finish” and observe if the error got eradicated.


Solution 13: Check Out For Paper Jams
The printer may not be able to function properly due to a very common issue like paper jam. To fix this issue you can start off by restarting the printer and disconnecting the power adapter from the socket. After a few seconds reconnect the socket back, turn the printer “ON”, and then see if the problem has solved. If not then you can then proceed to solve the paper jam manually, to do so open the printer access door, pull out the paper using both your hands and make sure no pieces are left behind.
Solution 14: Turn OFF Firewall Settings
If your printer is not printing wirelessly and everything seems fine, you can try disabling your Windows Firewall to check if it solves the issue. To do so implement these steps:
- In the search bar near the Start menu type in “Firewall and Network Protection” and press “Enter”.

Choose Firewall and Network protection - In the pop-up window click to select “Domain Network” and then turn “OFF” the Microsoft Defender Firewall using the slide button.
- Now repeat steps one and two for “Private and Public Networks” as well.

Solution 15: Check Your Printer Ink Levels
Your printer will refuse to print if it’s on a low ink level, and you can use your “HP Software” to check for your printer ink levels, your printer will also alert you if ink levels are low.
Solution 16: Use the HP Smart Application
You can try printing documents using the HP Smart Application. For this carry out these steps:
- Download the application from the official HP website and on the home screen of the app click on “Print”.
- Then choose to select the “File” you want to print and next select your “Printer”.
- Finally, click on “OK” and then “Print”.
Solution 17: Contact HP Customer Support
If none of the above-indexed solutions worked for you, then you can try contacting HP customer support for further help. You can also reach them at “+1-888-621-0339”, and the HP team will further assist you in solving the error with your printer. Also, the HP customer support service is available 24/7 and therefore you can submit your query anytime you come up with an error.
Hopefully, the aforementioned fixes would be enough to help you resolve the error successfully but if the error continues to stay then you may Contact Us here and we will further look into the problem for you.