How to Fix Error Code 0xc00000e9 on Windows?
Windows 10 is preferred by most of the computer users because it offers very stable and robust features integrated with an environment that is convenient and user friendly for every user. Although it is a well-structured OS, still there are some glitches that are reported frequently by the users. One of the most common error codes reported quite recently is error code 0xc00000e9 that prevents your system to boot properly and it is mostly seen on Windows 10 but can sometimes find its way on top on other Windows versions as well. If you have unexpectedly come across this error, there is nothing to worry about because you can easily rectify windows error by following the guide illustrated below.

What causes error code 0xc00000e9 on your PC?
After thorough research on user’s complaints, we have concluded that there are numerous triggers that might be the backbone of the 0xc00000e9 error that you just came across.
- This error might occur on your computer if the hard drive or the RAM is not connected to its respective port properly.
- You might encounter error code 0xc00000e9 if there are bad sectors on your hard drive.
- If your computer’s hard drive driver is not installed properly then this error might pop up on the screen.
- You might come across error code 0xc00000e9 windows 10 if your Windows BCD files are not built properly.
Pre-Tips:
If you have just come across error code 0xc00000e9 and are having trouble while booting up your system, then don’t panic and go through the basic troubleshooting steps indexed below that will most probably rectify this issue easily.
- Take the power adapter of your computer out of the socket and detach all the peripheral devices from it.
- Open the side lid of the CPU, disconnect the RAM from its port and clean it with the help of a glint.
- After cleaning the RAM insert it back into your system and make sure that it is seated at its place with appropriate connections.
- Now locate the hard drive and the SATA port. Detach the cables connected to your hard drive, clean the ports with a clean cloth, and afterward reattach the cables. Make sure that SATA cables are inserted into the correct port.
- Remove the CMOS battery to hard reset the BIOS settings and afterward insert the power adapter of the computer back into the power socket and start your computer. Plug all the peripheral devices one by one into the computer and check whether the error is resolved.
What can you do to fix the Error Code 0xc00000e9 on your computer?
Solution 1: Set boot priority
This error mostly occurs if your computer is unable to boot up properly from the harddrive. So, to rectify this error, alter the boot priority of your hard disk in the BIOS settings by following the steps illustrated below:
- Insert the power adapter of the computer into the power socket and press the power button to turn it ON.
- Press and hold the ESC button to enter the BIOS settings. (Note: Different computers have different buttons to enter BIOS settings e.g, ESC, F2, F12 or Delete. )
- When the BIOS settings are displayed on the screen, navigate to the Boot tab.
- Make sure you set your Hard Drive is set as the 1st Boot Device.

Set your Hard Drive as 1st Boot Device - Navigate to the Advanced tab and reconfigure the PC’s HDDsetting to either AHCI or IDE. (Check both settings one by one. If AHCI doesn’t fix this error, switch to IDE)
- Now navigate to the Exit tab and select Load optimal defaults.

Load optimal defaults - Apply the changes and restart your computer to check if the issue is terminated.


Solution 2: Perform a system restore
System Restore is a feature embedded in Windows OS that allows the user to revert the computer to an older state. Hence, restore your system by following the steps stated below:
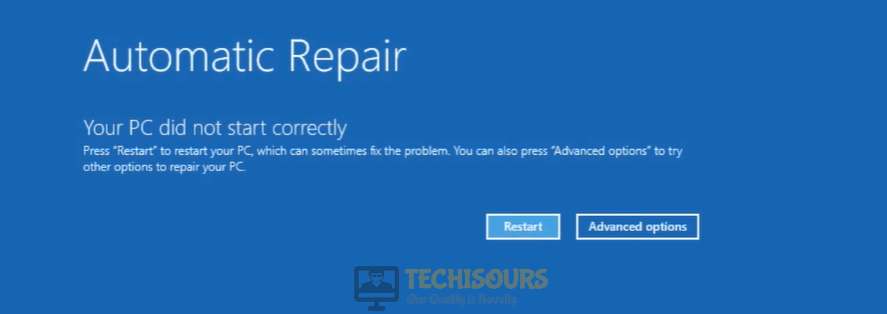
- Press the power button three times consecutively, at the time of startup, to open the Automatic Repair window.

Automatic Repair - Click on the Advanced Options button and select Troubleshoot.

Choose Troubleshoot option - Select Advanced Options again and click on System Restore.

Click System Restore - Select a restore point that was created before you came across this error.

Choose Restore Point - Click Next and then select Finish.


Solution 3: Reset your PC
In many cases, users have reported that resetting the PC has been proven the most efficient solution to this problem. By resetting your PC, you reinstall the Windows, revert the settings of the computer to the factory defaults, and remove all the applications that were installed on your computer previously. Follow the steps below to carry this task out:
- Press the power button three times consecutively, at the time of startup, to open the Automatic Repair screen and click on Advanced Options.
Choose Automatic Repair - Click on the Advanced Options button and select Troubleshoot.
Choose Troubleshoot option - Now select Reset this PC.

Reset this PC - Now follow the onscreen instructions and wait until your computer is finished with the reset process and as soon as the process completes restart your system to figure out whether the issue still exists or not.

Solution 4: Repair your PC from Advanced Startup
Advanced Startup Menu is a boot menu that allows you to try different remedies if your computer is having startup issues. Therefore, repair your PC from the Advance startup menu by following the steps indexed below and see if the glitch is eliminated:
- Press the power button three times consecutively, at the time of startup, to open the Automatic Repair window.
Automatic Repair window - Click on the Advanced Options button and select Troubleshoot.
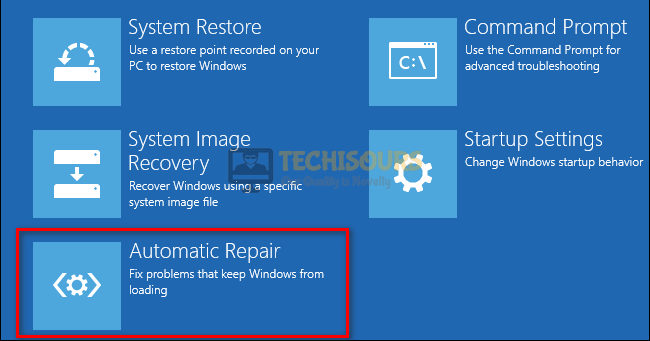
Choose Troubleshoot option - Select Advanced Options again and click on Automatic Repair.

Automatic Repair utility - When the automatic repair process is completed, reboot your system and whether the issue is resolved or not, and if the issue still persists proceed further.
Solution 5: Rebuild your Window’s BCD files
Boot Configuration Data is a sort of a database that comprises boot-time configuration data. If you have encountered error code 0xc00000e9 while booting up your computer then there might be a chance that the BCD files might’ve become corrupted hence, follow the steps indexed below to rebuild BCD files and afterward check whether the error still persists.
- Press the power button three times consecutively, at the time of startup, to open the Automatic Repair window.
Automatic Repair window - Click on the Advanced Options button and select Troubleshoot.
Choose Troubleshoot option - Select Advanced Options again and click on Command Prompt.
-
Open command prompt - Now type and execute the following commands one by one in command prompt window:
bcdedit /export c:\bcdbackup
attrib c:\boot\bcd -h -r -s
ren c:\boot\bcd bcd.old
bootrec /rebuildbcd
- Now type exit and hit enter to restart your PC and check whether the error is rectified.

Solution 6: Modify the boot mode
There are mainly two Boot modes in your computer, one is UEFI boot mode that is used by UEFI firmware and the second is Legacy boot mode that is utilized by BIOS firmware. You might encounter this error if you are using UEFI boot mode. Therefore, switch to Legacy boot mode and check whether the issue is resolved or not.
- Press the power button three times consecutively, at the time of startup, to open the Automatic Repair window.
Automatic Repair window - Click on the Advanced Options button and select Troubleshoot.
Choose Troubleshoot option - Now navigate to Advanced options, select UEFI Firmware Settings, and afterward click on Restart.

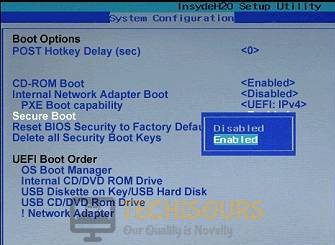
UEFI Firmware Settings - In the BIOS settings, make sure that the boot mode is set as UEFI, so, navigate to the Boot tab, and disable the Secure boot settings.

Secure boot settings - Now change the boot mode from UEFI to Legacy/CSM and make sure that Secure boot settings are enabled for it.

Switch to legacy mode - Apply the settings and reboot your computer to check if the problem is terminated and if the issue still persists then proceed further.


Solution 7: Update Volume Boot Code
Volume boot code is an essential code that is used to start the boot manager to begin the actual loading of the Operating System. If this boot code is somehow corrupted then you will encounter error code 0xc00000e9 hence to eliminate this error, update your Volume Boot Code by following the steps illustrated below:
- Press the power button three times consecutively, at the time of startup, to open the Automatic Repair window.
Automatic Repair - Click on the Advanced Options button and select Troubleshoot.
Click on Troubleshoot - Select Advanced Options again and click on Command Prompt.
Open Command Prompt - Now type and execute the following command in the command prompt window:
bootsect /nt60 sys
Update Volume Boot Code - When the boot code is successfully updated, restart your computer and see if the issue is rectified.

Solution 8: Run CHKDSK Utility
If the bad sectors on the hard disk that are causing frequent crashing of the system then you might encounter error code 0xc00000e9 on your system. Hence to resolve this issue, run a check disk utility to scan your disks for problems and resolve them automatically. Follow the steps indexed below to carry this task out:
- Press the power button three times consecutively, at the time of startup, to open the Automatic Repair window.
Automatic Repair - Click on the Advanced Options button and select Troubleshoot.
Choose Troubleshoot - Select Advanced Options again and click on Command Prompt.
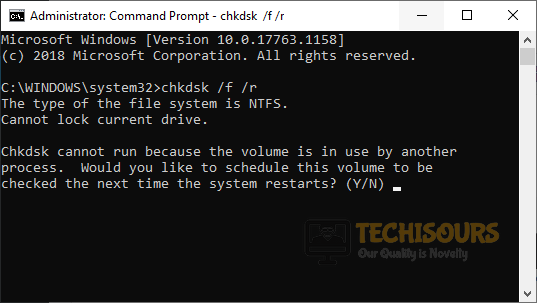
Select Command Prompt - Type the following command and hit enter to execute it:
chkdsk /f /r

Run CHKDSK Utility - Hit Y on your keyboard and as soon as the operation is complete, type exit to restart your PC and hopefully, the error would’ve gone by now.
Solution 9: Repair your system files
You might come across this error if there are some corrupt system files on your system, therefore, to get rid of this error, try to repair your system files by running SFC and DISM commands in your command prompt by following the steps indexed below:
- Press the power button three times consecutively, at the time of startup, to open the Automatic Repair window.
Automatic Repair - Click on the Advanced Options button and select Troubleshoot.
Choose Troubleshoot - Select Advanced Options again and click on Command Prompt.
Open Command Prompt - Type the following command and hit enter:
sfc /scannow

Run command - Running the scan will automatically look for corrupt files and delete them. When the scan is complete run DISM in order to repair your system files. Type and execute the following command one by one in a command prompt:
DISM /Online /Cleanup-image /Scanhealth
DISM /Online /Cleanup-image /Restorehealth
- Now type exit and hit enter to restart your PC and check if the error is rectified.

Solution 10: Update your device drivers automatically
Device drivers are the most essential components that help you to integrate peripheral devices with your system easily. This error might arise on your computer if some of the device drivers are corrupted or outdated. So, to resolve this issue, update all the device drivers and the best way to update all of the device drivers automatically is to use Driver Easy.
- Launch your favorite browser and download Driver Easy.
- Double-click on the downloaded executable file and install the tool by following the on-screen instructions.
- Click the Scan Now button.

Click on Scan Now - Now a list will appear in front of you that will be comprised of all the outdated drivers on your computer. Note: You can update them manually by clicking the update button in front of every driver or you can update them collectively by clicking the Update all button at the bottom.

Update device drivers - Restart your computer and check if the issue is resolved or not.


Solution 11: Reinstall Disk Driver
If updating the driver’s doesn’t eliminate this error, then there might be a reason that the disk-driver is not working properly and it might be preventing your system to boot up properly. So, to get rid of this problem, uninstall the disk driver and reinstall it by following the steps given below:
- Click the search button in the taskbar and type Device Manager.

Open Device manager - Now, locate and expand the Disk Drive option form the list. Right-click on the driver and select Uninstall device.

Reinstall Disk Driver - Restart your PC to automatically detect the latest drive driver on your computer and check whether this proved to be an efficient fix for you or not. If not, there is no need to panic, just proceed further.


Solution 12: Uninstall latest Windows update
Numerous users have reported that they encountered this specific issue after installing latest updates on their respective systems hence, in order to rectify this error, Uninstall the latest Windows update by following the steps illustrated below:
- Click the search button in the taskbar, type msconfig, and hit Enter.

Search System Configuration - Navigate to the Boot tab and check the box parallel to Safe boot. Also, enable the button parallel to the Network option.

Safe boot - Now click on the search button in the taskbar and search for Control Panel.

Search for Control Panel - Click on Programs and select Programs and Features.

Choose Programs and Features - From the left pane, select View installed updates.
View installed updates - Right-click on the latest windows update and select Uninstall.

Uninstall the latest update


Solution 13: Scan for viruses
When the system is connected to the internet then there is a large probability that your system gets attacked by numerous viruses and malware. Viruses sometimes block various features of Windows that trigger the error code 0xc00000e9. Follow the steps below to scan your system for viruses and see whether the error is terminated:
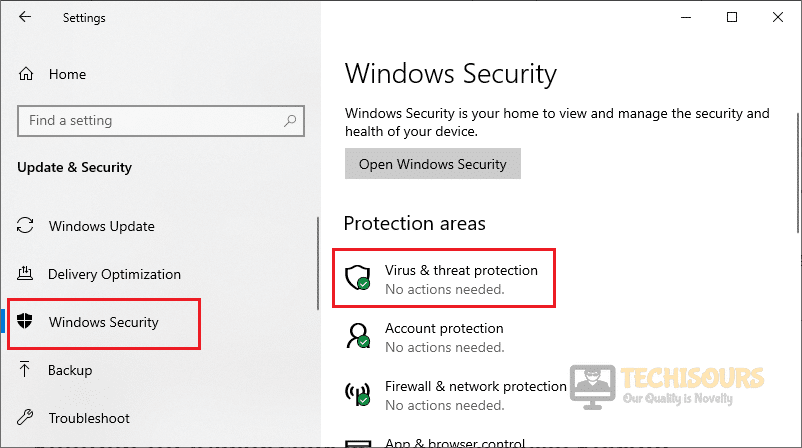
- Click on the search button in the taskbar, search for settings, and navigate to Update and Security.

Navigate to Update and Security - From the left pane, select Windows Security and click on Virus and Threat Protection at the right pane.

Virus and Threat Protection - Click on Quick Scan and wait for the computer to scan and eliminate the viruses found on your machine.

Choose the Quick Scan option


Solution 14: Fix windows registry using auslogics registry cleaner
If there is any corrupted file in the Windows registry then you may encounter error code 0xc00000e9 on your system hence fix your registry by following the steps given below:
- Launch your favorite browser and download Auslogics Registry Cleaner.
- Double-click on the downloaded executable file and follow the on-screen instructions to install it.
- Now launch the tool and click on the Scan Now button to scan your registry for corrupted files and fix them automatically.

Choose Scan Now button

Solution 15: Update your Windows
Microsoft keeps on releasing the latest versions of windows in which glitches reported of the previous versions are removed. You might encounter error code 0xc00000e9 on your system if you are using an outdated version of the windows. Therefore, install the latest version of windows on your system by following the steps given below:
- Click the search button in the taskbar and type Settings.

Type Settings - Now navigate to Update and Security.
Update and Security - On the left pane, click Windows Update.
- Click on Check for updates and wait for the computer to check for updates and install if there is any available.

Check For Updates - Restart your computer and check if the problem is resolved.


Solution 16: Verify disk connections
In many cases, this error arises on your system if your hard drive or SSD is not connected to its respective port properly. To verify that your hard drives are connected to their respective ports properly, follow the steps indexed below:
- In the taskbar, click the search button and type Command Prompt.
- Right-click the icon and click Run as Administrator.

Open Command prompt - Type the following command one by one and hit enter to execute them:
diskpart
list disk

Verify disk connections - If your system is unable to detect a hard drive, it will not be included in the list of drives displayed on the screen. In case, the drive is not detected, detach it and plug it back properly. If you still can’t detect your hard drive, then there might be a chance that the problem is with the cables or the hard drive itself. In case, the problem is with the hard drive, then proceed to the solutions explained below to rebuild MBR and scan for bad sectors.


Solution 17: Rebuild MBR and scan for corrupted sectors
A Master Boot Record (MBR) is an essential boot sector at the very beginning of a partitioned hard disk that comprises the information regarding how the logical partitions are organized on a specific medium. You might encounter this error if there is some issue with the MBR or your disk contains some bad sectors. Hence, follow the steps below to rebuild MBR and scan for bad sectors:
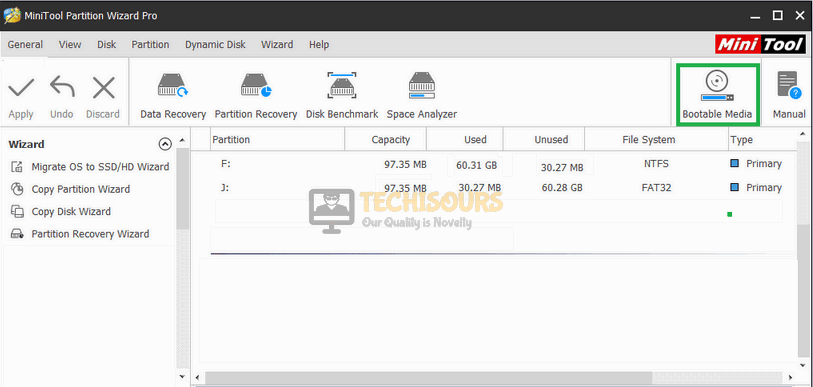
- Launch your favorite browser and download Minitool Partition Wizard.
- Double-click on the downloaded executable file and follow the onscreen instructions to install the tool.
- When the tool is installed, launch it and select Bootable Media at the top-right of the screen. Note: Also, connect a USB drive to your computer.

Choose Bootable Media - Follow the on-screen instructions and select USB Flash Drive as the media destination to burn the boot.iso file into the USB drive.

Choose USB Flash Drive - Now navigate to the Windows icon at the bottom-right of the screen. Click on the power button and select shutdown.
- When your system is powered OFF, wait for a couple of minutes and afterward press the power button to restart your computer.
- Press and hold the ESC button to enter the BIOS setting. Note: Different computers have different buttons to enter BIOS settings e.g, ESC, F2, F12 or Delete.
- When the BIOS settings are displayed on the screen, navigate to the Boot tab.
- Set your Removable Devices as 1st Boot Device and restart your computer.

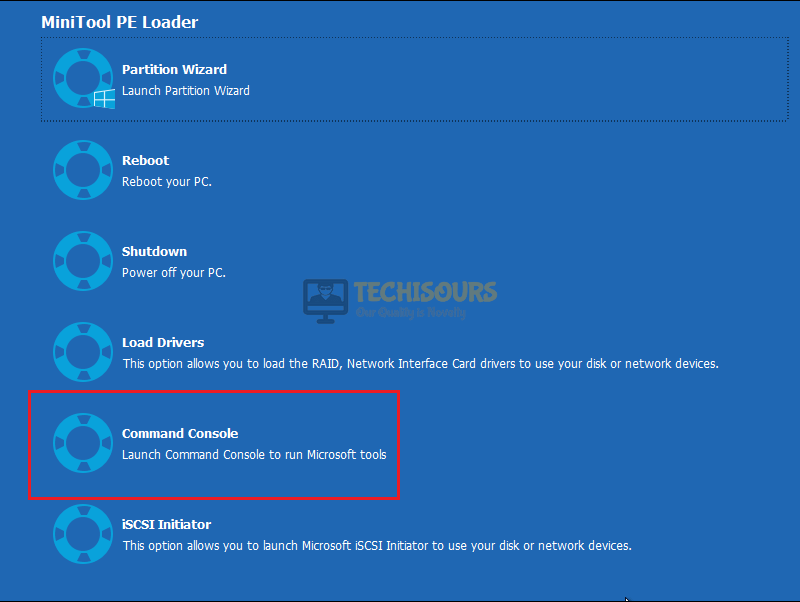
1st Boot Device - Wait for a while until you enter the following interface and select the Command Console option to launch Command Prompt input windows.

Click on Command Console - Type the following commands one by one and hit enter to execute them:
bootrec /fixmbr
bootrec /fixboot
bootrec /rebuildbcd
- Now reboot your computer to check if the error is terminated and if the error still persists proceed to the guide below.
- Reboot your system and navigate to the Boot tab in BIOS settings. Wait for a while until you enter the following interface and select the Partition Wizard option.
Choose Partition Wizard - Now locate and right-click on the system disk and select the Surface Test option.
- Click on Start Now to begin scanning for bad sectors. If bad sectors are detected by the tool, they will be marked with a Red block.

Scan for bad sectors - If your computer has detected some corrupted sectors, then proceed to the solution indexed below to recover the files and replace the hard drive.


Solution 18: Replace your hard drive
If there are some bad sectors on your drive, then the best remedy is to replace the drive. But it is necessary to recover all the data that was saved in that drive before replacing it with a new one. Hence follow the steps indexed below that illustrate how to use MiniTool Partition Wizard to recover the data from the bad sectors and save them at a safe location.
- Boot your computer with MiniTool Partition Wizard bootable media, navigate to its main interface, and select the Data Recovery option from the toolbar.
- Now choose the system disk and then click on the Scan button.
- Click on the Find button to find the lost files and then save them into a safe location by clicking on the Save button.
- Now your files are safe and you can proceed forward to disconnect your drive and replace it.
Hopefully, the error might have gone by now but if you need further assistance, contact here