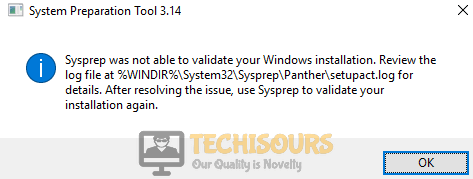
Sysprep was not able to validate your Windows installation Error on Windows [Fixed Completely]
A very common issue is faced by Windows users when they try to run the Sysprep tool after downloading some applications from the Windows App store or while building a new Windows 10 machine to be used as a template. This error states “Sysprep was not able to validate your windows installation”. This is a simple error and can be solved easily after going through this article.
What prevents Sysprep to validate your Windows Installation?
A lot of people are facing this issue around the globe. There are different reasons that are considered to be behind this problem some of the most common are listed below:
- Sometimes you download an app from the Windows store that might cause this problem.
- The error might be caused by Windows 10 that support InstantGo encryption.
- Removal of Default Windows application might cause this error.
- this error might occur by updating a build-in app from the windows store.
Pre Tips
If you come across this error message, before going to any major solution try to fix the most common reason behind this error by disabling encryption for the system volume. Follow the steps to carry this task out:
- Open Command Prompt as administrator.
- Run the following command one by one and hit enter.
-
manage-bde -status
Disable-Bitlocker –MountPoint ‘C:’
By doing so, you can disable the encryption for the system volume that is based on BitLocker.
What to do if your Windows Installation cannot be verified by Sysprep?
Solution 1: Remove the Upgrade key from Windows Registry
If you are still having this issue, try to remove the upgrade key from the Windows Registry and check if the problem remains. Follow the steps below to carry this task out.
- Click the search button on the taskbar and type Registry Editor.
- Click to open it.
- On the left pane, go to HKEY_LOCAL_MACHINE -> SYSTEM -> Setup.
- On the right pane, delete the upgrade key.

Upgrade key - A warning window will appear. Click yes.
- Restart your PC and check if the problem is resolved.

Solution 2: Install Default Windows Application
If this error is still occurring on your PC, install the default Windows application and check if the error is resolved. To do this, follow the steps below:
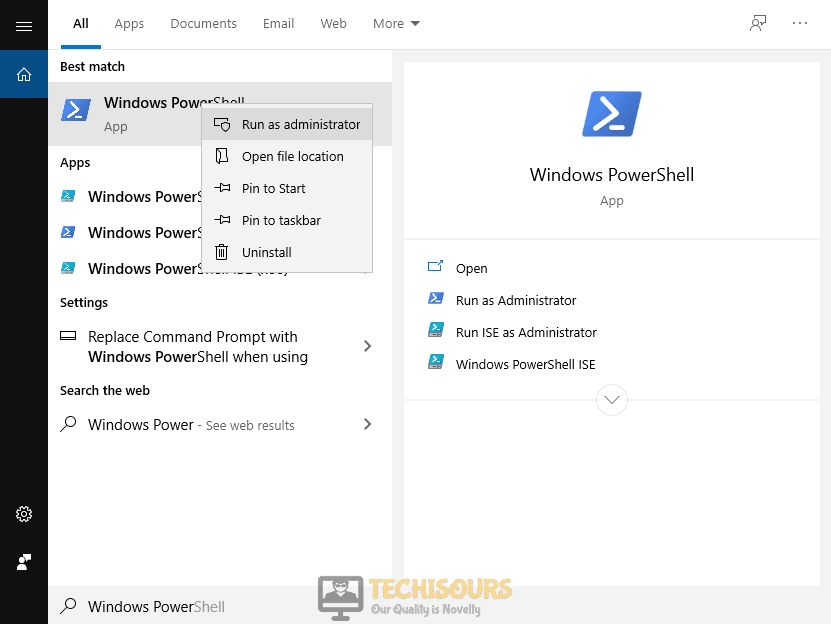
- Click the search button on the taskbar and type Windows Powershell.
- Right-click on it and click Run as Administrator.

Windows Powershell - Run the following command and when the process is completed, check if the issue is resolved.
-
Get-AppxPackage -AllUsers| Foreach {Add-AppxPackage -DisableDevelopmentMode -Register “$($_.InstallLocation)\AppXManifest.xml”}
Solution 3: Make a new Administrator Account
If you still can’t get off this error message, try to make a new administrator account and try to fix this problem. Follow the steps below to make a new administrator account.
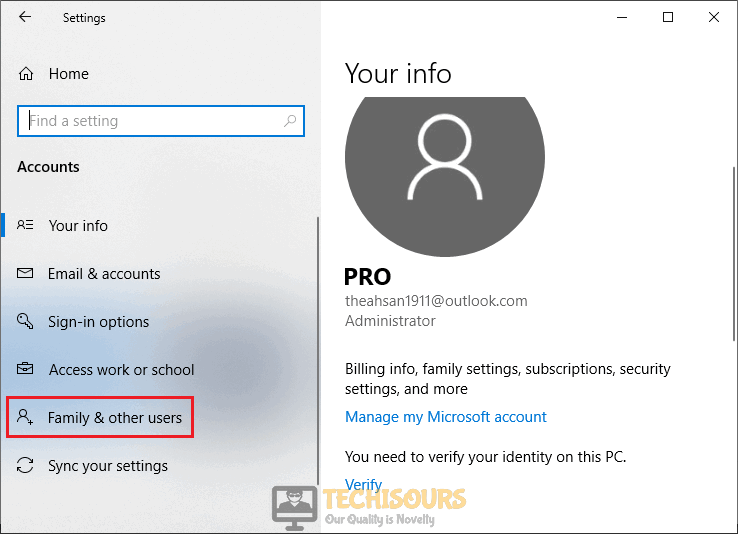
- Click the search button on the taskbar. Type and open Settings.
- Click on Accounts.

Accounts - On the left pane, click on Family and other users.

Other Users - Now click Add someone else to this PC.
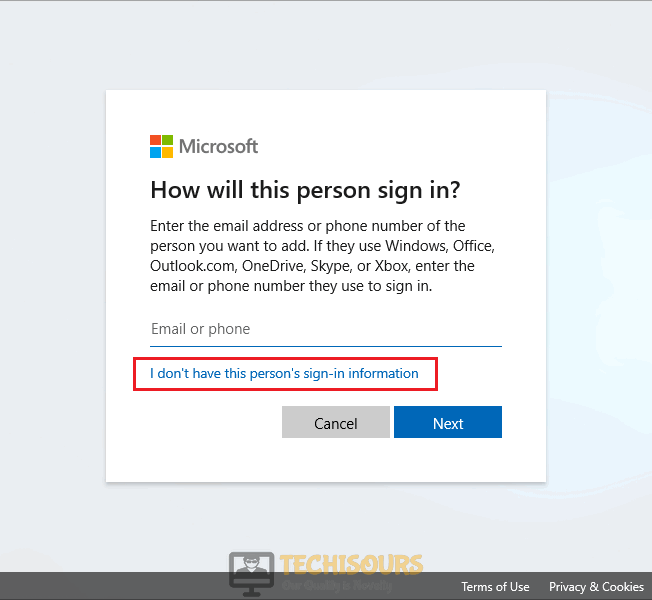
Add someone - Click I don’t have this person’s sign-in information.

Creating account - Now click Add user without a Microsoft account.
- Set the username and password of your own choice.
- Select the Change account type and choose the Administrator once the account is created.
- Now restart your PC and repeat the procedure till Step 3.
- Select your old account and click Remove.
- Restart your PC.


If you need further assistance, click here.