How to Fix Destiny 2: Error Code Chicken [Fixed Completely]
Destiny 2 is a really popular game and has a large player base but recently, people have been facing the Error Code Chicken while trying to connect to the Destiny 2 servers. Therefore, in this article, we will be enlisting the reasons behind this issue and will also provide you with some convenient fixes and workarounds that should fix it up in no time.

What Causes the Error Code Chicken on Destiny 2?
After looking into this issue, we concluded that the following are some of the most prominent reasons due to which this error is triggered on your computer.
- Console Cache: It is possible that your console has acquired some corrupted cache due to which the Error Code Chicken is being triggered while trying to connect to the Destiny 2 servers. This cache can easily be regenerated and erasing it might just be the solution that you are looking for.
- Download Cache on Steam: If you are trying to play Destiny 2 on Steam and are running into the Error Code Chicken while trying to connect with the servers, you can try clearing the download cache on Steam and verify if doing so fixes the issue.
- Internet Connection: It is also possible that the internet connection that you are using to connect to the Destiny servers is either blocking the connection from being made or it has been blacklisted at the servers end for malicious activity.
- Internet Provider Issue: In some situations, the ISP that is providing you with the connection might’ve prevented you from being able to connect to the Destiny 2 servers due to which the Chicken Error Code is being seen while attempting the connection.
Now that you are familiar with some of the most prominent triggers behind the Error Code Chicken issue on Destiny 2, we will be moving on towards implementing the solutions.
Before you start:
- Take the power adapter of your router out of the socket and wait for it to shut down.

Removing the Plug from the socket - In the meanwhile, detach all the power cables from your console.
- Now make sure you shift all the other electronic devices away from the router so that they don’t interfere with its wifi signals. If possible, change the position of your router and bring it closer to the console.
- Now power cycle the router by inserting its power adapters into the socket and wait for it to start.
- When the router displays full signal strength, insert the power adapter of your console back into the socket and check if the error code chicken is rectified.
- If the error persists, try to reconnect to the server again and keep on trying until it connects to the server.
- If this also does not eliminate the error, connect your console directly to the router with the help of an Ethernet cable, and switch to a wired connection.

Ethernet cable - We also recommend you to terminate all the bandwidth-intensive apps that are running in the background.
- Sometimes, this error might occur if the Bungie servers are under maintenance, If this is the case, then the solution is beyond your control. You can check the server status by visiting the Bungie’s official website.

Fixing the Error Code Chicken on Destiny 2:
Solution 1: Clear console’s cache
Xbox Users:
- Open the Xbox settings and proceed to the “Network” option.
- Navigate to “Advanced settings” and select “Alternate Mac Address”.

Choose Alternate MAC Address - Now select the “Clear cache” option and a window will appear on the screen and from there select “Yes” and wait for the console to restart.
- When the console restarts, check if the destiny error code chicken is rectified.

PlayStation Users:
- Press and hold the power button of your console and wait for it to shut down.
- Detach the power cords from your console and repeatedly press and release the power button to clear the console’s cache.
Removing the Plug from the socket - Now, attach the power cable to your console and insert the power adapter into the switch and wait for the console to restart.
- After the console restarts, most probably bungie error code chicken is eliminated.
Solution 2: Clear download cache on Steam
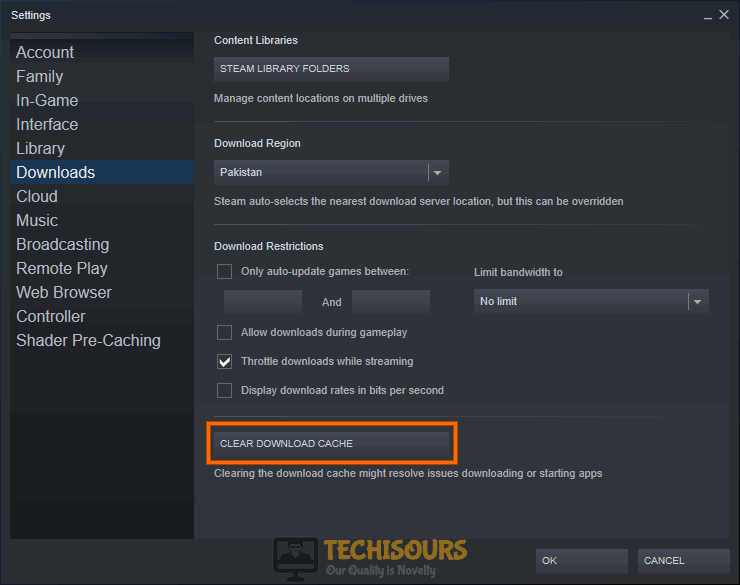
- Click on the “Steam” icon at the top-right corner of the client’s window and select “Settings”.

Choose Steam Settings - Navigate to the “Downloads” tab and click on the button labeled as “Clear Download cache”.

Clear Download cache - After clearing the download cache, proceed to launch the game on your computer and check if the error code chicken destiny 2 is rectified.

Solution 3: Restore License on PS4
- Turn on your PS4 and navigate to the console’s “Settings”.
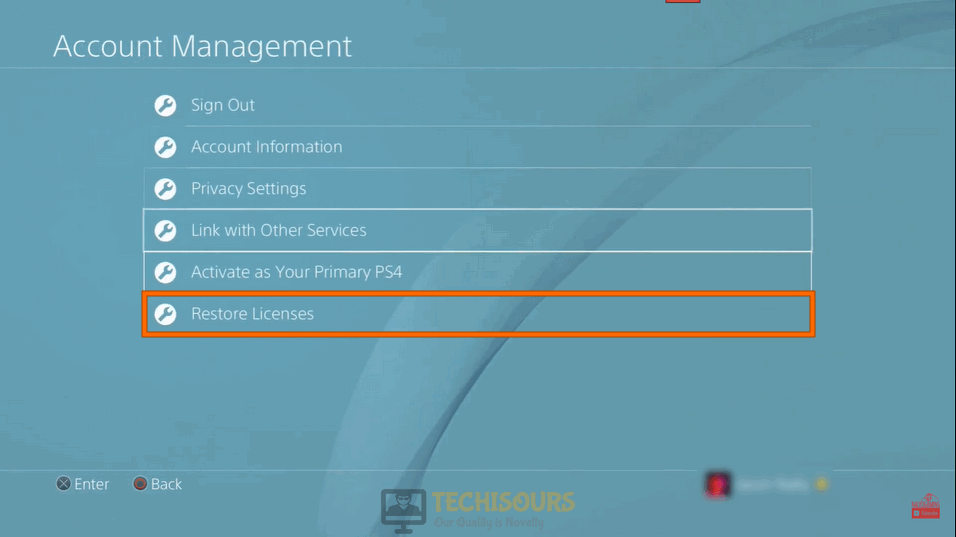
- Now select “PlayStation Network” and click on “Account Management”.

Clicking Account Management - Navigate to “Restore License” and click on the “Restore” button to restore the license of your PS4 immediately.
Restoring License

Solution 4: Connect to a Hotspot
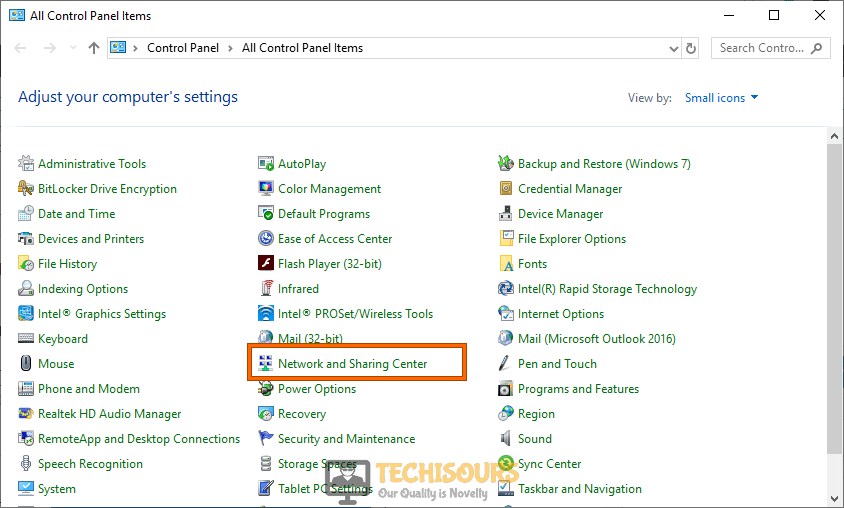
- Press “Win + R” keys on your keyboard to launch the Run box and search for “Control Panel”.

Opening Control panel - Select “Small Icons” from the list parallel to “View by” located at the top-right corner of the screen and click on “Network and Sharing Center”.

Network and Sharing Center - From the left pane, click on the “Change adapter settings” option.

Change adapter settings - Now right-click on the internet adapter your computer is currently connected to and select “Properties”.
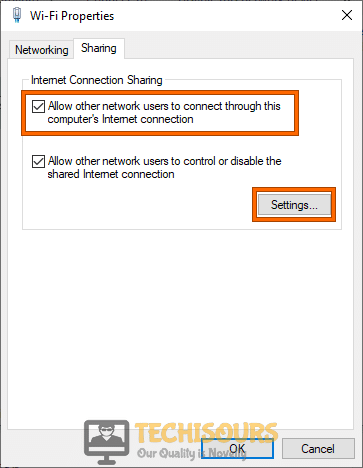
- Now check the box parallel to “Allow other network users to connect through this computer’s internet connection” and click on the “Settings” button.

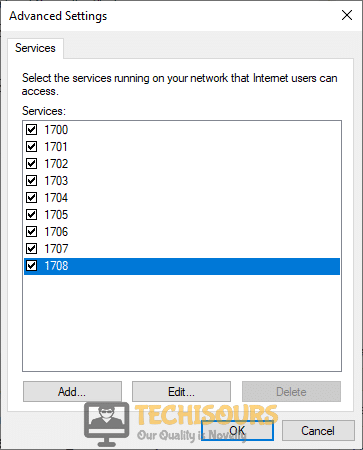
Allow other network users to connect - Check the boxes parallel to each option one by one and click on the “OK” button to confirm the changes.

Checking the boxes - Now click on the search button located on the taskbar and search for “Command Prompt”.
- Right-click on Command Prompt and select “Run as Administrator”.

Run Command Prompt - Type the following command in the prompt and hit enter to execute it.
Note: Replace VirtualNetworkName by the name of your network and Password by the key you other devices will need to connect to your hotspot.netsh wlan set hostednetwork mode=allow ssid=VirtualNetworkName key=Password netsh wlan start hostednetwork
- Now proceed to your console and connect it to the hotspot network established through your computer.
- Now launch the game and most probably the destiny 2 error code chicken would’ve been resolved uptill now.


Solution 5: Reinstall the game
Playstation 4 Users:
- Turn on your PS4 and navigate to the console’s “Settings”.
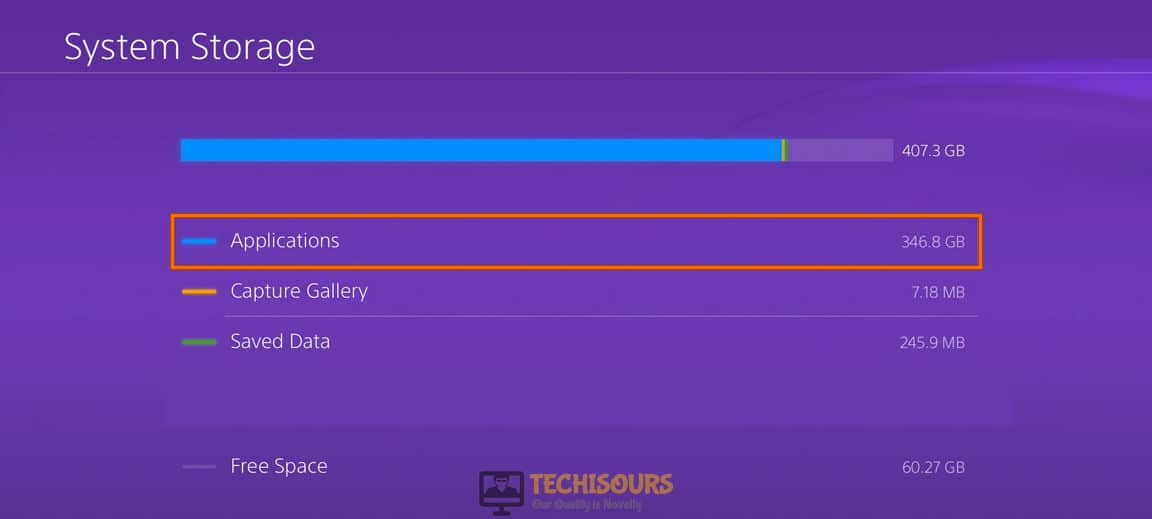
- Navigate to the “System Storage” menu and then select “Applications” to view the applications installed on your console.

Clicking Applications - Now hover to the Destiny 2 application and press the “Options” button.
- From the menu appeared on the right side of the screen, click on the “Delete” option, and select “OK” to confirm.
- Now follow the steps explained in “Solution 1” to clear the console’s cache.
- After clearing the cache, turn on your console and sign in to your PSN profile.
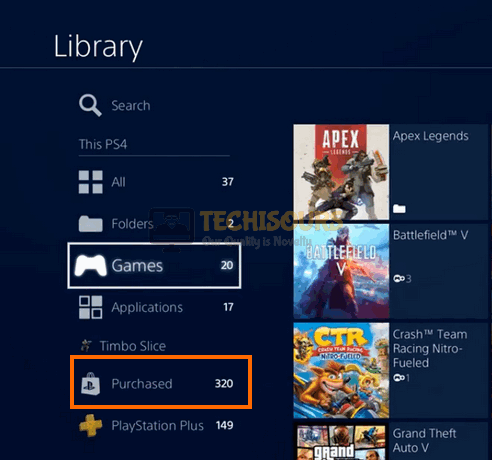
- From the home screen, launch “Library” and navigate to the “Purchased” option located at the left pane of the screen.

Choose Purchased Games - Now locate “Destiny” from the list of purchased items and click on the “Download” button to reinstall the game on your console.
Note: You can also reinstall the game using a game disk. Simply insert the disk in your console and follow the on-screen instructions to reinstall the game. - When the game has been reinstalled, check if you still encounter error code chicken while playing Destiny 2 on your console.
Xbox Users:
- Switch on your Xbox and sign in to your Xbox One profile.
- From the home screen, navigate to the “My Games and Apps” and locate “Destiny 2” after navigating to the“Games” tab from the left pane.

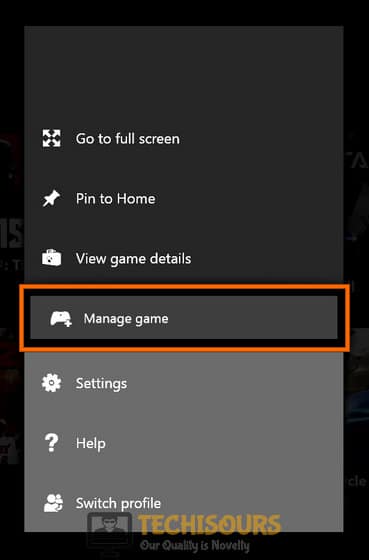
My Games and Apps - Press the “Menu” button and select the “Manage Game” option.

Choosing Manage Game - Now click on the “Uninstall All” option and then click on “Uninstall All” again to confirm the process.
- After the game has been uninstalled, follow the steps explained in “Solution 1” to clear the console’s cache.
- After clearing the cache, turn on your console and sign in to your Xbox One profile.
- From the home screen, navigate to the “My Games and Apps” menu and find “Destiny 2” under the “Ready to Install” section.

Clicking Ready to Install - Now click on the “Install” button to reinstall the game on your console.
Note: You can also reinstall the game using a game disk. Simply insert the disk in your console and follow the on-screen instructions to reinstall the game.


Solution 6: Contact ISP
If none of the solutions explained above helped you to rectify Error Code Chicken from your console, then the last option you are left with is to contact your ISP and seek their help to terminate this error. There might be a chance that there is some maintenance in the process or your ISP has blocked your connection with the Bungie’s servers. Hence, just call your ISP and explain your problem to the representative and wait for them to resolve this issue in a short time.
If you are still unable to fix this issue, you can contact us for any further assistance.