Easily Fix Bad Pool Header Windows 10 [Complete Guide]
We have gotten some complaints about the Bad Pool Header Windows 10 issue where you are unable to properly boot your system or sometimes this error can also prevent you from installing an update or a new fresh install of Windows. There have also been cases where the Bad Pool Header Windows 10 BSOD has occurred and in this article, we will be looking into fixing this issue completely.

Make sure to follow all the steps carefully and to read through the reasons due to which the error is triggered in the first place. Also, start by implementing the solutions one-by-one until one of them fixes the issue for you.
What Causes the Bad Pool Header Windows 10 Error?
After going through all of the fixes that are commonly used to get rid of this problem, we came to the conclusion that the following must be the primary reasons behind its occurrence.
- Antivirus Issue: Sometimes the Antivirus that you are using on your computer might be preventing System files from loading properly due to which the Bad Pool Header Windows 10 Issue is being triggered. Therefore, we suggest that you try to temporarily disable the Antivirus and then check to see if that fixes the issue.
- Outdated Drivers: If the Drivers installed on your computer have been outdated, you will run into the error sometimes if there are incompatibility issues with the hardware. Therefore we strongly suggest that following the steps below, you try to update all the outdated drivers and then check to see if doing so fixes the errors.
- Damaged System Files: Sometimes, certain system files on your computer might get damaged due to which the Bad Pool Header Windows 10 BSOD can occur. Therefore, you can perform certain scans and check to see and repair the damaged files.
- Recently Installed Updates: If you installed updates before this issue started occurring, it is vital that you try and ensure that the update isn’t causing this issue. Therefore, we strongly suggest that you try and uninstall the recently installed updates.
- Fast Startup Feature: If the Fast Startup Feature on your computer has been enabled, it is suggested that you try and turn it off temporarily as mentioned below and check to see if doing so fixes the error message because it can sometimes prevent the Windows from recovering from an error.
- Registry Issue: If the Windows registry has acquired some bugs or is configured incorrectly, the Bad Pool Header Windows 10 Issue might be seen while installing an update or while performing simple tasks. Therefore, we suggest that you try and repair your registry as mentioned in the solutions below.
Now that we have taken you through almost all the possible reasons behind its occurrence, you can finally start implementing the solutions.
Before You Start:
You should start off by unplugging all your external devices, such as USB’s External drives or other Peripherals. Once everything is disconnected check if the error vanishes now. Secondly, try resetting your PC. For this type in “Reset this PC” in the Cortana search bar and hit the “Enter” key, in the following window select “Get Started” and next follow the on-screen instructions to reset your PC. Resetting your PC will delete any apps and settings you’ve made/installed but your files will be kept safe.
How to fix the bad pool header error windows 10 issue:
Fix 1: Disable Your Anti-Virus Temporarily
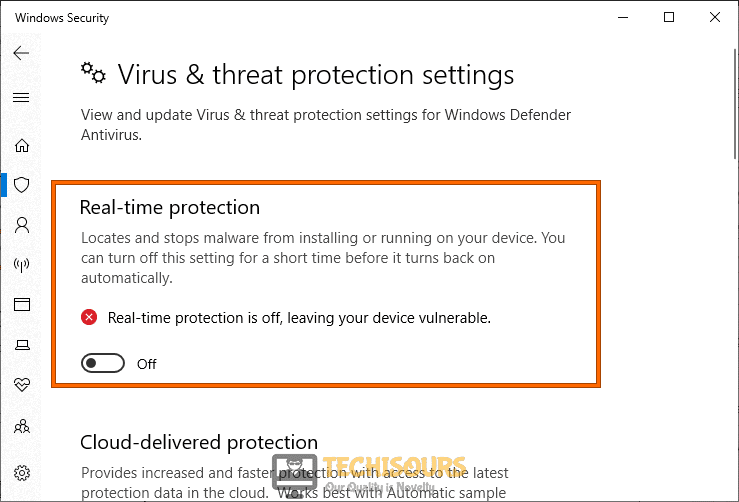
Try disabling your Anti-Malware software if you have any installed, if you use Windows 10 then you can turn OFF the already built-in Anti-Virus known as the Windows Defender. For this follow the steps below:
- In the search bar near the Start menu type in “Virus and Threat Protection” and press “Enter”, when the new window opens up click on “Manage Settings” under Virus & Threat Protection Settings.

Virus and Threat protection - In the following window turn the “Real-Time Protection” OFF using the toggle button.

Disable Real-time protection

Fix 2: Check For Updates
If you’re connected to the internet always make sure new updates are downloaded and installed completely to avoid any errors on your system. To do so follow these steps:
- In the search bar type in “Check For Updates” and press “Enter”, in the pop-up Windows Update tab click on the “Check For Updates” button and wait for Windows to look for Updates online.

Check For Updates - If any updates are found they will be “Downloaded” and “Installed” automatically.
- When your system gets updated then check to see if the bad pool header windows 10 dell error got resolved.

Fix 3: Update Drivers
You can also manually update your device drivers by following this method:
- In the search bar near the Start menu type in “Device Manager” and press “Enter”, when the Device Manager window opens up look for a “Yellow Exclamation Mark” near any of the devices.

Typing in Device Manager - If you see a Yellow mark, expand that “Device Section” and right-click on the troublesome device. From the drop-down menu then select “Update Driver” to look for the updates automatically.

Fix 4: Check Your Disk For Bad Sectors
The Bad Pool Header error commonly occurs with memory-related issues, so its good to take a look at your hard drive:
- Press the “Window + S” keys together on your keyboard and in the search bar type in “cmd”. When the results show up right-click on Command Prompt and select “Run As Administrator”.

Run Command Prompt - Inside the Command Prompt window type in the following command and press “Enter”:

chkdsk.exe /f /r
- Once the Command is executed close the command prompt window and “Restart” your PC and most probably bad pool header error windows 10 issue gets settled.
Fix 5: Diagnose Your RAM
Memory issue can also mean issues with your Random Access Memory or RAM. In order to diagnose it go through these steps:
- Open up the “RUN” dialog box using the “Window + R” keys simultaneously on your Keyboard, in the RUN prompt type in “mdsched.exe” and press “Enter”.

Typing in “mdsched.exe” - In the new window click on “Restart Now and Check For Problems”, the program will now start looking for errors in your RAM, so you need to stay patient in this step.

Restart now and check for problems - Once the test is over your PC will “Restart”, after the restart press the “Window + X” keys on your keyboard and then select “Event Viewer” from the drop-up menu.
- In the Event Viewer window select “Windows Logs” in the left pane and then move on to select “System”, in the right pane. Then click on “Find” from the right window pane and type in “MemoryDiagnostic” in the search bar.
- Now you will be shown the results for the “RAM Tests” and most probably after running the RAM test the bad pool header windows 10 update issue would be rectified.


Fix 6: Disable the Indexing Service
Disabling the Indexing Service sometimes solves the bad pool error on Windows, In order to disable this service proceed with these steps:
- Press the “Window + R” keys on your keyboard to open up the “RUN” dialog box, in the RUN prompt type in “services.msc” and press “Enter”.

Typing in “services.msc” - In the pop-up Services window scroll down in the list to locate “Indexing Service” or “Windows Search”, once located right-click on it and select “Properties”.
- Then change the “Startup Type” to “Disabled” and press the “Stop” button below. Apply all the changes made and then click on “OK”.

Disable the Indexing Service


Fix 7: Run the Windows Update Troubleshooter
- On your keyboard press the “Window + I” keys together to open up “Settings”, in the Settings window click on “Update and Security” and then select “Troubleshoot” in the left menu.

Choose Update and Security - In the Troubleshoot menu click on “Additional Troubleshooters” and then select the “Windows Update Troubleshooter” from the left pane.
- Then click on “Run Troubleshooter” to start the process and after completion hopefully the stop code bad pool caller issue would be rectified.

Fix 8: Run the SFC Scan
- Press the “Window + R” keys on your keyboard and type in “cmd” in the Run dialog box, in order to open up an “Admin cmd” press the “Ctrl + Alt + Enter” keys after typing in cmd.
- In the Command Prompt window type in the following command and hit the “Enter” key:
sfc /scannow
Fix 9: Run the DISM Scan
- Open up the “Command Prompt” window and then type in the below command and press “Enter” to execute it:
DISM /Online /Cleanup-Image /RestoreHealth
The DISM and SFC scan help fix corrupt system configuration files.
Fix 10: Uninstall Recently Installed Programs
If you’ve started experiencing the issue after installing a new program recently then try uninstalling the application to check if it’s the culprit:
- Open up the “RUN” dialog box using the “Window + R” keys together, in the search bar then type in “appwiz.cpl” and press “Enter”.
Typing “appwiz.cpl” - In the pop-up Programs and Features window scroll down through the list and locate the program you wish to “Uninstall”, once you locate the app right-click on it and select “Uninstall” from the drop-down menu.

Fix 11: Uninstall Recent Updates
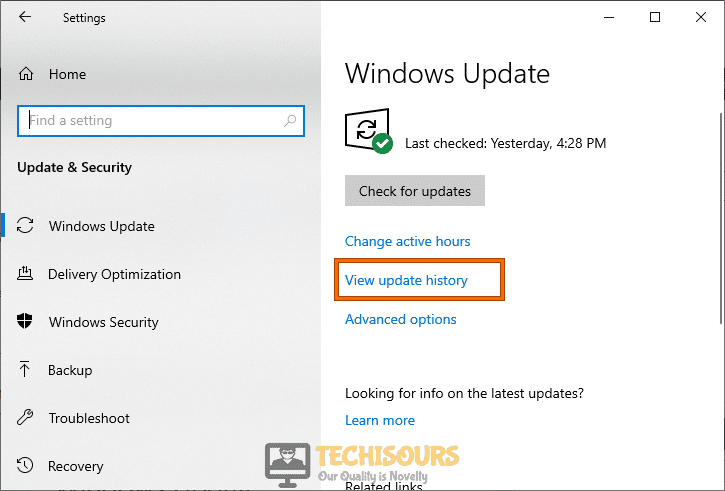
If the error started showing up after installing a new Windows Update recently, you can try uninstalling it using the method below:
- Using the Windows search bar type in “Check For Updates” and press “Enter”, in the new Update window select “View Update History”.

View update history - Next, select the “Uninstall Updates” option in the new window and afterward check to see if the error got fixed.
Fix 12: Disable Fast Startup On Your PC
- In the Windows search bar type in “Power and Sleep Settings” and press “Enter”, in the new window select “Additional Power Settings” in the right pane.

Typing Power and Sleep Settings - Then in the following window click on “Choose What the Power Button Does” in the left vertical menu, at the top now click on “Change Settings That Are Currently Unavailable”.

Change settings that are currently unavailable - Next, uncheck the box in front of “Turn On Fast Startup (Recommended)”.
- Once done save your changes made, close the window, and most probably the bad pool header windows 10 BSOD issue would be resolved.


Fix 13: Perform A Clean-Boot Hardware
- In the search bar type in “Device Manager” and press “Enter”, when the Device Manager window opens up expand the section for “Display Adapters”.
Typing in Device Manager - Then right-click on your adapter and select “Disable Device”.
- Repeat the same for the following devices as they are not important. This will help in ruling out any hardware related issues:
Display Adapters

Sound, video and game controllers

Network Adapters

USB Devices and controller (Please don’t disable this if you are using USB keyboard or Mouse or Wireless Keyboard or mouse)

DVD/CD-ROM drives

Modems  Ports
- Once all devices are disabled “Restart” your PC and start enabling the devices one by one again, enable one device at a time, and then restart your PC and afterward check for the error.
Fix 14: Boot Into Safe Mode
Safe Mode is a Windows Boot mode that loads the Windows in a clean state, it helps us boot into Windows without any third-party apps running in the background. In order to boot into safe mode implement these steps:
- Restart your computer using the Start Menu, as soon as the restart process starts start spamming the “F8 Key” on your keyboard.
- When the Boot menu occurs select “Safe Mode” and then press “Enter”.
If the error does not appear in safe mode that means that a third-party app on your PC is causing the error and needs to be uninstalled.
Fix 15: Perform A Clean Boot
You can also perform a Clean boot to check for problematic software and drivers by following the procedure listed below:
- In the Windows search bar type in “MSConfig” and press “Enter”, in the System Configuration window select “Selective Startup”, now make sure to uncheck the “Load Startup Items” check box.

Typing in “Msconfig” - Then click on the “Services” tab at the top and checkmark the box in front of “Hide All Microsoft Services”, once all Microsoft services are hidden click on “Disable All” in the right.

Hide all Microsoft services - Apply all the changes made and click on “OK”. Afterward, “Restart” your computer to boot into a Clean state mode.


Fix 16: Clean Windows Registry
Manually interfering with the Windows Registry values can cause permanent damage to your Windows, and for these reasons, we will use a third-party application to do the work for us. We recommend using “Auslogics Registry Cleaner”, as it is a free tool that offers full cleanup of corrupt registry errors.
Fix 17: Use System Restore
- In the search bar near the Start menu type in “Create A Restore Point”.

Create a Restore Point - In the System Properties window click on “System Restore”, then select a restore point when your PC was working fine. Once you select the date hit the “Next” button.
- Next, follow the on-screen instructions to complete the process and after completion of the process most probably the windows 10 BSOD bad pool header issue would be rectified.

Fix 18: Perform A Clean Windows Install
If none of the solutions indexed above worked for you, all you are left to do now is to make a new Clean Installation of Windows on your computer and if you’re not a computer geek and doesn’t know how to perform this by yourself we’ll recommend you to hire a technician for that.
Hopefully, the methods listed above will help you get over the error easily but if the error continues to stay then feel free to Contact Us here.