Easily Fix You are not Currently Using a Display Attached to an Nvidia GPU Error
Some users have been getting the You are not Currently Using a Display Attached to an Nvidia GPU error and we have decided to fix it in this article. This error is mostly triggered due to driver misconfiguration or issues and we have included a lot of solutions that you can apply on your computer for free to get rid of this error message.

Make sure to go through all of the listed reasons and also to implement the solutions in a step-by-step manner until one of them gets rid of the “You are not Currently Using a Display Attached to an Nvidia GPU” error for you.
What Causes the You are not Currently Using a Display Attached to an Nvidia GPU Error?
After studying this error in detail and reading some user experiences, we decided that the following must be the most crucial triggers behind this error.
- Outdated Drivers: The GPU drivers installed on your computer might be outdated due to which you are running into the “You are not Currently Using a Display Attached to an Nvidia GPU” error. Therefore, we suggest that you try and install the outdated drivers as we have mentioned in the solution below to fix the issue.
- Disabled GPU: In certain scenarios, the Graphics card installed in your system might be disabled or it might have gone faulty. Therefore, we suggest that your try and enable it which in some cases can get rid of this error message.
- Missing Files on Windows 7: Windows 7 has been left stranded by Microsoft and users need to make sure that they have the latest available updates for it in order to run modern software properly. Therefore, we suggest that you install the missing files as mentioned below to fix this issue.
Now that you have been taken through almost all the listed reasons, we can finally start implementing the solutions.
Before You Start:
To begin with, you must check if your monitor is plugged into the Nvidia GPU port properly. For this go to the back of your PC to see if the monitor is plugged into the GPU port or not. If it is not plugged in the GPU port then plug the monitor cord into the GPU and check if it fixes the error for you.
Fixing the You are not Currently using a Display Attached to an Nvidia GPU Error:
Solution 1: Update Nvidia Drivers
- Right-click on the “Windows” logo on the left side of the taskbar and click on “Device Manager” from the drop-up menu.

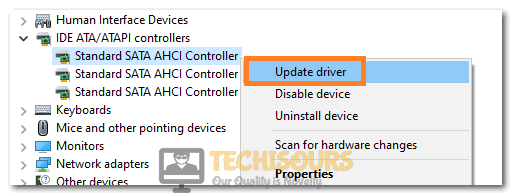
Open Device Manager - Now navigate to the “Display Adapters” option and click to expand it. Now right-click on “Nvidia GPU” and select “Update Driver” option from the dropdown menu.

Clicking on Update Driver - After that select “Search automatically for the drivers”. This will search and update the driver automatically.

Search automatically for updated driver - If this doesn’t work then download any driver update like Drivereasy or any other. Install that software and follow the instructions to “Scan” if any updates are required or not. After that, you can choose to update all drivers automatically by purchasing the software or you can download individual drivers from their scan and install them manually.

Scan now - Check to see if doing so has fixed the ‘You are not Currently Using a Display Attached to an Nvidia GPU’ error.


Solution 2: Enable Your Nvidia GPU
- Right-click on the “Windows” logo on the left side of the taskbar and from the drop-up menu choose to select “Device Manager”.
Open Device Manager - Navigate to the “Display Adapter” option and click to expand it. Now right click on “Nvidia GPU”. If it is already enabled, click on “Disable Device” first, and after that right-click again and select “Enable device”. Similarly, if it is disabled then you must click on“Enable device” in the first place.

Enabling the GPU - Check to see if doing so fixes the “You are not Currently Using a Display Attached to an Nvidia GPU” error message.

Solution 3: Install Nvidia Drivers For Desktop
- Right-click on the “Windows” logo on the left side of the taskbar and from the pop-up menu click to select “Device Manager”.
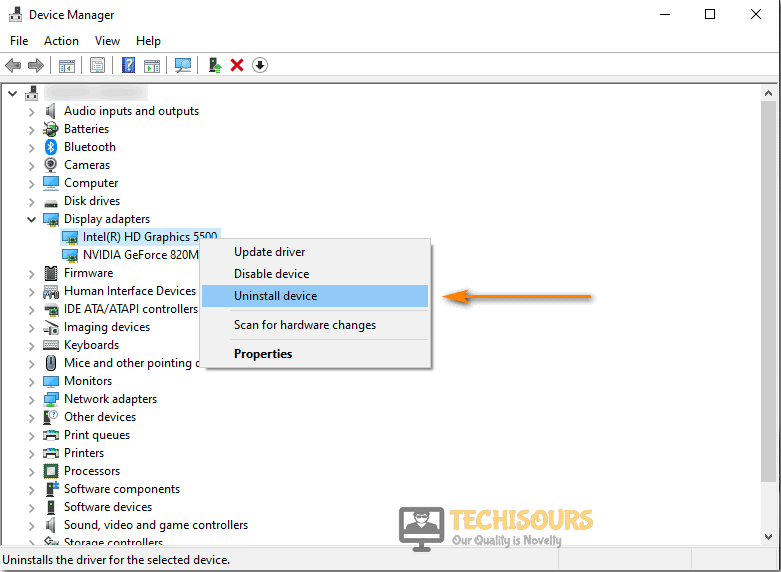
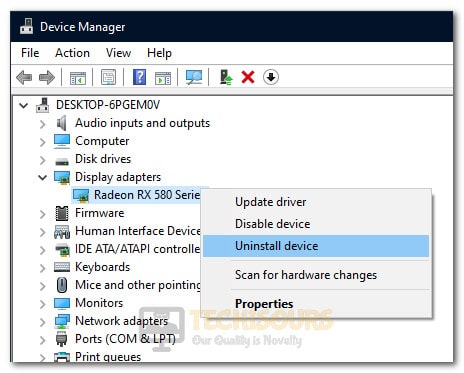
Open Device Manager - Navigate to “Display Adapters” and click to expand it. Now right-click on “Nvidia GPU” and select “Uninstall Device” from the dropdown menu.

Uninstall Graphics Driver - Go to the GeForce driver download center and use the “Auto-detect your GPU feature” to auto-detect the drivers that can be installed on your computer. You can also search drivers manually. If you are searching manually, don’t forget to select the correct OS and its version.

Downloading Nvidia Driver - Download the latest driver and run it on your system to install it completely.
- Afterward during the installation manager runs, when prompted, check the “Perform a clean installation” box and click on the “Next” button. This will automatically install the drivers on your computer.

Checking the “Perform a Clean Installation” button - Check to see if doing so fixes the “You are not Currently Using a Display Attached to an Nvidia GPU” error on your PC.


Solution 4: Install OEM Drivers For Nvidia and Intel On Laptop
- Right-click on the “Windows” logo on the left side of the taskbar and from the drop-up menu click to select “Device Manager”.
Open Device Manager - Navigate to the “Display Adapters” option and click to expand it. Now right-click on “Nvidia GPU” and select “Uninstall Device” from the dropdown menu. Also, do the same for “Intel graphic cards” and uninstall them.

Uninstalling GPU Device - Now proceed to your manufacturer’s website and enter the “Service tag” or “Serial number” whichever is asked. You can find them at the back of the laptop or you can also auto-detect using the website.
- Then search for the “Graphics Drivers” that are for your system and download both “Nvidia” and “Intel drivers”.
- First, install Intel drivers, and then after that install Nvidia drivers by running the driver files that you downloaded.
- Finally, “Restart” your PC and check if the error exists or not.
Solution 5: Check Nvidia Display Driver Service
- Press the “Windows + R” keys simultaneously to open up the “Run” dialog box.
- Here type in “Services.msc” in the text box and click “OK”.

Typing in “services.msc” - A “Services” window will pop up with a list of services. Navigate to “NVIDIA Display Driver Services” and right-click on it. From the dropdown menu click on “Properties” to open the properties window.
- Next, navigate to “Startup Type” and click on it to select “Automatic”.

Startup type - Click “Apply” and then hit the “OK” button.


Solution 6: Prevention of Automatic Update
- In the search dialog box near the “Start” menu search for “Control Panel” and click to open it from the list of search results.
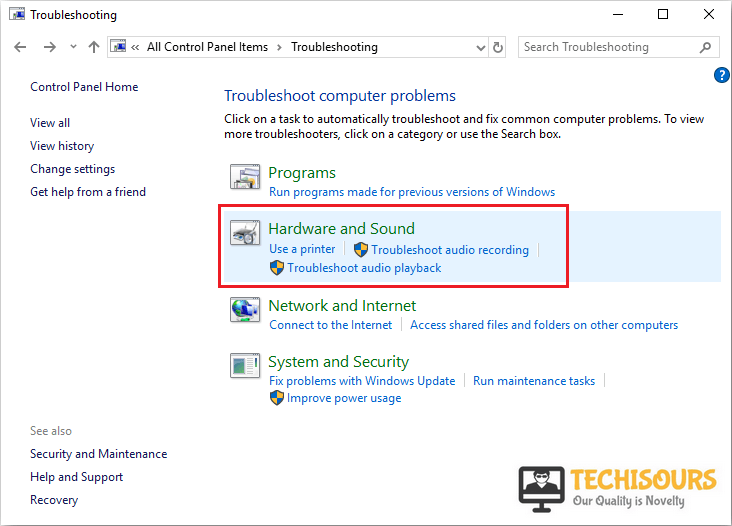
- In the pop-up window navigate to “Hardware and Sound” and click on it.

Hardware and Sound - Next click on “Devices and Printers” and in the search bar on the top right type “ Device Installation” and hit the “Enter” key.
- Then click on “Change Device Installation Settings” under “Devices and Printer”.
- A dialog box will appear up at this stage, here click to select “NO” and press “Save Changes” in order to confirm the changes.
- Now “Reboot” the computer and the error must be resolved after this.
Solution 7: Install Service Pack and RE23XTREME.EXE (For Windows 7 Only)
- Download and install the latest drivers using the steps mentioned in “Solution 3” and “Solution 4” above.
- Next, download the “Service Pack 1” by clicking here. Download and follow the instructions given on this link to install Service Pack1 properly.

Selecting Service Pack 1 - Now download the drivers for your “Processor”, you can check this website to download and install drivers if you have an intel processor. If you have any other processor you can go to your manufacturer’s site and download the drivers for your processor.
- After downloading now “Install” the “.exe” file by following the on-screen instructions.

Follow the methods listed above to completely remove the error and in case of any more questions or queries feel free to Contact Us here.