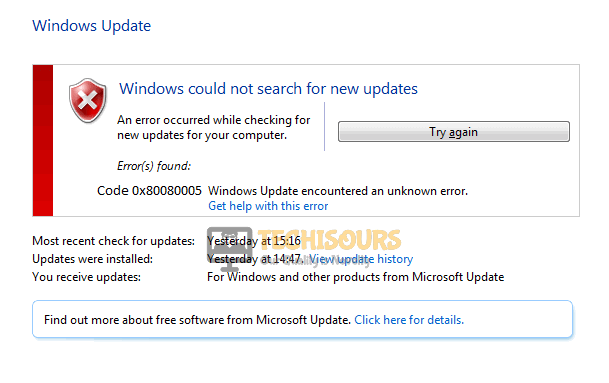
Fixing the Windows 7 Update Error 80080005 Completely
While installing updates on a Windows 7 PC, the most common error that occurs is “Windows Update Error 80080005″. This happens after your system detects a fresh system update. The people who come across this error are unable to get the download of the requested update of Windows. This is a common problem and it can be solved easily and within little time.

What causes the Windows update error 800080005?
The 0x80080005 issue is reported by a number of Windows users and there are several reasons behind this issue some of which are listed below:
- Corrupted System Files may cause this error.
- Damage Harddrive might be a reason behind this problem.
- Windows Registry Errors may cause this problem.
- This problem may arise due to the Presence of malicious programs.
- Network configuration issues might be the cause of this issue.
- The drivers’ problem may result in this error.
Pre Tips
If you come across error 0x80080005, then before moving to any major solution, try to run a basic windows update troubleshooter. To do this, follow the steps below.
- Click the search button in the taskbar. Tye and pen Troubleshoot Settings.
- On the left pane, click Troubleshoot.
- Now click on Windows Update.
- Click Run the Troubleshooter.
- Now click Try Troubleshooting as an administrator.
- Restart your computer and check if the problem is resolved.
Still, if the problem is unresolved, proceed further.
What to do if you get the “windows update error 80080005” on Windows 7?
Solution 1: Use the System File Checker Command
If this error message is still appearing, repair the system files by following the steps given below:
- In the taskbar, click the search button and type Command Prompt.
- Right-click the icon and click Run as Administrator.
Command Prompt - Type the following command and hit enter
sfc /scannow

Solution 2: Download the .NET Framework To get Rid of Error 0x80080005
Sometimes this error arises because Windows update requires a .NET framework. To download the .NET framework, follow the steps below:
- Click the search button in the taskbar. Type appwiz.cpl and open it.
appwiz.cpl - On the left pane, click Turn Window Feature on or off.
Windows Feature - Now check the box parallel to .Net Framework 3.5 and then click OK.
.NET Framework - Now click on Download Files from Windows Update.
- Restart yOur Computer and try to update the system again.
Solution 3: Fix Windows File Corruption
If you are still having this trouble, try to fix the Windows File corruption by following the steps below:
- In the taskbar, click the search button and type Command Prompt.
- Right-click the icon and click Run as Administrator.
Command Prompt - Type the following command and then restart your computer.
DISM.exe /Online /Cleanup-image /Restorehealth
Solution 4: Reset Windows Update Components
Resetting Windows Update Components fixes this problem in most of the cases. Follow the steps to carry this task out.
- In the taskbar, click the search button and type Command Prompt.
- Right-click the icon and click Run as Administrator.
Command Prompt - Now type the following commands one by one and hit enter.
net stop wuauserv
net stop cryptSvc
net stop bits
net stop msiserver
ren C:\Windows\SoftwareDistribution SoftwareDistribution.old
ren C:\Windows\System32\catroot2 catroot2.old
net start wuauserv
net start cryptSvc
net start bits
net start msiserver
pause
Solution 5: Own the System Volume Information directory
If you still can’t get rid of this error, take ownership of the system volume information directory. To do this, open the command prompt as an administrator and execute the following command.
cmd.exe /c takeown /f “C:\System Volume Information\*” /R /D Y && icacls “C:\System Volume Information\*” /grant:R SYSTEM:F /T /C /L
Solution 6: Edit Your Registry
If this error is still appearing, edit your registry and check if the problem remains or not.
- Click on the search button in the taskbar. Type Registry Editor and open it.
Registry Editor - Click on HKEY_LOCAL_MACHINE -> SYSTEM -> CurrentControlSet -> Control
Control - Now go to the right pane and right-click on the empty space. Click New -> DWORD (32-bit) Value and set the name of the DWORD to RegistrySizeLimit.
- Now open the DWORD file that you created recently and change its value to 4294967295.
Solution 7: Initialize BITS
If you still can’t get rid of this error, try to initialize Background Intelligent Transfer Service and check if the issue is resolved.
- Click the search button on the taskbar. Type Administrative Tool and open it.
Administrative Tool - Now click Services.
Services - Locate Background Intelligent Transfer Service Background Intelligent Transfer Service and right-click on it to open the Properties.
- In the general tab, click Automatic (delayed start) and then click OK.
Automatic (Delay Start)
If you need further assistance, click here.


