Easily Fix Windows could not Configure one or more System Components [Complete Guide]
The Windows could not Configure one or more System Components Message is seen mostly while trying to update your Windows installation to the latest version using the Windows Update Utility. This error mostly is triggered due to some incorrect configurations on the computer or sometimes due to certain disabled services.

The error might also be triggered due to some other reasons which we have explained in great detail below. Therefore, read through the reasons that we have mentioned below and move on towards implementing the solutions that we have compiled after some intense research and brainstorming.
What Causes you to see the Windows could not Configure one or more System Components message while updating Windows?
After reading through some troubleshooting techniques that worked for certain users facing this error, we devised that the following must be the reasons due to which it occurs.
- Internet Information Services: Windows has a bunch of preinstalled services that are vital for certain elements and features that it entails. However, we have discovered that some users were facing the Windows could not Configure one or more System Components error because of the Internet Information Service running on their computer. Therefore, it is recommended that you remove it from your computer using the method below.
- SD Card Reader: Weirdly enough, some users complained that they got this error because while updating their Windows, an SD Card Reader or an SD Card was inserted on their computer and this was causing the error message to appear. Therefore, removing the SD Card reader can be a good option if you are getting this on your computer.
- Outdated Drivers: Some users complained that outdated Wi-Fi drivers were the reason behind the occurrence of the Windows could not Configure one or more System Components error. Therefore, we recommend that you try and remove the drivers already installed on your system and them update them to the latest available version on the internet.
- Machine Keys: Certain Machine keys if present on your system can cause misconfiguration while a new update is being applied and to fix this, you will have to remove them from your computer. Therefore, in order to remove the Machine Keys, it is recommended that you navigate to the folders where they are stored and delete them.
- Update Misconfiguration: The Windows Update Utility on your computer might have gotten glitched or misconfigured due to which the Windows could not Configure one or more System Components error is being seen while applying a new update. Therefore, we recommend that you try and troubleshoot the Update Utility using the default Windows Troubleshooter as it can sometimes fix issues with updates.
Now that you have been made aware of most of the reasons due to which this error occurs in the first place, we can finally move on towards implementing the solutions.
Before you Start:
- If you have connected an SD Card Reader or have installed an SD Card on your computer, it is recommended to eject them and remove them physically from the computer as they can sometimes cause misconfiguration during an update and trigger the error.
- Try disconnecting all connected devices that aren’t needed during an update or Windows installation and check to see if that fixes the Windows could not Configure one or more System Components issue.
- Try using a different Installation media if you are getting the Windows could not Configure one or more System Components Windows 7 Installation error.
Fixing the Windows could not Configure one or more System Components Message while Updating Windows:
Solution 1: Uninstalling Internet Information Service
- Press “Windows +R” on your keyboard and type “Control Panel” in the Run Prompt and press “Enter”.

Typing in Control Panel - Navigate to “Uninstall a Program” under the “Uninstall” category. Click on “Turn Windows features on or off” on the left side of the window. Click on “Yes” if you are asked for any permissions.

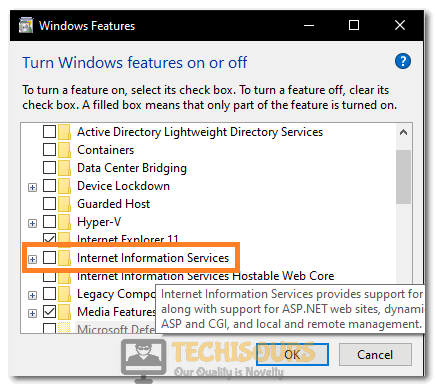
Turn Windows features on or off - Locate the “Internet Information Services” entry in the “Windows Feature” dialogue box.
- Uncheck the box next to it and click the “OK.”

Uncheck the Internet Information Services option - After doing this, check to see if the Windows could not Configure one or more System Components error is fixed.


Solution 2: Reinstalling Wi-Fi Drivers
- Make sure to download the Wi-fi Drivers that your Wi-fi Module requires to operate as we will be uninstalling them in the steps below. Alternatively, you can use Driver Easy to scan and download them for you but they will also require internet connectivity, Make a Scan using Driver Easy and determine your Wi-Fi module, after that, search on the internet for its drivers and keep them on your computer before continuing.
- Press “Windows + R” on your keyboard to open “Run.” In the Run dialogue box, type or paste “devmgmt.msc” to open the “Device Manager.”

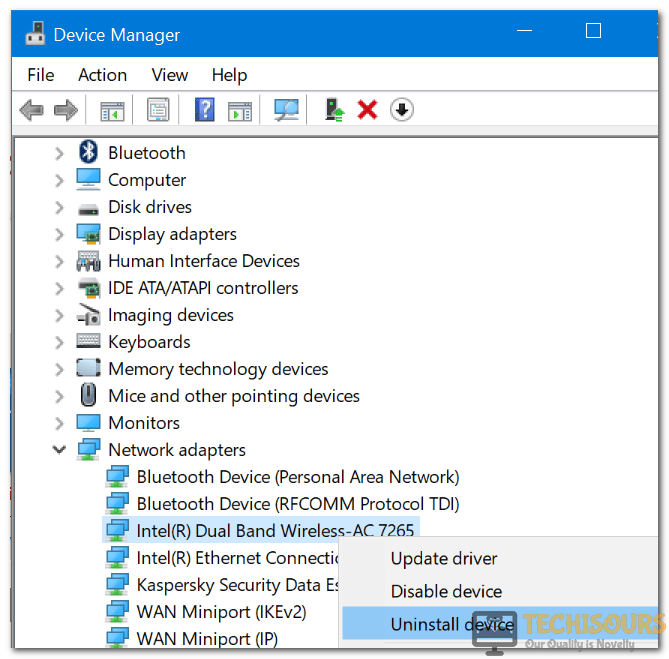
Typing devmgmt.msc in the Run prompt - Locate the “Wireless Adapter Driver” option under “Network Adapters”.
- Right-click on your “Wireless Driver” and select “Uninstall”.

Uninstall The Device From The Network Adapter - Make sure to uninstall all the network drivers on your computer.
- After this, install the downloaded drivers on your computer and try to run the update.
- Check to see if the Windows could not Configure one or more System Components error still occurs.

Solution 3: Update Using the Media Creation Tool
- Download the Media Creation Tool. Once downloaded, run the “setup” named “MediaCreationTool.exe.” Click on “Yes” if you are asked for any permissions.
- In the “Windows 10 Setup” dialogue box, select the “Upgrade this PC now” option and click on “Next.”
- Accept the license terms from the following window.

Upgrade this PC now - In the “Ready to install” window, select the “Install Windows and Keep personal files and apps” options. Proceed by clicking on “Next” and then “Install.”
- Wait for the process to finish and proceed like normal.
- Check to see if this has fixed the Windows could not Configure one or more System Components error and completed the update successfully.

Solution 4: Removing MachineKeys From Windows
- Launch into the File Explorer on your computer and navigate to “This PC.”
- Follow the path “C:\ProgramData>Microsoft>Crypto>RSA>MachineKeys”. Click on the “View” tab on File Explorer’s menu and click on the “Hidden items” option if you are unable to see “Program Data.”

View Hidden Items - Locate the files listed below and right-click on them and select “Delete” from the drop-down menu.
6de9cb26d2b98c01ec4e9e8b34824aa2_GUID      iisConfigurationKey
d6d986f09a1ee04e24c949879fdb506c_GUID      NetFrameworkConfigurationKey
76944fb33636aeddb9590521c2e8815a_GUID      iisWasKey

Solution 5: Backup & Delete IIS Dependent Folders
- Right-click on the desktop and select “New > Folder” in the drop-down menu. Name it as “IIS Backup.”
- Press “Windows + E” on your keyboard to open the “File Explorer”, type in “*windows-iis*” in the search bar, and press “Enter.”

Typing in “windows-iis” in the search bar - Once the search is done, press “Ctrl + A” to select all the files. Press “Ctrl + X” to copy and delete them.
- Open the “IIS Backup” folder on the Desktop and press “Ctrl + P” to paste the files.
- Press “Windows + E” on your keyboard to open “File Explorer” and navigate to “This PC”. Navigate to “C:\Windows > System32”.

Click on This PC - Locate the folder named “inetsrv” and press “Ctrl + X” to cut it and paste it back in the “IIS Backup folder.”


Solution 6: Running Windows Update troubleshooter
- Press “Windows + R” on your keyboard and type “Control Panel” in the Run Prompt and press “Enter”.
Typing in Control Panel - Type “Troubleshooting” in the search bar on the “Control Panel” and select “ Troubleshooting (troubleshooting history)”
- Choose “System and security” under “Troubleshoot computer problems” and select “Windows Update”.

Troubleshoot Windows Update - In the “Windows Update” dialogue box, click on “Advanced” and click on “Next.”
- Wait for the “Windows Update troubleshooter” to end to know your problem.

Solution 7: Renaming the inetsrv Folder
- Press “Windows + E” on your keyboard to open “File Explorer” and navigate to “This PC“. After that, Navigate to “C:\Windows > System32″.

Click on system 32 - Locate the folder named “inetsrv”, right-click and select “Rename” and rename the file as “inetsrv.old”. Press “Enter”.
- Check to see if doing so has fixed the Windows could not Configure one or more System Components issue.

Solution 8: Deleting Pending Windows Updates
- Press “Windows” + “R” to open the Run prompt, type in “PowerShell” and press “Shift” + “Ctrl” + “Enter” to launch it with Admin Permissions.

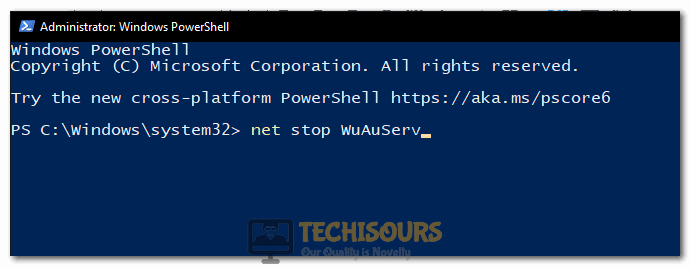
Launching Powershell - Paste the command following commands into the PowerShell Windows one by one and press Enter after each.
net stop WuAuServ
net stop Cryptsvc
net stop bits
net stop msiserver

Typing in the command to stop the service - After executing those commands, type in and execute the following two commands to rename the folders.
ren <C:\Windows\SoftwareDistribution SoftwareDistribution.old>
ren <C:\Windows\System32\catroot2 Catroot2.old>
- After this, paste in the following commands to start the stopped services once more.
net stop WuAuServ
net stop Cryptsvc
net stop bits
net stop msiserver

Starting the service back up - Restart the system and check “Windows Updates” to see if the pending updates are gone.
- If you don’t see any updates available, Navigate to “C:\Windows > SoftwareDistribution”. Right-click on “SoftwareDistribution.Old” and “delete” it if you see “SoftwareDistribution” beside it.
- Now, check to see if the Windows could not Configure one or more System Components error is fixed.

Solution 9: Boot Windows 10 in Safe Mode
- Press “Windows + R” on your keyboard to open “Run.” In the Run dialogue box, type or paste “msconfig”.

Typing in “Msconfig” - Hover over to the “Boot” tab and check the “Safe Mode” option, click on “OK” and make sure to restart your system.

Boot in safe mode - Try to run the Windows Update while in the Safe Mode and check to see if it proceeds.
- If Windows Updates normally, repeat “step 1 and step 2” and uncheck the “Safe Mode” option this time to ensure Windows boots normally.
- Check to see if booting and updating in Safe Mode has fixed your Windows could not Configure one or more System Components issue.


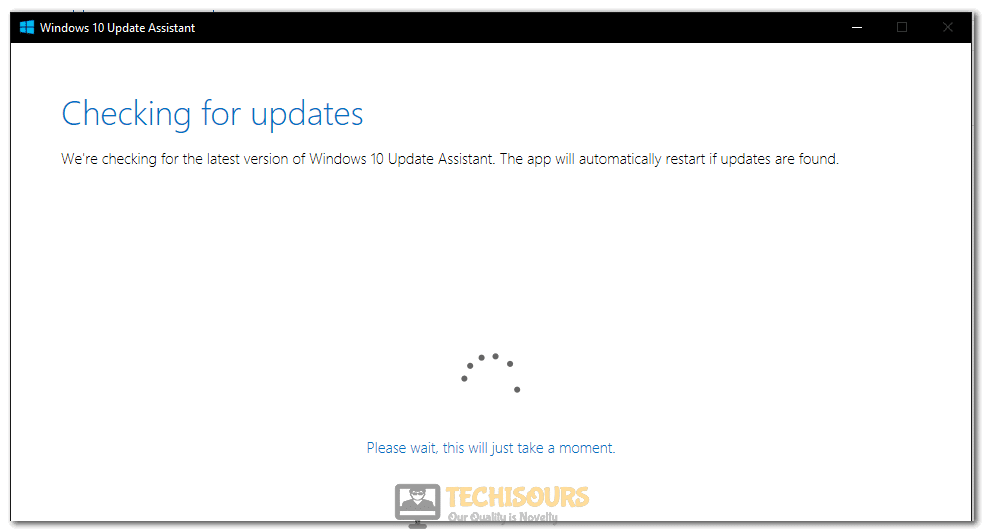
Solution 10: Updating Windows 10 using the Update Assistant.
- Open the “Windows 10 download” site and click on “Update now”.
- The download will now begin, make sure to complete the download and then run the downloaded executable.

Running the Executable - After running, click on Upgrade Now and follow through with the on-screen instructions to start the Windows Update.
- Check to see if doing so fixes the Windows could not Configure one or more System Components error.
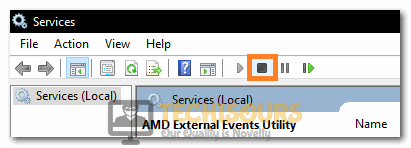
- Press “Windows + R” on your keyboard to launch into the “Run” prompt, type “services.msc” in the search box and press “OK”.

Typing in “services.msc” - Click on the “Application Host Helper Service” select the “Stop” button on the upper bar.

Clicking on the Stop button - Launch into the File Explorer and type *WinSxS* in the search bar and press “Enter.”
- Right-click on the folder and select the “Properties” option.
- From the top, select the “Security” button and click on the “Edit” option in the list of “Group or User Names”.

Tweak security settings - After that, click on “Add” and enter in your Windows Account user name.
- Click on the “Check Names” option and it will automatically accept it if you have entered in the correct user name.

Check Names - After that, click on “Apply” to add this user to the list of Group or User names and it will take you back to the list of added Groups and Usernames.
- In the list, select the username that we have just added, and from the bottom, check the “Allow” box for all permissions.
- Click on “Apply” and then on “OK’ and the permission will have been granted and the ownership is taken.
- Once done, select all the “windows-iis” folders and press “Ctrl + X” on your keyboard. Switch to “another drive (D:\, E:\ etc.)” and press “Ctrl + V” to paste the files.
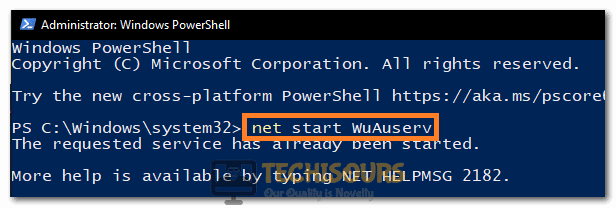
- Press “Windows’ + “R” to open the Run prompt, type in “PowerShell and press “Shift’ + “Ctrl” + “Enter” to launch into it.
Launching Powershell - Paste “net start WuAuServ” and hit “Enter” to start the updates again.
- Check for updates and install them on your computer.
- Check to see if the Windows could not Configure one or more System Components error has been resolved.


After trying out these solutions, if you have still been unable to fix the issue, feel free to contact us.