Fix: We couldn’t Complete the Updates Undoing Changes [Complete Guide]
A lot of users have been getting the “we couldn’t complete the updates undoing changes” error while trying to install the latest updates on their computers and in this article, we have committed ourselves to fix that issue. For this, we will be instructing you with several easy solutions in a step-by-step manner so that you can do it yourself.

Make sure to follow all the instructions and to read through the “what causes” part to better establish an understanding of this problem. Also, ensure that you try out all the solutions one by one until one of them fixes the issue for you.
What Causes the ‘We Couldn’t Complete The Updates Undoing Changes’ Error on Windows?
After sifting through all the mentioned solutions, we came to the conclusion that the following must be the primary reasons due to which this error occurs.
- General Glitch/bug: Most of the times, the error is triggered due to a minor glitch or misconfiguration with the Windows components and you can verify this by running the default Windows Update Troubleshooter as mentioned in the solutions below. Make sure to let the troubleshooter diagnose and fix the ‘we couldn’t complete the updates undoing changes’ error if possible.
- Corrupted Download: In certain situations, the download of Windows update files might have gotten corrupted due to which this error can sometimes occur. Therefore, we strongly suggest that you try and get rid of the download files and check to see if this fixes the issue.
- Damaged System Files: Some System files on your computer might have gotten damaged due to a power failure or storage failure. Therefore, we suggest that you try running some scans to better diagnose which component of the System files is damaged and whether it can be repaired.
- Disabled Services: Some services, if disabled, will prevent the Windows update from being installed properly. Therefore, we suggest that you follow our instructions below and make sure that the specified service is started in order to avoid getting the ‘we couldn’t complete the updates undoing changes’ error.
- Driver Issues: If the drivers installed on your system haven’t been updated to the latest available versions or if they are improperly installed, you will get the ‘we couldn’t complete the updates undoing changes’ error while trying to update your Windows.
- Registry Errors: If the registry on your computer has been improperly configured, we suggest that you try and follow the solution below to make an attempt to repair it and reconfigure some of its components.
- Limited Space: If the space on your computer is running out, it is advised to make sure to free up some more space because it can sometimes be an issue while trying to fix the ‘we couldn’t complete the updates undoing changes’ error.
Now that you have been taken through almost all the important reasons behind its occurrence, we can finally start implementing the fixes.
Before You Start:
Before you begin with any of the updates, boot your computer into the Safe Mode by following the steps below:
- Restart your computer from the Start menu as you would do normally, as soon as the Restart begins start spamming the “F8 Key” on your keyboard to get into the “Boot Menu”.
- From the Boot Menu select “Safe Mode” and after proceeding check whether we couldn’t complete the updates undoing changes server 2012 r2 issue arises in Safe Mode too. If yes, then proceed to the major remedies indexed beneath.
Rectifying the We couldn’t Complete The Updates Undoing Changes issue:
Solution 1: Run the Windows Update Troubleshooter
- Open up the “Settings” window using the “Window + I” keys on your keyboard, in the Settings window select “Update and Security” and then click on the “Troubleshoot” option in the left vertical menu.
- In the Troubleshoot section click on “Additional Troubleshooters”, and in the following window select the “Windows Update” option and hit the “Run the Troubleshooter” button.

Run the Troubleshooter

Solution 2: Delete the SoftwareDistribution Folder
The SoftwareDistribution folder keeps all of the update files, your update may fail if this folder gets corrupted. So, in order to delete this folder follow these steps:
- Before we start deleting any folders we have to stop some “Update” services using the Command Prompt, for this press the “Window + X” keys simultaneously and then select “Windows PowerShell (Admin)” from the drop-up menu.
- In the new Windows PowerShell tab type in the following command one after the other and make sure to hit “Enter” after each command:
net stop wuauserv

net stop bits

net stop cryptSvc

net stop msiserver
- Once all the commands are executed close the PowerShell window or minimize it, now go to the following address in “This PC”:
C:\Windows\SoftwareDistribution
- In here “Delete” all of the folder/files. Once all the files/folders are deleted, maximize or open a new PowerShell window and execute the following commands in the same way as above:
net start wuauserv

net start bits

net start cryptSvc

net start msiserver
- Once done “Restart” your computer and try updating again and most probably we couldn’t complete the updates undoing changes server 2019 problem would be rectified.
Solution 3: Turn On the App Readiness Service
- On your keyboard press the “Window + R” keys together to open up the “Run” dialog box, in the Run prompt type in “services.msc” and press “Enter”.

Typing in “services.msc” - In the pop-up Services windows scroll down in the list to find “App Readiness”, and right[-click on it to select “Properties”.

Clicking on Properties - In the Properties window change the “Startup Type” to “Automatic” and then hit the “Start” button below. Once done “Apply” all the changes made and select “OK”.


Solution 4: Disable Automatic Windows Update
- Press the “Window + R” keys together, in the pop-up “Run” dialog box type in “services.msc” and hit “Enter”.
Typing in “services.msc” - Scroll down in the list of Services to locate “Windows Update”, once located right click on it and select “Properties”.
- In the Properties window change the “Startup Type” to “Disabled” and then hit the “Stop” button. Then “Apply” all the changes made and hit the “OK” button.

Disable Automatic Windows Update

Solution 5: Delete Any Recently Installed Software
If you’re unable to install updates after recently installing a new program, there’s a chance that the new program is messing with your Windows Update service causing it to fail. In this scenario you can try uninstalling the program using the method below:
- Open up the “Run” dialog box using the “Window + R” keys on your keyboard, in the address bar type in “appwiz.cpl” and press “Enter”.

Typing “appwiz.cpl” - In the Programs and Features window scroll down in the list of programs to find the specific program you want to delete that might be causing this issue and once located select the program and then hit the “Uninstall” button at the top.

Uninstall Real Player


Solution 6: Run the DISM and SFC Scan
The DISM and SFC Scan helps repair corrupt window configuration files, to perform these scans you need to perform these steps:
- In the search bar near the Start menu type in “Command Prompt” and from the list of search results right click on it to select “Run As Administrator”.
- In the Command Prompt window then type in the following command:
DISM.exe/Online /Cleanup-image /Restorehealth
- Once the DISM command is executed now type in the sfc command and hit “Enter”:
sfc /scannow
Note: The SFC command may take up a while so be patient.
Solution 7: Free-Up Space For the Update
Sometimes the Update may fail due to very less space on your Windows Drive, so in order to check the Drive Space implement these steps:
- Open up “This PC” from your Desktop, Windows 7 and above users can directly check the drive space, for this simply right click on your “Windows Drive” and select “Properties”.
- In the “General” tab you will see the space you have available on your drive.
You can also use the “Disk Cleanup” to make space on your drive:
- In the search bar near the Start menu type in “Disk Cleanup” and hit the “Enter” button.

Run Disk Cleanup - From the pop-up window select the “Drive” you want to clean up and press the “OK” button.
- From the “Files” section select all of the files you want to get rid of except “Downloads” and press the “OK” key.
Note: If you think there is very low space you can try deleting or moving some unimportant files to other drives to make space for the update.

Solution 8: Delete Recently Installed Updates
Sometimes previously failed updates can cause issue, with the method below you can delete recently installed updates:
- Press the “Window + I” keys simultaneously to open up the “Settings” window, in the Settings window click to select “Update and Security”.

Choose Update and Security - In the Windows Update section click on “View Update History” option, and afterward choose the “Uninstall Updates” option.

Uninstall Latest Windows Update


Solution 9: Enable Metered Connection
Some users were also able to solve the issue after they enabled metered connection on their computers. In order to do so you need to follow these steps:
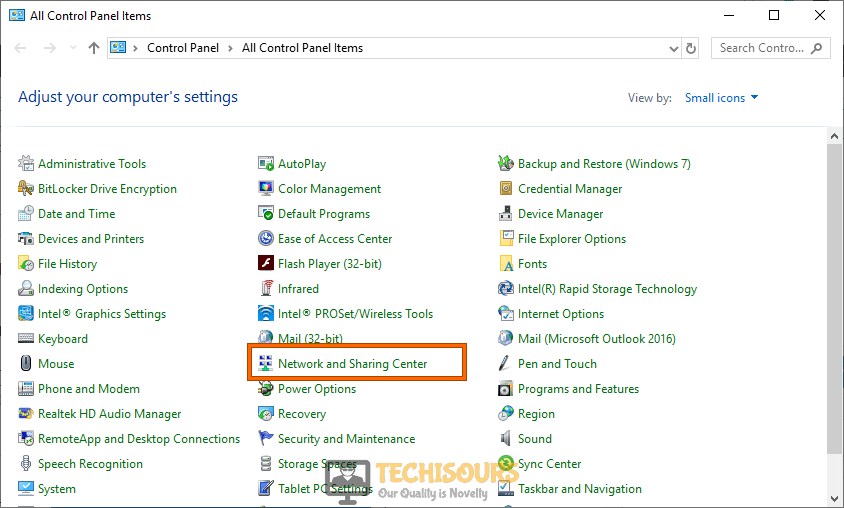
- Right click on the “Network” icon on your Taskbar, and from the drop up menu click to select “Open Network and Sharing Center”.

Click on Network and Sharing Center - Then select “Properties” below your “Network Adapter” and turn “ON” the “Metered Connection” in the new window using the toggle button.

Turn ON Metered Connection

Solution 10: Disabling Network List Service
- Open up the “Services” menu using the search bar, in the Services window scroll down to locate “Network List Service”.
- Once located right click on Network List Service and select “Properties”, in the Properties window then change the “Startup Type” to “Disabled” and click on “Stop”. Apply all the changes made and then click on “OK”.

Disable Network List Service

Solution 11: Configure Group Policy Settings
The issue can also be caused by wrong configuration in the Group Policy Settings. To reconfigure the Settings proceed with these steps:
- Open up the “Run” dialog box using the “Window + R” keys together and type in “gpedit.msc” in the address bar. Then press the “Enter” key.
Typing “gpedit.msc” - Now go to the following address using the Folders in the left pane:

Computer Configuration > Administrative Templates > Windows Components > Windows Update
- In the address above now locate and right-click on “Configure Automatic Updates”, select “Properties” and then select “Enabled” in the top left of the window.
- Once done “Apply” all the changes made and click on “OK” and hopefully we couldn’t complete the updates undoing changes server 2016 issue would be resolved.
Solution 12: Check For Driver Issues
- In the search bar type in “Device Manager” and press “Enter”, in the new Windows check for “Yellow Hazard Marks”, if you find any expand the section and right click on the device with the sign.
- From the drop down menu then select “Update Driver”.
Solution 13: Unplug All USB Peripherals
Sometimes a device plugged into your PC can lead to things being defective, to get rid of this unplug all of the extra accessories / devices from your PC and then check if the issue got solved.
Solution 14: Run A Malware Scan
To run a scan with Windows Defender you need to follow this procedure:
- In the Cortana search bar type in “Virus and Threat Protection” and press “Enter”, in the pop-up window click on “Scan Options”.

Virus and Threat protection - From the list of available options select “Full Scan” and then click on the “Scan Now” button.

Solution 15: Fix System Registry Settings
- Press the “Window + R” keys simultaneously to open up the “Run” dialog box, in the Run prompt type in “regedit”, and hit “Enter”.
Typing “regedit” - Now in the Registry Editor window navigate to the address below:

HKEY_LOCAL_MACHINE\SOFTWARE\Microsoft\WindowsUpdate\UX
- In the “UX Folder” right click on “IsConvergedUpdateStackEnabled” and select “Modify” from the drop down menu.
- Now set the “Value Data” to “0” and set the “Base” to “Hexadecimal”, once done click on “OK” and navigate to the other address below:
HKEY_LOCAL_MACHINE\SOFTWARE\Microsoft\WindowsUpdate\UX\Settings
- In the Settings folder now right click “UxOption” and select “Modify” from the drop down menu, change the “Value Data” to “0” and “Base” to “Hexadecimal”.
- Once done click on “OK” and proceed to the address below:
HKEY_LOCAL_MACHINE\SOFTWARE\Policies\Microsoft\SystemCertificates
- Now right click in a blank space and select “New” and then “DWORD (32-bit) Value”.
- Rename the new value to “CopyFileBufferedSynchronousIo”. Now right click the Value and select “Modify”. Change the “Value Data” to “1” and set the “Base” to “Hexadecimal”.
- In the end click on “OK” and exit the “Registry Editor”, restart your PC and check if the error got resolved.
Solution 16: Install the Update Manually
If the Update is refusing to install automatically you can then choose to install it manually, simply check what file is failing to update from the “Update” menu in Settings, once you know the update “Download” it manually from the internet and install it from here.
Solution 17: Reset Your PC
In the Windows search bar type in “Reset this PC” and press “Enter”, in the new window that opens up select “Get Started” under Reset this PC option and follow the on-screen instructions to reset your PC accordingly.
Resetting your PC will delete any apps and settings but your files will be kept safe.
Solution 18: Perform A System Restore
- In the Cortana search bar type in “System Restore” and select “Create A Restore Point” from the list of search results.

Create a Restore Point - In the new window click on the “System Restore” option, and then select a “Restore Point” when updates were working fine. Once the date is selected hit the “Next” button.
- Next, follow the on-screen instructions to complete the restore process and afterward proceed to check if we couldn’t complete the updates undoing changes error got eradicated now.

Following all of the above-indexed solutions will help you get away with the error smoothly but if you still continue to face any bugs then feel free to reach us out here.