Easily Fix Warframe Error 10054 [Complete Guide]
Some users while playing Warframe got the “An Existing Connection Was Forcibly Closed by the Remote Host: Warframe Error 10054” issue and we decided to fix it by using some methods that you can implement on your computer for free. We will also list the reasons due to which the issue occurs in the first place and then provide you with solutions in this guide.

What Causes the Warframe Error 10054: An Existing Connection Was Forcibly Closed by the Remote Host?
After having to go through most of the solutions that worked for our test benches, we came to the conclusion that the following must be the most prominent reasons behind it.
- Firewall/Antivirus: Sometimes, the Antivirus or the Firewall that has been installed on your computer might be blocking certain network packets due to which the game might not be able to communicate with its servers. Therefore, we suggest that you try to fix the Firewall by blocking it temporarily or adding an exception.
- Region: The region that you have selected in the game might be causing the Warframe Error 10054 on your computer. Therefore, we suggest that you try to change it and then check to see if doing so fixes this issue on your computer.
- DNS Configuration: The DNS configuration that has been set for your internet connection might sometimes trigger connectivity errors. Therefore, we recommend that you try to configure this properly and then check if the Warframe Error 10054 is fixed.
Now that you have been taken through most of the reasons behind its occurrence, we can finally start implementing the fixes for the Warframe Error 10054.
Before you Start:
- Try to contact your ISP and ask them if a Firewall has been installed on the Router that is preventing some traffic from connecting to your computer.
- Try to Disconnect from your Proxy or VPN if you have activated it.
- Restart your router and try to use the LAN cable to connect to the computer.
- Try to change the network that you have connected to.
- Try to create a new Warframe account and check to see if doing so fixes the issue.
Fixing the Warframe Error 10054:
Fix 1: Perform a Clean Boot
- Press “Windows + R” to launch into run prompt, type in “msconfig” and press “enter” to launch into the configuration panel.

Typing in “Msconfig” - Click on the “Services” tab from the top of the window and check the “Hide All Microsoft Services” option and click on the “Disable All” option.

Hide All Microsoft Services - After this, click on the Startup tab and select “Open Task Manager”
- Select all of the items that are configured to run on startup and click on the “Disable” option.
- Restart to perform a clean boot and check to see if the error still occurs.
- If it doesn’t, start enabling the services and apps bunch by bunch and narrow down the service that is causing the Warframe Error 10054.


Fix 2: Disable Firewall
- Press the “Windows + R” keys on your keyboard, type in “Firewall.cpl” and press “Enter” to launch into the Firewall control panel.

Typing in “firewall.cpl” - Click on the “Turn Windows Defender ON or OFF” option and from there, click on the “Turn off Windows Defender Firewall” option for both the private and public options.

Turn off Windows defender firewall - Save the changes, click on “OK” and exit out of the window.
- Check to see if doing so fixes the Warframe Error 10054.


Fix 3: Disable Antivirus
- Press the “Windows + I” keys on your keyboard, click on the “Update & Security” button and from the left side, click on the “Windows Security” option.

Windows Security - Select the “Virus & Threat Protection” option and from the right side, click on the “Manage Settings” button under the “Virus & Threat Protection” heading.
- Turn off the “Real-Time Protection” toggle to disable the Defender on your computer.

Disable Real-Time Protection - Check to see if doing so fixes the Warframe Error 10054 issue.


Fix 4: Switch In-Game Region
- Launch Warframe on your computer and click on the “Options” button.
- From there, click on the “Gameplay” tab and now from the “Region” change your region and click on “Confirm”.

Changing Warframe Region to fix Warframe Error 10054 - Now, check to see if you still get the Warframe Error 10054 while connecting to the match.
- You can switch the region back and check again.

Fix 5: Enabling IPV6
- Launch Warframe on your computer, press “Esc” to open the menu and click on the “Options” button.
- From the tabs, click on “Chat” and make sure to turn on the “IPV6” toggle.
- Press “Windows + R” to launch into the Run prompt, type in “ncpa.cpl” and press “Enter” to launch into the network control panel.

Typing in “ncpa.cpl” - Right-click on the Wi-Fi connection that you are using and select the “Properties” option.
- From here, make sure to check the “Internet Protocol Version 6(TCP/IPv6)” option and click on “Ok” to exit out of the window.
- Also, make sure that the IPV6 is enabled on your router as well.
- Check to see if doing so fixes the Warframe Error 10054 issue.

Fix 6: Refresh Windows Network Settings
- Press “Windows + R” to launch the Run prompt, type in “cmd” and press “Shift + CTRL + Enter” to launch with admin permissions.

Typing in cmd - Type in the following commands one by one and press “Enter” to execute them on your computer.
netsh int ip reset c:\resetlog.txt

ipconfig /release

ipconfig /renew

ipconfig/flushdns

netsh winsock reset

- From here, restart your computer and check to see if doing so fixes the Warframe Error 10054 issue.
Fix 7: Change DNS
- Press “Windows + R” to launch into the Run prompt, type in “ncpa.cpl” and press “Enter” to launch into the network control panel.
- Right-click on the Wi-Fi connection that you are using and select the “Properties” option.
- Double click on the “Internet Protocol Version 4(TCP/IPv4)” option.

Internet Protocol Version 4 (TCP/IPv4) - From here, check the “Use the following DNS server addresses” and type in the following DNS addresses.
Primary DNS Address: 8.8.8.8

Secondary DNS Address: 8.8.4.4
- Restart your computer and check to see if doing so fixes the Warframe Error 10054.

Fix 8: Disabling UPnP and NAT-PMP
UPnP (Universal plug n Play) and NAT-PMP (Port Mapping Protocol) are services of the network that helps devices and software to configure when both are connecting to a network.
- First, launch “Warframe” open the “menu” and go to “Option”.
- From the above tabs click on the “Gameplay” option.
- Now uncheck the “Enable UPnP” and uncheck the “Enable NAT-PMP” and click on “CONFIRM“.

Disabling UPnP and PMP - Restart Warframe and check to see if you have been able to fix the Warframe Error 10054.

Fix 9: Set up Static IP on Router
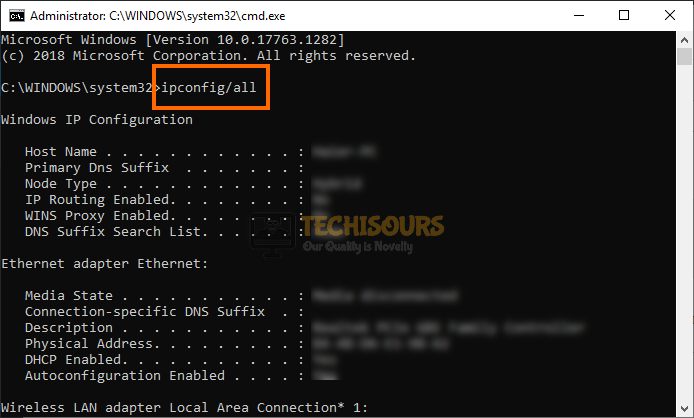
- Press “Windows + R” to launch the Run prompt and type in “cmd” to launch the command prompt.
- Type in “ipconfig /all” and note down the Physical Address, IPV4 Address and the IPV4 Default Gateway Address.

ipconfig/all - Now, paste the IPV4 Address in your browser to open the login page of your router.
- Type in the “Username” and the “Password” to log in to the page. (NOTE: It can usually be found on the back of the router).
- Now in “Advanced Setup” look for “Address Reservation” or the “Static Route” option.
- After that fill up the information by typing the “Physical Address” and “IPv4 Address” in the given boxes and click on “Save”.
- At last open Warframe and check to see if the Warframe Error 10054 is fixed.
Fix 10: Disabling TCP/IP Using Regedit
- Press “Windows + R” to launch into the Run prompt, type in “regedit” and press “Enter”.
Typing “regedit” - Navigate through the following address in the registry editor:
HKEY_LOCAL_MACHINE\SYSTEM\CurrentControlSet\services\Tcpip\Parameter
- After that right-click on the empty area and then click on “New”, now choose “DWORD (32-bit) value”.
- You will see a new registry. Set its name to “TdxPrematureConnectIndDisabled” and set its value to “1”.
- Finally, restart your PC and see if the issue is resolved or not.

Fix 11: Router Settings & Port Forwarding
- First, enter the IP address of your router that we found in the 9th fix.
- Now go to the “Enable the default firewall” and disable it.
- Go to the “WAN Setup” and disable the “Disable SPI Firewall” option if your router supports Stateful Packet Inspection.
- After that, click on the “Advanced” tab and then select “Qos” and disable the “Start Qos”.
- Now click on “DMZ”
- If “Current DMZ Status “is enabled, “disable” it, and enter your PC IP in “DMZ Host IP Address” and click on “Save’.
- Finally, launch “Warfare” and check if the error is resolved.
- If after all this the issue still occurs, enter the IP address of your router on the browser and open the routers administrator page.
- Now click on “NAT” setup and open the “Port Triggering Setup”
- You will see some ports below. Make changes as mentioned,
UDPports: 4950 & 4955

TCP/UDP port: 443

TCP/UDP port range: 6695 to 6699
- Now open “WAN Settings” in your router and enable “SIP-ALG“, and if your router also has “IGMP Proxying” then you must enable it as well.
- Add the ports that are mentioned above in this method to your “Antivirus/Firewall”.
- Check that your router is not connected to another router if it is connected then use your modem in the bridge mode.
Fix 12: Update Router Firmware
- Launch into the Router’s Login page from the browser and log in with your credentials as we have done in the fixes above.
- From here, look for a firmware update option that should be present in the administrator’s region.
- Update your Firmware as per the instructions from your ISP and check to see if the Warframe Error 10054 is fixed.
If the Error has still not been fixed, contact us for further troubleshooting.