Fix: The Windows Experience Index could not be Computed [Easy Instructions]
A lot of users have been getting the “the windows experience index could not be computed” error and it prevents them from completing certain tasks on their Windows Computer. The full error message states “the Windows Experience Index could not be computed could not measure video playback performance” or sometimes, it might state “the Windows Experience Index could not be computed. cannot complete assessment”.

Some variations of the error might state “Could not Measure Storage Performance” and some might state “failed to properly assess the disk” however, you need not worry because we have compiled solutions that are both general and specific so applying them will surely fix the issue even if you are getting any one of these variations of the error.
Windows Experience Index rates CPU, RAM, Hard drives, and display system individually by scoring them in between 1 and 5.9. The lowest score is Zero also called as Base Score. To run Aero Interface a base score of 3 is required, while for gaming and other purposes a base score of 4-5 is required. Windows Experience Index uses Windows System Assessments Tool (WSAT).
What Causes the Windows experience index could not be computed Error on Windows?
After going through some preliminary fixes, we concluded that the following must be the most common triggers due to which this error occurs.
- Outdated Drivers: It is possible that the drivers that you are using on your computer have been outdated due to which the “the Windows Experience Index could not be Computed” error is being triggered. Therefore, we recommend searching for any available driver updates as mentioned in the solution below and installing them on your computer.
- Damaged System Files: In certain cases, the system files on your computer might have gotten damaged due to which the error message is being seen. Therefore, we recommend that you try and repair them using the SFC scan utility as mentioned below and then check to see if doing so fixes the “the Windows Experience Index could not be Computed” error.
- HDD configuration: Hard Drives after being installed into the system need to be configured properly with the operating system so that the computer is able to properly access them and store files on them. Therefore, we recommend that you check to see from your Bios if the HDD configuration has been done properly.
- Outdated Bios: In certain cases, it is possible that the Bios on the computer might be outdated due to which you are running into the “the Windows Experience Index could not be Computed” error. However, updating the Bios is a very tricky process and if you do it improperly, you could end up with a bricked motherboard. Therefore, we recommend that you proceed with this step with the utmost caution.
- Outdated OS: It is possible in some cases the operating system on your computer has been outdated due to which the error message is being triggered. Therefore, we recommend that you try and install the latest available updates and then check to see if doing so gets rid of the issue.
Now that you have been taken through almost all the important reasons behind its occurrence, we can finally start implementing the fixes.
Before You Start:
To start with you need to implement a couple of basic fixes and see if your problem gets solved. Just proceed with turning off your system completely and then clean the motherboard from any dirt or dust particles by using a blower. Also, take out the RAMs and clean them using a dry page. In case both of these do not work then move forward to implement some of the advanced fixes mentioned below.
Fixing the Windows experience index could not be computed issue:
Solution 1: Update Graphics Card Drivers
To start with you must know the graphics card driver installed on your system. If you already know about it then skip steps “1 and 2” and carry on with the procedure from step “4”:
- Press the “Window + R” keys together on your keyboard to open up the “Run” dialog box.
- Then type in the command “devmgmt.msc” in the dialog box to open up the “Device Manager” window.

Typing devmgmt.msc - In here locate the option of “Display Adapters” and click to expand it. You will be shown with the graphics card installed on your PC.
- When you have got to know about your graphics card now open your browser and type in “[Your Graphics Card Name] Drivers”. Fill in the bracket with the name of your graphics card. When you are directed to your “Graphics Card Manufacturer site,” navigate to the “Drivers & Utility” or “Drivers & Support”. Browse for your Graphics Card and “Download” the latest driver present.
- Once downloaded, get back to the “Device Manager” window, right-click on your “Graphics Card” and proceed by clicking on the “Update Drivers” in the menu.

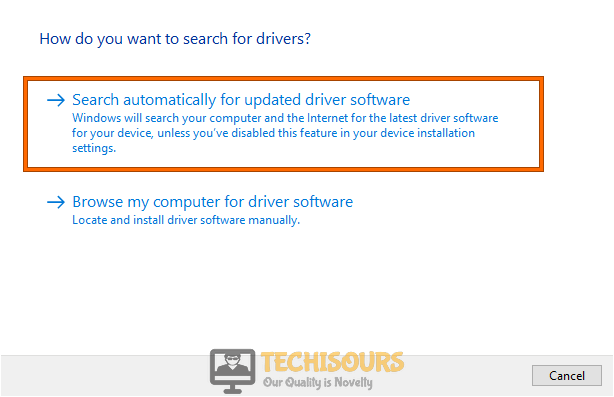
Updating Driver - Then carry on by clicking on the “Search Automatically For Drivers”. Wait for a while until the computer finds and installs the updated drivers automatically.

Search automatically for updated driver - It is optimal to restart your PC lastly and then check to see if the error got removed now.


Solution 2: Run SFC Scan
SFC is a Microsoft Windows utility and with the help of this software, one can search for corrupt files and restore files in the system. To run an SFC scan on your system follow these steps:
- Press the “Window + S” keys simultaneously on your keyboard and type in “cmd” in the search bar.
- Right-click on the “Command Prompt” to select “Run As Administrator” from the pop-up list.

Run Command Prompt - Now type in the following commands one by one in the command prompt window and hit the “Enter” key to execute them.
sfc /scannow
DISM.exe /Online /Cleanup-image /Scanhealth
DISM.exe /Online /Cleanup-image /Restorehealth
DISM.exe /online /cleanup-image /startcomponentcleanup
- After executing all of the commands now check to see if the windows experience index could not be computed could not measure video playback performance error still persists or not.

Solution 3: Use Windows Experience Index Repair Tool
One can also fix all of the Windows-related errors and bugs by using this Windows Experience Index Repair Tool. You can simply download this tool by clicking here, run it on your system, and then check if it solves the glitch for you.
Solution 4: Configure Hard Drives RAID
One of the biggest concerns for users nowadays is keeping their data safe. Configuring a hard drive raid will not only put multiple drives together in a single disk but will also improve the performance and is easier for the user to use too. It also provides a cure for this particular error. To configure Hard Drive RAID on your system follow the below-listed steps:
- Right-click on “This PC” and from the drop-down menu click to select the “Manage” option.

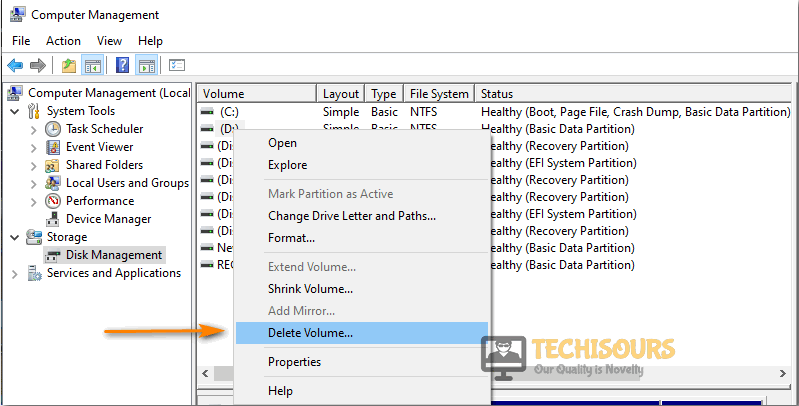
Choose Manage Option - In the “Computer Management” window proceed to select the option of “Disk Management” from the left pane.
- In here right-click on the specific drives you want to include in the RAID and then click to select “Delete Volume”.

Choose Delete Volume Option - Once done now you will be able to see how much space is left free and it will also help in removing the data loss and will improve the performance too.
- Finally, proceed to verify if the error got removed now.

Solution 5: Change Environmental Variable Values
You can alter the environmental variable values by following a few simple steps that are mentioned below:
- Navigate to “This PC” and click to open the “Computer” tab located at the top of the window.

Click on This PC - Then select the “Properties” option and scroll down to find the option of “Advanced System Settings”. Click to select it.
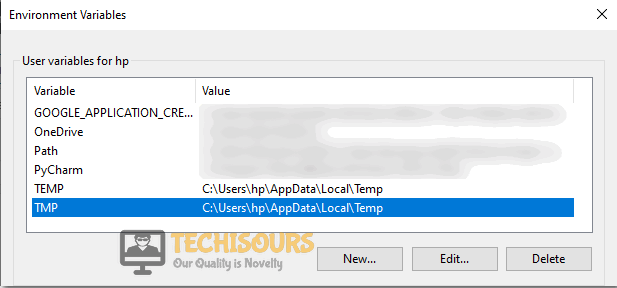
- In the “System Properties” window scroll down to the bottom to find and then click on the option of “Environment Variables”.

Choose Environmental Variables Option - In here replace the values of “TEMP” and “TMP” with “D:\User\[username]\AppData\Local\Temp”.

Tweak Environmental Variables - Now check to see if the error got resolved or not.


Solution 6: Disable Antivirus and Firewall Temporarily
- Search for “Control Panel” in the search bar and click to open it. Here proceed to select “System and Security”.
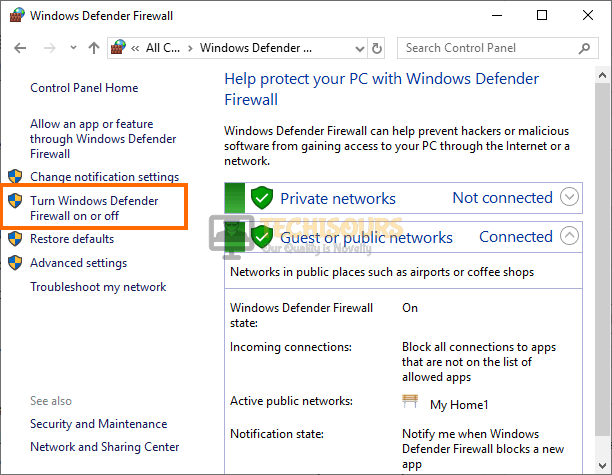
- Then locate and click on the option of “Windows Defender Firewall” and proceed to select “Turn Windows Defender Firewall On Or Off” in the left pane.

Turn Windows Firewall on or off - In the “Customize Settings” window checkmark the option of “Turn Off Windows Defender Firewall” in both private and public network settings.

Turn off Windows defender firewall - Lastly, observe if the windows experience index could not be computed could not measure video playback performance error got eradicated now.

Solution 7: Clean Boot Your PC
Sometimes the third-party applications installed on your computer can be in a clash with your device causing it not to function properly. To check if any other program is at a clash with your drive implement these steps:
- Search for “msconfig” in the search bar located near the Start menu to open up the “System Configuration” window.

Typing in “Msconfig” - When the window opens click on the “Services” tab placed at the top.
- Scroll down to the bottom of the window to checkmark the option of ‘’Hide All Microsoft Services’’. Then click on “Disable All” at the bottom of the window.

Hide all Microsoft services - Now proceed to open up the “Startup” tab and click to open “Task Manager”.
- When the task manager window opens up in the Startup tab click to select “Disable” at the bottom of the screen.
- Close the task manager window and go back to the “Services” tab and click “OK”.
- Close all windows and restart your computer now to check if the error still persists or not.


Solution 8: Update BIOS
One of the common causes for the occurrence of this error is the usage of an outdated application on your system. When the newer version of any software gets released it results to block or limit the support for previous versions. In such a case updating BIOS might help resolve the error successfully. To do so follow the steps indexed beneath throughout:
- Open the “Start Menu” on your PC or press the “Windows icon” on your keyboard to open it.
- In the search bar located at the bottom, type or paste “System Information”.

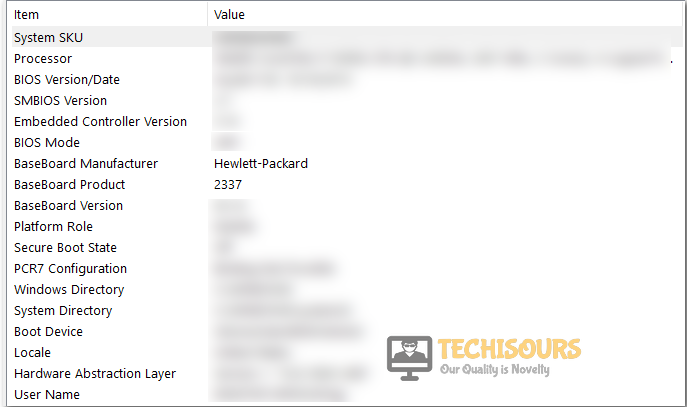
Choose System Information - In the “System Information” dialogue box, locate “Motherboard Manufacturer or BaseBoard Manufacturer” in the “System Summary Tab”.

Motherboard Manufacturer option - Then note down the “Baseboard Manufacturer and Baseboard Product”.
- Combine these two entries and search them in your browser in the “Address Bar”. Proceed to the first link in the search results.
- Once you are on the “Manufacturers’ website,” navigate to the “Drivers and Utility” tab and “Download” the latest drivers present in the list. Make sure to download the files in a “USB” thumb drive!
- Restart your computer and keep the USB drive plugged in. Keep smashing the “Delete” key once you see the splash screen on your monitor. You would be directed in the “BIOS” of your motherboard. Head on to the “Tools Tab”.
- Under the “UEFI Update Utility” select “Instant Flash”. Your system will search for the BIOS file in the USB drive.
- Click on “Update” once it discovers the BIOS file. Click on “YES” to confirm your decision.
- The system will take a few minutes to update the BIOS. “Do not turn off your system” under any condition, even if it appears to be stuck. Doing so can result in a dead motherboard.
- Once done, press “Enter” to reboot. Your system would be up and running on the latest version of BIOS.
- Once completing the whole procedure now check to see if the error got fixed.

Solution 9: Check For Windows Update
By updating windows on your system it runs in optimal and smooth functioning and increases the performance just like the drivers. Windows update is free and easy to update and if you want to check for any available Windows updates on your system follow the below-mentioned steps:
- Search for the “Settings” option from the Start menu and click to select it.
- Then proceed to select “Update & Security”.

Update and Security - In the “Windows Update” tab there will be an option titled “Check For Updates”, click on this to verify and download any latest updates available on your device.

Check for updates - This process might take some time but once completed proceed to check if you are able to get rid of the error.


Hopefully, by following the aforementioned fixes you’ll be able to resolve the problem successfully but if the issue still persists you can Contact Us here.