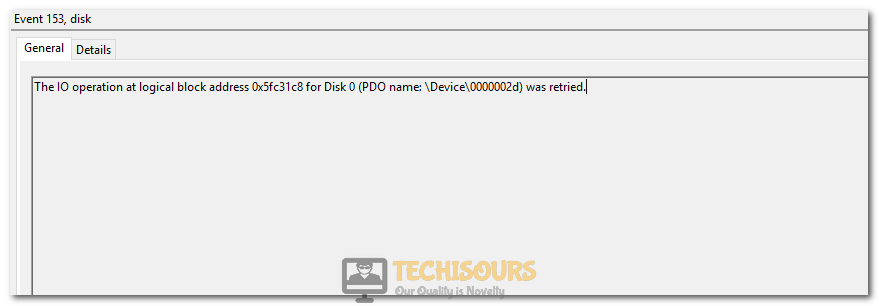
Fix: The IO Operation at Logical Block Address for Disk was Retried [Complete Guide]
There have been some complaints from users that have discovered the IO operation at Logical Block Address for Disk was Retried error in their Event Viewer screen after a blue screen of death or system crashes. We have compiled this article to present you with some workarounds, solutions, and fixes that you can implement on your computer to completely get rid of this error.
Make sure to follow all the instructions carefully and accurately to get rid of the Event ID 153 the IO operation at Logical Block Address for Disk was Retried Error. Also, we have compiled the reasons due to which this error might be seen for most people.
What Causes “the IO operation at Logical Block Address for Disk was Retried” Error on Windows?
After going through some troubleshooting instructions, we concluded that the following are some of the most important reasons due to which this error occurs in the first place.
- Corrupted Sectors: It is possible that your Drive might contain some sectors that have been corrupted due to a storage failure and due to this, the “the IO operation at Logical Block Address for Disk 0 was Retried” error is being triggered. We recommend running some disk scans to help you determine and fix such issues.
- SATA cables: In certain situations, the SATA Cables being used by your HDD or SSD that connect it to the computer might be faulty due to which you are running into the “the IO operation at Logical Block Address for Disk was Retried” error. We recommend replacing the cables and then checking to see if doing so fixes this error.
- Outdated Bios: It is also possible that your Bios have been outdated due to which you are getting this issue. Bios Updates are very critical and necessary in order to ensure that your system is running at its peak performance. However, updating the Bios can be a sensible step and you might want to read more about it in the solution below.
- Power Plan: Sometimes the Power Configuration settings being used by your computer might not be correctly set due to which you are running into the Event ID 153 error on your computer. Therefore, we recommend reconfiguring these settings using the steps below.
- Outdated Drivers: Some IDE/SATA drivers on your PC might be outdated and this can also cause the error to appear inside your Event Viewer screen. Therefore, we recommend that you try and update your drivers to the latest available version from the manufacturer or from a third-party software provider.
Now that you have gone through most of the reasons due to which this error occurs, we can finally move on towards implementing the solutions.
Fixing the IO operation at Logical Block Address for Disk was Retried Error:
Solution 1: Running an SFC (system file checker) Scan
- Press “Windows” + “R” to open the Run prompt.
- Type in “cmd” and press “Shift” + “Ctrl” + “Enter” to launch into it with admin permissions.

Typing in cmd - In the “command prompt”, type or paste ‘sfc /scannow’. Don’t forget to give a single space between sfc and /scannow and remove the quotation marks.

sfc / scannow - Press “Enter” to run this command on your system.


It should be noted that this Command will delete some of the files saved on your computer, but since they would already be corrupted, it had no use.
Solution 2: Changing the SATA Cables
- Click on Start Menu, select the “Power” option and select the “Shut Down” option.

Selecting Shut Down - Now, wait for your PC to shut down completely. Now remove the plug from the main socket.
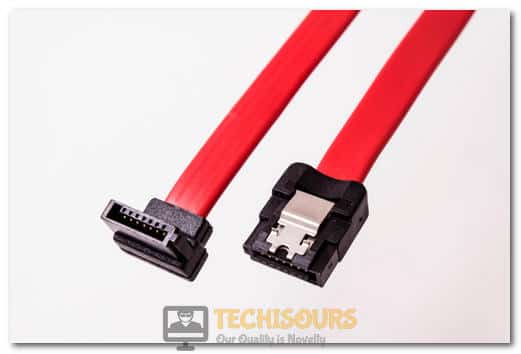
- Open your PC and locate your “Storage Devices (SSD or HDD)”. Get new “SATA Cables” from a store.

SATA Cables Used to Connect SSD and HDD to Computer - Remove the pre-installed SATA cables from your storage devices.
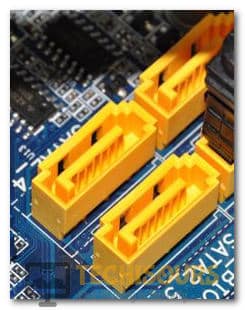
- Now install the new SATA cables you got. Make sure to check the alignment and try plugging the SATA cable into a different SATA port.

SATA Ports on Motherboards - Put back your system and plug-in power. Switch on your system, and hopefully, it should resolve your problem.

Solution 3: Updating the BIOS
Keep in mind that this is a precise step and any power loss while the Bios is being updated will ruin your motherboard. Follow this with extreme caution and remember to seek professional help if you think you won’t be able to complete it yourself. First, you need to know the manufacturer and model of your Motherboard. To do this
- Open the “Start Menu” or press the “Windows button” on your keyboard to open the “Start Menu.”
- In the “Search Bar” located at the bottom, type or paste “System Information.”

Clicking on System Information - In the “System Information” dialogue box, Locate for “Motherboard Manufacturer or BaseBoard Manufacturer” in the “System Summary Tab”.
- Note down the “Baseboard Manufacturer and Baseboard Product”.

Note Down the Motherboard Model - Combine these two entries and search them in your Browser in the “Address Bar”. Proceed to the first link in the search results.
- Once you are on the “Manufacturers’ website”, navigate to the “Drivers and Utility” tab and “Download” the latest drivers present in the list. Make sure to download the files on a “USB” thumb drive.
- Restart your computer and keep the USB drive plugged in. Keep smashing the “Delete” key once you see the splash screen on your monitor. You would be directed in the “BIOS” of your motherboard. Head on to the “Tools Tab”
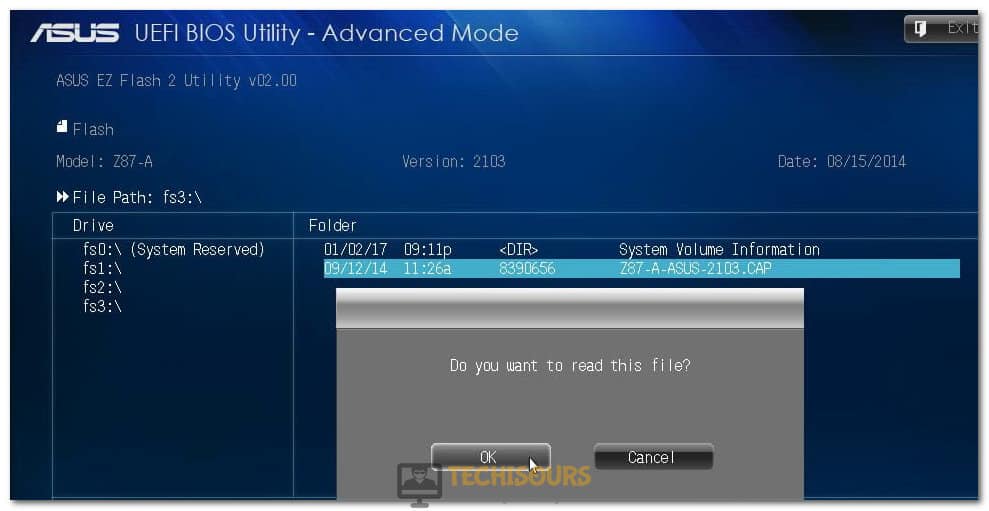
- Under the “UEFI Update Utility” select “Instant Flash”. Your system will search for the BIOS file in the USB drive.
- Click on “Update” once it discovers the BIOS file. Click on “YES” to confirm your decision.

Installing Bios Update File - The system will take a few minutes to update the BIOS. DON’T TURN OFF YOUR SYSTEM under any condition, even if it appears to be stuck. Doing so can result in a dead motherboard.
- Once done, press “Enter” to reboot. Your system would be up and running on the latest version of BIOS.


Solution 4: Updating the IDE ATA/ATAPI controllers
- Press “Windows + R” on your keyboard to open the “Run” dialog box. Paste or type “devmgmt.msc” in the “address bar” and press “Enter” to open “Device Manager.”

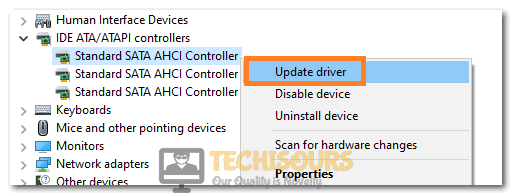
Typing devmgmt.msc in the Run prompt - Locate for “IDE ATA/ATAPI controllers” in the “Device Manager” and double click to expand the “IDE ATA/ATAPI controllers drop-down menu.” Right-click on each option in the “IDE ATA/ATAPI controllers drop-down menu” and click on the “Update driver” option.

Clicking on Update Driver - Select the “Search automatically for updated driver software” option on the pop-up window and walk through the on-screen instructions to install the “Latest drivers” on your system.
- Follow “step 2 and 3” with each option present under the “IDE ATA/ATAPI controllers” to update the drivers of all the options.
- “Restart” your system to save in the changes made and for the updated drivers to take effect. Hopefully, there won’t be any errors anymore.

Note: Alternatively, you can try to use third-party drivers and check to see if that fixes this issue on your computer. These drivers can be found on the internet.
Solution 5: Setting the Power plan to High Performance
- Press “Windows + R” on your keyboard to open the “Run” dialog box. Paste or type “powercfg.cpl” in the “address bar” and press “Enter” to open “Power Options”

Typing in “powercfg.cpl” - Under the “Choose or Customize a Power Plan” select “High Performance”. If the option is not visible to you click on “Show Additional plans” and the “High Performance” option will appear.
- Select this plan and after that, click on the “Change Plan Settings” option.

Change Plan Settings - After that, click on the “Change Advanced Power Settings” option and then click on the “Turn off Hard Disk After” option and increase it to “999999”.
- This should prevent the disk from being disabled and it might fix the “the IO operation at Logical Block Address for Disk was Retried” Error.


Solution 6: Disabling Dynamic Tick
- Press “Windows + R” on your keyboard to open the “Run” dialog box. Paste or type “Cmd” in the Run prompt and press “Ctrl + Shift + Enter” to open “Command Prompt Window”. Click on “YES” if you come across any permission prompts.
Typing in cmd - In the “Command Prompt” window, paste or type “bcdedit /set disabledynamictick yes” and press “Enter” to disable “Dynamic Tick”.
- Close the “Command Prompt” to save the settings and “restart” your computer for the settings to take effect.
Solution 7: Increasing the TimeOutValue in the Registry Editor
- Press “Windows + R” on your keyboard to open the “Run” dialog box. Paste or type “regedit” in the “address bar” and press “Enter” to open “Registry Editor”. Click on “YES” if you come across any permission prompts.
Typing “Regedit” - In the “Registry Editor” window, navigate to “Computer > HKEY_LOCAL_MACHINE > SYSTEM > CurrentControlSet > Services > Disk” in the drop down menu on the left.
- Once in the “Disk key”, locate and double click on “TimeOutValue” on the right-hand section of the window. The “Edit DWORD (xx-bit) Value” will open up. Type any value under “Value Data” to 30 or less.

Editing the TimeOut Value in Registry - Make sure the “Hexadecimal” option is selected. Press “OK” and restart your computer for the settings to take effect.


Solution 8: Disabling the Paging Executive
- Press “Windows + R” on your keyboard to open the “Run” dialog box. Paste or type “Regedit
Typing “regedit” ” in the “address bar” and press “Enter” to open “Registry Editor”. Click on “YES” if you come across any permission prompts.
- In the “Registry Editor” window, navigate to “\ HKEY_LOCAL_MACHINE \ SYSTEM \ CurrentControlSet \ Control \ Session Manager \ Memory Management” in the drop-down menu on the left.
- Once in the “Memory Management”, locate and double click on “DisablePagingExecutive” on the right-hand section of the window. The “Edit DWORD (xx-bit) Value” will open up. Erase the “0” and replace it by “1” to disable the paging executive.

Editing the Registry Value - Press “OK” and restart your computer for the settings to take effect.
- Check to see if the “the io operation at logical block address for disk was retried” error still occurs.

Solution 9: Changing SATA HDD to ATA (or IDE) from AHCI
- Only proceed with this method if you’re familiar with the BIOS and computer settings.
- Open the “Start Menu” or press the “Windows button” on your keyboard to open the “Start Menu.”
- Click on the “Power” button and press the “Shift key” and click on “Restart”. This will direct you to the “Recovery menu”
- Once in the “Recovery Menu”, click on the “Troubleshoot” then proceed to “Advanced options”. In “Advanced options”, select “Startup Settings” and click on “Restart”.

Advanced Options - Keep smashing the “Delete” key once you see the splash screen on your monitor. You would be directed in the “BIOS” of your motherboard. Locate the “SATA Operation” setting and set it to “ATA”. Save your settings and exit the BIOS.
- Your computer will boot into the “Startup settings”. Press “5” or “F5” to boot it in “Safe Mode with Networking”. Once done, restart your computer like normal.

Selecting “Safe Mode with Networking” - Check to see if this issue the “the IO Operation at Logical Block Address for Disk was Retried” error.


Solution 10: Bad Storage Device
It is sometimes possible that the storage device itself has gone bad and it cannot be used anymore. Therefore, you should try to look for a replacement for the device.
If you require further troubleshooting for the io operation at logical block address for disk was retried error, please feel free to contact us.