Easily Fix Taskeng.exe Keeps Popping up Issue on Windows
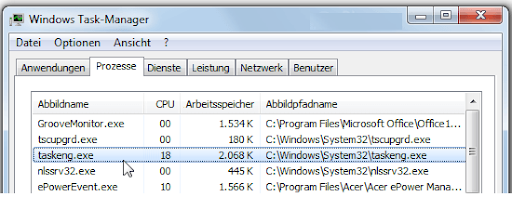
Some users have been complaining that taskeng keeps popping up in their task manager and in some cases, it might be using considerable resources as well. In this article, we have written in detail about the “Taskeng.exe” process that you see in your task manager and have also listed different steps and solutions that you can undertake to get rid of it.
Fixing the taskeng.exe keeps popping up issue completely:
SOLUTION 1: Manually Delete Taskeng.Exe Files
You can manually delete the taskeng.exe and files related to it by following the steps mentioned below;
- Click on the Windows Start Menu option and navigate to the “Control Panel”.

Type in Control Panel - The Control panel window will appear in front of you, in that window find the “Add or Remove Programs” option and click on it.
- In the “Currently Installed Programs” window, select “taskeng.exe” and then select the “Change/Remove” option.
- Navigate to the following directories from the “Run” prompt, select the “View” tab, search for the files having a similar extension as given below, and remove all of them:

%Temp%\[random].exe

%AppData%\vsdsrv32.exe

%CommonAppData%\pcdfdata\config.bin

%Windows%\system32\[random].exe

%Documents and Settings%\[UserName]\Desktop\[random].lnk
- Reboot the computer after you have performed all the above-mentioned steps.
SOLUTION 2: Remove System Junk files
Taskeng.exe error may arise due to unused system junk files that keep on piling in the windows drive. You can remove these junk files with the help of the windows disk cleanup utility which comes preinstalled in all Microsoft Windows systems.
To delete these junk files, follow the steps given below;
- In the start menu, type ‘‘command’’ and hold the “Ctrl+shift” keys on the keyboard. Now press the “Enter” button and a permission dialog box will appear in front of you and from there click the “Yes” option.
- Now type ‘’Run’’ in the start menu and in the search window type ‘’cleanmgr’’ and click the “OK” button.

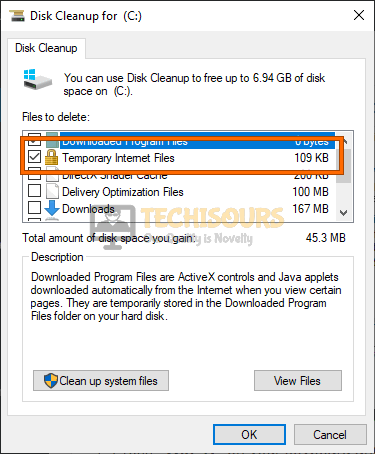
Typing in “Cleanmgr” - Disk Cleanup window will appear and from there select the “Drive C”. Now your system will calculate how much occupied disk space the user can regain and will list several options, choose the one you need to clean like Temporary Internet Files, etc, and click the “OK” button.

Cleaning Temporary Internet files

SOLUTION 3: Reinstall Microsoft Office
Taskeng.exe error can arise due to corrupt Windows registry keys associated with taskeng.exe / Microsoft Windows Vista Promotional Pack. Taskeng.exe error can also occur due to some corrupt software like MS Office. For that purpose, just uninstall that software that is related to Microsoft Windows Vista Promotional Pack and install them again to fix this issue.
Follow the instructions given below to successfully remove that software. In our case, MS Office was found the culprit behind this issue therefore we’ll be indexing the uninstallation method of it below:
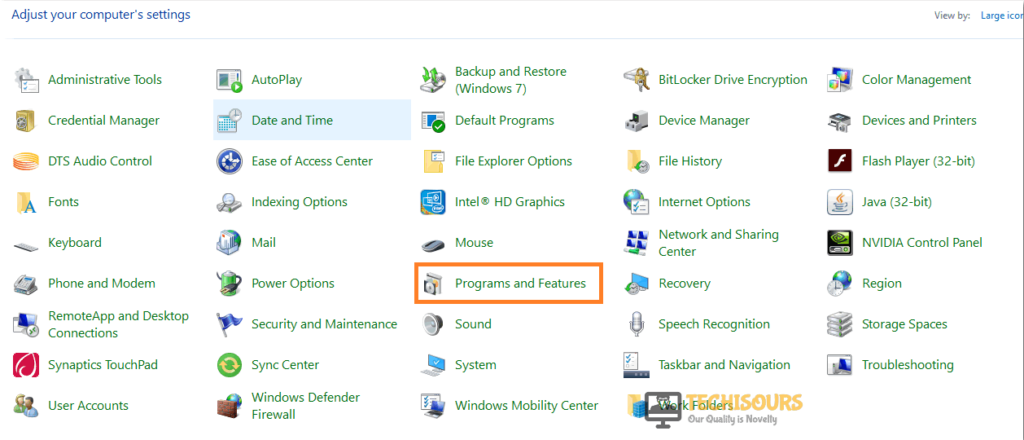
- Firstly, proceed to the Start menu and type the “Control Panel”.

Typing in Control Panel - A new window will appear in front of you, select the “Programs and Features” option from that window.

Choose programs and Features option - Find the programs that are related to “taskeng.exe” like MS Office, select it, and choose the “Uninstall” option.
- When you have finished uninstalling MS Office, reboot your system and check whether the issue is gone.

Later if the problem is resolved you can try re-installing MS Office and continue your daily tasks.
SOLUTION 4: Disable User Feed Synchronization (UFS)
In some operating systems, a task named User_Feed_Scynchronization is the main cause of taskeng.exe error. Disabling this task has turned out to be useful for some users. Follow the instructions given below to successfully disable this task:
- Click on the Start button and type “Task scheduler” in the search bar. Afterward, press Enter button and the Task Scheduler window will open in front of you.

Type In Task Scheduar - Locate the “Task Scheduler Local” option on the left-hand side and right-click on Task Scheduler Library.
- Make sure the Show Hidden Tasks option is enabled under the “View” tab.
- Expand the “Name” column list and locate the “User_Feed_Synchronization” option, select the task and click on the “History” option.
- Now proceed to the “History” tab and expand the “Date” and “Time” options. If the selected task is the reason for this particular error, you will see a lot of errors that occur every five minutes.
- Now select the “Disable” option in the right-hand pane.
- When you have performed all the above-mentioned tasks, close the Task Scheduler and reboot your computer.

SOLUTION 5: Reinstalling the Taskeng.exe file
Taskeng.exe related errors can arise when these files have been deleted mistakenly or removed by another program. You can reinstall the taskeng.exe file by following the steps given below:
- To begin, start your computer system in Safe Mode by pressing the F8, Esc keys, etc on startup.
Windows 7 & Windows Vista Users: Once you have entered the Safe Mode, click the Start icon and type “taskeng.exe” into the search box. A list will appear showing several programs, find the file name Taskeng and select the “Delete” option. - Empty the “Recycle Bin” to delete the file permanently.
- Now reinstall the Taskeng.exe file by running the System File Checker. For this, purpose, press the “Windows + R” keys simultaneously, then type “cmd” and press the “OK” button.

Typing in cmd - Once the screen of Command Prompt launches, type the following command and press the “Enter” button and wait until the installation process is complete:
sfc/scannow

SOLUTION 6: Scan System using Antivirus Software
Taskeng.exe error can arise if a virus attack has corrupted the taskeng.exe file or related Microsoft Windows program files or the user has downloaded some corrupt software or program. If you want to remove the virus or infection-related with the Taskeng.exe file, then you can consider scanning the computer system with authentic antivirus software.
Good antivirus software is effective not only in dealing with viruses & Trojans, but it also helps in running the operating system smoothly.
The AVG is reputable antivirus software that can be considered to remove this type of virus. You can get the free version of this antivirus and run a deep system scan to see if the Taskeng.exe file is infected with viruses. Once the deep system scanning is complete, all the possible threats related to the taskeng.exe error will be removed automatically.
SOLUTION 7: Perform a Windows Update
Updating Windows to the latest update might resolve this issue. Many taskeng.exe error messages that arise can be due to an obsolete Windows Operating System. To Update Windows, follow the steps given below:
NOTE: Your system must be connected to an active internet connection before performing the below-mentioned steps.
- Click on Start / Windows icon, type “Windows Update” in the search box, and press Enter key.

Windows Update Settings - Windows Update section will appear, click on the “Check for Updates’’ option and wait (depending upon your internet connection).

Check for updates - If updates are available, then they’ll start downloading automatically.
- After that, click on the ‘’Install Updates’’ option and after installing the updates, restart your PC.


SOLUTION 8: Block OfficeBackgroundTaskHandlerRegistration
Sometimes the Taskeng.exe error could be caused by an issue related to Microsoft Office. This issue can be resolved by disabling the ‘’OfficeBackgroundTaskHandlerRegistration’’ from the Task Scheduler. Follow the steps given below to resolve this issue;
- Press the “Windows + R” keys simultaneously on your keyboard, a “Run” dialogue box will appear at the front.
- Type ‘’taskschd.msc’’ in the dialogue box and press the “Enter” button.

Type Taskschd Command - Task scheduler window will appear, find Task Scheduler library in this window, right-click on it, expand “View”, and select “Show Hidden Tasks” option.
- Expand the “Microsoft” folder that is located beneath the Task Scheduler Library folder and click on it and afterwards double click on the “Office”.
- Select ‘’OfficeBackgroundTaskHandlerRegistration’’ file and “Disable” it from the right-side options section.
- Then select the file ‘’OfficeBackgroundTaskHandlerLogon’’ from the same section and “Disable” it too.

SOLUTION 9: Remove RocketTab error
Taskeng.exe error is also associated with various errors that include a browser hijacker which is called MyWebSearch. This unwanted software is run by Trovi Download Manager which is famous for creating software that causes various problems in the functioning of the operating system.
Another indication is the RocketTab error which also creates issues related to pop-up errors. Now to check whether the Taskeng.exe error is a virus, follow the instructions given below to successfully remove this error.
- Press “Alt + Ctrl + Del” keys simultaneously to open the task manager and navigate to the “Processes” tab.
- Find the file named “taskeng.exe”, right-click on the file, and click on the option ‘’Open file location’’.
- The path should be the same as indexed below and if it’s not similar to this path, then it’s most probably a virus:
C:\Windows\System32
- Follow “Solution 6″ that we have written above to be able to completely remove the file.
SOLUTION 10: Remove Suspicious Tasks
This problem can arise when some doubtful programs are running in the background as Scheduled Tasks. You can easily stop these programs with the help of software. Follow the below-mentioned steps to remove these tasks:
- First of all, download “Autoruns” software by clicking here.
- After successfully downloading the file, install the software by following the on-screen instructions.
- Now navigate to the ‘’Scheduled Tasks’’ tab and find and uncheck the tasks that have unusual image paths i.e. File not found.
- Go ahead and restart your computer after implementing the steps above and hopefully you will be able to fix the issue. However, if the problem still persists proceed to the next potential fix indexed below.
SOLUTION 11: Remove Taskeng.exe Pop-Up Error From Your Browser
We will also have to address the Taskeng.exe pop-up errors in browsers as they are common among users as well.
NOTE: Resetting the browser’s settings will clear all data stored in the browsers i.e. usernames, passwords, bookmarks, history, etc, therefore, make sure to create a backup before resetting.
Mozilla Firefox Users:
- Open “Mozilla Firefox” and in the top right corner, click on the menu icon and select the option “Add-ons and Themes”.
- Now go to the “Extensions” option and look for any doubtful extension installed and if found any, “Remove” it.
- Again, click on the menu icon and go to the “Help” option. In the help menu, proceed to the “More troubleshooting information” option.
- Click the “Refresh Firefox” option located on the “Troubleshooting Information” page.A dialog box will appear asking for permission to refresh firefox and hit the “Refresh Firefox” prompt button.
- When the procedure is complete, click “Finish”.
Google Chrome Users:
- Open “Google Chrome” and in the top right corner, click on the menu icon and afterward choose “Settings”.
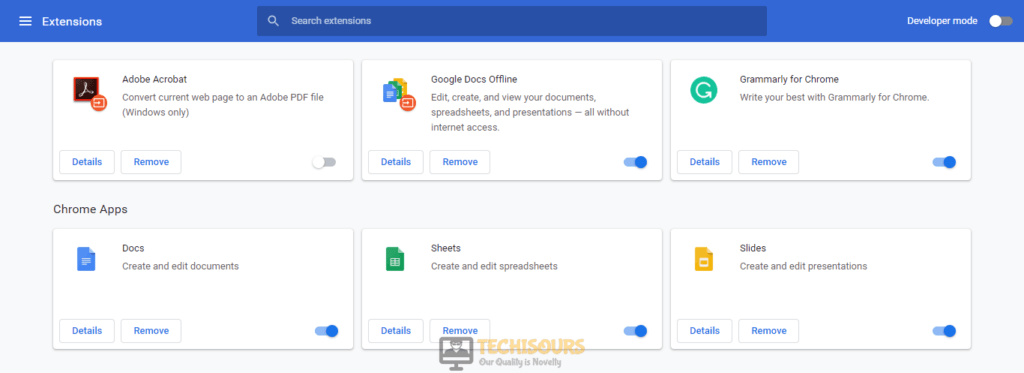
- Click on the “Extensions” option in the lower-left menu and remove all the suspicious extensions.

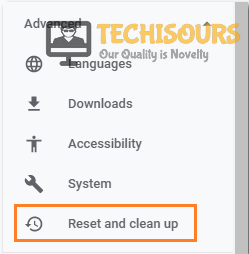
Removing Extensions - Again, click on the menu icon and go to the “Settings” option. In the settings window, proceed to the “Advanced” option in the left menu and expand it.
- Select the option “Reset and Clean Up” at the bottom of the list. Now select the option “Restore Settings to Their Original Defaults” and you’ll observe a dialogue box asking for permission. Now, choose the “Reset Settings” option.

Choose Reset and Cleanup Option - Now that the browser has been restored, verify if the issue is resolved.
If you are still unable to fix the issue, Contact Us for further troubleshooting.