Fix: Steam is having trouble connecting to the Steam servers [Complete Guide]
Steam is one of the most popular digital game stores and game management platforms on the PC Master Race and many believe it to be the most superior one. However, it is not entirely without fault because we have gotten some complaints of users getting the “Steam is having trouble connecting to the Steam servers” error while trying to log in to their accounts.

In this article, we have compiled the solutions that you can apply on your computer by yourself to completely get rid of the issue and these solutions have been thoroughly tested prior to being included. In addition to that, we have also made sure to list the reasons due to which the issue occurs in detail.
Why is the “Steam is having trouble connecting to the Steam servers” Error Seen on your Computer?
After going through the solutions thoroughly, we came to the conclusion that the following must be the most vital reasons due to which the issue is being triggered.
- Missing Admin Permissions: Sometimes, if the Admin permissions haven’t been granted to Steam, it might face issues while trying to read or write on the System Drive. Therefore, we suggest that you launch it with admin permissions as we have mentioned below.
- Firewall: If the Firewall on your computer is blocking some or all network packets that are coming from Steam, the Steam is having trouble connecting to the Steam servers issue might be seen. Therefore, we suggest that you let Steam through your Firewall as it is a safe app and there isn’t really any risk of a network breach.
- Steam Server Down: If the Steam servers are temporarily down due to maintenance or any other reason, you will get the Steam is having trouble connecting to the Steam servers error while trying to connect. Therefore, we strongly suggest that you check to see if the servers are down for other people as well.
- Outdated Network Driver: If the Network Driver installed on your computer has been outdated, you will run into the Steam is having trouble connecting to the Steam servers error. Therefore, we suggest that you try to update your Network Driver to the latest one available.
- VPN Connection: If you are using a VPN connection, it is recommended that you refrain from doing so because these connections are often bounced off of different servers to mask your location but a lot of traffic coming from one server can include some bad traffic as well and Steam might ban such traffic from being able to connect to its servers.
- Corrupted User Account: If the user account that you are using has acquired some corrupted configurations or bugs, it is recommended that you create a new local account and check to see if you are able to fix the issue by using that account.
- Network Affected: Sometimes, the Network connection that you are using to connect to Steam might have been glitched due to which the Steam is having trouble connecting to the Steam servers issue is being triggered.
Now that we have made you aware of most of the reasons behind the error, we can finally start implementing the solutions on our computers.
Fixing the Steam is having trouble connecting to the Steam servers Error:
Method 1: End All Steam Process
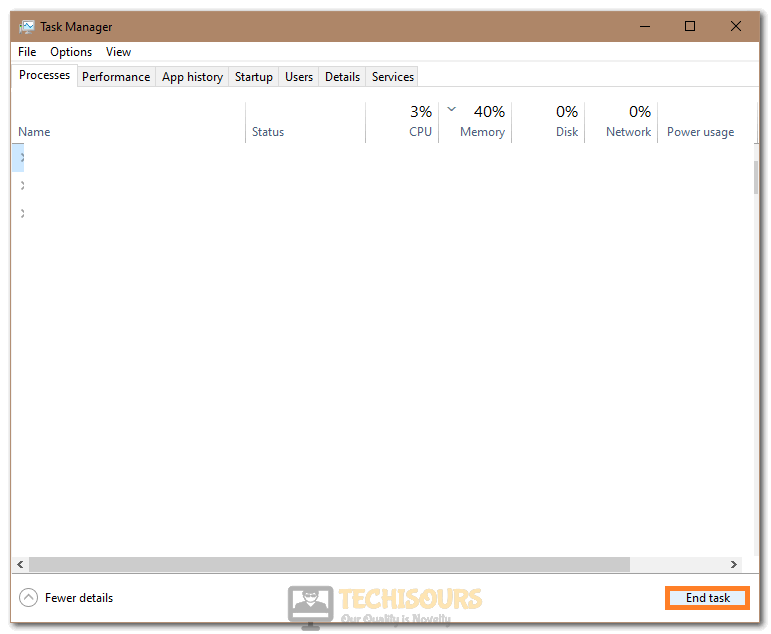
- Press “Ctrl +SHIFT + ESC” to launch into the task manager and click on the “Steam” task.
- From the bottom, select the “End Task” option to end the task.

Clicking on the “End Task” button - After ending all of the Steam Processes, make sure to restart your computer and check to see if the issue is fixed.
Method 2: Steam Client Update
- Launch into your Steam app and click on the “Steam” option on the top left side.
- From the menu that opens up, click on the “Check for Steam Client Updates” option.

Checking for Steam Client Updates - Wait for the process to finish and check to see if the issue is fixed.

Method 3: Reset the Winsock Settings
- Press “Windows + R” keys on your keyboard and type in “cmd”. After that, press the “Shift + CTRL + Enter” keys to launch with admin permissions.

Typing in cmd - After you have successfully launched into the command prompt, type in the following command and press “Enter” to execute it.
netsh winsock reset
- Wait for a few seconds until the command has been executed on the computer and after that, type in the following command and press “Enter” to run it.
netsh winhttp reset proxy
- After both the commands have finished executing, restart your computer and check to see if the Steam is having trouble connecting to the Steam servers issue has been fixed.

Method 4: Running Steam with Admin Permissions
- From your desktop, right-click on the “Steam” icon and select the “Properties” option.
- From there, click on the “Compatibility” tab up top and check the “Run this Program as an Administrator” option.

Run this program as an administrator - Also, make sure to uncheck the “Run in Compatibility Mode For” option.
- Click on the “Apply” button and then select the “OK” button.
- From there, close out of the window, run Steam and check to see if the issue is fixed.

Method 5: Check Steam Server Status
Sometimes the servers that are responsible for storing and providing the users with all of the data that is available on Steam might go down for maintenance or due to any other glitches or conflicts. During these times, the issue is faced by all users in a specific region or worldwide. Therefore, we suggest that you if Steam is Down from this website.
Method 6: Reboot Your Router
In some specific cases, the error might occur because your Internet Router has been glitched or because too many devices are connected to it due to which the bandwidth is getting choked for your device. Therefore, we suggest that you disconnect all devices that have been connected to the Router and then turn it off.
After turning the Router off, disconnect the power cable and press its power button to let the static electricity be consumed by the Router so that it turns off completely. After this has been done, make sure to power the router back on and check to see if the Steam is having trouble connecting to the Steam servers issue is fixed.
Method 7: Add Steam Exception in Firewall
- Press “Windows” + “R” to launch into the Run prompt, type in “Firewall.cpl” and press “Enter” to launch into the Firewall Control Panel.

Typing in “firewall.cpl” - In here, click on the “Allow an app or feature through firewall” option at the left side of the window.
- After doing so, click on the “Change settings” option and then select the “Allow another app” option.

Allow another app - From here, click on “Browse” and navigate through the locations and double click on your “Steam.exe” file that is usually by default in the “C:\Program Files (x86)\Steam” address.
- In the end, click on the “Add” button at the bottom of the window and save the changes made.
- Restart your computer and check to see if doing so has fixed the issue.


Method 8: Change IP of Steam
- From your keyboard, press the “Ctrl + Shift + Esc” keys in order to launch the Task Manager.
- Click on the “Processes” tab and from there, click on the “Steam Client Bootstrapper” option, select it and click on “End Process” at the bottom right corner of the window.
Clicking on the “End Task” button - In addition to this, click on any other instances of Steam running on your computer and click on the “End Task” option.
- From here, right-click on the “Steam.exe” shortcut on your desktop and click on the “Open File Location” from the context menu.
- In here, right-click on the “Steam.exe” file here and select the “Create shortcut” option.
- Now that the new shortcut has been created, right-click on the shortcut and select the “Properties” option.
- After that, navigate to the “Shortcut” tab, click on the “Target” box, add a space after the last quotation and type “-tcp” in the end.

Typing in “-tcp” at the end of the Target address - Click on “Apply” and from there, click on the “OK” option.
- Launch back into Steam and check to see if the issue is fixed.

Method 9: Delete All Files and Reinstall
- Right-click on the “Shortcut” on your desktop and select the “Open File Location” option.
- Make sure that you have launched into the task manager and stopped all Steam processes beforehand as we have managed in the previous solution.
- In here, make sure to delete all the files and folders except the “Steamapps, userdata, skins, Steam.exe, Ssfn” files.

Deleting Except these files - After that, launch the “Steam.exe” app and it will start updating itself.
- Wait until the update has been completed and check to see if the Steam is having trouble connecting to the Steam servers issue is fixed.

Method 10: Renew IP Using Command Prompt
- Press “Windows + R” to launch into the Run prompt, type in “cmd” and press “Shift + CTRL + Enter” to provide admin permissions.
Typing in cmd - After this, type in the following commands and press “Enter” after each to execute them on your computer.
Ipconfig/release

ipconfig/all

ipconfig/flushdns

ipconfig/renew

netsh int ip set dns

netsh winsock reset

netsh winsock reset catalog

netsh int ip reset.log
- After all of the commands have been executed, check to see if you are able to fix the Steam is having trouble connecting to the Steam servers issue.
Method 11: Reinstall Steam
- Press “Windows + R” to launch Run and type in “Firewall.cpl” and press “Enter”.
Typing in “firewall.cpl” - From here, right-click on the “Steam” app and select the “Uninstall” option.
- Wait for the uninstallation to be completed.
- Now, download Steam again and install it on your computer.
- Check to see if you are able to now fix the Steam is having trouble connecting to the Steam servers error.
Method 12: Rename a File
- Right-click on the “Steam” Shortcut on your desktop and select “Open File Location”, by default, the Steam file location is “C:\Program files(x86)\Steam”
- Inside this folder, make sure to delete the file named “ClientRegistry.blob”.

Deleting the Client Registry Blob File - This file will automatically be recreated after you launch Steam for the next time so you don’t have to worry about losing any data.
- Launch into Steam and check to see if you are able to fix the “Steam is having trouble connecting to the Steam servers” error on your computer.

Method 13: Update Network Driver
- On your keyboard, press the “Window + R” keys simultaneously to launch the Run prompt, from there, type in “devmgmt.msc” and press “Enter” to launch into the device management window.

Typing devmgmt.msc in the Run prompt - Scroll down to the “Network Adapters” option and double-click on it to expand it. Right-click on your network driver and select the “Update Driver” option.
- Click on the “Automatically Search for Updated Network Driver” option on the next screen and let Windows automatically check for updated drivers.

Search automatically for updated driver - Alternatively, you can also click on the “Search for Driver on Windows Update” option.
- After updating the driver, check to see if you are able to fix the “Steam is having trouble connecting to the Steam servers” error.


Method 14: Disable Antivirus
- On your keyboard, press the “Window + I” keys to launch into the Windows Settings.
- From here, click on the “Update and Security” option and select the “Windows Security” button from the left side, in the end, select the “Virus & Threat Protection”.

Choose Windows Security Option - From there, click on the “Manage Settings” option under the “Virus and Threat Protection” heading.
- In the end, make sure to turn off the “Real-Time Protection” option and save your changes.
- Check to see if doing so has fixed the issue.

Method 15: Disable Firewalls
- Press “Window + R” keys on your keyboard, type in “firewall.cpl” and press the “Enter” key.
Typing in “firewall.cpl” - After that, click on the “Turn Windows Defender on or off” option from the left side.
- From here, for both the “Private” and “Public” networks, make sure to select the “Turn OFF Windows Defender Firewall” option.
- Click on “OK” to save your changes and fix the issue.
Method 16: Change Network
Sometimes, the network that you are using might be causing this issue due to being glitched or IP restricted. Therefore, we suggest that you try to use your mobile’s hotspot or any other Wi-Fi network to connect to the Steam servers and check to see if you are able to fix the issue.
Method 17: Update Windows
- Press “Windows + I” on your keyboard to launch into the settings.
- From here, click on the “Update & Security” option and then click on the “Windows Update” button from the left side.

Update and Security - In the end, click on the “Check for updates” button and let the updates be downloaded on your computer.
- These updates will sometimes ask you to restart your computer to install them.
- Comply with the instructions and finish installing the updates on the computer.
- Check to see if installing these updates fixes the “Steam is having trouble connecting to the Steam servers” issue.

Method 18: Delete and Rename Files
- Right-click on the “Steam.exe” shortcut on the desktop and select the “Open File Location” button.

Open file location - Alternatively, your Program Files Folder should contain Steam if you selected the default install location.
- In here, make sure that you delete or rename the “userdata” and “servers” folders to anything other than their original name so that they are not recognized by the Steam app.
- After that, press “Window + R” on your keyboard and type in “C:\Program Files (x86)\Steam\htmlcache\” and press “Enter”. From here, press “CTRL + A” and then “Shift + Delete” to select and Delete all files inside the folder.
- Navigate to the following location on your computer.
C:\Program Files (x86)\Steam\userdata\steam_ID\config\
- In here, find the “localconfig.vdf” file and rename it to “localconfigOld.vdf”.
- Now, restart your computer and check to see if you are able to fix the Steam is having trouble connecting to the Steam servers error.

Method 19: Disable VPN
Make sure that you try to disable your VPN or disconnect from the VPN for a while and check to see if doing so fixes the issue. This is because sometimes the VPN connection might be prevented from connecting to the Steam servers due to bad traffic.
Method 20: Create a New Account
- Press the “Window” key from your keyboard, right-click on the “Profile” icon and select the “Change account settings” option.

Clicking on the “Change Account Settings” option - From here, click on the “Family & other users” option from the left column and click on the “Add Someone Else to this PC” option under the “Other users” section.

Add someone else on this PC - After that, click on the “I don’t have this person sign-in information” and proceed ahead with the on-screen instructions to create a new user account.
- After the account has been created, make sure to sign in to this new account and check to see if doing so lets you connect to the Steam servers.


Method 21: Install VirtualBox
- Download VirtualBox on your PC and run the downloaded executable to install it on your computer.
- From here, install Windows on it and create a new account as we have mentioned above.
- Check to see if you are able to sign in to Steam on this new account on the VirtualBox software.
Method 22: Lower the Modem’s Security
Sometimes, the router might be configured to not allow UPnP or any other mode of network connection due to which the issue might be triggered. Therefore, we suggest that you check to see if your router allows UPnP and if it doesn’t contact your ISP and have them enable this option on your router to make sure that you are able to connect to the Steam servers properly.
If you have followed all of these methods and the error still occurs for you, we recommend that you contact us for further troubleshooting.