Easily Fix Scanning and Repairing Drive Stuck Issue [Complete Guide]
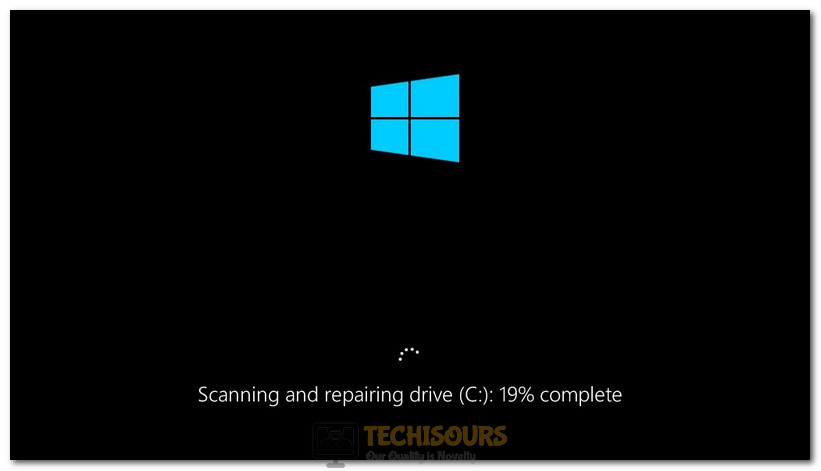
Windows might be prompted to repair the Hard Drive if there are some errors or bad sectors on it. This often shows up during the bootup process and shows the “Scanning and Repairing” message while it is repairing the drive. However, some users have been getting the Scanning and Repairing Drive Stuck issue on their computers.
No doubt, the fear of losing valuable files and important data due to the scanning and repairing stuck issue can be distressing. But, it is always recommended to have a backup of your important files to avoid any data loss. However, using data recovery software like Remo Recover can help you retrieve lost or inaccessible data in such situations.
In this article, we have listed all the different methods and workarounds that you can deploy to completely fix this issue on your computer. In addition to that, we have also listed the reasons due to which the error comes up in the first place. Make sure to go through them first and then start deploying the solutions.
Why is the Scanning and Repairing Drive Stuck on your Computer?
After carefully studying this error on our computer, we were able to deduce why it was triggered in the first place.
- Drive Errors: It is possible in some cases that the Hard Drive installed on your computer might have some bad sectors or corrupted firmware. Therefore, we suggest that you try to fix these Drive errors and check to see if doing so fixes the issue.
- Damaged OS: Sometimes, the Operating system installed on your computer might have been damaged due to a storage failure or some other reason. This can in turn damage some of the operating system’s core features which can result in this process being stuck.
- User Account: In certain cases, the user account that you are using might have some damaged user files or certain misconfigurations that can lead to the Scanning and Repairing Drive Stuck issue. Therefore, we strongly suggest that you try to use another user account for this process.
Now that we have taken you through some of the most important reasons due to which the error is triggered, we can finally start implementing the solutions.
Fixing the Scanning and Repairing Drive Stuck Issue:
Method 1: Check for Errors
- Press “Windows + E” to launch into the File Explorer and from the left side, right-click on the Drive Letter that you have experienced this message with and select the “Properties” option.
- From there, click on the “Tools” option and under the “Error Checking” option, select the “Check” option.
- Click on the “Scan Drive” option and from there under the “Error Checking” window.

Scan Drive - Now, If some errors are found, you will be prompted to repair them. For that, select the “Repair” option and click on the “Scan Drive” option if no errors are found.
- Check to see if doing so fixes the Scanning and Repairing Drive Stuck issue.

Method 2: Checking Drive Status
- Press “Windows + R” to launch into the Run prompt.
- Type in “control panel” and press “Enter” to launch into the Control Panel.

Open Control panel - From there, on the top right side, select the “View By” option and click on the “Small Icons” button.
- Now, select the “Security and Maintenance” option and expand the “Maintenance” button.

Selecting the “Maintanence” option - Now, under the drive status section, select the “Repair this Drive” option if it is available to start the repairing process of the drive that got the Scanning and Repairing Drive Stuck issue.


Method 3: Performing a CHKDSK scan
- Press the “Windows + R” buttons to launch the Run prompt.
- Type in “cmd” and press “Shift + CTRL + Enter” to launch into the command prompt with administrative permissions.

Typing in cmd - Now, make sure to type in the following command and press “Enter” to start the check disk operation and make sure to replace the “X” in the command with the drive letter of the drive in question.
chkdsk x:/f
- Wait for the check disk scan to be run and check to see if the Scanning and Repairing Drive Stuck issue is fixed.

Method 4: Repairing Drive in Safe Mode
- Click on the “Start Menu” icon to launch the start menu, click on the “Power” icon, press and hold the “Shift” key and click on the “Restart” button.
- After the computer restarts, from the new screen, click on the “Troubleshoot” button and then select the “Advanced” button.

Choose Troubleshoot - From here, select the “Startup Settings” option and from there, press the “F4” option to restart your computer in safe mode.
- Now, after the computer restarts, press “Windows + R” to launch the Run prompt, type in “Powershell” and press “Shift + CTRL + Enter” to launch into the PowerShell window.
- From here, make sure to execute the following command and wait for it to be finished. Remember to replace the “X” letter with the drive letter of the drive in question.
repair-volume -driveletter x
- Check to see if doing so fixes the Scanning and Repairing Drive Stuck issue.

Method 5: Make sure the disk connection is solid
The scanning and repair device stuck error can be caused due to faulty connection of the drive and computer. Before trying the more complicated troubleshooting procedures you should check the disk connection. Make sure to check the cable and SATA port connections of your PC. Remove any loosened cable or port and connect back tightly. Now turn on your PC and see if the error persists.
Method 6: Wait for more Time
With older hardware, performing the repairing functions can take extended periods of time and this might be the reason due to which the Scanning and Repairing Drive Stuck issue is being seen. We recommend that you wait for some time and let the operation proceed normally if you are unable to fix it using the methods above.
Method 7: Stop Operation Manually
- Since the stuck process will cause your computer to stall, you need to press the “Power button” to shut down the PC.
- Wait for a few seconds then turn ON your PC. The “Preparing Automatic Repair” screen will appear and then you’ll see the “Diagnosing your PC” message.
- Press any key on the keyboard continuously before the disk checking process starts. This will stop the disk scanning process from starting and the Scanning and Repairing Drive Stuck issue will be fixed.
Method 8: Turn OFF Automatic Disk Repair
- If you are facing the Scanning and Repairing Drive Stuck issue, press and hold the “Power” button on your computer until it shuts down completely. Start the computer back up again and when you get the “Windows Logo”, press and hold the button again to shut it down once more.
- Upon the next bootup, repeat the process again to shut it down and boot it back up.
- Now, the computer will open the Windows Recovery Environment when it starts. From there, navigate through the “Troubleshoot > Advanced Options > Command Prompt” options from the “Choose an Option” screen.

Advanced Options - Type in “bcdedit” in the command prompt and press “Enter”.
- From the values that load up after executing the command, note down the values for “Identifier” and “RecoveryEnabled” under the Windows Boot Loader heading.
- Now, execute the following command to turn off the Automatic Disk Repair.
bcdedit /set {current} recoveryenabled no - Restart your machine and wait for the computer to boot back up again.
- Check to see if the Scanning and Repairing Drive Stuck issue is now resolved.

Method 9: Using System File Checker (SFC)
- If you are stuck at the Scanning and Repairing Drive Stuck screen, follow the steps in the solution above to start the command prompt window.
- If not, press “Windows + X” to launch the menu and select the “Command Prompt (Admin)” option from it.
- Inside here, type in the following command and press “Enter” to execute it.
sfc /scannow

sfc / scannow - Check to see if running the scan fixes the issue.

Method 10: Replacing Corrupted HDD
The scanning and repairing process can also get stuck if your computer’s hard drive is damaged. In this case, you need to recover your data as soon as you can to avoid losing all of it.
For this, you need an external hard drive and an ubuntu live CD. boot your PC from the ubuntu CD and transfer all the data you can find to the external hard drive. This will save your important from getting lost in the case your hard drive has corrupted
As mentioned previously, you can also use Remo Recover, a robust data recovery software designed to restore more than 500 file formats (like photos, videos, documents, etc.) under various data loss scenarios, including accidental deletion, formatting, and system crashes. Moreover, this tool is compatible with all versions of the Windows operating system, including the latest Windows 11 and 10
Method 11: Create New User Account
- Press “Windows + R” to launch into the Run prompt.
- Type in “control userpasswords2” and press “Enter” to launch into the User Accounts window.
- From here, make sure to click on the “Add” button under the user’s tab and select the “Add a User without Microsoft Account” button.

add a user without a Microsoft account - Now, make sure to select the “Local Account” button and choose the credentials for your account and password.
- Click on “Apply” and then on “OK”.
- Sign in to this account and check to see if doing so fixes the Scanning and Repairing Drive Stuck issue.

If the issue is still not fixed, contact us for further troubleshooting.