How to stop Microphone Auto adjusting Windows 10 [Complete Guide]
Windows 10 has its quirks and features but it is generally disliked by a lot of ‘non-technical’ users because it is in no way a minimal or simple operating system. It has this cluster of features that are in no way made convenient for the general public and this has caused a lot of hate towards this particular operating system over the years. One common query that the people have had, is how to stop microphone auto-adjusting windows 10. This might be useful for some people but for others, it is a total nuisance and we have taken it upon ourselves to fix it in this comprehensive guide.
Why Does the Microphone Auto adjust on Windows 10?
There are a couple of potential triggers behind this particular problem on Windows 10 so before we move on towards fixing it, we think that it is crucial that you are made aware of the root causes behind this issue.
- App Control: Some applications when installed on the computer request specific permissions for proper operation and it is possible that one of these applications asked for exclusive control of the audio drivers installed on your system and you granted this control due to which it has been allowed to auto-adjust your microphone as it wills.
- Sound Settings: It is important that some sound settings are disabled on your computer or they give some other applications the permission to be able to automatically adjust the Microphone’s volume on your Windows 10 PC. In addition to this, it is also possible that Windows has been allowed to configure the Microphone to a particular scenario.
- Default Format: In some cases, you might have selected the incorrect Audio format from the settings and this might not be entirely compatible with your Microphone and it can end up causing this error on your computer. Therefore, it is best to reconfigure this setting using the guide below.
- Audio Control Software: Some hardware on your computer might come bundled with audio control software that prevents Windows from being able to control the Microphone volume and instead that is automatically adjusted by the software itself.
Now that you know what causes this issue on your computer, it is safe to move on towards implementing fixes to eradicate this issue.
Before you start:
- Take the plug of your microphone out of its port and insert it into a different port.
- Open the volume mixer and set the volume level of all entries equal to each other.
- If the issue persists, press “Win + I” keys simultaneously on your keyboard to open “Settings” and navigate to the “Update and security” option.

Update and Security - From the left pane, navigate to the “Troubleshoot” tab and click on the “Run the troubleshooter” button associated with “Playing Audio”.

Run the troubleshooter - When the troubleshooting procedure is finished, check whether the microphone not adjusting issue is resolved.


Prevent Microphone from Autoadjusting on Windows 10:
Solution 1: Prevent apps from controlling the microphone
- Right-click on the “Speaker” icon located at the bottom-right of the screen and select “Sounds”.

Select Sounds Option - Navigate to the “Recording” tab and double-click on “Microphone” to open its properties.
- Now go to the “Advanced” tab and uncheck the box parallel to “Allow applications to take exclusive control of this device” option.

Do not Allow applications to take control - Save the changes and check whether the microphone auto-adjusting problem arises again.


There are two major applications that might interfere with the sound feature of Windows even if you have performed the steps indexed above. So, in order to prevent these applications from taking exclusive control of the Microphone, follow the steps listed below.
Skype:
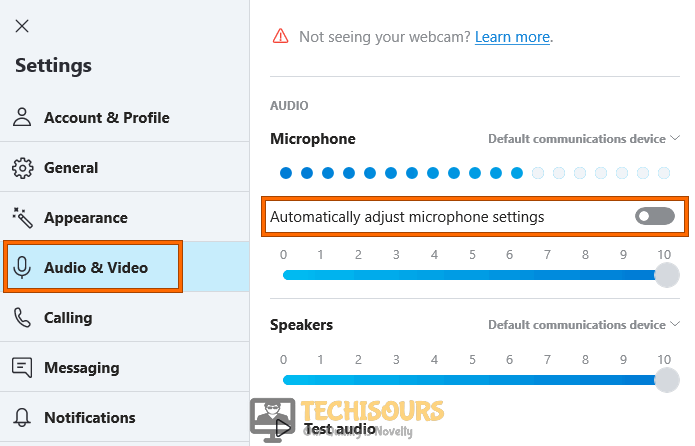
- From the home screen of Skype, click on the “Three-dot icon” located on the top-left corner, parallel to your user name, and choose “Settings”.

Choose Skype Settings - From the left pane, navigate to the “Audio and Video” tab and disable the toggle button parallel to the “Automatically adjust microphone settings” option.

Prevent Skype from controlling microphone

Steam:
- From the home screen of Steam, click on the “Friends and chat” option located at the bottom-right corner of the screen.
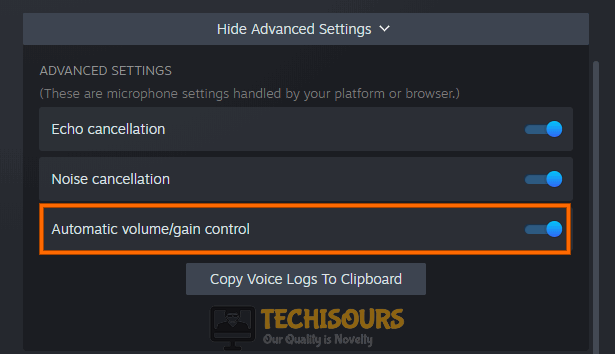
- Click on the “Setting cog” and navigate to the “Voice” tab from the left pane of the screen.

Choose Advanced settings - Now click on “Show Advanced Settings” and disable the toggle button parallel to “Automatic volume/gain control”.

Prevent Steam from controlling microphone

Solution 2: Tweak Sound settings
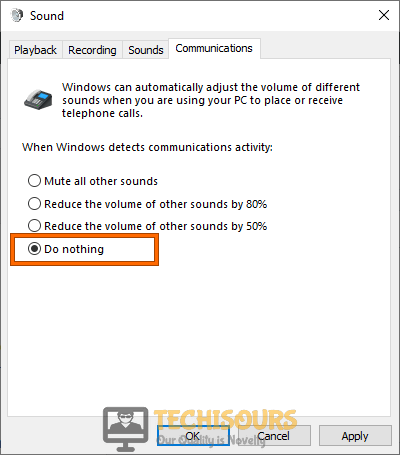
- Right-click on the “Speaker” icon located on the taskbar and select “Sound”.
Select Sounds Option - Navigate to the “Communications” tab and check the box parallel to “Do Nothing”.

Click Do Nothing Option - Under the “Recording” tab, right-click anywhere in an empty region and check “Show disabled devices”.

Show Disabled Devices - Right-click on the device that you are using for recording purposes (Might be default microphone or a headset) and select “Set as default device” from the pop-up menu.
- Now double-click on that specific device to open its “Properties”.
- Navigate to the “Levels” tab, adjust the level of your recording device to at least “75” by moving the slider and make sure that the “Speaker” icon located parallel to the level slider is “Enabled”.
- If the “Microphone Boost” slider is available on your PC, move the slider and set its value to “20 dB”.
Setting Levels - Now proceed to the “Enhancement” tab, check the box parallel to “Disable all sound effects” and uncheck the box parallel to “Acoustic echo cancellation”.
Disable all sound effects - Now save the changes and speak in your microphone to see if the “Bars” parallel to the Microphone option turn green.
- After propagating all these changes, most probably you’ll not google how to stop microphone auto adjusting windows 10 issue again.


Solution 3: Modify Default format
- Right-click on the “Speaker” icon located on the taskbar and select “Sound”.
Select “Sound” - Under the “Playback” tab double-click on the device that you are using for recording purposes (Might be default microphone or a headset) to open its “Properties”.
- Go to the “Advanced” tab and set the “Default Format” to “24 Bit – 44100 Hz”.
Modify Default format - Similarly, proceed to the “Recording” tab and double-click on your device to open its properties.
- Navigate to the “Advanced” tab and set the “Default Format” to “16 Bit – 44100 Hz”.
Modify Default format


Solution 4: Scan your computer for viruses
- Press “Win + I” keys on your keyboard to open “Settings” and navigate to the “Update and security” option.
Choose Update and Security - Navigate to “Windows Security” from the left pane and select “Virus and threat protection” from the right side of the window.
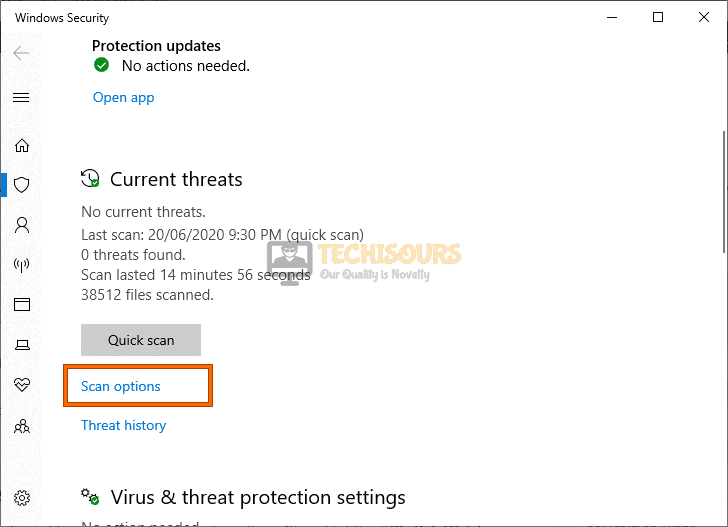
Virus and threat protection - Now click on “Scan options” and check the box parallel to “Full scan”.

Scan options - Click on the “Scan now” button.

Perform a full scan - On the completion of the scan, hopefully, you won’t ask anyone how to stop microphone auto adjusting windows 10 issue again.


Solution 5: Disable Windows Media Player
- Press “Ctrl + Shift + Esc” keys simultaneously on the keyboard to open the “Task Manager” and navigate to the “Processes” tab.
- Select all the processes related to “Windows Media Player” and click on the “End Task” button to end the WMP tasks in the background.

Disable Windows Media Player

Solution 6: Reinstall your microphone driver
- Press “Windows + X” keys simultaneously on the keyboard and select “Device Manager”.

Choosing Device Manager - Now click on “Sound, video and game controllers” to expand the list and double-click on the sound driver.

Choose Sound driver - Proceed to the “Drivers” tab and click on “Uninstall driver”.
Uninstalling Sound driver


Solution 7: Performing a Clean Boot
- Press “Windows + R” keys simultaneously to launch the Run box and type in the “msconfig” command.

Typing in “Msconfig” - Click on “Services” and check the “Hide all Microsoft Services” option.

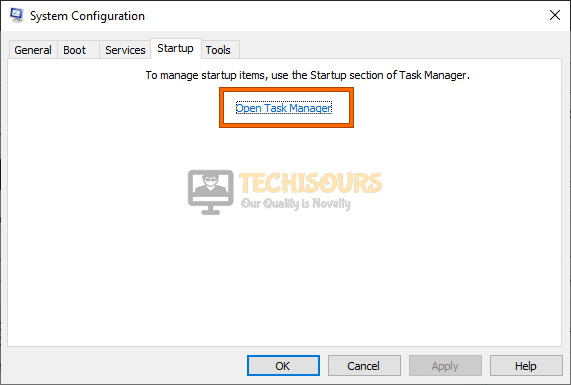
Hide all Microsoft services - Select the “Disable all” button and then click on the “Startup Tab”.
- From there select the “Open Task Manager” button to launch the task manager.
Open Task Manager - Select each service one by one and click on “Disable” to prevent them from launching on startup.

Disable startup services - Restart your computer and all the unnecessary services and applications will now be stopped and hopefully, you won’t be searching for how to stop microphone auto adjusting windows 10 again.


Solution 8: Perform a system restore
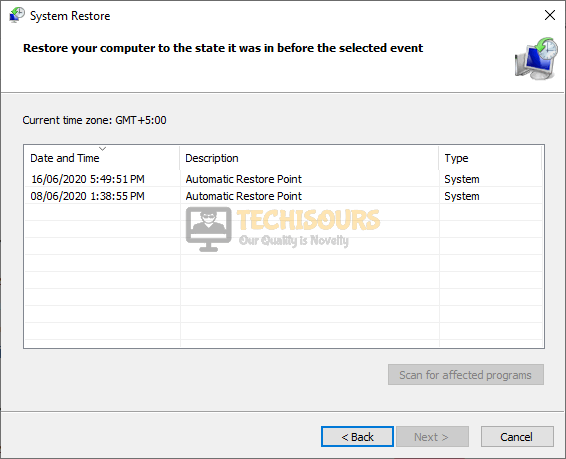
- Press the “Win + R” keys simultaneously on the keyboard to open the Run box and search for “rstrui” command.

Typing in “rstrui” command - Select a restore point that was created before you came across this error.
- Click “Next” and then choose “Finish”.

Perform a system restore

Solution 9: Restart in Safe mode
- On your keyboard, press “Windows + I” keys simultaneously to open “Settings” and select “Update and Security”.

Choose Update and Security - From the left pane, click on “Recovery” and then select “Restart Now” under the heading of Advanced Startup.

Click on Restart now button - Click on “Troubleshoot” and then select “Advanced Options”.

Choose Advanced Options - Now select “Startup Settings” and click on “Restart”.
- Now select “Safe mode with networking” before the system restarts and wait while it reboots.
- When the computer is booted into safe mode, check whether the microphone auto adjusting windows 10 issue is resolved or not.


Solution 10: Uninstall audio control software
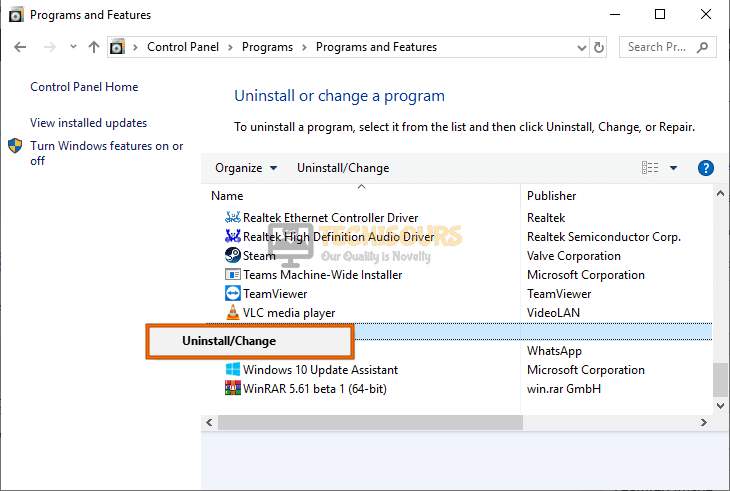
- Press “Windows key + R” simultaneously on the keyboard to open the run box and search for the “appwiz.cpl” command.
Typing “appwiz.cpl” - Now locate “Audacity”, “Dolby” or related software from the list of Softwares installed on your computer, right-click on it and select “Uninstall”.

Uninstall incompatible software - After successfully uninstalling these applications, check if the microphone adjusts itself automatically or not.

Solution 11: Check for Windows update
- Press “Windows + I” keys on the keyboard to open “Settings” and choose “Update and Security”.
Choose Update and Security - Navigate to the “Windows Update” tab from the left side of the screen and select “Check for Updates”.
Check for updates

Workaround:
Many people have reported that they managed to get around this problem by disabling all the devices in the “Recording” section of the Sound settings. So, disable all the devices attached to your computer and see if the issue persists.
If none of the solutions explained above, helped you address how to stop microphone auto adjusting windows 10 query, we recommend you to replace the default Windows driver by a Realtek audio driver.
Hopefully, the error might have gone by now but if you need further assistance, contact here.