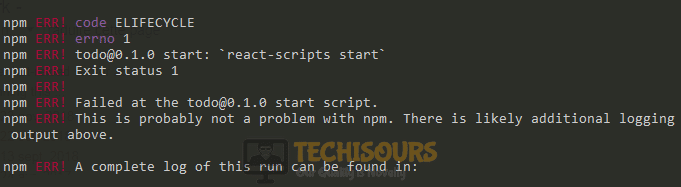
NPM ERR: code ELIFECYCLE [Fixed Completely]
React Native is an open-source platform for application development that was introduced by Facebook to eliminate the limitation of single platform development and it enables the developer to develop applications for Android, IOS, Web, and UWP. Although it is a robust and well-structured platform with a vast community of developers to build applications, still there are some error codes that are reported by the developers. Quiet recently, developers have encountered “error code elifecycle” which prevents them to install the packages using npm. We have looked into this error and illustrated some efficient solutions below which will help you to rectify this problem.
What causes the error code elifecycle?
After analyzing numerous developer reports, we have concluded that there are several reasons that might trigger this error on your system.
- You might encounter error code elifecycle if you haven’t deleted the “node_modules” folder from the directory yet.
- If a file named as “package-lock.json” is present in your directory.
- If the required port to install npm packages is not available.
Pre-Tips:
The error code elifecycle might arise on your computer due to a temporary glitch which might be resolved easily by just restarting your computer hence follow the steps to carry this task out.
- Click on the X icon at the top-left of your text editor to close it.
- Take the plug of your computer out of the socket and wait for it to shut down.
- After waiting for a couple of minutes, reinsert the plug of your computer back into the power socket and wait for it to start.
- Launch your text editor and check whether the issue is resolved.
How to get rid of the error code elifecycle on npm run-script build?
Solution 1: Clean cache and delete some files
A cache is a storage that stores data in it to be used later in order to make processes faster. When the packages are installed, their default directory is the “node_modules” folder. The error code elifecycle might occur if there is some fault in the cache or the node_module folder. So, to rectify this error, clear the cache and delete the respective folder and check if the error persists.
- Open your terminal and type the following command to clear the cache.
npm cache clean --force
- Now delete the node_modules folder and the package-lock.json file from the directory by executing the following command in the terminal window.
rd /s /q node_modules
rd /s /q package-lock.json
- Now type the following commands in the terminal and hit enter to execute them.
npm install
npm start
Solution 2: Verify cache contents
If clearing the cache didn’t help you get rid of this error, then proceed to perform cache verification. All you need to do is to open your terminal and type the following command to verify your cache. This command will verify all the contents of the cache including garbage and excessive data and it will also verify the integrity of the cache.
npm cache verify
Solution 3: Reinstall the CLI package globally
Installing the CLI packages globally allows you to access these packages from anywhere in the computer using your terminal after they are installed. Many users have reported that the most efficient procedure to terminate the npm err! missing script: start issue is to reinstall the CLI packages globally on your computer. Just open your terminal and type the following command and hopefully the problem would be rectified by trying this potential fix:
npm install -g node-pre-gyp
Solution 4: Look for port availability
React-native uses an essential port to communicate data while installing packages using npm commands. The npm err! missing script: start issue might occur on your system if that specific port is unreachable or currently being utilized by another application. Hence, kill all the processes running on that port and check whether the error is rectified.
- Type the following command in the terminal and execute it to check whether the port is available.
npm install node-port-check --save
- If the port is used by some other application, kill the process of that port by executing the following command and check if the error persists.
lsof -ti:8080 | xargs kill
Solution 5: Download the latest version of Node.js
There are numerous versions of Node.js available on the internet. The latest versions of node.js are released from time to time in which many features are improved and bugs of older versions are fixed. You might encounter an error code elifecycle if you are running an older version of Node.js. Hence, to terminate this error, update your node to the latest version by following the steps indexed below.
- Open your terminal and type the following command:
devtools i --javascript nodejs:12.16.2
- If upgrading your node version to the latest one didn’t prove efficient for you, try to revert to the older version of node.js by downgrading it and see whether the issue is resolved.
Solution 6: Add an Environment Variable
An environment variable is a value that is basically a part of the environment in which a process runs. A process queries the value saved in the variable to find a suitable location to save temporary or other essential files. The npm err! code elifecycle arises on your system if the environment variable is not set properly. Therefore, reset the environment variable again and check if the error is rectified. Follow the steps illustrated below to carry this task out:
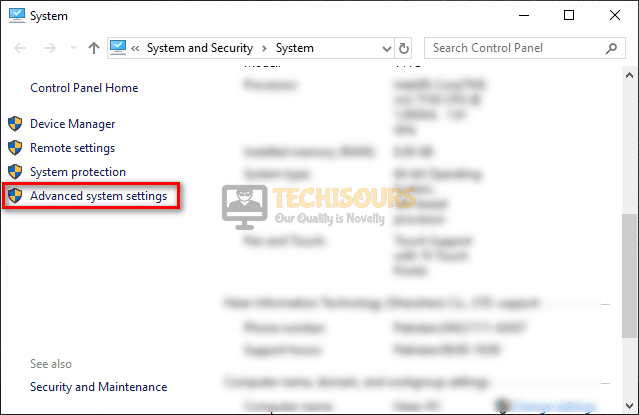
- Right-click on This PC and select “Properties”.

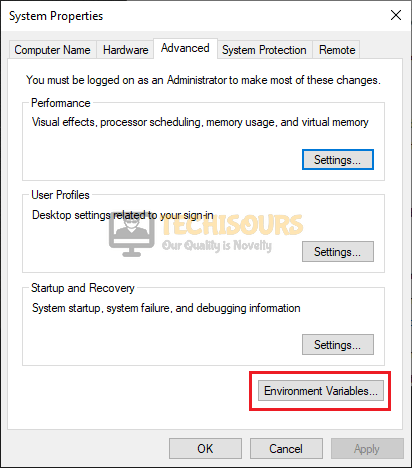
Choose Properties - From the left pane, select “Advanced system settings”.

Click on Advanced system settings - Locate and click on the “Environment variables” button.

Choose Environment variables - Now click the New button under the “User variable” section.

Choose a New button - Enter the PATH as the variable name and set the following path in the variable value.
C:\Windows\System32

Setting parameters


Solution 7: Create react app ESLintless
Numerous developers have reported that the most efficient solution to rectify this issue is to create the react app using ESLintless. If you still can’t get rid of the npm err! code elifecycle, then follow the steps indexed below and check if the error still persists.
- Open your terminal and execute the following command.
create-react-app my-app --scripts-version @nomoreanalog/react-scripts-eslintless
- Now execute the following command to install the Babel plugin style components.
npm install --save-dev babel-plugin-style-componenets
Solution 8: Treat warning appropriately
In some situations, if the warnings are not treated properly, they start to be treated as errors by the compiler, and hence error code elifecycle arises. Hence, open your terminal and execute the following command to stop treating warnings as errors.
CI=false npm run build
.styles('resources/css/test.css', 'public/css')
.version();
Solution 11: Move some variables to a new file
If you still encounter this error, then there might be a chance that some variables are not read properly by the compiler. If this is the case, then an efficient solution to resolve this issue is to create a new file and move these variables to it and check if the error persists.
- Cut the following variables from your current file.
{"presets": [ ["env", { "targets": { "uglify": false } }] ]} - Make a new file in the same directory with the name of .babelrc and add those variables here.
Solution 11: Point to the correct location
While running the npm install command, make sure that your terminal is pointing in the directory where the .js file is located. Most beginners encounter error code elifecycle due to this faulty pointing issue. If the path is correct, then to get around this error, try to move your application folder to another directory and check if the error is rectified. For example, if your application folder is located in C: move it to E: to resolve this issue.
Solution 12: Run the scripts with root privileges
Unsafe-perm is set to “false” as default to suppress the update notification if you are using an older version of npm. This problem may arise on your system if the script is not running with the root privileges. So, to resolve this issue, open your terminal and type the following command to run the scripts from the package installation as root.
npm install --unsafe-perm
Solution 13: Force download Chrome driver
If you have encountered an error code elifecycle while trying to install the chrome driver using npm command then there is no need to panic you can force download it. Just open the terminal window and type the following command. Hit enter on your keyboard to execute the command and check if the error is gone.
npm install chromedriver --chromedriver-force-download
Solution 14: Check for resource limitation
You might encounter an error code elifecycle due to resource limitations on your computer. For example, if you have installed a low memory RAM in your computer then there are higher chances for you to encounter this error. You will come across this error if your computer has a 512MB RAM embedded in it, therefore, replace it with a 1GB RAM to rectify this issue.
Solution 15: Reinstall your Linux Distro
This error may arise on Linux if there is some issue with the distro you are using. As it is a very hectic task to locate it, therefore, an efficient alternative is to reinstall the Linux distro you are currently using. Follow the steps below to carry this task out.
- Download the ISO of your preferred Linux distro from the internet and burn it on a USB device.
- Shut down your computer and insert the USB drive in it.
- Power the system on and quickly press the “F2” button until you see the BIOS setting menu.
- When the BIOS settings are displayed on the screen, navigate to the “Boot” tab.
- Make sure you set your “USB Drive” is set as the “1st Boot Device”.

Set USB drive as the 1st Boot Device - Now restart your computer and follow the on-screen instructions to start the installation.
- After the OS is installed successfully, check if the error persists.

Hopefully, after following this guide the error should be gone by now but if you need further assistance, contact here.