Fix: Netflix error code m7361-1253 [Complete Guide]
Netflix is one of the most diverse streaming platforms nowadays with a plethora of different movies and TV shows available for streaming. Quite recently, a lot of users have been complaining about the Netflix Error code m7361-1253 which prevents them from being able to stream and shows the “There was an unexpected error. Please Reload the page and try again” message while trying to do so.

In this article, we have compiled some fixes and solutions that will help you to completely get rid of the “Netflix Error code m7361-1253” message and will also provide some reasons due to which it is triggered in the first place.
What Causes Netflix Error code m7361-1253?
After going through some solutions being presented by different users, we concluded that the following are some of the most important reasons due to which this error occurs.
- Outdated Browser: Sometimes, the browser that you are using to stream might be outdated due to which you are running into the Netflix Error code m7361-1253 message while trying to do so. Therefore, update your browser as mentioned in the solutions below and check to see if doing so fixes the error.
- Hardware Acceleration: Hardware acceleration is a feature used by some browsers to streamline the video processing and graphics processing task. However, sometimes this feature can end up halting the streaming procedure.
- Corrupted Cache: Cache is used by a lot of services and applications to decrease loading times and it can often be corrupted. Therefore, we recommend that you try and clear out the corrupted cache and then check to see if doing so fixes the Netflix Error code m7361-1253.
- Antivirus: The Antivirus installed on the computer might be blocking certain network packets coming from Netflix due to which an unexpected error is being shown while trying to stream. Therefore, we recommend that you try and turn it off temporarily.
- Outdated Drivers: In certain cases, some drivers might be outdated and due to this, the Netflix Error code m7361-1253 might be shown. Therefore, we recommend that you update your drivers and then check to see if doing so makes the issue go away.
- Outdated OS: Sometimes the operating system might be outdated due to which the error message is being shown. Therefore, we recommend that you try and update your operating system to see if doing so fixes the issue.
- Netflix Issue: Netflix itself can sometimes go under maintenance or go down temporarily due to which such issues are commonly triggered. Therefore we recommend that you try and check if other people are getting this error as well.
Now that you have been taken through the reasons due to which this occurs, we believe that it is time to start implementing the solutions that can be found below.
Before You Start:
Before carrying on to implement some of the advanced troubleshooting tips try a couple of basic fixes to eradicate the error instantly just like restarting your browser after you shut it down completely or restarting your PC. To restart your computer properly go with the below-mentioned steps:
- Open your PC and press the “Alt + F4” keys together on your keyboard. In the “Shut Windows Down” dialog box, click on the drop-down menu.
- From the drop-down menu select “Shut Down” and hit “Enter”.
- Once the system restarts, launch your browser and try streaming on Netflix again.
If you still aren’t able to get through the issue follow the solutions listed below.
How to fix error code m7361-1253 on Netflix:
Solution 1: Update Your Browser
- Navigate to the “Customize and Control Google Chrome” menu displayed by three vertical dots located on the most top right side of your browser under the “Close button”.
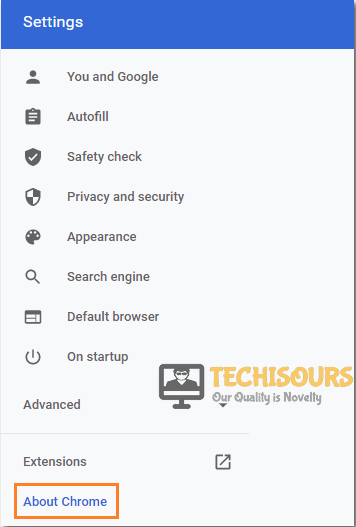
- Locate either the “Help” option or “About” section of your browser.
Choosing the About Chrome Option - Check if your browser has any updates available. If not, it will be stated that your browser is up to date along with the version.
- If you see the “Update” option available, simply click on it and wait for your browser to finish the process.
Updating Google Chrome - Reload your browser and try using Netflix again to check if the issue still persists or not.
Solution 2: Enable/Disable Hardware Acceleration Option
- Open your browser and click on the “Customize and Control Google Chrome” menu displayed by three vertical dots located on the most top right side of your browser.
- Navigate to the “Settings” option from the drop-down menu and scroll down to select the “Advanced” option.
- Select “System” from the menu pane on the left and look for the “Use Hardware Acceleration When Available” option.
- Turn it “OFF” and then back on again, and then relaunch your browser to see if the problem got resolved.
Disable hardware acceleration
Solution 3: Clearing the Browser Cache
- Open your browser and click on the “Customize and Control Google Chrome” menu displayed by three vertical dots located on the most top right side of your browser.
- Navigate to the “Settings” option from the drop-down menu and scroll all the way down to click on the “Advanced” option.
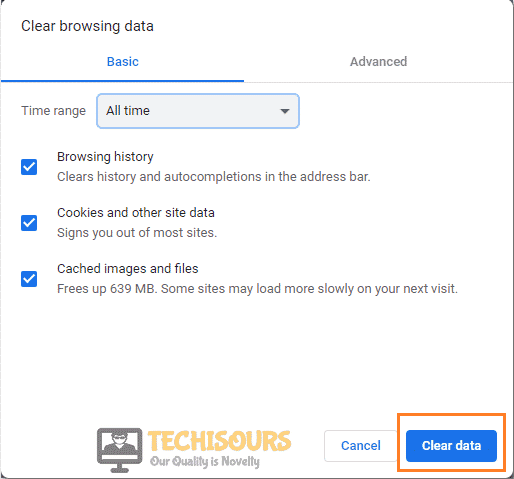
- In the “Privacy and Security” tab click to select “Clear Browsing Data”.
Clear browsing data - Next, go to the “Advanced” tab of the new pop-up window and select the time range to “All Time”.
- Make sure to check the box for “Cookies and Other Site Data” and uncheck everything else.
- Finally, click on “Clear Data” and try watching content on Netflix again.
Click Clear Data
Solution 4: Use A Different Browser
You can also opt to download the most up-to-date version of Mozilla Firefox, Google Chrome, or Opera as well as try to use the browser which supports HTML5 as it is well suited for your Netflix web player.
Solution 5: Verify Your ISP Compatibility With Netflix
Some ISPs restrict streaming from online platforms to save bandwidth hence giving rise to such errors. So call your ISP and make sure that their services support Netflix streaming to verify and help eradicate the error.
Solution 6: Disable Your Antivirus
- On the desktop, locate and then right-click on your antivirus software icon.
- From the popup context menu choose to select “Disable”.
Disable antivirus - Now try to use Netflix again and check to see if you have been able to remove the issue.
Solution 7: Change the Audio Sample Rate
- Press the “Window + S” keys simultaneously on your keyboard, type in “Control Panel” in the search bar and click to open it.
- Click on “Hardware and Sound” from the list of menus and then choose “Sound” from the menu that follows.
- In the “Sound” dialog box, right-click on the device plugged in your computer (it will have a green check beside it) and select “Properties” from the dropdown menu.
- Move over to the “Advanced” tab and change the “Audio Sample Rate” to a higher or lower frequency from the drop-down menu. It is better to test out which frequency works for you by clicking on the “Test” option.
Change Audio Sample Rate - Click on “Apply” to save your settings and try streaming on Netflix to check if the error has gone now.
Solution 8: Update Your Drivers
- To begin with download and install Driver Talent.
- Then open “Driver Talent” and click on “Scan” to detect all the drivers.
Click on Scan Button - Click on “Repair” to fix the faulty drivers or click on “Uninstall” for any newly installed problematic drivers or click on “Update” to update drivers.
Solution 9: Update Windows
- Open your PC and go to the “Start Menu” located on the bottom left of the screen. Here proceed to select the “Settings” option.
- Then navigate to the “Updates and Security” section and you would be directed to the “Windows Update” window.
Update and Security - Click on the “Check For Updates” option available at the top of the page. Install any updates if they are present and restart your computer for the changes to have their effect.
Check for updates - Finally, observe if you have overcome the problem now.
Solution 10: Fresh Windows Installation
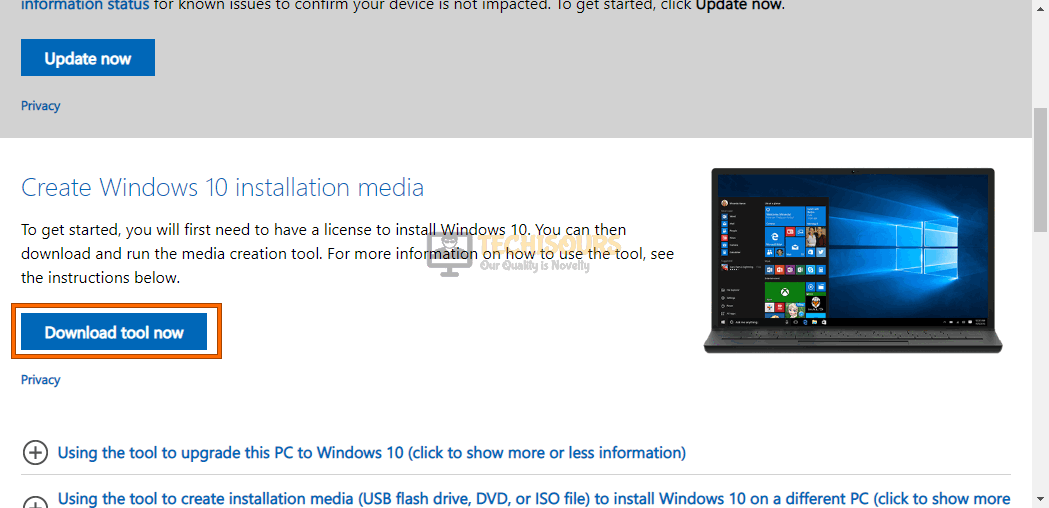
- You should “Download” the bootable windows media creation tool ver1803 on a USB Flash drive.
- Restart your system, and don’t click on “OK” when the error pops up on the screen.
- Double-click on the “Media Creation Tool” from the USB flash drive to “Run” it.
Media creation tool - Click on “Accept” to agree with the license and then select the “Create Installation Media (USB Flash drive, DVD, or ISO File) for another PC” option.
- Select your desired language and choose the “Edition” as “Windows 10” and “Architecture” as “64 bit (x64)”.
- Next, select the “ISO File” option. Choose where to install your file and click on “Save” to start downloading. Click on “Finish” when you’re done.
- Download and install the latest version of Rufus 3.13 on the same USB.
- Double click on Rufus and select the “Media Creation Tool” by clicking on the “Browse” button and locating it.
- Click on “Start” for a clean installation of “Windows 10” and once done now check to see if you got rid of the error.
Solution 11: Clearing Netflix Cookies Cache
- Open your browser and type in netflix.com/clearcookies in the search bar. By doing so you’ll be signed out of your Netflix account and will be redirected to the Home screen.
- Fill in your “Login Credentials” and try watching Netflix again.
Solution 12: Update the Netflix Application
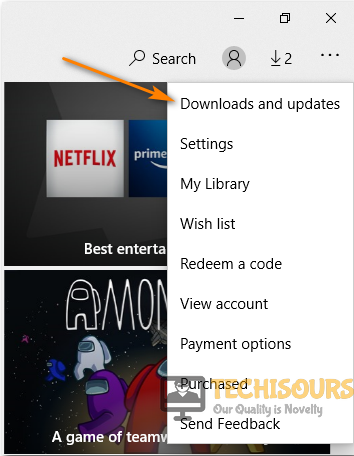
- Open the “Microsoft Store” application from the taskbar and click on your “User Profile” located on the side of the “Search” option.
- Click on the “Download and Updates” option and then select “Check For Updates”.
Check for Updates - Click on the down arrow on the right in order to download the Netflix update.
- Open Netflix now and see if the error still persists or not.
Solution 13: Flush/Change the Current DNS to the Google DNS
- Press the “Window + R” keys simultaneously on your keyboard and type “ncpa.cpl” in the Run prompt. Then hit “Enter”.
ncpa.cpl - On the new window select the “Network Connection” dialogue box, and right-click on it to select the “Properties” option from the context menu.
- Next click on the “Internet Protocol Version 4(TCP/IPv4)” to enter a new window. Here change the DNS to either of the server addresses.
Internet Protocol Version 4 (TCP/IPv4) - You need to alter the “Preferred DNS Server” to “8.8.8.8” and “Alternate DNS Server” to “8.8.4.4” respectively.
Switch to Static IP and DNS addresses - Next, click on the “OK” option and then wait for the changes to have their effect.
- Finally, exit from all the windows and relaunch the Netflix application to observe if the error got removed.
Solution 14: Deactivate Netflix Account
- Launch the “Netflix App” on your television and follow the following sequence using the arrows on your remote:
UP, UP, DOWN, DOWN, LEFT, RIGHT, LEFT, RIGHT, UP, UP, UP, UP
- Select “Deactivate” from the two options.
- Launch the “Netflix App” again, and “Sign-in” using your credentials and verify that the Netflix Error code m7361-1253 issue is resolved.
Solution 15: Refresh Internet Content
- Open your TV “Settings” and navigate to “Network”.
- From the “Network Setup” menu, choose the “Refresh Internet Content” option.
- Launch and check to see if the Netflix Error code m7361-1253 has been fixed.
Solution 16: Reinstall the Netflix application
Sometimes, reinstalling Netflix also works just fine. Make sure to restart your device in between uninstalling and reinstalling.
Solution 17: Contact Netflix Support
If none of the above-mentioned methods worked for you then contacting Netflix Support could be your last bet. Make sure to report your problem clearly and if possible attach the error screenshots along with it and you’ll be contacted by the support team after a few days to help resolve the Netflix Error code m7361-1253 issue for you.
Hopefully, the above-listed fixes would be enough for you to get rid of the error successfully but if the issue still exists then you may Contact Us here.


