Intel RST Service is not running? Here is How to Fix it
Sometimes, there might be an error on your computer where the “Intel RST Service is not running” issue might be occurring on your computer. Basically, Intel RST stands for Intel Rapid Storage Technology and it improves the performance of your system storage and manages some basic tasks that ensure its proper working.

However, if this error is occurring on your computer, you might be getting other glitches on your computer as well owing to the service not running properly. Therefore, in this article, we have managed to compile all of the different methods and solutions that can get the Intel RST Service running properly.
Fixing the Intel RST Service is not Running Issue:
Solution 1: Enable Service Startup
If somehow, the service has prevented the permissions that allow it to start up as soon as the computer boots, you will get the Intel RST Service is not running issue. Therefore, we suggest that you permit the service to run automatically when the computer boots up.
- Press “Windows + R” to boot inside the run prompt and type in “Services.msc” inside it.
- Now that you have done this, press “Enter” to launch into the services panel.

Typing in “services.msc” - In here, look for the “Intel RST or Intel Rapid Storage Technology” Service and right-click on it.
- After this, make sure to select the “Properties” option and click on the “General” tab in the new window that opens up.
- Now, click on the dropdown that says “Startup Type” and make sure to select the “Automatic or the Automatic (Delayed Startup)” option from the list and then click on “Apply” to save your changes.
Note: Make sure to click on the “Stop” option if it is already running.
Set your Startup type to Automatic - Exit out of the properties window and restart your computer.
- Check and verify if the Intel RST Service is not running issue has been fixed.


Solution 2: Manually Start Intel RST Service through Task Manager
In certain situations, the Intel RST service might not run because it was terminated at runtime by another application or by your OS. Therefore, we recommend that you try to start it back up from the task manager. In order to do so:
- Press “Windows + R” to launch into the Run prompt.
- Type in “taskmgr” and press “Enter” to launch into the task manager window.

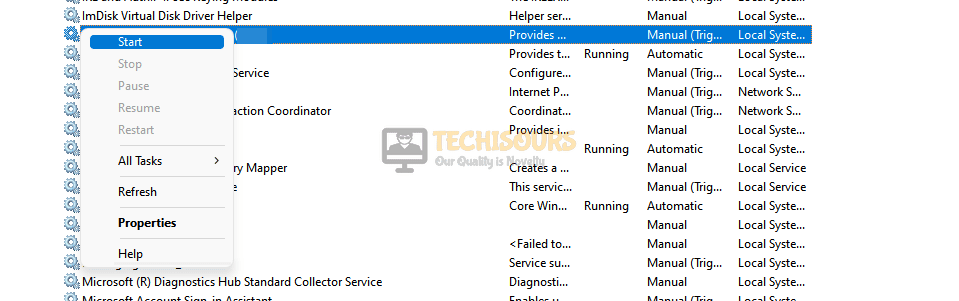
Typing in “taskmgr” - From here, click on the “Services” panel from the top and here, look for the “Intel RST” or the “Intel Rapid Storage Technology” from the list.
- Now, right-click on it and select the “Start” option to start this service back up.

Starting the Intel RST Service backup - Make sure to check if the Intel RST Service is not running error has been terminated.

Solution 3: Initiating Driver Update
Sometimes, the Intel RST driver might have been outdated due to which the error started occurring and it wasn’t able to run on your computer. Therefore, you should try to install a driver update which can get it back up and running in most cases. For this, you can employ a variety of methods depending on your preference. The most convenient one would be to use an application like DriverEasy to automatically check for and update drivers.
However, to initiate a manual update, first go to the Intel website or your manufacturer’s website to check for and download the relevant Intel RST Drivers. When found, repeat the following steps to install it on your computer.
- Press “Windows + R” to launch into the Run prompt, type in “devmgmt.msc” and press “Enter” to be able to launch into the device management panel.

Typing devmgmt.msc in the Run prompt - From here, click on the “Disk Drives” dropdown and right-click on the “Intel RST” associated driver.
- Select the “Update Drivers” option and then click on the “Browse my Computer for Drivers” option.

Clicking on the Browse My Computer for Drivers option - Now, click on the “Browse” button and lead it to the downloaded Intel RST Drivers.
- From here, make sure to select the Intel RST Drivers and double-click on them to install them on the computer.
- Check to see if this has fixed the Intel RST Service not running issue on your computer.


Solution 4: Check for Windows Updates
Windows has been notoriously bad at keeping compatibility issues at bay after issuing new updates. Therefore, it wouldn’t be a surprise if the issue was caused due to a bad Windows Update. However, you can check if a patch is out for the issue in the form of another update. For that:
- Press “Windows + I” to launch into the settings.
- From here, click on the “Windows Update” button and then select the “Check for Updates” button to initiate a check for available updates.

Check for updates - Wait for the checking process to be completed and make sure that any available updates are installed.
- After doing so, check to see if the Intel RST Service is not running issue has been fixed.

If the issue still persists, contact us for further troubleshooting.