Fix: Origin Overlay not Working [Fixed Completely]
Origin in addition to being an online gaming store also serves as a game launcher and it comes packed with some neat features to enhance the users’ gameplay. One of these features is the Origin In-game Overlay. However, we have received some complaints from users about the Origin Overlay not Working Issue. After coming to know about this, we compiled this comprehensive guide to help you in fixing this issue completely.

What Causes the Origin Overlay not Working Error?
After going through some basic troubleshooting instructions, we came to know that the following were some of the most prominent reasons due to which this error might occur on your computer.
- Disabled Overlay: It is possible that if you are unable to use the Origin Overlay in your game, it might have been disabled either manually or it can also sometimes get disabled automatically after an update. Therefore, the best thing to do first is to check whether the overlay has been enabled from the Origin settings or not.
- Corrupted Cache: Like all applications, Origin also caches important data to decrease loading times and to increase productivity. However, if this cache gets corrupted, you will most certainly run into the Origin Overlay not Working error when trying to load into a game. This cache can however be regenerated simply by clearing out the older one and we have done the same in the guide below.
- Outdated Drivers: If the computer drivers haven’t been recently updated, it is recommneded to check if all the important drivers are up to date. With every operating system and application update, mostly, there are new features that require the rest of your computer to be updated as well. Therefore, Origin Overlay might not work in-game if you are running the computer with outdated drivers.
- Antivirus/Firewall Blockage: If you have installed a third-party antivirus on your computer or even with the default Antivirus sometimes, you run into a false positive which prevents Origin from being in contact with its servers and this can often trigger the Origin overlay not working issue.
- Outdated Operating System: As with most components of your computer, the Operating System also needs to be periodically updated to ensure that your computer has the latest definitions and features the be able to run modern applications. Therefore, if Origin Overlay isn’t working, it is best to check for any operating system updates as well.
Now that you have been made familiar with most of the reasons behind the existence of this issue, we can finally move on towards fixing the Origin Overlay not working issue.
Before we start:
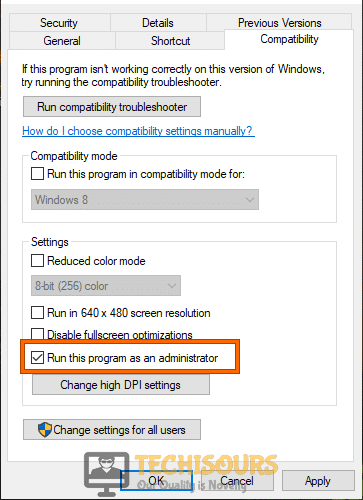
- Right-click on the Origin’s shortcut located on the desktop and select “Properties” from the pop-up menu.
- Navigate to the “Compatability” tab and check the box parallel to “Run this program as an administrator”.
- Now launch Origin and see if the overlay issue persists.

Run this program as an administrator
Fixing the Origin Overlay not Working Issue:
Solution 1: Enable Origin’s In-Game Overlay
- Launch the Origin desktop client and login to your user account.
- Now click on the “Origin” icon from the menu bar located at the top of the screen, and select “Application settings”.

Opening Application settings - Navigate to the “Origin In-Game” tab and enable the toggle button, parallel to “Enable Origin In-Game”.

Enable Origin In-Game - After applying the changes, hopefully, Origin’s overlay will be back to normal.


Solution 2: Switch to Origin client Beta
- Launch the Origin desktop client and login to your user account.
- Now click on the “Origin” icon from the menu bar located at the top of the screen, and select “Application settings”.
Opening Application settings - Navigate to the “Application” tab and enable the toggle button, parallel to “Participate in Origin client betas” located under the “Client Updates” section.
- After switching to the Beta version, restart the Origin client and see if the in-game overlay is back to normal.
Solution 3: Clear Origin’s Cache
- Right-click on the “Windows” icon located on the taskbar and select “Run” from the pop-up menu.

Click on Run - When the Run box appears, type “%temp%” in its text field and hit the “Enter” key on the keyboard to open the “Temp “ folder.

Typing in “%temp%” - Now select all the files in this folder and hit the “Delete” key on the keyboard to clear the temp folder.
- Now open the Run box again and search for “%ProgramData%/Origin”.
Typing in “%ProgramData%/Origin” - Here, delete all the files and folders except the “LocalContent folder” folder.
- Now open the Run box again and search for “%AppData%”.
Typing in %appdata% - Now locate and delete the “Origin” folder and check if the issue has been removed after clearing the Origin’s cache.


Solution 4: Tweak in-game settings
- From the Origin client, open the faulty game and open its “Settings”.
- Now navigate to the “Visual” section and enable the “Turn on Windowed mode” option.
- If, after switching to the windowed mode, the error persists, then we recommend you to turn the “V sync” on and see if the issue is removed.
- After making the changes, check and see if you encounter the issue error again.
Solution 5: Repair the game files
- Launch Origin client and navigate to the “My game library”, from the left pane, to view the list of games installed through Origin.
- Now right-click on the game you are having trouble with and select “Repair” from the pop-up menu.

Repair the game - When the repairing process is finished, relaunch Origin and check if the Overlay is working normally now.

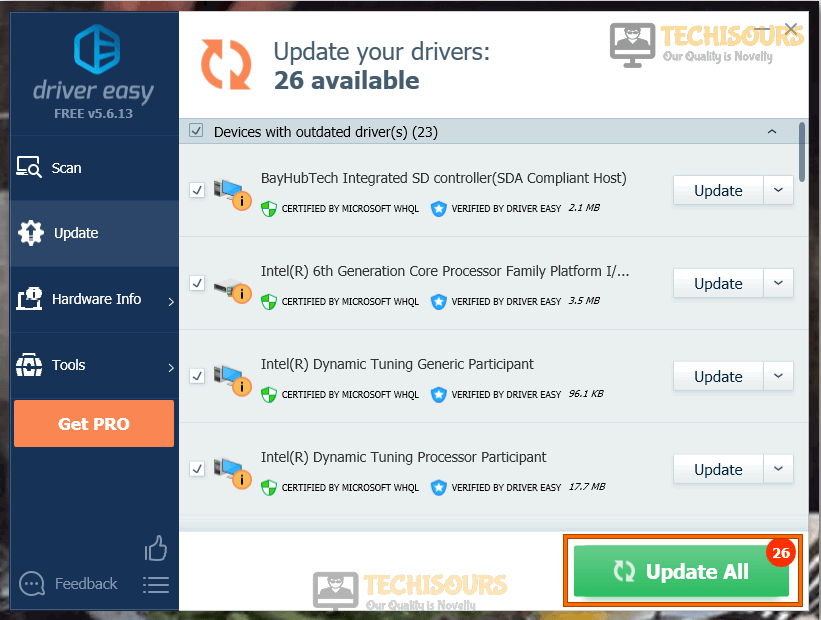
Solution 6: Update device drivers automatically
- Launch a browser on your computer and download Driver Easy from its official site.
- Now double-click on the downloaded file to open its installation wizard and follow the on-screen instructions to install the tool on your computer.
- When the tool is installed successfully, launch it and click on the “Scan Now” button to scan for all the outdated drivers installed on your PC.

Scan now - When the scan is completed, click on the “Update all” button to update all the drivers collectively.

Update all - After updating all the device drivers to their latest built, restart the Origin client and see if you encounter the same problem again.

Solution 7: Close background applications
- Press “Ctrl + Shift + Esc” keys simultaneously on the keyboard to open the task manager and navigate to the “Processes” tab.
- Now select all the processes that may consume your computer’s resources and prevent Origin’s overlay from working properly.

Ending unwanted background applications

Some background applications that might trigger this issue with our Origin’s in-game are listed below.
Razer Synapse
OBS
Steam
Cortex
Nvidia GeForce Experience
Uplay
Xbox Windows app
Discord
MSI afterburner
Rivatuner statistics/server
Reshade
AMD’s Wattman program
Fraps
AB overlay
Asus Sonic Radar
NVIDIA Shadowplay
AverMedia Stream Engine
Solution 8: Add Origin as an exception to your Antivirus
- Launch your antivirus software and navigate to its “Settings”.

Opening Avast Settings - From the left pane, go to the “General” tab and select the “Exception” option.
Adding Origin as an exception - Now add the path to the Origin’s executable file to add it as an exception to the anti-virus.
- After adding the Origin’s client to your firewall’s exception, restart the Origin’s client to check if the problem with Overlay has been terminated.


If, after adding Origin to your antivirus’ exception, you encounter the same error again with Origin’s overlay, we recommend you to disable your antivirus software completely and see if the issue has been removed.
- Click on the “^” icon located on the taskbar to open the system tray and right-click on the “Antivirus icon” installed on your computer.
- Now choose “Avast Shield Control” and then select the “Disable Permanently” option.

Disable antivirus permanently

Solution 9: Perform a clean boot
- Right-click on the “Windows” icon located on the taskbar and select “Run” from the pop-up menu.
Click on Run - When the Run box appears, type “msconfig” in its text field and hit the “Enter” key on the keyboard to open the “System Configuration” folder.

Typing in “Msconfig” - Under the “Services” tab, check the box parallel to “Hide all Microsoft services” and click on the “Disable all” button.

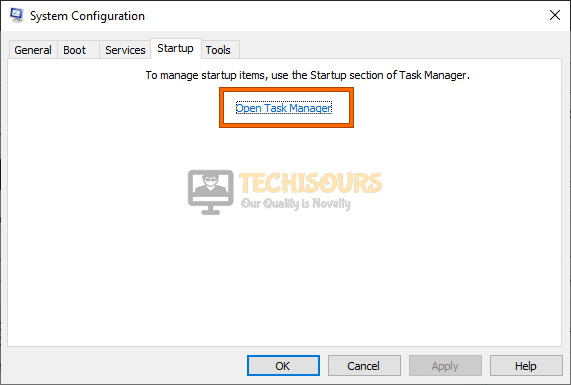
Hide all Microsoft services - Now navigate to the “Startup” tab and click on the “Open task manager” option.
Open Task Manager - Here, select all the services one by one and click on the “Disable” button to prevent them from running when the computer is started
- Now reboot your computer to enter into the safe mode and see if the in-game overlay issue has been resolved.


Solution 10: Disable DX12
In this solution, we will explain how to disable DX12 specifically in the “Battlefield” game. If you are dealing with a different game, the steps will be similar.
- Press “Win + E” keys on the keyboard to open the File Explorer and navigate to the following location.
C:\Users\Pro\Documents\Battlefield 4\settings
- Now right-click on the “PROFSAVE_profile” file and open it with the “Notepad”.
- Now press “Ctrl + F” to open the search box and search for “Dx12Enabled”.
- Change the value of “Dx12Enabled” from “1” to “0” and save the changes.
- After making the changes, restart Origin and the game to check if the issue persists.
Solution 11: Reinstall Origin
- Right-click on the “Windows” icon located on the taskbar and select “Run” from the pop-up menu.
Click on Run - When the Run box appears, type “appwiz.cpl” in its text field and hit the “Enter” key on the keyboard.
Typing “appwiz.cpl” - Now right-click on the “Origin” icon and select “Uninstall” from the pop-up menu.
- Navigate to the following location in your directory and delete the “Origin” folder.
C:\Program Files (x86)
- Now open the run box again and search for “regedit” to open the Registry Editor.
Typing “regedit” (Note: Make changes in the Registry Editor at your own risk as it requires great care and experience)
- From the left pane, navigate to the following location and delete the “Origin” folder located on the right side of the window.
HKEY_LOCAL_MACHINE\Software\WOW6432Node
- Similarly, locate and delete the “Origin” folder from the following location of the Registry editor too.
HKEY_LOCAL_MACHINE\SOFTWARE\Microsoft\Windows\CurrentVersion\Uninstall
- Now open the run box again and search for “%ProgramData%”.
Typing “%Programdata%” - Locate and delete the “Origin” folder from here too.
- Now launch a browser on your computer and download Origin from its official site.
- Now double-click on the downloaded file to open its installation wizard and follow the on-screen instructions to install the tool on your computer.
- When the Origin client is installed successfully, check and see if the issue with in-game overlay has been resolved.


Solution 12: Check for Windows updates
- Hit “Win + I” keys on the keyboard to open System Settings and navigate to “Update and Security”.

Update and Security - From the left pane, navigate to the “Windows Update” tab and then click on the “Check for updates” button located on the right side of the screen.

Check for updates - Now install the update on your computer, if available, and see if you encounter the same error again after updating your Windows to the latest version.


Solution 13: Reset your Windows
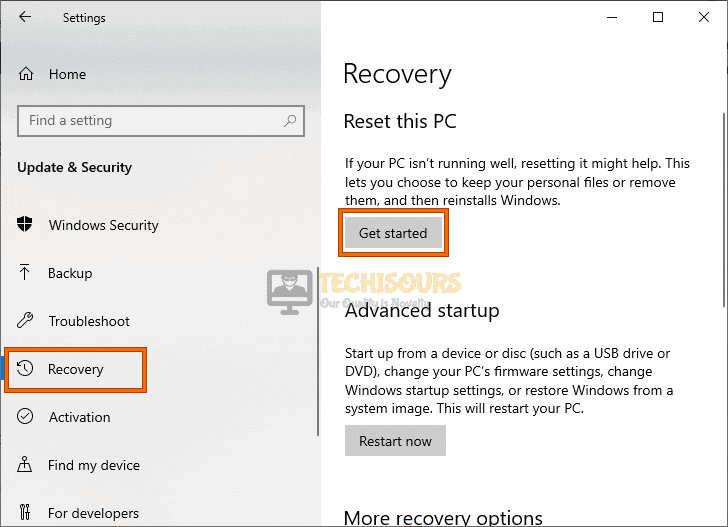
- Hit “Win + I” keys on the keyboard to open System Settings and navigate to “Update and Security”.
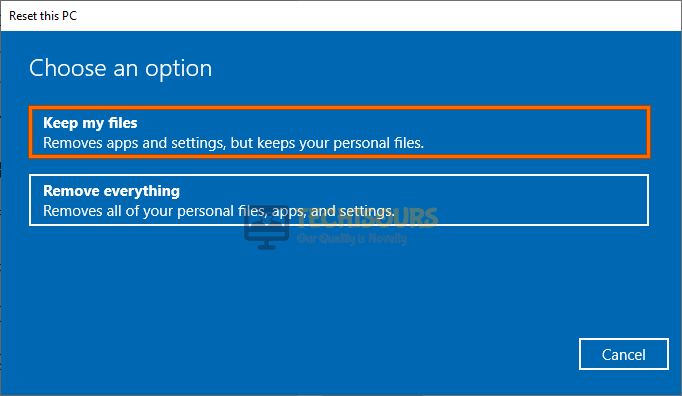
Update and Security - From the left pane, navigate to the “Recovery” tab and then click on the “Get Started” button located under the “Reset this PC” section, on the right side of the screen.
Reset this PC - Now click on the “Keep my files” option and follow the on-screen instructions to reset your PC.

Keep my files
Note: Reset your PC at your own risk as it requires great care and experience. We recommend you to refer to a person who is a computer expert.
Workaround:
If none of the solutions explained above has helped you resolved this issue, then we recommend you to make another user account on your PC and log into it as an administrator to check if the error has been resolved.
Hopefully, the error might have gone by now but if you need further assistance, contact here.