Easily Fix Inaccessible Boot Device Error when Booting Up
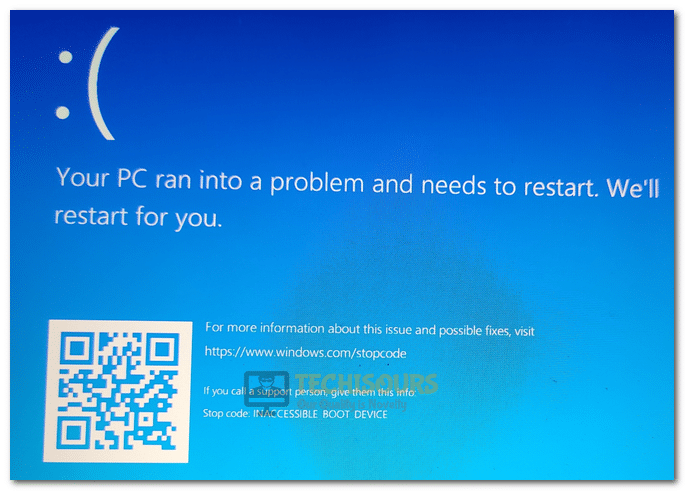
If you are running into the Inaccessible Boot Device Blue Screen of Death error on your Windows computer, you have come to the right place. We recently got wind of this issue from one of our readers and decided to get to the bottom of it. Upon our investigation, we stumbled upon the fixes and workarounds that we have mentioned in this article that can be used to completely fix it.
In addition to that, we have also listed different reasons due to which this error occurs in the first place. Make sure to follow through and read the whole article and then start applying the solutions one-by-one until one of them fixes the Inaccessible Boot Device Error for you.
Why is an Inaccessible Boot Device BSOD Error caused on Windows?
After going through the solutions and successfully deploying the fixes, we came to the conclusion that the following must be the primary reasons behind its occurrence.
- SATA Mode: Most users facing this issue discussed that when they changed their SATA mode settings, they were able to get rid of the Inaccessible Boot Device error so it is possible that it might be the cause behind your issue as well.
- DISK Errors: Sometimes, the Storage disk on your computer might contain some bad sectors or clusters due to which the Operating System is facing trouble loading all of its files. Therefore, we suggest that you check your computer for Disk Errors.
- Pending Updates: In certain cases, pending updates can also cause the Inaccessible Boot Device error. Therefore, we recommend that you remove them using the guide that we have inked below in order to ensure that this is not the reason behind your issue.
- Recent Installations: If you have recently installed any new software on your computer or updated your drivers, they can also trigger this issue and leave you hanging between the boot cycle. We strongly suggest that you boot using safe mode and check to see if you are able to get into the operating system.
- Outdated Drivers: If the drivers on your computer haven’t been updated for a while, you might run into the error message while trying to launch into your operating system. Therefore, we strongly suggest that you try and update all the outdated drivers.
Now that you have been taken through almost all the possible fixes, we can finally start applying the workarounds.
Fixing the Inaccessible Boot Device Error:
Solution 1: Automatic Repair
This is the first thing that Windows does after you get the Inaccessible Boot Device Error, is that it launches the Automatic Repair. Therefore, upon getting the error, your PC will be automatically restarted. If it isn’t, do it manually and launch it into the Automatic Repair. Follow through with the onscreen instructions if the Automatic Repair works correctly, but, if it doesn’t don’t worry because for most of our users, upon getting into the Automatic Repair, it showed “Automatic Repair Couldn’t Repair Your PC” message.
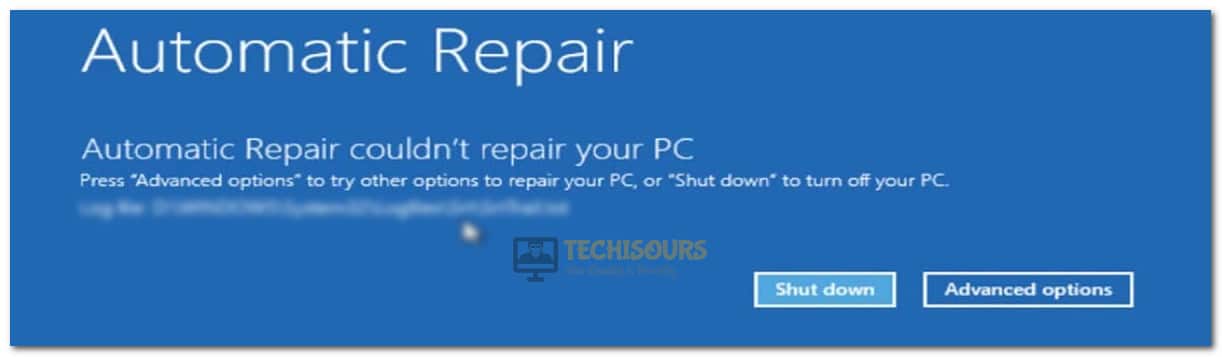
Therefore, we will be proceeding with the other solutions, however, from this message, you will be able to extract the location of your Windows because it often points to the Log File location which should name the partition in which your Operating System is installed.
Solution 2: Exploring Advanced Options
Upon getting the “Automatic Repair Couldn’t Repair Your PC” message, you will also see the “Advanced Options” screen.
- Inside the Advanced Options screen, click on the “Troubleshoot” button.
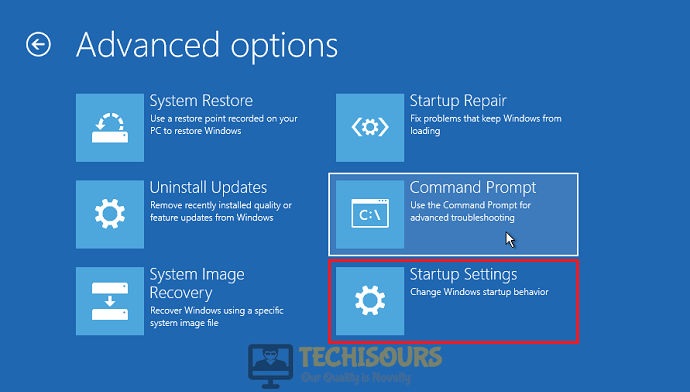
- From here, select the “Advanced Options” button and then select the “Startup Repair” option.

Choose Startup Repair Option - This should restart the Pc and in some cases, might be able to fix the Inaccessible Boot Device error.
- If this doesn’t work, launch back into the Troubleshoot button from the Advanced Options and then select the “Advanced Options” again.
- From here, click on the “System Restore” button and then select the “Restore Point” if any of them are available.
- If you were fortunate enough to have some restore points available on your computer, you will be able to restore your PC to an earlier date which should fix this issue in most cases.
- All you have to do is select a valid restore point from the screen and click on “Next”.
- From there, follow the on-screen instructions to fully restore your computer to an earlier date.

Solution 3: Executing Commands
If you weren’t able to restore your computer to an earlier date, you can try to run some commands from the prompt in order to fix this error message. For that:
- Press the “Advanced” options button from the screen and click on the “Troubleshoot” option.
- From here, click on the “Advanced Options” button and select the “Command Prompt” button.

Command Prompt - This will launch the command prompt onto your screen.
- Inside the command prompt, execute the following commands one by one to perform a detailed scan and repair of your drive.
sfc /scannow
DISM /Online /Cleanup-Image /RestoreHealth

sfc / scannow - After both of the commands above have been executed, try to restart your PC and check to see if the Inaccessible Boot Device error has been fixed.
- In case it hasn’t been fixed, restart the computer, go through the same steps and get back into the command prompt.
- Make sure to insert a USB that contains the Windows Installation Media and has been made ready to boot.
- Type in the following commands and execute them one by one in order to fix this issue.
dism /online /cleanup-image /scanhealth
dism /online /cleanup-image /restorehealth
DISM /Online /Cleanup-Image /RestoreHealth /source:WIM:X:SourcesInstall.wim:1 /LimitAccess
- After executing the commands above one by one, restart your computer and check to see if the Inaccessible Boot Device error has been fixed.


Solution 4: Repairing Hard Drive
If the steps that we went through above, failed to repair your Hard Drive, we can try to repair it manually using some advanced commands that should get rid of the bad sectors on your computer. For that purpose:
- Press the “Advanced Options” button from the screen and then select the “Troubleshoot” option.
- Click on the “Advanced Options” tab again and from here, click on the “Command Prompt” button to launch into the command prompt.

Command Prompt - Inside the command prompt, type in the following commands one by one.
bootrec.exe /rebuildbcd

bootrec.exe /fixmbr

bootrec.exe /fixboot

chkdsk /r C:

chkdsk /r D:
- Make sure that these commands are executed one after the other.
- After all of them have run successfully on your computer, you should restart it and then check to see if you have gotten rid of the Inaccessible Boot Device Error.

Solution 5: Changing SATA Mode from Bios
It is sometimes possible that you are running your storage devices in such a way that they aren’t able to properly sort the boot order and load your operating system.
- Once your computer starts up, press the “Del” or the “F2” button to load into the Bios.
- In the Bios, the steps will vary depending upon your Manufacturer. For some general instructions, go into the “Advanced” tab in your Bios and make sure to set the “SATA Mode” to “AHCI” if they were previously on RAID.

Using AHCI mode - After making this change, make sure to save your changes which is usually done by pressing F10 on the keyboard.
- Restart your computer and check to see if you are now able to Fix the Inaccessible Boot Device Blue Screen of Death Error.

Solution 6: Checking Hardware
Sometimes it is possible that there might be some hardware-related faults on your computer. However, we recommend that first and foremost, you check for any loose cables connected to your Motherboard, do a special check of the SATA cables connected to your HDD or your SSD. Also, make sure that the power cables are properly connected to the storage device.
Solution 7: Repairing our Windows Installation using CMD
Before continuing with this step, we will have to make a Bootable USB for the Windows that you are running. You can do that quite easily using Rufus Software on another computer where you can download the Windows ISO and then make it bootable after installing that USB.
After making a bootable USB, make sure to insert it onto the system that is getting the error, and then from the Bios, make sure to set your Boot Order to boot from the USB instead of your Storage device. Once, the computer has booted from the USB, select your Language and region if the setup prompts you to.
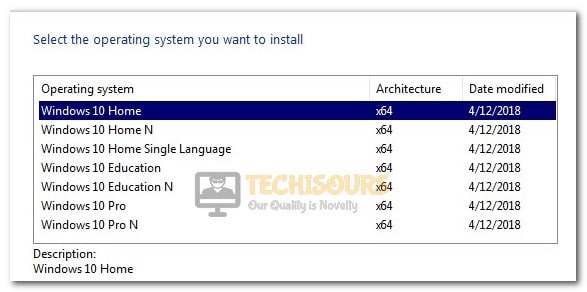
- On the setup screen, make sure not to select the Operating system version that you want to install when the setup wants you to select it.
- We just need to get the setup to this point where it asks you to select the Windows Operating System Version and from here, press the “Shift” + “F10” keys on your keyboard.

Launching Command Prompt at the Screen - Inside the command prompt, type in the following command and press “Enter”.
DISKPART
- After that, type in the following command and press “Enter”.
LIST DISK
- From here, identify the disk that has the Operating System installed on it.
- Type in the following command to select that disk and replace 0 with the number of the disk that we identified.
SELECT DISK 0
- After selecting the valid disk, select the valid volume by typing in the following command.
LIST VOLUME
- This will list the Allocation to Different Volume on the disk, from the list, identify the System Reserved Partition Label of the Volume and note down its volume number.
- Type in the following command to select the volume and make sure to replace its number with the one that we identified.
SELECT VOLUME 1
- Type in the following command to reset the System Reserved Partition.
FORMAT FS=NTFS QUICK
- After this command, the volume will be formatted and we will have to build it up again to make sure that our system works correctly. For that, execute the following command to assign a letter to this new buildup.
ASSIGN LETTER=S
- Now again type in the following command.
LIST VOLUME
- From here, you will see that the letter that we assigned has been given to the System Reserved partition again.
- Type in the following command to exit from Disk Part.
Exit
- Now, type in the following Letter and press Enter to get to the newly built drive.
S:
- This will move the cmd to the S drive. In here, type in the following commands and press “Enter” after each.
BCDBOOT D:\WINDOWS /S S: /F ALL
Note: In the command above, the D and the S Letter represent the Windows installation Drive and the newly assigned Letter respectively.
- Let the command run for a couple of seconds until it shows the “Boot Drive Created Successfully” Message.
- Restart your computer and check to see if it restarts properly and boots into the Windows.
Solution 8: Removing Recently Installed Packages
If you have installed any packages recently that could’ve messed up your system files or startup configuration, you might run into the Inaccessible Boot Device Error. For that, we will be teaching you to remove the packages without having to get into your system. If you can get into it, just go to the applications manager and uninstall them from there, but if you can’t, follow the steps below.
- Click on the “Advanced Options” from the screen and then select the “Troubleshoot” button.

Choose Troubleshoot - From here, also select the “Advanced Options” button again and click on the “Command Prompt” option to launch into the Command prompt.
- Type in the following command into the command prompt and press “Enter”.
dir C:
- After doing that, type in the following command to get a list of packages that were recently installed.
dism.exe /image:<drive letter for windows directory> /Get-Packages >> c:\temp\packages.txt
- From here, you will see the list of recently installed packages on your computer. Make sure to replace the drive letter in the above command to properly check for them.
- After identifying the recent package, make sure to note down its exact identity.
- Type in the following command and replace the package identity inside the command and execute these commands to remove the package from your computer.
dism.exe /image:<drive letter for windows directory> /remove-package /packagename:<package name>
- After the package has been successfully removed from your computer, restart it and check to see if doing so fixes the Inaccessible Boot Device error.
- If this doesn’t fix the issue, make sure to repeat this process and execute the command in step 4 to get a list of all pending update packages. After doing that, use the command in step 7 to remove them from your computer. For example, some users were able to fix their errors by running the command below.
x:\windows\system32\dism.exe /image:d:\ /remove-package/packagename:Package_for_RollupFix~31bf3856ad364e35~amd64~~14393.1715.1.10

Solution 9: Pending Update Packages
Sometimes, the pending update packages can cause your system to go into this turmoil and trigger the error message. Therefore, we recommend that you get rid of some updated packages on your computer in order to fix the error message.
- Using the same method that we have been using in the solutions above, launch into the command prompt from the blue screen.
Command Prompt - Type in the following commands into the command prompt one by one and check to see if doing so fixes the error message.
reg load HKLM\temp c:\windows\system32\config\software
reg delete HKLM\temp\Microsoft\Current Version\Component Based Server
reg unload HKLM\temp
- Check to see after executing these commands if you are able to fix this error message.
Some users have identified that installing the KB4054517 update was causing this error for some of their computers so it is a good idea to uninstall that update.
Solution 10: Starting in Safe Mode
It is possible that your PC isn’t able to boot properly because something that launches with the start of the operating system is preventing it from being able to run properly. Therefore, we recommend starting your PC in Safe mode and if you are successful in doing so, fix this issue from there. For that:
- On the Blue Screen that contains the Error, click on Advanced Options, and from there, select “Troubleshoot” and then click on the “Advanced Options” screen.

Advanced Options - From there, click on the “Startup Settings” option, and from there select the “Restart” button.
Startup Settings - After the restart, follow the on-screen instructions to successfully get inside the safe mode.
- Inside the safe mode, make sure to uninstall any recently installed applications that you think might be causing these issues and also make sure to update any outdated drivers.
- If you recently installed any drivers that caused this issue, we recommend that you uninstall them as soon as possible and then check to see if doing so fixes the issue.

Solution 11: Using RegBack Method
Boot into your computer and from the bluescreen, get into the command prompt options as we have done in the solutions above. From there:
- Type in the following command and press “Enter”. Make sure to replace C with the Drive Letter on which Windows has been installed on your computer.
cd Windows\System32
- After that, type in and execute the following command.
cd config
- Type in the following command to list all of the files present inside this folder.
dir
- After that, make sure that you see the “Regback” folder inside the listed files and if you do, execute the following command.
cd regback

Using Regback command - Inside here, type in and execute the following command to list all of the files.
dir
- Make sure that there are numbers behind the files inside the folder greater than 0, this will indicate that there is some data present inside them and they aren’t just empty folders. If they were to be empty, this whole solution wouldn’t work and you should move on to other solutions. However, if they aren’t empty and there are numbers behind them greater than 0, you should execute the following commands one by one to copy them from regback folder to the config one and back up the ones already present there.
cd..

ren default default.bak

ren sam sam.bak

ren security security.bak

ren software software.bak

ren system system.bak

cd regback

copy *.* ..

cd..

dir
- After executing the last command, check to see if the new folders that we copied are present in the config folder and that the old ones have been renamed to “.bak” counterparts.
- Type in “Exit” and press “Enter” to exit from the command prompt.
- Check to see if doing so has fixed your issue.

IMPORTANT NOTE: If you are unable to fix your issue even after going through all of these solutions, chances are, your operating system is damaged. Therefore, we suggest installing it again using the bootable USB that we have created in the solutions above.
If you still get this issue after going through all of these errors, we suggest that you try and contact us for further troubleshooting.