Fixes
How to Fix Geforce Experience Black Screen [Fixed Completely]
Geforce Experience is a bundled software that mostly people install to keep their Graphics Card drivers updated and installed properly. However, people have been getting the Geforce Experience black screen issue on their computers lately and in this article, we have compiled some fixes to eradicate this completely.

What Causes the Geforce Experience Black Screen Issue?
After going through some basic troubleshooting guides, we concluded that the following are the most common reasons behind the occurrence of this issue.
- Driver Issue: In some cases, due to the Driver that you have installed on the computer or if you haven’t installed the Nvidia Driver yet this issue might be triggered. It can sometimes be related to the application trying to access the Dedicated GPU without having the proper drivers to back up that hardware.
- Improper Installation: It is also possible that you haven’t properly installed GPU drivers on your computer due to which this issue is being triggered. This improper installation of the Nvidia Drivers is almost always the cause behind the nvidia geforce experience black screen issue.
- Compatibility Issue: In some situations, the Geforce application might actually be suffering from an incompatibility issue with the operating system installed on the computer. Therefore, you can run it in the compatibility mode to fix the Geforce Experience black screen windows 10 issue.
- DirectX Issue: It is also possible that the DirectX installed on your computer might not actually be the right one and you have installed the wrong version of DirectX due to which the black screen issue is being seen on Geforce Experience.
- VPN: Geforce Experience uses the internet to connect with the Nvidia servers and get information on the latest drivers available for your system. Therefore, it is always a good idea to disable any applications that are tempering with the internet connection that your PC is using.
Now that you are familiar with most of the reasons behind the Geforce Experience Black Screen issue, we can finally move on towards implementing the fixes.
Before you start:
- Shut down your computer and take the power plug out of the socket.

Plugging out the adapter - Wait for five minutes and then power cycle your computer by inserting the plug back into the socket.
- Now launch Geforce Experience from the desktop shortcut and not from the system tray.

Fixing the Geforce Experience Black Screen:
Contents
hide
Solution 1: Run with an Integrated Graphics
Method 1:
- Right-click on the Geforce Experience icon located on your desktop and hover over the “Run with graphics processor” options.
- Now select “Integrated Graphics” from the pop-up menu that just appeared on the screen.
- If the Geforce Experience application launches without any trouble, navigate to the “Drivers” tab located on the top-right corner and then click on the “Download” button.
- When the download is completed, reboot your computer to automatically install the new driver and check whether the black screen issue has been rectified.
- If the issue still persists, right-click on the Geforce Experience icon located on your desktop, hover over the “Run with graphics processor” options and select “Change default graphics processor” from the pop-up menu.
- Under the “Program Settings” tab select “Integrated Graphics card” from the drop-down list associated with “Select the preferred graphics processor for this program”.
- This will most probably resolve the issue but if you still encounter nvidia geforce experience black screen problem again, kindly have a look at the next solution indexed below.
Method 2:
- Right-click on the desktop and select “NVIDIA control panel” from the menu.

Clicking on the Nvidia Control Panel - From the left pane, click on the “3D Settings” option to expand its list and choose “Manage 3D settings”.
- Have a look at the right side of the screen and from there click on the “Program Settings” tab.
- Now select “Geforce Experience” from the list of programs to customize and “Integrated Graphics” as the preferred processor for the program.
- Apply the settings and launch Geforce Experience to check whether the black screen issue has been rectified.

Solution 2: Rollback Intel Graphics driver
- Press “Win + X” on the keyboard and click on the “Device Manager” option.

Open Device Manager - Now click on the “Display Adapters” to expand the list of graphics card drivers installed on your computer.

Clicking Display Adapters - From the list of these drivers, double-click on the driver associated with “INTEL”, to open its properties.
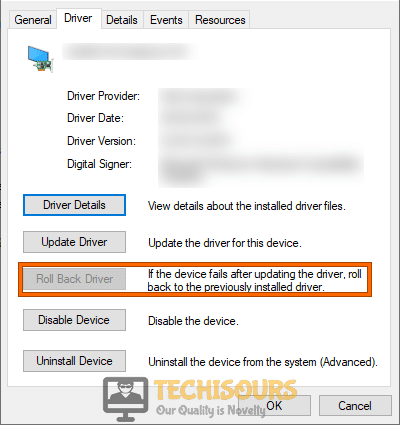
- Now navigate to the “Driver” tab and click on the “Rollback Driver” option to revert to an older version of the driver.

Rollback Driver


Solution 3: Rollback NVIDIA graphics card driver
- Press “Win + X” on the keyboard and click on the “Device Manager” option.
Open Device Manager - Now click on the “Display Adapters” to expand the list of graphics card drivers installed on your computer.
Clicking Display Adapters - From the list of these drivers, double-click on the driver associated with “NVIDIA”, to open its properties.
- Now navigate to the “Driver” tab and click on the “Rollback Driver” option to revert to an older version of the driver.
Rollback Driver - If the rollback button is greyed out on your computer, please move to the next solution indexed below.
Solution 4: Reinstall the driver in safe mode
- On your keyboard, hit “Windows + I” keys simultaneously to open “Settings” and select “Update and Security”.

Choose Update and Security - From the left pane, click on “Recovery” and then select “Restart Now” under the heading of Advanced Startup.

Click on Restart now button - Click on “Troubleshoot” and then select “Advanced Options”.

Choose Advanced Options - Now select “Startup Settings” and click on “Restart”.
- Now select “Safe mode with networking” before the system restarts and wait while it reboots.
- Press “Win + X” on the keyboard and click on the “Device Manager” option.
Open Device Manager - Now click on the “Display Adapters” to expand the list of graphics card drivers installed on your computer.
Choosing Display Adapters - From the list of these drivers, double-click on the driver associated with “NVIDIA”, to open its properties.
- Now navigate to the “Drivers” tab and click on the “Uninstall Device” button to uninstall the driver from your computer.

Uninstalling Device Drivers - After uninstalling the driver, disconnect your computer from the internet and restart it in normal mode.
- Launch your favorite browser and proceed to the NVIDIA website to download the new driver.
- Now, under the “Manual Driver Search” section, select an appropriate graphics card type and your current Operating system.

Manually search for the driver - Now click on the “Start Search” button and download the latest version of the driver.
- Install the driver on your PC and reboot your computer to check whether you encounter geforce experience black screen after update issue on launching Nvidia GeForce experience.


Solution 5: Run in Compatibility mode
- Right-click on the GeForce Experience shortcut located on the desktop and select “Properties”.
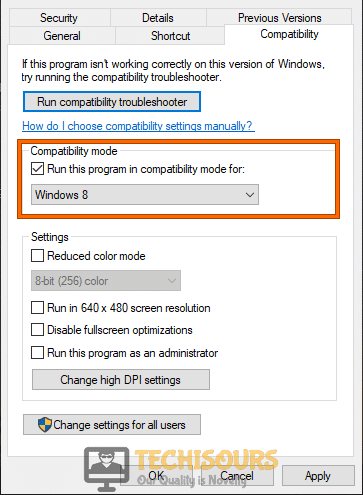
- In the properties windows, navigate to the “Compatibility” tab and check the box parallel to “Run this program in compatibility mode for:”.

Running GeForce Experience - Now select a version of Windows that is currently installed on your computer, apply the changes, and reboot your computer to see if the Nvidia GeForce experience shows a black screen again.
Solution 6: Tweak some settings in the NVIDIA control panel
- Right-click on the desktop and select “NVIDIA control panel” from the menu.
Clicking on Nvidia Control Panel - From the left pane, click on the “3D Settings” option to expand its list and choose “Manage 3D settings”.
- From the right side of the window, click on the “Global Settings” tab and choose “Power Management Mode”.
- Set this mode to “Prefer Maximum Performance” if it is set to “Adaptive” and save the settings.

Prefer Maximum Performance - Now close the control panel and launch Geforce Experience to check whether the geforce experience black screen windows 10 issue persists.

Solution 7: Run compatibility troubleshooter
- Right-click on the Geforce Experience shortcut located on the desktop and select “Properties”.
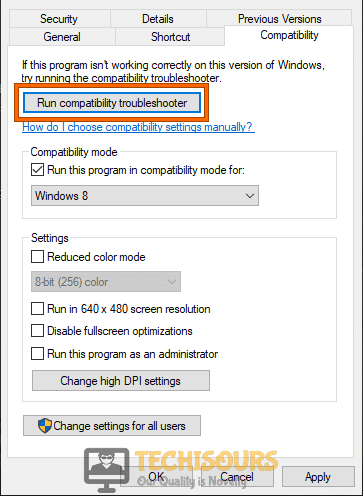
- Now navigate to the “Compatibility” tab and click on the “Run compatibility troubleshooter” button.

Running compatibility troubleshooter - Now follow the on-screen instructions to complete the troubleshooting and after it is done and most probably the nvidia geforce experience black screen problem would be resolved.
Solution 8: Scan your Laptop for updates (For Dell users only)
- Launch your favorite browser and click here to proceed to the Dell support website.
- Now set the Product and service tag of your machine and scan your laptop for updates.
- When the scan process is finished, update any driver that is outdated and launch Geforce Experience to check if the issue has been rectified.
Solution 9: Removing the incompatible application
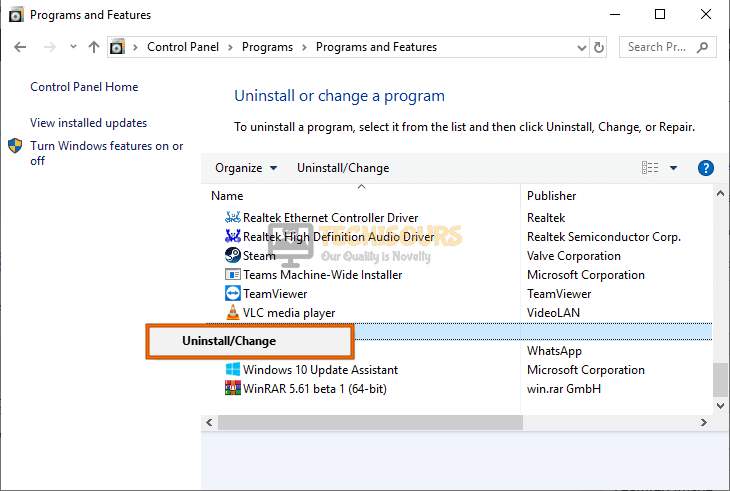
- Press “Windows key + R” from the keyboard to open the run box and search for “appwiz.cpl”.

Typing “appwiz.cpl” - Now locate “ROG Gamefirst”, or “Duet display” from the list of Softwares installed on your computer, right-click on it and select “Uninstall”.

Uninstall ROG Gamefirst

Solution 10: Change DirectX version
- Right-click on the Geforce Experience shortcut located on the desktop and select “Open File Location”.
- Now, in the folder where the Geforce Experience executable is located, locate and select a file named “GeforceNOWStreamer”.
- Right-click on that file and open it with “Notepad”.
- Now replace the “nv-gfn-accelerator=dx11” entry by “nv-gfn-accelerator=dx9” and save the file.
- Now launch Geforce Experience and hopefully, the issue would’ve been resolved.
Solution 11: Use a VPN
- Press “Ctrl + Shift + Esc” keys simultaneously on the keyboard to open the task manager and navigate to the “Process” tab.
- Now select all the processes associated with “NVIDIA Geforce Experience” one by one and click on the “End Task” button.

Ending Processes - Now connect your computer to a VPN.
Note: If you don’t have a VPN installed on your PC already, we recommend you to download one from the internet first. - Press “Win + R” keys on the keyboard to open the run box and search for “cmd” to open the command prompt.

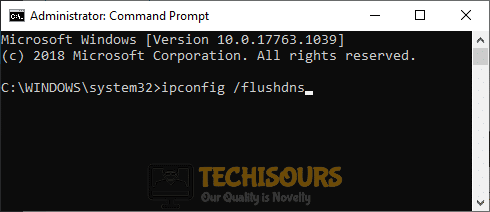
Typing in cmd - Now type the following command in the prompt and hit “Enter” to execute the command.
ipconfig/flushdns

Flushing DNS - After executing the above command, proceed to launch Geforce Experience again and check if it shown black screen again.


Solution 12: Reinstall NVIDIA Geforce Experience
- Press “Windows key + R” from the keyboard to open the run box and search for “appwiz.cpl”.
Typing appwiz.cpl - Now locate “NVIDIA Geforce Experience” from the list of softwares installed on your computer, right-click on it and select “Uninstall”.
Uninstalling NVIDIA Geforce Experience - When the uninstallation process is completed, launch your favorite browser, and download the latest version of the NVIDIA Geforce experience from here.
- Double-click on the downloaded file and follow the onscreen instructions to install Geforce Experience on your PC again.
Solution 13: Reset your PC
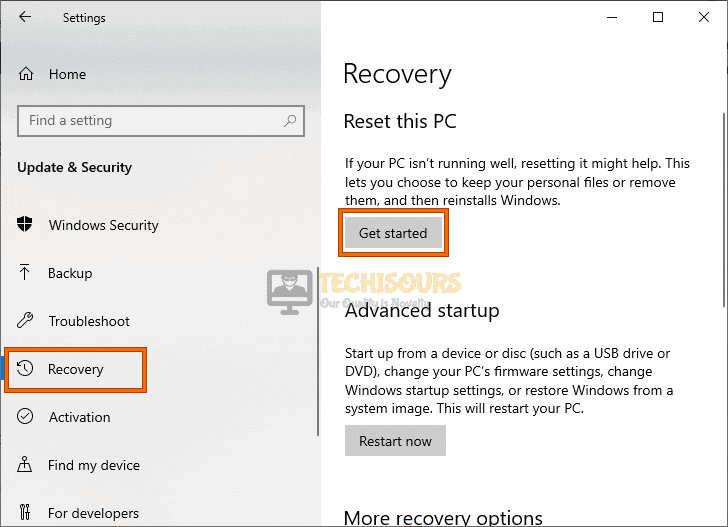
- Press “Win+I” from the keyboard to open “Settings” and select “Update and Security”.
Choose Update and Security - Navigate to the “Recovery” tab from the left pane and click on “Get Started” under the “Reset this PC” section.

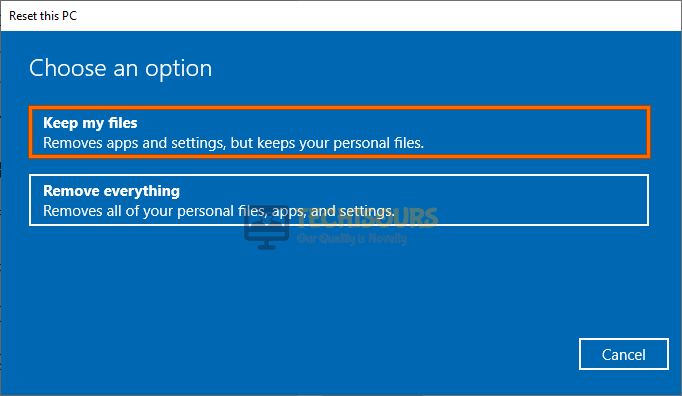
Reset this PC - Now click on “Keep my files” and follow the on-screen instructions to reset your Windows.

Choose Keep my files - After the Windows Reset, launch Geforce Experience, and hopefully, now the geforce experience black screen windows 10 issue would’ve been resolved by now.
Workaround:
- Launch your favorite browser and navigate to the NVIDIA’s website to download the new driver.
- Now, under the “Manual Driver Search” section, select an appropriate graphics card type and your current Operating system.
Manually search for the driver - Now click on the “Start Search” button and download the latest version of the driver.
- Right-click on the installer and select “Properties” from the pop-up menu.
- In the properties windows, navigate to the “Compatibility” tab and check the box parallel to “Run this program in compatibility mode for:”.
Running GeForce Experience - Now select a version of Windows that is currently installed on your computer, apply the changes, and run the file to install the drivers on your computer.
Hopefully, the error might have gone by now but if you need further assistance, contact here.