How to Fix Destiny 2: Error Code Beet [Complete Guide]
Destiny 2 is a really popular game and is loved by a huge fanbase all across the world. However, we have recently received reports from users that have acquired the Error Code Beet on Destiny 2 while loading into the game and mostly this error is associated with a request timeout. Don’t worry as we have compiled some of the most convenient workarounds and solutions to help you fix this error completely.

What Causes the Error Code Beet on Destiny 2?
This error code doesn’t specify one particular issue and there can be a couple of reasons behind its occurrence. We have listed some below.
- Cache: The first thing that comes to mind when such an issue arises is the corrupted cache. The cache can often be corrupted due to storage failure and it can cause the long loading times due to which the request gets timed out and the Error Code Beet is sprung up on the screen.
- Outdated Drivers: If your computer hasn’t received the latest driver updates to support the hardware installed on your computer, you might be getting the Error Code Beet on your screen while trying to load into the game. Therefore, it is best to ensure that all driver updates have been installed.
Now that you are familiar with some of the most obvious reasons behind the occurrence of the destiny 2 error code beet, we will be moving on towards implementing the fixes.
Before you start:
In most situations, users have encountered Error Code Beet while playing Destiny 2 if their computer does not meet the requirements of the game to run smoothly. Make sure your systems meet the following requirement before proceeding to play Destiny 2 on your PC.


Fixing the Error Code Beet on Destiny 2:
Solution 1: Clear console’s cache
Xbox Users:
- Open the Xbox settings and proceed to the “Network” option.
- Navigate to “Advanced settings” and choose “Alternate Mac Address”.
Alternate MAC Address - Now select the “Clear cache” option, select “Yes” and wait for the console to restart
- When the console restarts, check whether the destiny 2 error code beet is rectified.
Play Station Users:
- Press and hold the power button of your console and wait for it to shut down.
- Detach the power cords from your console and repeatedly press and release the power button to clear the console’s cache.
Removing the Plug - Now, attach the power cable to your console and insert the power adapter into the switch and wait for the console to restart.
- When the console restarts, check if the bungie error code beet is rectified.
Solution 2: Update device drivers automatically
- Navigate to your favorite browser and download Driver Easy.
- Double-click on the downloaded executable file and install the tool by following the on-screen instructions.
- Click the “Scan Now” button to start the scanning process.
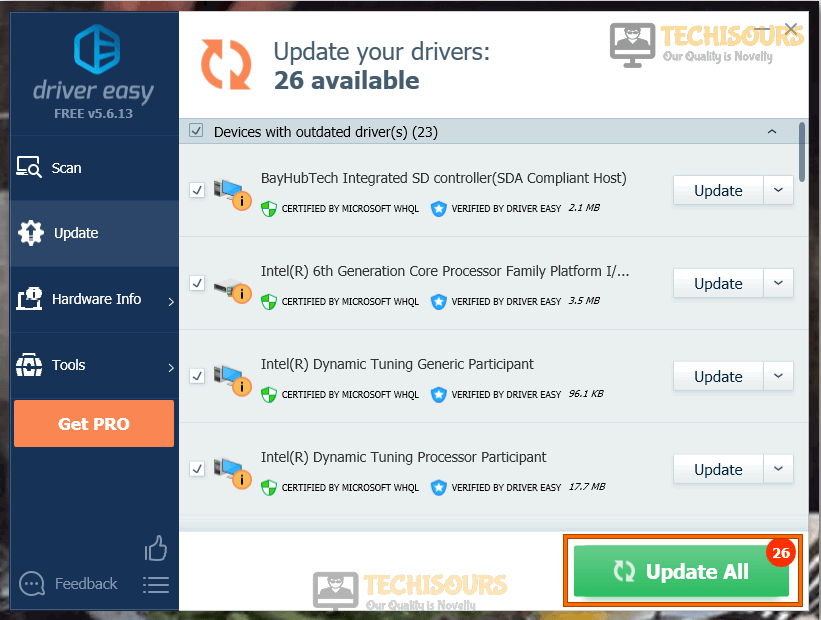
Click on Scan now - Now a list will appear that will be comprising all of the outdated drivers on your computer. It is up to you that you update them selectively or collectively by clicking the “Update All” button at the bottom.
Updating Drivers - When the drivers are updated successfully, restart your computer and hopefully, the error would’ve been resolved.
Solution 3: Run a repair tool
- Open your favorite browser and download the Advanced System Repair tool.
- Now double-click on the downloaded executable file and follow the onscreen instructions to install Advanced System Repair on your system.
- When the tool is installed on your computer, launch it and click on the “Scan” button to scan for corrupted files and click “Fix all now” to fix all the corrupted system files on your computer.
Advanced System Repair Tool - Once you have fixed all the corrupted files, proceed to launch Destiny 2 again and see if the error is rectified.
Workaround:
If you have encountered Error Code Beet while playing a private match with a lobby of 12 players, try to rejoin that private match that is already in progress by directly joining a participating friend on their roster screen.
If you are still unable to fix this issue, you can contact us for any further assistance.


