Easily Fix Final Fantasy XIV Error 90001 [Complete Guide]
The Final Fantasy XIV Error 90001 pops up for some users during the gameplay along with the “Connection with the server was lost” message. This happens usually due to the network packets being lost or blocked either by your ISP or by the game’s servers. In this article, we have written in articulate detail the steps that you can take to completely fix the issue on your computer.

In addition to that, we have also listed the reasons due to which the issue occurs in the first place. Therefore, make sure to go through the reasons first to develop a better understanding of the issue and then start implementing the solutions that we have listed below.
Why is the Final Fantasy XIV Error 90001 Triggered?
After having to go through most of the solutions used to fix this issue, we concluded that the following must be the primary reasons due to which it is triggered.
- Server Outage: It is possible in some cases that the server might be facing an outage due to which the Final Fantasy XIV Error 90001 is being triggered. Therefore, we suggest that you check for any outages as we have mentioned below.
- UPnP: Sometimes, the UPnP feature might not be working on your router because it has been disabled from the admin panel. Therefore, we recommend that you try to enable it by following the steps that we have listed below.
- Outdated Drivers: In certain cases, the GPU Drivers that your PC is using might have been outdated and this can sometimes trigger the Final Fantasy XIV Error 90001. Therefore, as we have mentioned below, try to update your drivers to the latest ones available from your GPU provider.
Now that we have taken you through the reasons, we can finally start implementing the steps used to fix the issue.
Fixing the FFXIV 90001 Error:
Fix 1: Check for Server Outage
It is possible in some cases that the Final Fantasy XIV servers might be temporarily down for maintenance due to which you are getting the Final Fantasy XIV Error 90001 on your computer. Therefore, we suggest that you check to see if the servers are up from here. If there is a worldwide outage, you will have to wait until the servers come back up in order to play the game, otherwise, you can proceed with the solutions below.
Fix 2: Powercycle the Router
- Make sure to shut down your router and unplug the power cord from the wall.
- Press and hold the “Power” button for at least 5 seconds with the power cord unplugged to ensure that the static electricity is removed.

Plugging out the power cable - Now, make sure to plug the power cord back in and turn on the Router.
- Check to see if the issue is now fixed.

Fix 3: Reset Router to Default
In most cases, the router that your ISP provides should have a reset button on its back. Therefore, we suggest that you press and hold this button to reset your router to its factory configurations and then check to see if this fixes the issue at hand.
Fix 4. Enabling UPnP in your Router Configuration
- Press “Window + R”, type in “cmd” and press “Ctrl + Shift + Enter” on your keyboard.
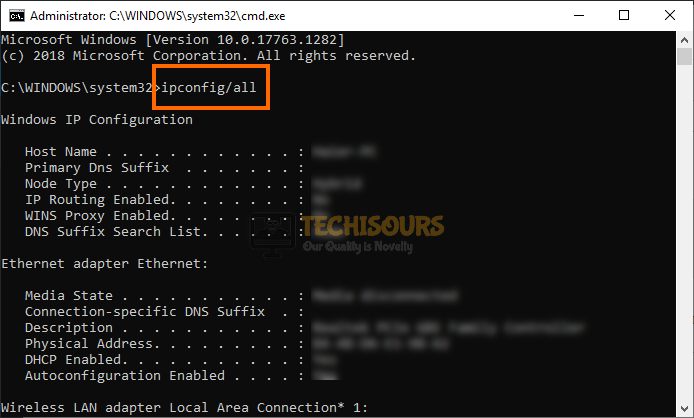
- Type in “ipconfig /all” and press “Enter” to list the ISP details.

ipconfig/all - Look for the “Default Gateway” option and note down the “IP Address” that is listed in front of it.
- Head over to your browser, in the address bar, type in the IP address that you noted before and press “Enter” to navigate to the router login page.
- On this page, make sure to type in the “Username” and the “Password” that can usually be found on the back of your router.
- Once you have logged into the admin panel, you will see multiple options, look for UPnP which can mostly be found in Advanced Settings or in “WAN”.
- Make sure that the “UPnP” option has been enabled on your router and restart it.
- Launch the game and check to see if the Final Fantasy XIV Error 90001 is resolved.
Fix 5: Forward Game Ports
- Press “Window + R”, type in “cmd” and press “Ctrl + Shift + Enter” on your keyboard to launch with admin permissions.

Typing in cmd - Type in “ipconfig /all” and press Enter on your keyboard.
- Look for the IP Address in front of the “Default Gateway” option and make sure to note it down.
- Paste this address in your browser and press “Enter” to load the admin panel login page.
- Now, make sure to type in your Username and Password that is usually found on the back of the router.
- Once you are in, look for “NAT Forwarding” or “Port Forwarding” or “Virtual Servers”.
- In here, according to your console, add the following ports.
For PC:
TCP: 54992-54994,55006-55007,55021-55040

UDP: 5060,5062,6250,3478-3479,12000-64000

For Steam:
TCP: 27015-27030,27036-27037,54992-54994,55006-55007,55021-55040

UDP: 4380,27000-27031,27036

For PS4:
TCP: 1935,3478-3480,8080,55296-55551

UDP: 3074,3478-3479,55296-55551

For PS3:
TCP: 3478-3480,5223,8080,54992-54994,55006-55007,55021-55040,55296-55551

UDP: 3074,3478-3479,3658,55296-55551
- After adding these ports, restart your router and check to see if you have been able to fix the FFXIV 90001 Error.

Fix 6: Reconfiguring Network Controller Settings
- Press “Window + R”, type in “devmgmt.msc” and press Enter on your keyboard to launch into the device management window.

Typing devmgmt.msc in the Run prompt - Double click on the “Network adapters” dropdown and right-click on your network device.
- Select the “Update driver” option and choose the “Search automatically for updated driver software” button.

Search automatically for updated driver - Follow the on-screen instructions to complete the update.
- After that, repeat from steps 1 to 3 but this time, select the “Properties” option instead of “Update driver” and go to the “Power Management” tab.
- Uncheck the option “Allow the computer to turn off this device to save power” and also disable the “Energy Efficient Ethernet” option.
- Save these changes and restart your computer.
- Check to see if you have been able to fix the Final Fantasy XIV Error 90001 on your computer.


Fix 7: Adding Firewall Exception for FFXIV
- Press “Window + R”, type in “control firewall.cpl” and press Enter on your keyboard.
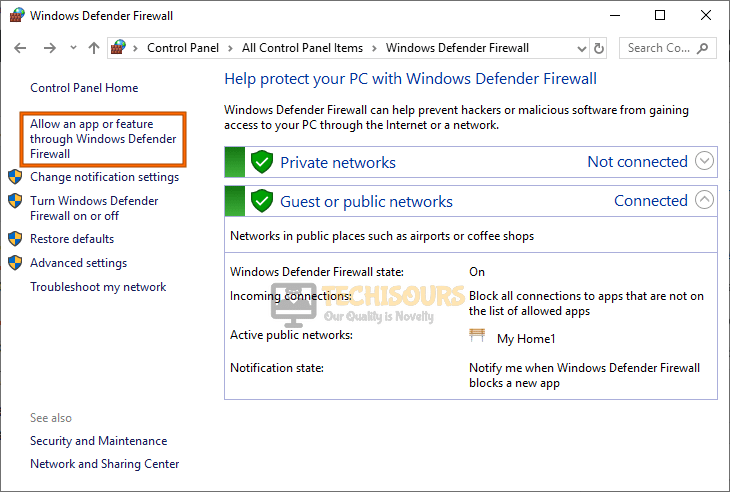
- From the options on the left, select the “Allow an app or feature through Windows Defender Firewall” button and click on the “Change Settings” option.

Allow an app or feature through Windows Defender Firewall - Select the“Allow another app…” option and click on the “Browse”.
- From here, point towards the FFXIV.exe inside the game installation folder.
- Now, in Firewall’s window look for this app that you just added and make sure every checkbox horizontal to it is checked.
- Now, repeat the first step and select the “Advanced Settings” option this time.
- Click on the “Inbound Rules” option from the left and select the “New Rule…” option on the right-side.
- Choose “Port”, click “Next” and select “TCP” and “Specific local ports”.
- Input the ports from the list below.
For Regular Users
TCP: 54992-54994,55006-55007,55021-55040

For Steam Users:
TCP: 27015-27030,27036-27037,54992-54994,55006-55007,55021-55040 UDP: 4380,27000-27031,27036
- Proceed further and follow the on-screen instructions to completely add these ports.
- In the “Profile” step, make sure all the options are checked and click “Next” afterwards.
- Set any name for this Rule and once it is added, restart your PC, and see If the Final Fantasy XIV Error 90001 issue is resolved now.
Fix 8: Using Google DNS Settings
For PC:
- Press “Window + R“, type in “ncpa.cpl” and press Enter on your keyboard.

Typing in “ncpa.cpl” - Right-click your connection and click “Properties”.
- Select “Internet Protocol Version 4 (TCP/IPv4)” and click “Properties”.

Internet Protocol Version 4 (TCP/IPv4) - Click “Use the following DNS server addresses” and input the following IPs.
8.8.8.8

8.8.4.4
- Click “OK” and restart your PC afterwards and check if your issue is resolved now


For Xbox:
- In the Dashboard click “Settings”, go to “Network” and “Advanced Options”.
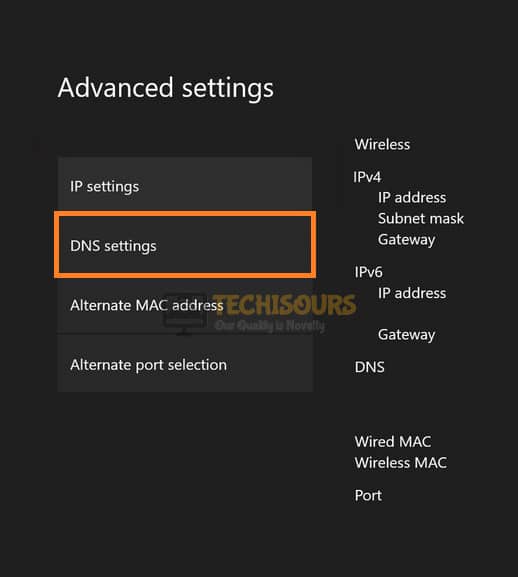
- Select “DNS Settings” and choose “Manual”.

DNS settings - Type in “8.8.8.8” in Primary DNS and “8.8.4.4” in Secondary DNS,
- Save changes and restart your console,
For PS4:
- Head over to the “Settings” from your dashboard and select “Settings”.
- Click “Network” and select “Set up Internet Connection” and press “X”.
- Choose “Wi-Fi” or “LAN” and select “Custom”.
- Change the “IP Address” to “Automatically” and modify “DHCP Host Name” to “Do not Specify”.
- Now, change “DNS Settings” to “Manual” and enter “8.8.8.8” as Primary DNS and “8.8.4.4” as Secondary DNS.
- Restart your Console after saving the changes.
Fix 9: Removing Third-party Security Apps
- Press “Window + S”, type in “Apps & features” and press Enter on your keyboard.

Selecting Apps & Features - Look for the third-party anti-malware, anti-virus, or firewall apps that you have installed.
- Click on it one by one and select “Uninstall”.
- Restart your PC and see if the issue is resolved now.

Fix 10: Reconfiguring Internet Explorer Settings
- Press “Window + S”, type in “Internet Options” and press Enter on your keyboard.

Internet Options - In the “General” tab, click “Delete…” to remove all the browsing history.
- Head to the “Security” tab and adjust the “Security Level” to the lowest.
- In the “Privacy” tab, click “Advanced” and choose “Accept” for both options and click “OK”.
- Go to the “Advanced” tab now and make sure the checkboxes for “Allow software to run or install even if the…”, “TLS 1.0”, “TLS 1.1”, “TLS 1.2” and “Use SSL 3.0” are unchecked.
- Click “Apply” and “OK”.
- Restart your PC and see if the issue is resolved now.

Fix 11: Update GPU Drivers
Sometimes, the GPU drivers that you are using might have been outdated due to which this particular issue might be triggered on your computer. Therefore, we suggest that you try to use the AMD Catalyst or the Nvidia Geforce Experience software to install updates to the GPU Drivers.
Fix 12: Force Game to Ignore UPnP
- Press “Window + E”, Navigate to “My Documents” > “My Games” and open the FF14 folder.
- Right-click “FFXIV.cfg” and select “Open with” and choose “Notepad”.
- Look for “Network Settings” and change the “UPnP” value to 0 from 1.
- Check to see if this fixes the Final Fantasy XIV Error 90001 issue.
Fix 13: Disable Firewall and Antivirus
- Press “Window + R”, type in “control firewall.cpl” and press Enter on your keyboard.

Typing in “Control Firewall.cpl” in the Run prompt - Click on the “Turn Windows Defender Firewall on or off” button from the options on the left.
- Select the “Turn Off Windows Defender Firewall…” option for both Private and Public Network Settings.
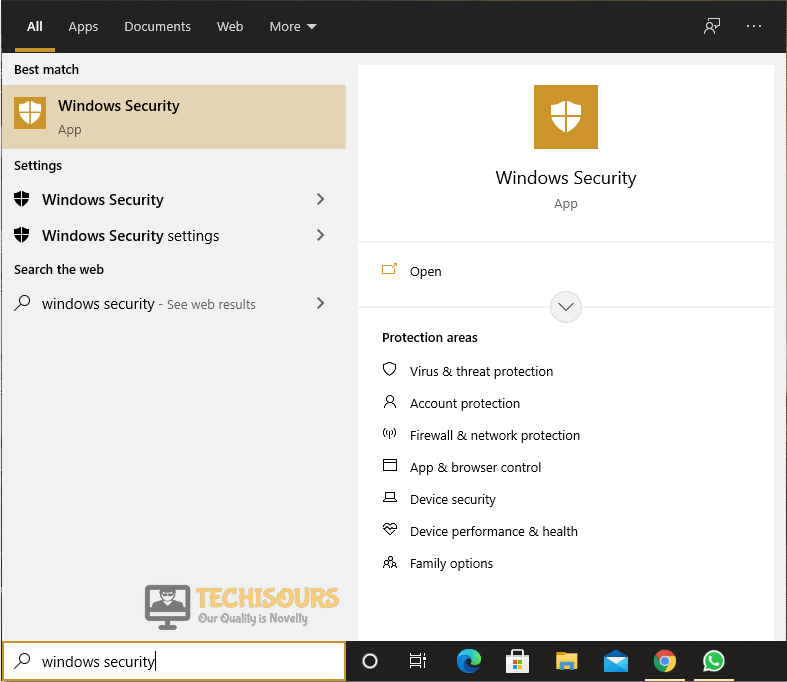
- Click on the “OK” option, press “Window + S” type in “Windows Security” and press Enter on your keyboard.

Type Windows Security - Select the “Virus & threat protection” option, click the “Manage settings” option under the “Virus & threat protection settings” heading.
- Disable all the options here and check to see if this fixes the Final Fantasy XIV Error 90001.

Fix 14: Try using WTF Fast
- Download the WTFast software from here by selecting “Free Trial” and creating an account with them.
- Once downloaded, go ahead, and install it.
- Once it is connected, launch your game and see if the Final Fantasy XIV Error 90001 issue is resolved now.
Fix 15: Reinstalling the game
- Press “Windows + R” to launch into the Run prompt, type in “appwiz.cpl” and press “Enter” to launch into the Applications Wizard.

Typing in “Appwiz.cpl” and pressing “Enter” - From here, make sure to right-click on the game icon and select the “Uninstall” button to remove it from your computer.
- After that, download the game again and install it on your computer from the start.
- Now, check to see if the issue is fixed.

If the issue is still not fixed, contact us for further troubleshooting of the matter.