The Error Code is 0x80070422? Here is How to Fix it
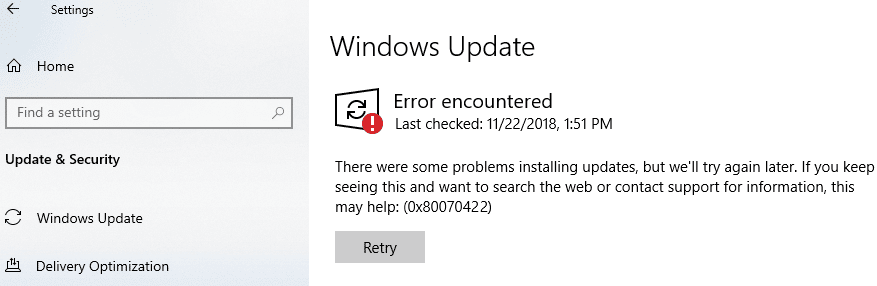
The Windows Update Error 0x80070422 can at times happen on your PC while attempting to update your Windows after the latest installation of the Operating System. We were getting this equivalent error on a portion of our PCs and in the wake of executing a few arrangements, we had the option to fix it for our own PC and that of our users.
Keeping in view the causes due to which the issue was being caused, we have listed the most effective techniques that you can apply on your PC to fix the 0x80070422 error completely.
Before You Start:
We would initially propose you eliminate all external gadgets associated with the PC aside from fundamental gadgets like the LAN Adapter or mouse and afterwards boot the PC. Furthermore, check whether your “Windows License Manager Service” is set to “Automatic” in your services because it worked for some users.
How to get rid of Windows 10 Error 0x80070422 Completely:
Solution 1: Restart Windows Installer Service
Follow the steps indexed below to restart the service:
- Press “Window + R” keys simultaneously, type in “services.msc” in the pop-up Run dialogue box, and then press “Enter” on your keyboard.

Typing in “services.msc” - In the Services window look for the “Windows installer” service and double-click to select it.
- Here change the startup type to “Automatic” and click on “Start”.

Start the Windows Installer Service - Click “Apply” and hit the “OK” button, “Restart” your PC and see if the error 0x80070422 is resolved.


Solution 2: Restart the Windows Update Service
- Press “Window + R” keys simultaneously, type in “services.msc” in the pop-up Run dialogue box, and then press “Enter” on your keyboard.
Typing in “services.msc” - In the Services window look for the “Windows Update” service and double-click to select it.
- Here change the startup type to “Automatic” and click on “Start”.

Restart Windows Update Service Note: If you’re prompted for an administrator password or confirmation, type the password or provide confirmation.

Solution 3: Run Windows Update Troubleshooter
The Windows 10 comes equipped with a default troubleshooter to determine any potential conflicts within its system. We can run that in the hopes of fixing the issue. For that:
- Firstly, press “Windows + I” to launch into the settings, click on the “Update & Security” option and select the “Troubleshoot” button from the left side.
- Now, scroll down until you find the “Additional Troubleshooters” option, click on it and select the “Windows Update” button.

Accessing Windows Update Troubleshooter - Click on the “Run the Troubleshooter” option and wait for the troubleshooting process to be completed.
- Make sure to follow through with the on-screen instructions to complete the troubleshooting process and check to see if your issue is now fixed.

Solution 4: Disable IPv6
- Press “Windows + R” to launch the Run prompt, type in “ncpa.cpl” and press “Enter” to launch the network control panel.

Typing ncpa.cpl - From there, Right-click on your Wifi connection and select “Properties“.
- After that, make sure to uncheck the “Internet Protocol Version 6 (TCP/IPV6)” option.
- Click on “OK” to save your changes and exit out of the window.
- Restart your computer and check to see if the error 0x80070422 has been fixed.

Solution 5: Reconfigure Windows Registry
- Press “Window + R”, type in “Regedit” and press Enter on your keyboard to launch the registry editor.
- From there, navigate through the following path:
HKEY_LOCAL_MACHINE\Software\Policies\Microsoft\Windows\WindowsUpdate
- Select “AU” that will be inside the “WindowsUpdate” folder and look for “UseWUServer” on the left side
- Double click on the “UseWuServer” entry and set its value to “0”.
- After doing that, navigate to the following path:
Computer\HKEY_LOCAL_MACHINE\SOFTWARE\Microsoft\Windows\CurrentVersion\WindowsUpdate\Auto Update
- Look for “EnableFeaturedSoftware”, if it exists then ensure that its value is set to 1, if not then double click it and set its value to “1” and “Base” to “Hexadecimal”.
- If “EnableFeaturedSoftware” does not exist, then select “Edit” and click “New”.
- Choose “DWORD (32-bit) Value” and set its name as “EnableFeaturedSoftware”.
- Double click it and change its value to “1” and its “Base” to “Hexadecimal”.
- After that, head to the following location:
HKEY_LOCAL_MACHINE\SOFTWARE\Microsoft\WindowsUpdate\UX
- Double-click “IsConvergedUpdateStackEnabled” and set its value to “0”
- After that, head to the following location inside the registry editor:
HKEY_LOCAL_MACHINE\SOFTWARE\Microsoft\WindowsUpdate\UX\Settings
- Double-click “UxOption” and set its value to “0”.
- In the end, navigate through to the following location on your computer:
HKEY_LOCAL_MACHINE\SOFTWARE\Policies\Microsoft\SystemCertificates
- Look for “CopyFileBufferedSynchronousIo”, if it exists then ensure that its value is set to 1, if not then double click it and set its value to “1” and “Base” to “Hexadecimal”.
- If “CopyFileBufferedSynchronousIo” does not exist, then select “Edit” and click “New”.
- Choose “DWORD (32-bit) Value” and set its name as “CopyFileBufferedSynchronousIo”.
- Double click it and change its value to “1” and its “Base” to “Hexadecimal”.
- Restart your PC and see if the error 0x80070422 has been fixed.
Solution 6: Restart Network List Service
- First of all, press “Window + R”, type in “services.msc” and press Enter on your keyboard.
Typing in “services.msc” - Look for “Background Intelligent Transfer Service”, “App Readiness” and “Network List Service”, right-click it, and select “Stop”.
- Right-click them again and select “Start” in order to get rid of the error.
Solution 7: Create a .BAT File
This issue can likewise be settled by making and utilizing a .BAT record intended to ensure that the Windows Update service and any remaining services that should be running effectively to download and introduce applications from the Windows Store. Hence, follow the steps indexed below to create a .bat file:
- Press the “Windows + R” keys simultaneously to open the Run prompt.
- Type the “Notepad” in the Run dialogue box, press the “Enter” button and type the following commands inside the fresh Notepad file one by one:
sc config wuauserv start= auto

sc config bits start= auto

sc config DcomLaunch start= auto

net stop wuauserv

net start wuauserv

net stop bits

net start bits

net start DcomLaunch
- Press the “Ctrl + S” keys simultaneously to save the file and check the “All Files” button. Save the file as “Repair.bat”, select the location where you want to save the file, and hit the Save button.
- Now, navigate to the location where you’ve saved the Repair.bat file, right-click on it and choose the “Run as Administrator” option and after running that file in Admin mode hopefully, the 0x80070422 error would be rectified.
If you are still unable to fix the issue, Contact Us for further troubleshooting.