What is WaasMedic Agent and How to Fix High CPU Usage by it
Some users have been encountering the WaasMedic.exe Agent in their task manager and have complained about high CPU or High Disk usage issues. In this article, we have listed the functions that this agent performs on your computer and have also listed the solutions that you can adopt to counter the high resource usage by it.

What is WaasMedic.exe Agent on your Computer?
WaasMedic is also known as Windows Update Medic Service and as the name suggests, it is related to the Windows Update service. This service keeps on running in the background on your computer and monitors the update downloading and installation process. If the Update gets corrupted or misses some files, it repairs the downloaded package so that the update can be installed normally.
If you are getting the WaasMedic High CPU usage on your computer, it means that the update repairing process might have gotten glitched or it might be encountering some hurdles due to which the issue is being triggered. You can follow some of the solutions that we have listed below to get around this issue.
Method 1: Uninstall Third-Party Antivirus
In certain cases, the Antivirus installed on the computer might be preventing the app from being able to download and install the repairs for the update package. Therefore, you can disable the Antivirus or uninstall it completely following the solution below.
- Press “Windows + R” keys on your keyboard to launch into the Run prompt, type in “Appwiz.cpl” and press “Enter” to launch into the application management wizard.

Typing in “Appwiz.cpl” in the Run box. - From here, scroll down and right-click on the “Avast Antivirus” option or the name of your Antivirus if you are using a different one.
- Select the “Uninstall” button and follow through with the on-screen prompts to completely remove the Antivirus from your computer.
- After uninstalling the Antivirus, check to see if the Waasmedic Agent Exe 100% disk usage issue is fixed.

Method 2: Initiate Disk-Cleanup on your Computer
- Press “Windows + E” to launch into File Explorer.
- From the left, click on the “This PC” option and right-click on the “Local Disk C” or the partition on which Windows has been installed.
- Select the “Properties” option and select the “General” tab from the new window.
- Click on the “Disk Cleanup” button and make sure to select the “Cleanup System Files” option.

Clicking on “Cleanup System Files” option - After the window loads the system files that can be cleaned up, from the next window, make sure to select all the options that contain some data and click on “OK” to start the cleaning process.
- After successfully running the Disk Cleanup, check to see if the WaasMedic.exe High CPU usage is fixed.

Method 3: Pausing Windows Update
- Press the “Windows + I” keys on your keyboard to launch into the settings and click on the “Update & Security” option.
- In here, make sure to select the “Windows Update” from the left side and select the “Advanced Options” button from the right.

Advanced Options - Select the “Select Date” dropdown below the “Pause Updates” heading and scroll down and select the last option from the list to delay the update by furthest.
- Check to see if doing so fixes the WaasMedic agent.

Method 4: Turning OFF DEP for WaasMedic Agent
- Press “Windows + R” to launch into the Run prompt, type in “sysdm.cpl” and press “Enter” to launch into the window.

Typing “sysdm.cpl” - From here, click on the “Advanced” tab and select the “Settings” option under the “Performance” heading.
- In the settings, click on the “Data Execution Prevention” tab and make sure that the “Turn on DEP for all Programs and Services except those I selected” is checked.

Selecting the Turn ON DEP for all option - After that, click on the “Add” button and from the list, and in the window that opens up, select the “WaasMedicAgent.exe” option.
- After adding the WaasMedic Agent into this list, exit out of the window and check to see if the issue has been fixed.


Method 5: Remove Extra USB Devices
It is possible that you might have connected a removable device to your computer that is preventing the agent from running properly or is glitching the WaasMedic service. Therefore, a good suggestion would be to completely remove all unnecessary USB devices from the computer such as Steering Wheels, Extra USBs and adapters.
Method 6: Kill High Resource Tasks
It is possible that the Sysmain, SuperFetch, CompatTelRunner.exe and System.exe can tasks might be causing huge resource usage on your computer due to which this particular issue is being triggered. Therefore, we suggest that you try to end these tasks if they are using high resources or any other task as well that is causing resource usage spikes.
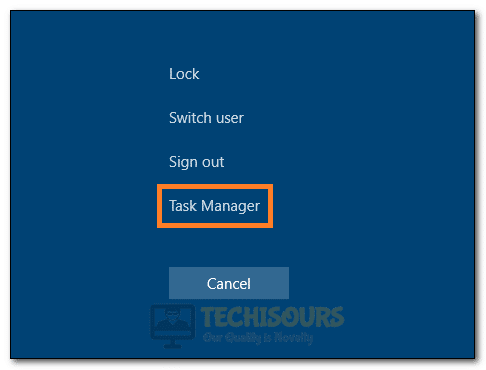
- Press “CTRL + ALT + Del” and select the “Task Manager” option from the list.

Launching Task Manager - Now, click on the “Processes” tab and identify the processes that are causing huge resource usage.
- Click on the task itself and then select the “End Task” button from the lower right side of the window.
- Check to see if doing so fixes the WaasMedic.exe high CPU usage issue.
Method 7: Turn off Auto Optimization of Drives
- Press “Windows + S” to launch the Windows Search, type in “Optimize” and select the the first option that lists “Defragment and Optimize Drives” heading.

Selecting Defragment and Optimize Drives Option - Click on the “Change Settings” option and from there, uncheck the “Run on a Schedule” option.
- This will turn off the Automatic Drive optimization, check to see if the issue has been fixed.

Method 8: End Java Update Checker
- Press “CTRL + ALT + Del” and select the “Task Manager” option from the list.
Launching Task Manager - Now, click on the “Processes” tab and identify the Java Update Checker process.
- Click on the task itself and then select the “End Task” button from the lower right side of the window.
- Check to see if doing so fixes the WaasMedic.exe high CPU usage issue.
Method 9: End Microsoft Store Update
It is possible that in the background, a Microsoft Store update is being processed due to which this issue is being triggered. Therefore, we suggest that you launch into the Microsoft Store, click on the “Three Dots” at the top right side and select the “Downloads and Update” option. From here, click on cancel button to cancel the update being processed and check if the issue is fixed.
Method 10: Removing WaaSMedic DLL Files
- Navigate through the Following options on your computer.
C > WINDOWS > System32
- In the System32 Folder, click on the “Search Bar” at the top right side and type in “Waas”.
- After that, make sure to delete all the files that have “.dll” in end of their name as their extension type. Such as, WaaSAssessment.dll, WaasMedicps.dll.
- After deleting these files, check to see if the High CPU usage by the WaasMedicAgent.exe has been fixed.
Method 11: Reconfigure WaaSMedic Agent from Registry
- Press “Windows + R” to launch Run prompt, type in “regedit” and press “Enter” to launch into it.
Typing “regedit” - On your computer, navigate through the following address.
Computer\HKEY_LOCAL_MACHINE\SYSTEM\CurrentControlSet\Services\WaaSMedicSvc
- In here, locate the “Start” value and double click on it. After that, set the “Data Value” to “4” and click on “OK”.
- Now, from here, make sure that you end the WaasMedic process from the task manager and repeat the steps listed in Method 9 above.

Method 12: Editing DataCollection in Windows Registry
- Press “Windows + R” keys on your computer to launch into the Run prompt, type in “Regedit” and press “enter” to launch into the Registry Editor.
Typing “regedit” - From here, navigate to the following address.
Computer\HKEY_LOCAL_MACHINE\SOFTWARE\Policies\Microsoft\Windows\DataCollection
- In this address, right-click on the right side at an empty space and select the “New > D-WORD (32-Bit) Value” option.
- Name this new value as “AllowTelemetry” and double-click on it.
- Change its “Data Value” to “0” and click on “OK” to save your changes.
- Exit out of the window and check to see if doing so has fixed the WaasMedic High CPU Usage issue.
Method 13: Check for Updates Manually
- Press “Windows + I” to launch into the settings, click on the “Update & Security” option and select the “Windows Update” button from the left side.
- From there, click on the “Check for Updates” button and let Windows complete the checking process for any missing updates.
Check For Updates - From here, make sure to select the “Download and Install” button if there are any updates available.
- Check to see if doing so has fixed the issue.

Method 14: Uninstall Office Access 2010
For some users, the error started occurring after they installed the Microsoft Office Access 2010 on their computer and in this step, we will be removing it from our computer to fix the issue. For that:
- Press “Windows + R” to launch into the Run prompt, type in “appwiz.cpl” and press “enter” to launch into the Application Management Wizard.
Typing in “Appwiz.cpl” in the Run box. - From there, right-click on the “Microsoft Office Access 2010” option and select the “Uninstall” button.
- From here, make sure to follow the on-screen instructions to completely remove the software from your computer.
- Check to see if doing so has fixed the issue.
Method 15: Perform System Restore
- Press “Windows + R” to launch into the Run prompt, type in “rstrui.exe” and press “Enter” to launch into the Windows Restore panel.
Typing in “rstrui” - From here, select “Choose a Different Restore Point” and click on “Next”.
- From the list of different restore points, select one that lies before the date on which this issue first started.
- Click on next to select the point and follow through with the on-screen instructions to restore your computer to the earlier date.
- After completing this step, make sure to exit out of the Window and check to see if the WaasMedic.exe High CPU usage is fixed.

Method 16: Disable Windows Update
While we don’t recommend that you go through with this step, you can use an Update Blocker program to completely block the updates from Microsoft in an attempt to get rid of this service once and for all. This can however leave you vulnerable to different viruses that are targeted at your outdated computer.
If you are still unable to fix this issue, contact us for further troubleshooting.