Easily Fix System Thread Exception not Handled [Complete Guide]
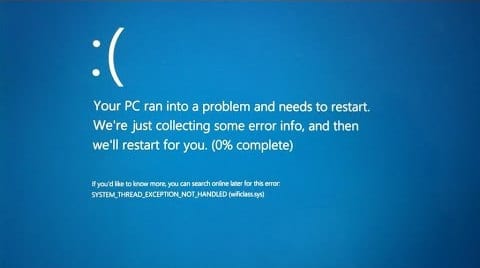
If you have been getting the System Thread Exception not Handled message or the “System_Thread_Exception_Not_Handled nfts.sys” message on your screen, it probably means that there are some elements on your computer that are preventing it from being able to load all the components of Windows properly.
Make sure to properly read through the what causes portion to develop a better understanding of the issue and also start implementing the solutions one by one in the order in which they have been listed and stop only when the error is fixed.
What Causes the System Thread Exception not Handled Error on Windows 10?
After going through the reasons behind the Stop Code System Thread Exception not Handled, we came to the conclusion that the following must be the most vital reasons due to which it is triggered.
- Display Drivers: If the Display Drivers that you have installed aren’t installed according to the proper method or if the installation is interrupted, this error can sometimes show up. The driver might also be outdated or it might not be properly configured with some other hardware on your computer so changing it according to the solution below might be a good idea.
- Sound Card Drivers: Sometimes the System Thread Exception not Handled BSOD can also occur due to faulty sound card drivers being installed on your computer. Not just that, sound card drivers are very important for many functions of the computer and if improperly configured, they can end up causing issues with a lot of different parts.
- Outdated Windows: If Windows has been outdated, you might run into the error message, therefore, we suggest that you install all the latest updates and check to see if doing so gets rid of it. Mostly, this occurs due to software-hardware incompatibilities which can sometimes be addressed through Windows updates.
- Damaged System Files: Another huge reason behind the System Thread Exception not Handled error is damaged system files. Therefore, you have to ensure that you haven’t damaged any system files by running some disk checks and system file scans as mentioned in the solutions below.
- Outdated BIOS: If the Motherboard’s Bios hasn’t been updated to the latest available version, it is possible that it contains some incompatibilities with certain hardware installed on it. Therefore, to ensure the best compatibility, we recommend that you update its bios to the latest available version.
- RAM Issue: Sometimes, the RAM installed on the computer might also cause the System Thread Exception not Handled error and in order to address it, you can try removing and reseating it in different order which can sometimes get rid of the error.
Now that you have been taken through almost all the important reasons, you can finally start implementing the solutions.
Fix System Thread Exception not Handled Error in Windows 10:
Solution 1: Reinstall Display Drivers
If you’re able to boot into Windows then skip Step 1 and 2. If not then you are required to follow this step.
- Open the “Start Menu” and click on the power button. Hold “Shift” and click on “Restart”.
- Click on “Troubleshoot” and select “Advanced” from the options. Choose “Startup Settings > Restart” and select “Safe Mode With Networking”.

Selecting “Safe Mode with Networking”

If you’re unable to launch into “Safe Mode”, try using the “Media Creation Tool”. To do this, follow these steps:
- Start with downloading the Media Creation Tool. Once downloaded, run the “Setup” named “MediaCreationTool.exe.” Click on “Yes” if you are asked for any permissions.
- In the “Windows 10 Setup” dialogue box, select the “Upgrade This PC Now” option and click on “Next”.

Upgrade this PC now - Then accept the license terms from the following window.
- In the “Ready To Install” window, select the “Install Windows and Keep Personal Files and Apps” options. Proceed by clicking on “Next” and then “Install”.
- Wait for the process to finish and proceed like normal.
- Once in the “Boot Menu” and click on “Troubleshoot” and select “Advanced” from options.
- Click on “Command Prompt” and type “BCDEDIT /SET {DEFAULT} BOOTMENUPOLICY LEGACY” and hit the “Enter” key.
- Type “Exit” and press “Enter” again.
- Restart your computer and repeatedly press the “F8” key until the “Advanced Boot Options” menu appears.
- Then click on “Safe Mode With Networking” and Log in.

Now you’re booted into the Safe Mode. Next move onto uninstalling. For this follow the steps below:
- Press the “Window + R” keys simultaneously on your keyboard to open up the “Run” prompt. In the Run dialogue box, type in or paste “devmgmt.msc” to open up the “Device Manager” window.

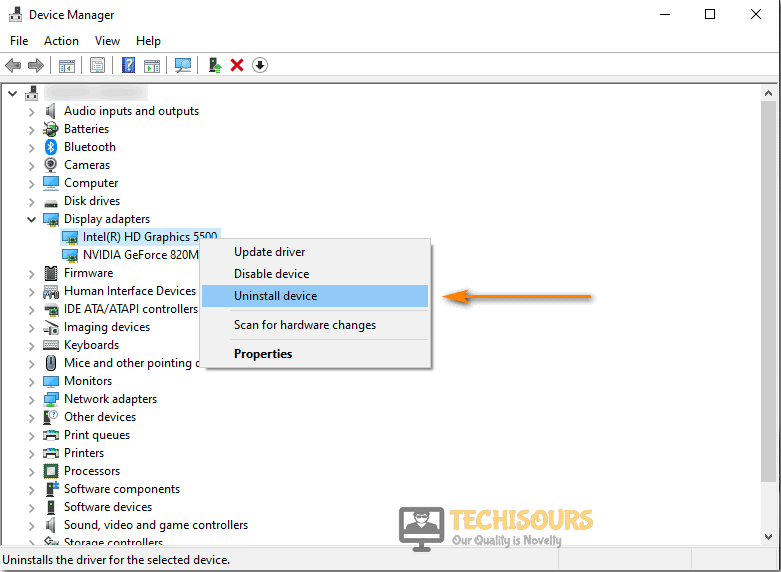
Typing devmgmt.msc - Here locate the “Display Adapters” option and double-click on it to extend it further. This will show you the Graphics Card installed on your PC.
- Once you know your graphics card, note it down. Right-click on it and select “Uninstall” from the context menu.

Uninstall Graphics Driver - Next proceed to “Restart” your system. Your display drivers would have been automatically installed but if not follow the next steps to install.

To manually install fresh GPU Drivers follow this procedure:
- Locate the “Display Adapters” option and double-click on it to extend it further. This will show you the Graphics Card installed on your PC.

Locating Display Adapters - Once you know your graphics card, open your browser and type in “[Your Graphics Card Name] Drivers.” Fill in the bracket with the name of your graphics card. If you are directed to our Graphics Card Manufacturer site, navigate to the “Drivers & Utility or Drivers & Support.” Browse for your Graphics Card and download the latest driver present.
- Once downloaded, get back to the “Device Manager” window, right-click on your “Graphics Card”, and proceed by clicking on “Update Drivers” in the menu. Next proceed by clicking on “Search Automatically For Drivers”. Wait for a while until the computer finds and installs the updated drivers.

Solution 2: Uninstall Sound Card Drivers
- Press the “Window + R” keys together on your keyboard to open up the “Run” dialog box. In the Run prompt type in or paste “devmgmt.msc” to open up the “Device Manager” window.
Typing devmgmt.msc in the Run prompt - Then locate the “Sound, Video, and Game Controllers“ option and double-click on it to extend it further. Right-click on any “USB Audio Devices” and select “Uninstall” from the context menu.

Sound, video and game controllers - Then check the “Delete the Driver Software For This Device” option and click on “OK”.
- Next “Restart” your system. Your sound card drivers would have been automatically installed but if not follow the next step to install.
- Open the “Device Manager” again. Click on “Action” from the task ribbon on the top and select “Scan For Hardware Changes” from the dropdown menu.

Solution 3: Rename the Problematic Driver
If the stop code system thread exception not handled error is followed by a file name, we can rename this driver so that Windows is unable to locate this driver and show us the BSOD.
- Search for the “Command Prompt” window in the search bar and click to open it up from the search results.
- Type in “c:” and “dir” followed by pressing “Enter” after each command.
- If a folder named “Windows” appears on the screen then you are at the right place. If not, type “d:” and hit “Enter” again and you’d hopefully see the folder.
- Now type “cd windows\system32\drivers” and then “ren drivername.sys driver name.old”. And don’t forget to press “Enter” after each command.
Note: Replace [drivername] with the particular error that was listed on the BSOD. - Next “Restart” your computer, and press the “Window + R” keys on your keyboard to open up the “Run” dialog box. In the Run prompt, type in or paste “devmgmt.msc” to open up the “Device Manager” window.
Typing devmgmt.msc - The driver you uninstalled will have an “Exclamation Mark” beside it. Right-click on the driver and click on “Update Driver Software” from the context menu. Next click on “Search Automatically For Updated Driver Software” in the following window.
Solution 4: Reset Your PC
- Open the “Start Menu” on the bottom left corner of your screen or simply press the “Window” button on your keyboard. Locate and open “Settings”.
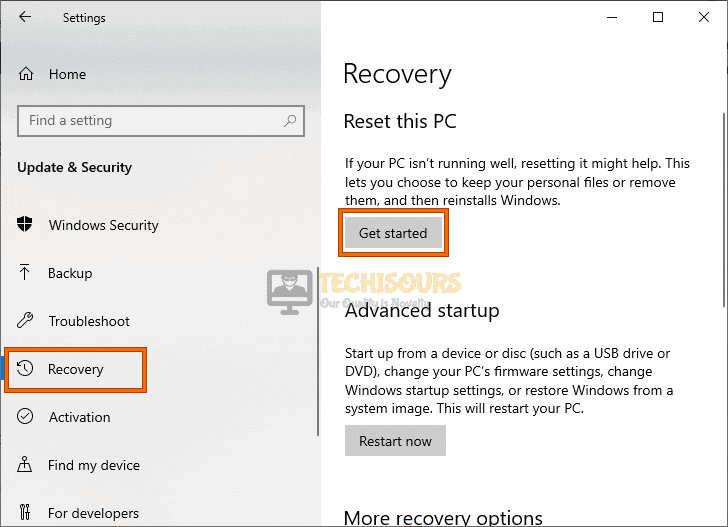
- Once in “Settings”, locate the “Update and Security” option. Navigate to the “Recovery” menu from the left menu pane.

Select Recovery Option - Click on the “Get Started” option under the “Reset this PC” section. Click on “Keep My Files” or “Remove Everything”. Do remember that your apps would be uninstalled and all your settings would be changed to Defaults.

Reset this PC - Then select “Just Remove My Files” or “Remove Files and Clean the Drive” depending on what you wish and then click on “Reset” in the next window.
- Allow Windows to restart and take its time and then click on “Continue” when the process has elapsed and most probably system thread exception not handled ntfs.sys issue would’ve been rectified.

Solution 5: Update Your Windows
- Go to the “Start Menu” located on the bottom left of the screen and from here proceed to “Settings”.
- Navigate to “Updates and Security” and you would be directed to the “Windows Update” window.
- Click on the “Check For Updates” option available at the top of the page. Install any updates if they are present and proceed to restart your computer.
Check for updates

Solution 6: Roll Back Your Drivers
- Press the “Window + S” keys together on your keyboard to open up the “Search” prompt. Here type or paste “Device Manager” in the search bar to open up the “Device Manager” window.

Typing Device Manager - Here locate the “Display Driver” menu and double click on it to extend it further. Right click on the extended option which would technically be your “Graphics Card” and then proceed to “Properties”.
- Switch to the “Driver” tab on the “Properties” window. Click on “Roll-Back Drivers” and press “OK”.

Solution 7: Run An SFC (System File Checker) Scan
- Open the “Start Menu” or press the “Windows button” on your keyboard to open up the Start Menu.
- In the search bar located at the bottom, type in or paste “Command Prompt (Admin)” and next click on the “Command Prompt” application. On a side note, click on “Yes” if the program asks you for permission.
- In the Command Prompt type or paste the following command:
Note: Don’t forget to give a single space between sfc and /scannow and remove the quotation marks.sfc /scannow
- Then press “Enter” to run this command on your system.
Solution 8: Run DISM Command
- Press the “Window + S” keys together on your keyboard to open up the search prompt. Here paste or type “cmd” in the address bar and press “Enter” to open up the “Command Prompt” window. Click on “YES” if you come across any permission prompts.
- In the Command Prompt window type in or paste the following commands. Press “Enter” after each command to execute them properly.
DISM.exe/Online/Cleanup-image/Scanhealth

DISM.exe /Online /Cleanup-image /Restorehealth

DISM /Online /Cleanup-Image /ScanHealth
Solution 9: Run CHKDSK Command to Check Disk Error
- Right-click on the “Windows icon” and select “PowerShell (Admin)” from the drop-down menu.
- Paste the command “chkdsk /f /r” ” in the Window and hit the “Enter” key.

Running chkdsk Command - Next proceed to “Restart” your computer and hopefully system thread exception not handled blue screen issue would be resolved.

Solution 10: Disable Hardware Acceleration
- Open your browser and click on the “Customize and Control Google Chrome” depicted as the “3 Vertical Dots” on the left of your address bar.
- Navigate to “Settings” from the drop-down menu. Scroll down and click on the “Advanced” option.
- Then select “System” from the menu pane on the left and look for the “Use Hardware Acceleration When Available” option.
- Turn it “OFF” and then relaunch your browser.

Disable hardware acceleration

Solution 11: Run Windows Memory Diagnostic
- Press the “Window + R” keys on your keyboard to open up the “Run” dialog box. In the Run prompt, type in or paste “mdsched.exe.”

Typing in “mdsched.exe” - Select “Restart Now and Check For Problems (Recommended)” from the “Windows Memory Diagnostic” dialogue box.
- Wait for the scan to get finish and afterward “Restart” your computer.

Solution 12: Update the BIOS
As a disclaimer, this method should only be followed by users already familiar. You are not recommended to follow if you are not a computer geek.
First, you need to know the manufacturer and model of your Motherboard. To do this:
- Open the “Start Menu” or press the “Windows Button” on your keyboard to open the “Start Menu”.
- In the search bar located at the bottom, type in or paste “System Information”.

Check System Information - In the “System Information” dialogue box, Locate for “Motherboard Manufacturer or BaseBoard Manufacturer” in the “System Summary Tab”.
- Note down the “Baseboard Manufacturer and Baseboard Product”.
- Combine these two entries and search them in your Browser in the “Address Bar.” Proceed to the first link in the search results.
- Once you are on the “Manufacturers’ website,” navigate to the “Drivers and Utility” tab and “Download” the latest drivers present in the list. Make sure to download the files in a “USB” thumb drive.
- Next “Restart” your computer and keep the USB drive plugged in. Keep smashing the “Delete” key once you see the splash screen on your monitor. You would be directed in the “BIOS” of your motherboard. Head on to the “Tools Tab”.
- Under the “UEFI Update Utility,” select “Instant Flash”. Your system will search for the BIOS file in the USB drive.
- Click on “Update” once it discovers the BIOS file. Click on “YES” to confirm your decision.
- The system will take a few minutes to update the BIOS. “DON’T TURN OFF YOUR SYSTEM” under any condition, even if it appears to be stuck. Doing so can result in a dead motherboard.
- Once done, press the “Enter” key to reboot. Your system would be up and running on the latest version of BIOS.

Solution 13: Clean Boot Your System
Please proceed with these steps with caution. We do not recommend this step for a complete beginner as any mistake can harm your computer.
- Press the “Window + S” on your keyboard and search for “System Configuration” by typing or copying “msconfig” in the search bar. Make sure to remove these quotations.

Typing in “Msconfig” - Once the System Configuration dialogue box appears up, proceed to the “Services” tab.
- Check the box in front of “Hide All Microsoft Services” located on the bottom left side of the window. Then click on the “Disable All” button located on the bottom right opposite.

Hide all Microsoft services - Now move to the “Startup” tab and click on “Open Task Manager”. Wait for the list to load entirely and “Disable” each program one by one by doing “Right click > Disable”.
- Close the Task Manager and return to the “System Configuration” window. Click on “OK” to save these settings and “Restart” your PC in order to let the changes have their effect.


Solution 14: Inspect the Minidump Files
- Press the “Window + R” keys together on your keyboard to open up the “Run” prompt. In the Run dialogue box, type in or paste “sysdm.cpl” to open up the “System Properties” window.
Typing “sysdm.cpl” - Here move over to the “Advanced” tab and click on “Settings” under the “Startup and Recovery” section.
- In the “System Failure” section, uncheck the boxes that you wish for Windows to carry out. We recommend going with this solution only if you are well versed and have experience in doing this. Doing anything incorrectly can lead to system instability.
- To turn off the “Write An Event To the System Log” option, press the “Window + S” on your keyboard. Then paste or type “cmd” in the address bar and press “Enter” to open up the “Command Prompt Window”. Click on “YES” if you come across any permission prompts.
- Type in or paste “wmic recoveros set WriteToSystemLog = False” in the “Command Prompt” and hit “Enter” to turn “Write An Event To the System Log” off from the registry.
- To turn off the “Send An Administrative Alert” option, open “CMD” again.
- Type or paste “wmic recoveros set SendAdminAlert = False” in the “Command Prompt” and hit “Enter” to turn “Send An Administrative Alert” off from the registry.
- To turn off the “The Automatically Restart” option, open “CMD” again.
- Type or paste “wmic recoveros set AutoReboot = False” in the “Command Prompt” and hit “Enter” to turn “The Automatically Restart” off from the registry.
- Click on the drop-down menu under “Write Debugging Information” and set it as “Small Memory Dump”.
- Open “CMD” again. Here type or paste “wmic recoveros set DebugInfoType = 3” in the “Command Prompt” and hit “Enter” to specify the setting by modifying the registry.
- Open “CMD” again. Type or paste “wmic recoveros set MiniDumpDirectory = D:\Minidump” in the “Command Prompt” and hit “Enter” to set the “D:\Minidump” folder as default to your dump files.
- Download “WDK” and follow the onscreen instructions to install Windows Driver Kit.
- Open “Command Prompt” window again. Type or paste “cd c:\program files\debugging tools for windows” in the “Command Prompt” and hit “Enter” to change the debugging tools for the windows folder.
- Load the dump file into a debugger by typing the following into the command prompt:
windbg -y SymbolPath -i ImagePath -z DumpFilePath
OR
kd -y SymbolPath -i ImagePath -z DumpFilePath
- You can use the following command to locate the file:
windbg -y srv*c:\symbols*http://msdl.microsoft.com/download/symbols -i c:\windows\i386 -z c:\windows\minidump\minidump.dmp
- Now you can easily inspect these dump files and look for errors.

Solution 15: Change RAM Slots
If you’re running dual-channel memory or RAM on all 2/4/8 channels, then you are advised to change the slots of each of your RAM. If you are running dual or quad-channel memory, you are advised to only swap out the two/four slots and not move to the other two/four vacant RAM slots on your Motherboard.
Solution 16: Turn OFF Anti-Aliasing In Nvidia Control Panel
- Launch the “Nvidia Control Panel” from your desktop or search for it in the “Start Menu”.
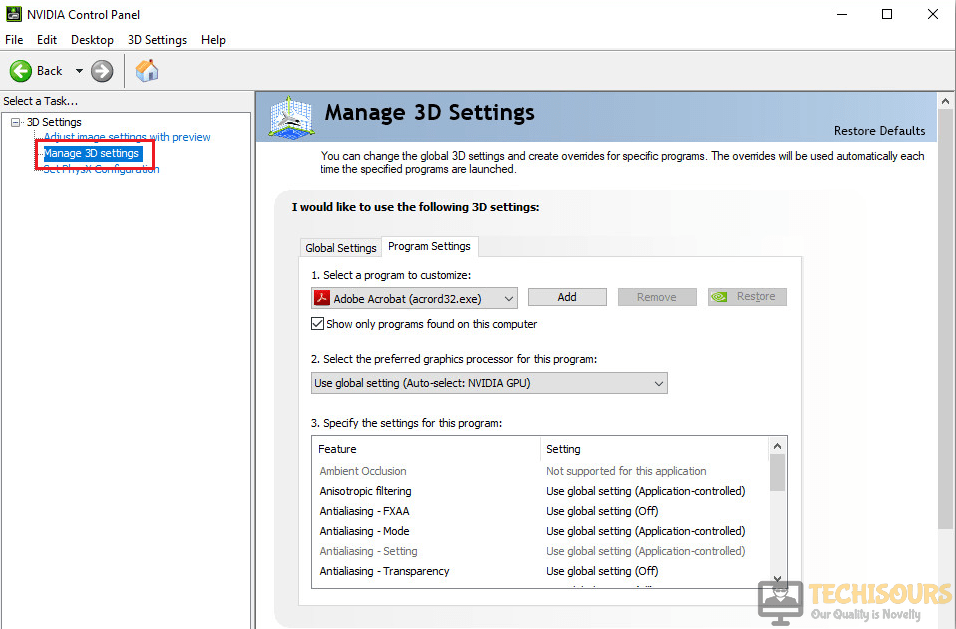
- Under the “3D Settings” section, click on “Manage 3D Settings”.

Manage 3D Settings - Under the “Global Settings” tab, locate and click on “Antialiasing – Gamma correction”.
- In the dropdown menu, select “ON” and then “Apply”.
- You can also download and use Nvidia Inspector if NCVP is actually what is triggering the BSOD.
Hopefully, the list of methods indexed above will hep you remove the error easily but if you still do have any further questions or queries feel free to Contact Us here.