How To Fix Shadowplay not Working Issue on GeForce Experience
Shadowplay is an Nvidia feature that people can use to record their gameplay using Geforce GPUs. It is primarily a very useful software that can be utilized very easily. However, recently, we have noticed some complaints from users that are complaining about Shadowplay not working. After coming to know of this, we decided to investigate the matter and drafted the following solutions to get rid of this issue.

Make sure to follow the steps written below carefully in order to avoid any further exaggeration of this issue. Also, make sure to glance over the reasons due to which it is triggered in the first place to develop a more informed understanding of this issue.
What Causes the Shadowplay Not Working Issue?
After investigating users’ claims about the Shadowplay not working issue, we came to the conclusion that the following are some of the most primary reasons due to which Shadowplay stops working.
- Glitched Service: It is possible that some Nvidia services might have been glitched due to which you are unable to get Shadowplay working properly. A simple fix to this is listed below where you can restart the services and they should start working normally.
- Disabled Nvidia Telemetry Service: If you have at any point disabled the Nvidia Telemetry Service, you will run into the Shadowplay not working issue because this service needs to be enabled in order for the Shadowplay feature to work properly.
- Missing Media Feature Pack on Windows 10: If your Windows installation is missing the Windows Media Feature Pack, you will run into the Shadowplay not working issue on your computer. A simple workaround to this should be to just download and install it on your computer.
- Experimental Features: In some cases, you might not have experimental features enabled on your computer due to which Geforce Experience is unable to properly deploy Shadowplay on your PC.
- Disabled Desktop Capture: Desktop Capture feature sometimes needs to be enabled in order for Shadowplay to record your screen. If the feature has been disabled, you will run into the Shadowplay not working error on your computer.
- Nvidia Driver Issue: If your Nvidia Driver has been installed incorrectly or if it has been glitched, Shadowplay will not be able to properly capture your screen. Therefore, it is recommended that you perform a clean installation of the Nvidia driver to fix the Shadowplay not working issue.
- Geforce Experience Installation: In certain situations, it is possible that the Geforce installation on your computer has been corrupted due to which you are unable to run Shadowplay properly. Therefore, completely reinstalling Geforce Experience should be the go-to fix in your case.
Now that you have read through the reasons due to which this error occurs, we can finally move on towards deploying fixes.
Before You Start:
We think that it is important that you get some basic troubleshooting out of the way before moving on to the more complex solutions.
- Make sure to completely restart your PC, all your applications and software.
- Right-click on Geforce Experience and select the “Run as Administrator” button and check if doing so enables you to be able to run the game.
- Make sure that you reinstall the software completely.
- Make sure that the Share Settings are enabled inside the Geforce Experience software.
- Make sure that you try to disable Nahimar, Razer Kraken, and Xonar software in the background.
- Make sure that you have enough space available in your recording folder as well as your root drive, if not, make sure to clear out at least 4 GB from each of them.
- Try turning off Twitch.
- Try to run the games in fullscreen mode.
Fixing the Shadowplay not Working Issue:
Solution 1: Adjusting System for Best Performance
- Press “Windows’ + “R” to open the Run prompt.
- Type in “control panel” and press “Enter” to launch the control panel.

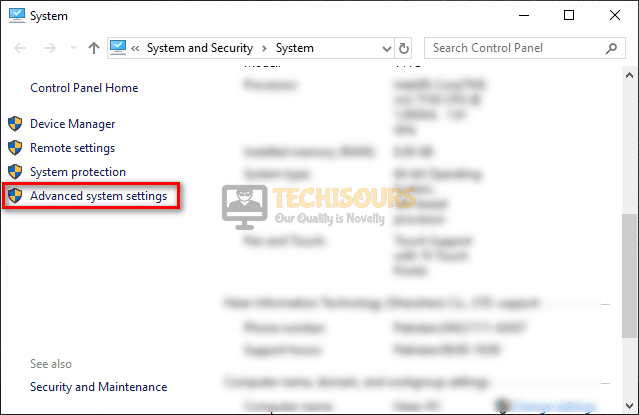
Open Control panel - Click on the “System and Security” option and then click on the “System” heading.
- Inside this setting, click on the “Advanced System Settings” button and then click on the “Advanced” tab.

Advanced system settings - Under “Performance”, click on the “Settings” option and check the “Adjust for best performance” button.
- Select the “Apply” option and close out this window.
- Check to see if doing so has fixed the Shadowplay not working issue.

Solution 2: Toggling Administrator Tag
- Navigate to the following location.
C:\Program Files\NVIDIA Corporation\NVIDIA GeForce Experience
- Inside this folder, you should be able to see the “Nvidia Share.exe” application.
- Right-click on it and select the “Properties” button.
- Once inside the properties, click on the “Compatibility” tab and then if the “Run this program as an administrator” box is unchecked, make sure to check it and if it is checked, make sure to uncheck it.

Opening Compatibility Tab - After toggling this setting, click on the “Apply” button and then select the “OK” button.
- Check to see if making this change fixes the Shadowplay not working error on your computer.

Solution 3: Installing Missing Packages
- Navigate to this download link and click on the “Download” button to download the Windows Media feature pack.
- Select the edition according to your Operating system version and click on “Confirm”.

Confirming Media pack Download - Install the downloaded executable and all of its tag-along software.
- After doing so, navigate to this download link to download Microsoft Visual C++ 2013.
- After downloading, run the executable, and install the software.
- Check to see if installing both of these helps in getting Shadowplay working again.

Solution 4: Perform a Clean install of Geforce Experience
- Press “Windows’ + “R” to open the Run prompt.
- Type in “Appwiz.cpl” to open the application wizard.

Typing in “Appwiz.cpl” and pressing “Enter” - Inside the application wizard, scroll down and right-click on the “Geforce Experience” software.
- Select the “Uninstall/Change” option and then follow through with the setup by following the on-screen instructions to completely remove this software from your computer.

Uninstall NVIDIA GeForce Experience - After removing the software, navigate to the following folder on your computer.
C:\Program Files\NVIDIA Corporation\
- In this folder, if you see an “Nvidia Geforce Experience” folder, click on it and press “Shift’ + “Delete” to remove it from your computer.
- Download the Geforce Experience software again and install it on your computer.
- Check to see if completing this whole reinstallation fixes the issue.
- If this doesn’t fix the issue, make sure to also remove any other recording software because that might be what is causing this conflict.


Solution 5: Turning Desktop Capture ON
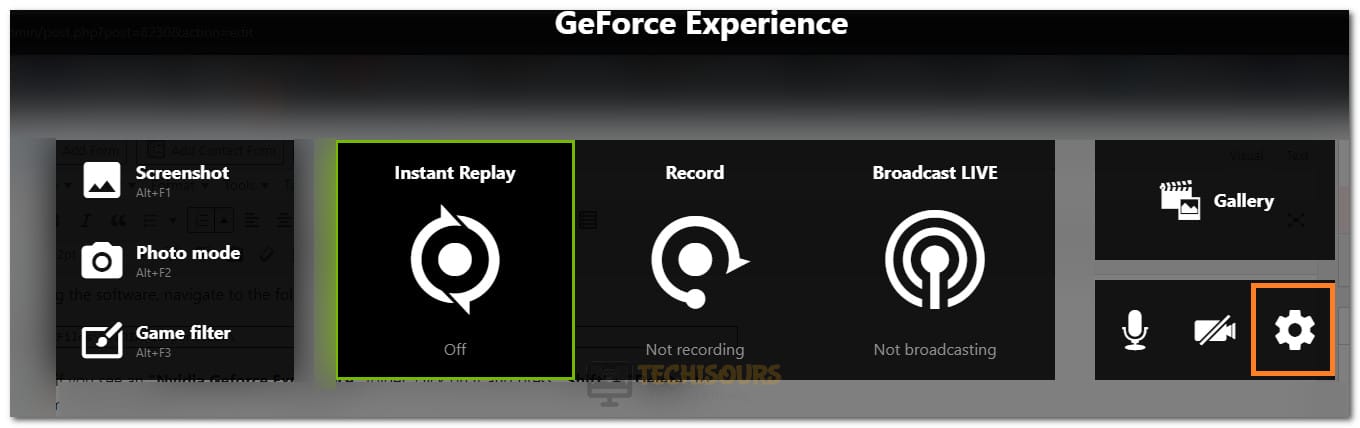
- Launch Geforce Experience and click on the In-game overlay option in the top right corner.
- After clicking on this, select the “Settings” knob and then scroll down and select the “Privacy” option.

Opening Settings - Make sure to turn on the Desktop Capture toggle.
- Check to see if by doing this, you are able to fix the Shadowplay not working issue.
Solution 6: Create Single Track
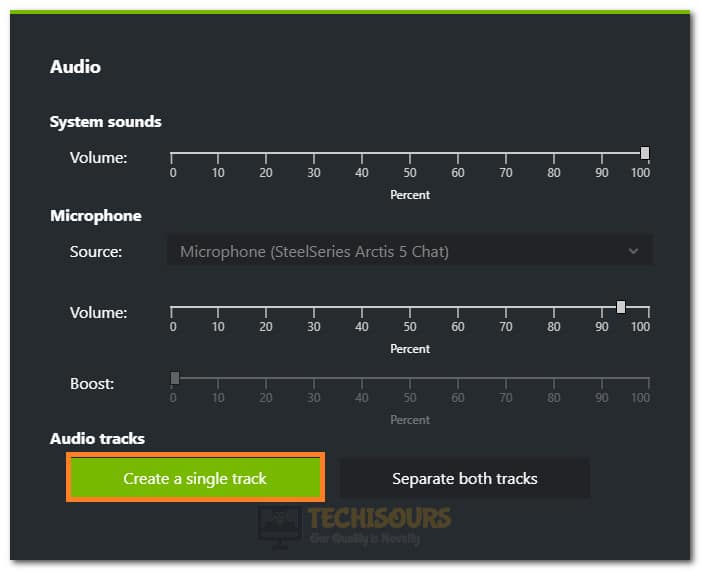
- With Geforce Experience and Shadowplay running in the background, press “Alt+Z” on your keyboard to open up Shadowplay.
- Click on the “Settings” cog and then scroll down and select the “Audio” option.
- Make sure that in this setting, the “Create Single Track” option is selected instead of the Separate both tracks option.

Selecting Create Single Track Option - Check to see if by doing this, shadowplay starts working normally again.
Solution 7: Checking App Volumes
- Right-click on the “Speaker” icon in your left corner of the system tray.
- Click on the “Open Sound Settings” option and then select the “App Volume and Device Preferences” option.

Clicking on the App Volume and Device Preferences - Make sure that under the “App Volume” heading, both the master volume and the Nvidia Container volume is turned all the way up.
- Check to see if by completing this step, the Shadowplay not working error is fixed.

Solution 8: Enabling Nvidia Device
- Press “Windows’ + “R” to open the Run prompt.
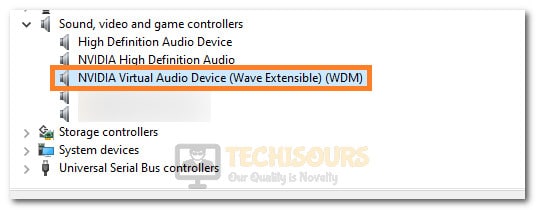
- Type in “devmgmt.msc” and press “Enter” to launch into the device manager.

Typing devmgmt.msc in the Run prompt - After doing so, expand the “Sound, Video and Game Controllers” tab and right-click on the “Nvidia Virtual Device (Wave Extensible) (WDM)” option.

Enabling Nvidia Device - Click on the “Enable Device” option if it has been disabled to enable it back up again.
- After enabling this device, check to see if Shadowplay starts working normally again.

Solution 9: Selecting Default Playback Device
- Right-click on the “Speaker” icon on the lower left of your system tray and select the “Sounds” option.
- Click on the “Playback” tab and make sure that you have selected the main playback device on your computer as the default one.

Select “Sound” - If that is not the case, make sure to click on your playback device in the list and then select the “Set Default” option.
- Check to see if by doing so, you are able to fix this issue.

Solution 10: Disable Aero Theme on Windows 7
- Press “Windows’ + “R” to open the Run prompt.
- Type in ” Control Panel” and press “Enter” to launch it on your computer.

Typing in Control Panel - Inside the control panel, click on the “appearance and Personalization” option.
- Inside this, click on the “Change Theme” option, and then from the list of themes, select a “Basic” theme instead of the Aero themes list.
- Click on “Apply” to save your changes and head back over to the desktop.
- Check to see if by disabling the Aero theme, Shadowplay not working issue has been resolved.

Solution 11: Disabling Blur behind Setting
- Press “Windows’ + “R” to open the Run prompt.
- Type in “regedit” and press “enter” to launch the registry editor.
Typing “regedit” - Inside the registry editor, navigate to the following address.
Computer\HKEY_CURRENT_USER\SOFTWARE\Microsoft\Windows\CurrentVersion\Themes
- On the right side, double click on the “Enable Blur Behind” entry if you have one and set its value to “1”.
- Save your changes and check to see if by doing so, you are able to fix the Shadowplay not working issue.
- If the setting isn’t available, right-click anywhere and click on the “New> Dword 32-bit Value” option.
- Once you have created this new value, name it “EnableBlurBehind” and press “Enter”.
- Set its value to “1′ Similarly and exit out of the registry.

Set value of the DWORD - Check to see if the issue has been fixed by doing so.


Solution 12: Restart Nvidia Services
- Press “Windows’ + “R” to open the Run prompt.
- Type in “services.msc” and press “Enter” to launch the service management window.

Typing in “services.msc” - Inside this window, right-click on the “Nvidia Display Container LS” and select the “Restart” option.
- Similarly, find all Nvidia related services in the list and restart them and if any one of them has been stopped, right-click on them and select the “Start” button.
- Some prominent services should be “Nvidia Streaming Service” and other container services.
- Check to see if by doing so, the Shadowplay not working error is resolved.

Solution 13: Deploying Experimental Features
- Launch Geforce Experience and click on the “Settings” cog on the top right side.
- Inside settings, check the “Enable Experimental Features” option.

Enabling Experimental Features on Nvidia Geforce Experience - Closeout of Geforce Experience after doing so and navigate to the following folders.
C:\Program Files\NVIDIA Corporation\NVIDIA GeForce Experience
- Inside this folder, delete the “Share.Json” and the “Geforce Experience.json” files.
- Relaunch Geforce Experience and close out of it again.
- Reinstall Geforce Experience and restart the computer.
- Check to see if you are now able to use the Shadowplay feature properly.

Solution 14: Fix Nvidia Shadowplay for a Specific Game
For some users, the Nvidia Shadowplay feature wasn’t working for a specific game such as Valorant. In order to fix this, follow the steps below.
- Right-click anywhere on your desktop and click on the “Nvidia Control Panel” option.
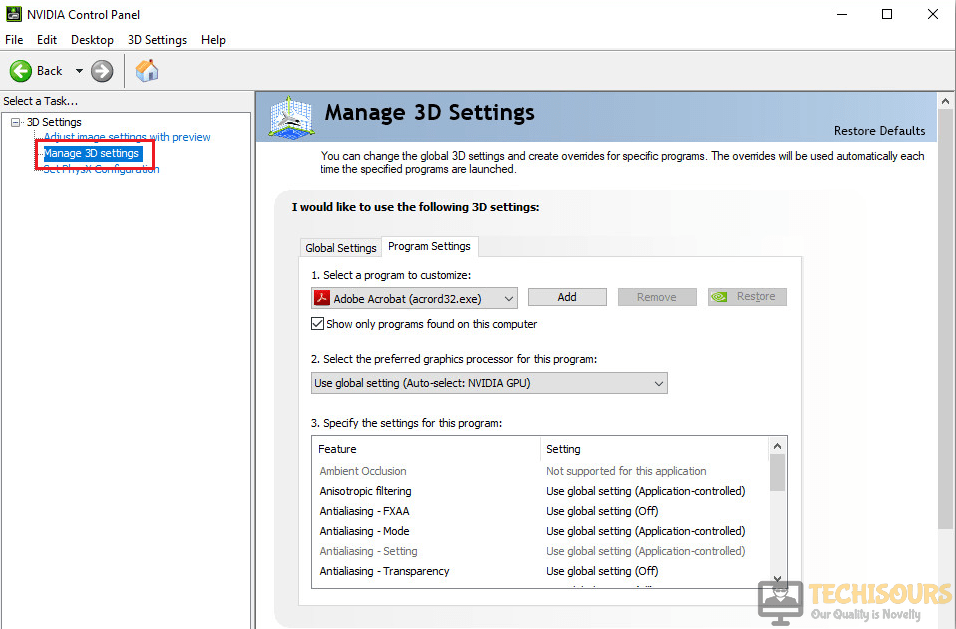
- Once the control panel is launched, click on the “Manage 3D settings” button.

Manage 3D Settings - Click on the “Program Settings” tab and make sure to add the game for which Shadowplay isn’t working.
- Check to see if by doing so you are able to fix the Shadowplay not working issue.
- If you are still getting the Shadowplay not working issue with Valorant, navigate to the following location and right-click on the mentioned file.
C:\Riot Games\VALORANT\live\ShooterGame\Binaries\Win64\VALORANT-Win64-Shipping.exe
- Click on “Properties” and then select the “Compatibility” tab.
- In the compatibility settings, make sure to check the “Disable Fullscreen Optimizations” option.
- Check to see if doing so fixes the issue.
Solution 15: Perform Clean Driver Install
- As a last resort, you can try and perform a fresh install of your GPU drivers and check if you are able to fix the Shadowplay not working error by doing so
- For that, download the Display Driver Uninstaller software from this website.
- After the software has been downloaded, follow the onscreen instructions to uninstall the Nvidia Driver completely and all of its associated software as well.
- After uninstalling, you will automatically be shifted to the Microsoft Basic Visual Adapter.
- Navigate to the Nvidia website and download the drivers for your Graphics Card by specifying its model.
- Download and install these drivers on your computer and Geforce Experience along with it.
- Check to see if by doing so, the Shadowplay not working error is fixed.
Hopefully, the shadowplay issue must be resolved by now but if you need further assistance, contact here.