Easily Fix the Program won’t Uninstall Issue on Windows [Complete Guide]
Windows is one of the most popular operating systems and is used by millions of people on the regular. However, users have in some cases found that a particular program won’t uninstall on their computer and in order to address this issue, we have written this article in which we have included solutions and workarounds that you can apply to completely get rid of it.

Why Program won’t Uninstall on your Computer?
After going through most of the solutions that have been conventionally used to fix the issue, we came to conclude that the following must be the most prominent reasons due to which it is triggered.
- Background Applications: It is possible in some cases that the background applications installed on your computer are interfering with the uninstallation process and due to this, the program won’t uninstall from your computer. Therefore, you can minimize the background interference by following the steps below.
- Incompatible Architecture: In some cases, the architecture of the application might not be compatible with your operating system. Therefore, we suggest that you try to make sure that you use compatible architecture with the OS and the uninstaller should run fine then.
- Antivirus: In some isolated cases, the Antivirus or the Windows Defender installed on your computer might be preventing the uninstallation process from taking place properly. Due to this, we recommend that you try to either disable the Antivirus or add an exception for the application that you are trying to uninstall.
Now that you have been taken through most of the reasons due to which it occurs, it is finally time that we move on towards implementing the solutions.
Before you Start:
Most commonly, two types of uninstallation methods are used for uninstalling the programs installed on your computer.
1. Using Settings
- Press “Windows + I” to launch the settings and click on the “Apps” option.
- Select “Apps & Features” from the left side and select the app from the right side.

Apps and features - Select the “Uninstall” button and process with the on-screen instructions to completely remove the application from your computer.

2. Using Control Panel
- Press “Windows + R” to launch into Run, type in “appwiz.cpl” and press “Enter” to launch into the application wizard.

Typing in “Appwiz.cpl” and pressing “Enter” - From here, right-click on the app that you want to remove and select the “Uninstall” option.
- Follow the process on-screen to completely remove the program from your computer.

Fix Program Won’t Uninstall Issue:
Fix 1: Use Application’s Uninstall Program
Most third-party applications come with an uninstaller inside their installation directory that you can use to remove them from your computer. For that:
- Right-click on the program that you want to uninstall and select the “Open File Location” button.

Clicking on the “Open File Location” option - From here, look for a uninstaller.exe file or something similar that will remove the software.
- Once found, double click on it and follow through with the on-screen instructions.

Fix 2: Uninstall in Safe Mode
- Press “Windows + R” to launch into the Run prompt, type in “msconfig” and press “Enter” to launch into the Microsoft Configuration panel.

Typing in “Msconfig” - From here, click on the “Boot” tab from the top and check the “Safe Boot” option and the “Minimal” option below it.
- Click on “Apply” and restart your computer to boot inside the safe mode.
- Now, try to uninstall the program and check to see if the program won’t uninstall issue has been fixed.

Fix 3: Remove via Registry
- Press “Windows + R” to launch Run, type in “regedit” and press “Enter” to launch the registry editor.

Typing “regedit” - From here, navigate to the following address.
Computer\HKEY_LOCAL_MACHINE\SOFTWARE\Microsoft\Windows\CurrentVersion\Uninstall\
- Inside this address, locate the folder with the program’s name from the left side and right-click on it.
- Select the “Delete” option from the menu and remove this program.
- Now, navigate to the installation directory of the program and remove the program from there as well.
- Check to see if you have been able to fix the Program won’t uninstall issue now.

Fix 4: Uninstalling Windows Apps Using PowerShell
- Press “Windows + R” to launch into the Run prompt, type in “Powershell” and press “Shift + CTRL + Enter” to launch with admin permissions.

Launching Powershell - Now, execute the following command but instead of the “*APPNAME*”, type in the name of the application that you want to uninstall.
appxPackage *APPNAME* | Remove-AppxPackage
- Make sure to use the standard App names recognized by Windows which can be found here.
- Now, check to see if you are able to uninstall the program on your computer.

Fix 5: Ending Process from Task Manager
- Press “Windows + R” to launch into Run, type in “taskmgr” and press “Enter” to launch into the task manager.

Typing in “taskmgr” - From here, click on the “Processes” tab and click on the process related to the app that you want to remove.
- Select the “Uninstall” button to completely stop the process from running on your computer.
- Check to see if doing so fixes the issue on your computer.

Fix 6: Utilize Microsoft Installation Troubleshooter
- Download the Installation Troubleshooter from here.
- After downloading the troubleshooter, run it on your computer and wait for the troubleshooting process to be completed.
- Once completed, check to see if the program won’t uninstall issue has been fixed on your computer.
Fix 7: Perform System Restore
- Press “Windows + R” to launch into the Run prompt, type in “rstrui.exe” and press “Enter” to launch into the Restore Environment.
Typing in “rstrui” - From here, click on “Next” and select the “Show More Restore Points” option if available.

Clicking on the “Show more Restore Points” - From the list of available points, select the date that comes before the date on which the program was installed.
- Click on “Next” after selecting the date and proceed with the instructions on-screen to complete the uninstallation process.
- Check to see if the issue has now been fixed.


Fix 8: Uninstalling Windows Updates
- Press “Windows + I” to launch into settings, click on the “Update & Security” option and from the left side, select the “Windows Update” button.
- From here, click on the “View Update History” button and click on the “Uninstall Updates” button from the top.

View Update History - Now, make sure to select a recent update, right-click on it and select “Uninstall” to remove it from the computer.
- Check to see if doing so fixes the program won’t uninstall issue.

Fix 9: Run Malware Scan
- Press “Windows + I” to launch into settings, click on the “Update & Security” option and select the “Windows Security” button from the left side.
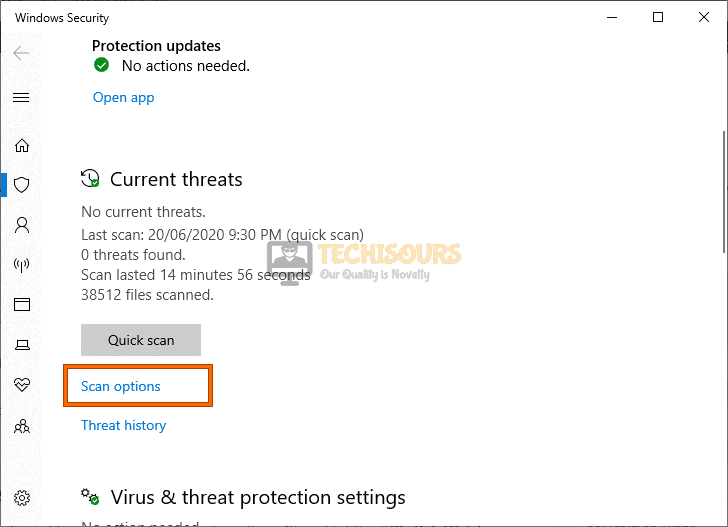
- Click on the “Virus & Threat Protection” button from the right and select the “Scan Options” button from the next screen.

Scan options - Now, check the “Full Scan” option and click on the “Scan Now” button.
- Wait for the scan to be completed and check to see if doing so fixes the program won’t uninstall issue
Fix 10: Remove Browser Extensions
- Launch into your browser and click on the “Three Dots” at the top right side.
- From there, click on the “More Tools” button and then select “Extensions” from the menu.

More Tools - Now, make sure to disable all the extensions and try to remove the program that you would like.
- Check to see if the issue is now fixed.

Fix 11: Running System and Disk Scan
- Press “Windows + R” to launch into the Run prompt, type in “cmd” and press “Shift + CTRL + Enter” to launch with admin permissions.

Typing in cmd - Type in the following commands one by one and press “enter” after each to execute them on the computer.
sfc /scannow

DISM.Exe /Online /Cleanup-Image /Restorehealth
- Check to see if doing so fixes the issue.

Fix 12: Free up Disk Space
Sometimes the uninstallation process cannot be completed on the computer because you don’t have enough disk space available to actually process the uninstallation information. Therefore, we would recommend that you first let go of any files that don’t require a uninstallation process and then try to uninstall the program.
Fix 13: Run uninstaller as Administrator
Sometimes, admin permissions might be required in order to uninstall the program from your computer. Therefore, we suggest that you try to log in to an administrator account on the computer and if you are running an uninstaller, we recommend that you right-click on it before starting it up and select the “Run as Administrator” button.
Fix 14: Ensure Architecture Compatibility
If you are trying to run an uninstaller on the computer, it is important that it matches the architecture of your Windows. Therefore, ensure that the uninstaller is 32-bit if your Windows is 32-bit and that the latter is 64-bit if the former is 64-bit. This will help in getting rid of any architecture related issues with the uninstallation process.
Fix 15: Remove Previous Versions
It is possible that a previous version of the program might already be present on your computer due to which the uninstallation process isn’t proceeding properly. Therefore, we suggest that you use any of the introductory methods to uninstall the previous version of the program and then try to remove its newer version.
Fix 16: Disable Antivirus
- Press “Windows + I” to launch into settings, click on the “Update & Security” option and select “Windows Security” from the left side.
- Now, click on the “Virus & Threat Protection” button and select the “Manage Settings” option under the “Virus & Threat Protection” heading.

Manage Settings - Now, turn off the “Real-time protection” toggle and exit out of the window.
- Check to see if the Program won’t uninstall issue has been fixed.

Fix 17: Check Security Settings
- Right-click on the program in action and select the “Properties” option.
- From there, click on the “Security” tab and click on the “Unblock” button if available and check to see if there are any permission errors.
- Make sure that your account has been granted full control of the app and close out of the window.
- Now, try to completely remove the program from your computer and check to see if the issue persists.
If the issue still persists, contact us for further troubleshooting.