Easily Fix Overwatch can’t hear Voice Chat Issue
Overwatch is one of the most famous games that users enjoy on their PCs but recently, we have been getting some complaints from users that they are running into the “Overwatch can’t hear voice chat” issue which is one of the most common issues that users encounter on this game. In this article, we have addressed this issue completely and by following the steps that we have listed below, you will be able to hear your teammates properly and use the voice chat feature normally. Make sure to go through the entire article to properly grasp the reasons due to which the issue is triggered.
What Can’t you Hear Voice Chat on Overwatch?
We were informed of this issue by some of our users and we started to investigate it as soon as we heard about it, according to our investigations and testing, the issue is mostly caused due to the following primary reasons.
- Outdated Drivers: It is possible in some cases that due to outdated audio drivers, you are running into the overwatch can’t hear voice chat issue. Therefore, we suggest that as quickly as possible, you update your device to have the latest audio drivers as we have mentioned below. It would also be useful to update the rest of your computer’s drivers as well to ensure maximum compatibility.
- Wrong Configuration: In some cases, your in-game settings might not be configured properly and this can sometimes trigger the overwatch can’t hear voice chat Xbox issue. This can also be the reason behind its occurrence on PC so we recommend that you go through the solutions below to ensure that your settings are configured as per the requirements.
- Background Processes: If there are a lot of background processes running on your computer, it might be possible that the game’s voice chat feature gets derailed. Therefore, we suggest that you try to minimize the background processes using the techniques mentioned below in this article. This will help in ensuring that no process is interfering with your gameplay.
- Firewall: Sometimes the Windows’ Firewall or any other antivirus might flag certain network packets as suspicious and prevent them from being received or transferred. Therefore, we suggest that you try to add exceptions in the Firewall as has been done in the steps below or you try to disable it altogether.
Now that we have taken you through most of the reasons due to which the issue occurs, we can finally start implementing the solutions.
BEFORE YOU START:
- First of all, make sure that the headset you are using isn’t faulty and it’s also connected properly to your system. Afterwards, check if the mute button on the headset is turned on. After you have performed both techniques, then test your headset with other games and applications and verify if the same issue arises with other applications. If your headset is working accurately as it should with other applications, then the issue is on the software side.
- Sometimes this issue arises when the audio device plugged into the system isn’t compatible with the game or the PC. This mostly happens with Bluetooth devices due to their compatibility issues with the game or with the PC. To verify this issue, first, check if the Bluetooth device is properly connected with the PC and is fully functional but, if the issue is not resolved then switch to a wired headset or audio device.
- Some users reported that there was a program called Nahimic that was causing issues with voice chat. Uninstalling it and rebooting the PC helped them to resolve the issue.
- For some users, using NVIDIA Gamestream along with the game triggers this issue due to some software glitch. This issue appears to be addressed by disabling the Gamestream application before starting the game.
- Often in-game voice chat is inaudible due to the fact that the other team members have tuned off your voice chat option from the group voice chat. Due to this, you won’t be able to listen to in-game voice chat.
Fixing overwatch can’t hear teammates issue:
Solution 1: Update Audio Driver
- Click on the Start button, type “Device Manager” in the search box, and open it. In the Device Manager window, expand the “Audio Inputs and Outputs” option, right-click on “Microphone” and select the option “Update Driver”.

Update Audio Driver - Afterwards, right-click on “Speakers” and select the option “Update Driver”.

Update Speaker Driver - Now right-click on the speaker icon located at the bottom right corner of the Taskbar and select the option “Troubleshoot sound problems”.

Troubleshoot Sound Problems - A troubleshooting window will appear in front of you. Follow the on-screen instructions and check if this method resolves your issue.


Solution 2: Update Driver Through Driver Easy
There is another way to fix these driver issues by simply installing a popular driver update assistant named Driver Easy.
- After installing the software, simply launch the software, click on the “Scan Now” option and wait for it to scan and detect all your computer’s outdated/faulty drivers. When the scanning is complete, simply select the ones that need fixing and wait for the software to download and install the latest files.

Scanning Through Driver Easy - Restart your PC, launch the game and check if the voice chat issue has been resolved.

Solution 3: Check In-Game Audio Settings
Sometimes in-game audio settings are set to a certain level by default that they are not clearly audible. Changing the in-game audio settings can help fix this issue. Follow the instructions given below to adjust the game’s audio settings:
- In the game’s main menu screen, locate “Options” and then navigate to the “Sound” option.
- A menu will appear in front of you listing settings for various in-game sound options.
- Now turn the “Voice Chat Volume” level to maximum i.e. 100 and similarly set the “Group Voice Chat” and “Team Voice Chat” options to “AUTO JOIN”.

Adjusting In-game Sound Options - Finally, launch the game and check whether the in-game voice chat is audible and if the issue still persists then try the next possible solution.

Solution 4: Tweak Battle.Net Application Settings
- Launch the “Battle.net” application and navigate to the “Settings” option.
- Locate the “Voice Chat” option, and in the Audio Output Device section, select the actual model of your headset that you are using from the list.

Voice Chat Settings - Afterward, click on the “Test Device” option and verify if your microphone and speaker are functioning normally as they should.

Solution 5: Set Headset / Speaker as default device
Sometimes when you plug your headset into your computer, it is not set as the default audio output device and as a result, you can’t hear any in-game voice chat. To set your headset as the default audio output device, follow the instructions given below:
- Right-click on the Start icon and navigate to the “Settings” option.

Select Settings - Locate the “System” option, click on it, and afterward select the “Sound” option from the left pane.

System settings - Click on the “Sound Control Panel” option located on the right side of the window.
- A window will appear in front of you, navigate to the “Playback” tab, right-click on the speaker/headset you are currently using from the list and click the option “Set as Default Device”.

Set Speaker as Default Device - Now in the Playback tab, select every other audio output device except the one that you are currently using, right-click on it, and select the option “Disable”.
- Afterward, head to the “Recording” tab, right-click on the microphone you are currently using from the list, and click the option “Set as Default Device”.

Set Microphone as Default Device - Now in the Recording tab, select every other audio output device except the one that you are using, right-click on it, and select the option “Disable”.
- Finally, click on the “OK” button, launch the game and check if the overwatch can’t hear voice chat pc issue has been resolved.


Solution 6: Try Pavucontrol Software
Some users reported that installing Pavucontrol and opening it simultaneously with Overwatch worked for them. After opening Overwatch with the stated software just ask someone to say something in Voice chat and as soon as you see their icon indicating that they are talking switch to pavucontrol. Afterward, in the stream tab, you’ll find a specific stream for voice chat that must be playing in the wrong device therefore change it to your default device.
Solution 7: Disable the audio output device’s exclusive mode
Due to the audio output device’s exclusive mode, it can prevent some games from accessing your headset/speaker. Disabling the exclusive mode can fix this issue therefore, follow the below-mentioned procedure to successfully disable the exclusive mode:
- Right-click on the Start icon and navigate to the “Settings” option.
Select Settings - Locate the “System” option, click on it, and afterward select the “Sound” option from the left pane.
System settings - Click on the “Sound Control Panel” option located on the right side of the window.
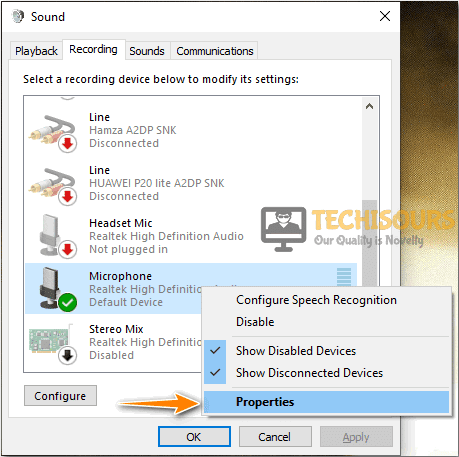
- A window will appear in front of you, navigate to the “Playback” tab, right-click on the speaker/headset you are currently using from the list and click the option “Properties”.

Accessing Speaker Properties - The Speakers Properties window will appear in front of you, navigate to the “Advanced” tab, and un-check the “Allow applications to take exclusive control of this device” option in the exclusive mode section.

Un-Check Speaker Properties Option - After following the above-mentioned instructions, click on the “Apply” button and then on the “OK” button.

Apply Speaker Properties Settings


Solution 8: Close the Background Processes
Tasks running in the background can also cause the game to crash and as a result, generate this error. Restricting the activity of background running tasks can also fix this issue. To disable the background running tasks, follow the below-mentioned steps:
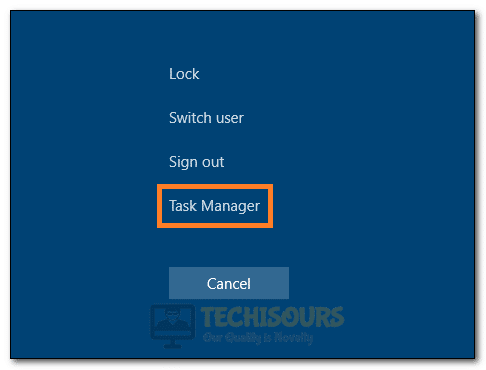
- Press the “Alt + Ctrl + Del” keys simultaneously and click on the “Task Manager” option.

Launching Task Manager - Navigate to the “Processes” tab and a list of all the tasks currently running in the background will appear in front of you.
- Now, right-click on all the unnecessary tasks individually and select the option “End task”.

Ending Unnecessary Processes

Solution 9: Match the Audio Sample Rates
Sometimes the audio sample rates and bit depth of both speakers and microphone are not exactly the same and as a result, you can’t hear any in-game voice chat. To set the audio sample rates of your computer hardware, follow the instructions given below:
- Right-click on the Start icon and navigate to the “Settings” option.
Select Settings - Locate the “System” option, click on it, and afterward select the “Sound” option from the left pane.
System settings - Click on the “Sound Control Panel” option located on the right side of the window.
- A window will appear in front of you, navigate to the “Playback” tab, right-click on the speaker/headset you are currently using from the list and click the option “Properties”.
Accessing Speaker Properties - The Speakers Properties window will appear in front of you, navigate to the “Advanced” tab, and verify that the sample rate and bit depth is “16 Bit, 48000Hz” in the Default Format section.

Setting Speaker Sample and Bit Rate - Afterward, head to the “Recording” tab, right-click on the microphone you are currently using from the list, and click the option “Properties”.

Choose Microphone Properties - The Microphone Properties window will appear in front of you, navigate to the “Advanced” tab, and verify that the sample rate and bit depth is “2 Channel, 16 Bit, 48000Hz” in the Default Format section.

Setting Microphone Sample and Bit Rate - Make sure that the sample rates and bit depth of both speakers and microphone are exactly the same.
- After following the above-mentioned instructions, click on the “Apply” button and then on the “OK” button.


Solution 10: Enable TCP & UDP Ports
Some users reported that enabling VoIP (Voice over Internet Protocol) on their PC resolved their issue as it is not enabled by some internet service providers by default.
Also check whether the TCP / UDP ports are open on your computer and if they are not, follow the below-mentioned procedure to open different TCP / UDP ports on your computer.
- Click on the windows start menu, type the control panel in the search box, and then click on the “Control Panel” option.

Control Panel - The Control panel window will appear in front of you, in that window find the “Windows Defender Firewall” option and click on it.

Windows Defender Firewall - Click on the “Advanced Settings” option in the left pane, “Windows Defender Firewall with Advanced Security” window will open in front of you, click on the “Inbound Rules” option located in the left panel, and afterward, select the “New Rule” option in the right panel.

Set Inbound Rules - New Inbound Rule Wizard will open in front of you, select the “Port” option and click the “Next” button.

Selecting Ports Option - Select the “TCP” and “Specific Local Ports” options, and in the box type your desired TCP port i.e. 1119, 3724, 6113, 80 one at a time and click the “Next” button.

Select TCP and Specific Local Port - Select “Allow The Connection” and hit the “Next” button, afterward select the network types, and click the “Next” button.

Allow The Connection - Finally, enter a name for the new inbound rule and click on the “Finish” button.
Enter Name For The New Inbound Rule - To open a “UDP” port, follow the same procedure as mentioned above, but in “Step 5”, select “UDP” instead of TCP and enter your desired UDP port in the “Specific Local Ports” section i.e.6250, 5062, and 5060 for voice control signals12000-64000 for voice media
3478 and 3479 for setting up voice


Solution 11: Temporary Disable Firewall on your PC
- Click on the windows start menu, type the control panel in the search box, and then click on the “Control Panel” option.
Control Panel Window - The Control panel window will appear in front of you, in that window find the “Windows Defender Firewall” option and click on it.
Windows Defender Firewall - Afterward, select the option “Turn Windows Defender Firewall On or off” in the left side pane.

Clicking on the “Turn Windows Defender Firewall On or OFF” option - In the customize settings window, select the option “Turn off Windows Defender Firewall (not recommended)” in both sections i.e. Private Network Settings and Public Network Settings.

Turn off Windows defender firewall


Solution 12: Re-install the Game
If none of the above-mentioned solutions work, consider performing a fresh reinstallation of the game again. Follow the instructions given below to successfully perform a clean reinstallation of the game:
- Firstly, right-click on the “Battle.net” icon and open it.

Launch the Battle.net - In the All Games tab, right-click on the game and click on the “Uninstall” option.

Uninstall The Game - Locate the game’s installation folder and delete all the remaining files if found any.
- Install the game again from the Battle.net main menu and check if the issue has been fixed.

Workaround:
If none of the above-mentioned solutions works out for you, then try contacting Blizzard technical support team. The Overwatch developer team can troubleshoot this issue and hopefully, they’ll be able to resolve your error.
If you are still unable to fix the issue, Contact Us for further troubleshooting.