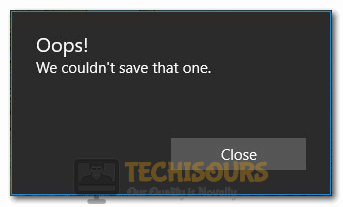
Fixing the Oops We Couldn’t Save that One Issue in Photos App
The Windows Photos App has been found to be glitchy by a lot of users and recently, we have gotten complaints that after trying to save the picture from the Photos app, users are getting the “Oops We Couldn’t Save That One” error or the “Oops! We Couldn’t Save That One” issue. In this article, we have written detailed steps that you can undertake to completely fix the issue on your computer.
What Causes the Oops We Couldn’t Save That One Issue?
After having to go through the solutions that fix the issues for most people, we concluded that the following are the most important reasons due to which it is triggered.
- Glitched Application: It is possible that the application installed on your computer might have been glitched and due to this, the Oops We Couldn’t Save That One issue might be triggered. Therefore, we suggest that you try to reinstall the app to get rid of the glitch.
- Image Issue: In some cases, the image being stored in a particular location might have been glitched due to which the error was triggered. Therefore, we recommend that you try to replace the images’ location and then try to edit it.
- Permission Issues: Sometimes the permissions granted to your account might not allow you to edit the image. Therefore, following the steps below, we recommend that you try to provide the permissions that are necessary.
Now that we have taken you through most of the reasons behind the error, we can finally start implementing the solutions.
Fix 1: Running Windows Troubleshooter
The built-in windows troubleshooter might be able to pinpoint and resolve the issue that causing this error. Follow the steps below to run the troubleshooter:
- Press “Window + S”, type in “Troubleshoot settings” and press Enter on your keyboard.
- Click “Additional troubleshooters” and select “Windows Store Apps”.

Clicking on Additional Troubleshooters - Now, click “Run the troubleshooter” and wait for the process to complete.
- If any errors are found they will be displayed along with their suggested solutions accordingly.
- Restart your PC afterwards and see if the issue is resolved.

Fix 2: Check for Updates
Keeping your windows up to date is essential as it will help resolve bugs/glitches and issues. And improve the overall performance and security of windows. Follow the steps below to do so:
- Press “Window + S”, type in “Check for updates” and press Enter on your keyboard.
- Click “Check for updates” and windows will automatically download and install the latest available updates or click “Download and install” if the update does not start automatically.

Check For Updates - Restart your PC afterwards and see if the issue is resolved now.

Fix 3: Reset Microsoft Photos App
Due to incorrect settings or corrupt profile files, this error might pop up. Follow the steps below to reset the app which will probably restore proper functionality:
- Press “Window + S”, type in “Apps & features” and press Enter on your keyboard.

Selecting Apps & Features - Look for “Microsoft Photos”, click on it and select “Advanced options”.
- Click “Reset” and select “Reset” once again.
- Restart your PC afterwards and see if the issue is resolved now.

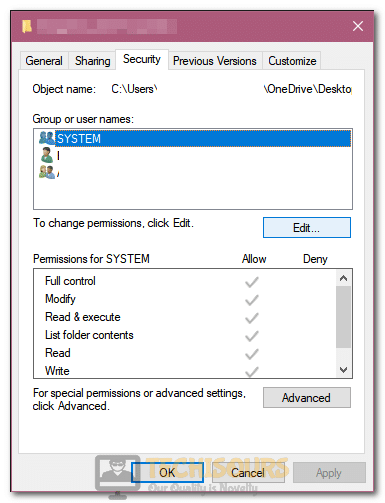
Fix 4: Reconfigure Folder Permissions
- Press “Window + E”, and head over to the location the image file is stored in.
- Right-click the folder and select the “Properties” option from the menu.
- In the “Security” tab, click on the account that you are using and select the “Edit” option.

Clicking on “Security” and selecting the “Edit” option - Tick the “Full Control” checkbox and click on the “Apply” option and then select “OK”.
- Check to see if the Oops We Couldn’t Save That One issue is resolved now.

Fix 5: Convert Image Files
Converting the image to a JPEG or PNG file is reported to have solved the issue for multiple users. Follow the steps below to convert the image file using Paint:
- Right-click the image file that you are facing issues with and hover to “Open with”.
- Select “Paint” from the list of programs.

Selecting “Open With Paint” option - Once in “Paint” select “File”, click “Save as” and choose “JPEG Picture” or “PNG Picture”.
- Choose the location where you want your image file saved and make sure the type is selected as JPEG or PNG.
- Click “Save” and now try editing this file in the Photos app.
- Check to see if doing so fixes the “Oops We Couldn’t Save That One” issue.

Fix 6: Save as a Copy
- Open the image that you want to edit in the Photos app and click “Edit & create” and select “Edit”.
- After making your desired changes, click “Save as a copy” at the bottom-right of the window.
- Choose the location that you want to save this copy at, and you should be good to go.
Fix 7: Use Another App for Editing
If you are still facing this issue, then you should try using this alternative app that has worked for many people and should work out for you as well. Follow the steps below to get this app:
- Press “Window + R”, type in “ms-windows-store://home” and press Enter on your keyboard.

Typing in “ms-windows-store://home” inside the Run Prompt - In the “Search” bar, search for “Irfanview” and click “IrfanView64”.
- Click “Get” and wait for it to download and install.
- Start the application once it is installed and drag your image file into it.
- Make the desired changes and then save the file.
- The Oops We Couldn’t Save That One issue should now be fixed on the computer

Fix 8: Edit Image Shortcut instead
- Right-click the image file you are facing issues with and select “Create a shortcut”.
- You can also, copy and paste this image to another location and launch the copied file or the shortcut.
- Now, open that shortcut or copy and you should be able to save it now after editing it.
Fix 9: Reconfigure Control Setting
- Right-click the folder where the images are stored and select “Properties”.
- In the “Security” tab, select the account that you are using and click on the “Edit” option.
Selecting “Security” and clicking on “Edit” - Make sure that you check the “Allow” option for “Full Control”.
- Click on “Apply” and then on “OK”.
- Check to see if doing so fixes the Oops We Couldn’t Save That One issue.
Fix 10: Running SFC and DISM Scans
- Press “Window + R”, type in “cmd” and press “Ctrl + Shift + Enter” on your keyboard.

Typing in cmd - Type in the following commands and press Enter after entering each.
sfc /scannow DISM /Online /Cleanup-Image /CheckHealth DISM /Online /Cleanup-Image /ScanHealth DISM /Online /Cleanup-Image /RestoreHealth Powershell Get-AppXPackage -AllUsers |Where-Object {$_.InstallLocation -like "*SystemApps*"} | Foreach {Add-AppxPackage -DisableDevelopmentMode -Register "$($_.InstallLocation)\\AppXManifest.xml"} - Restart your PC afterwards and see if the Oops We Couldn’t Save That One issue is resolved now.

Fix 11: Reinstalling Microsoft Photo App
Follow the steps below to perform a clean reinstallation of the Photos app:
- Press “Window + X”, select the “Windows PowerShell (Admin)” option and from there, execute the following command.
get-appxpackage *Microsoft.Windows.Photos* | remove-appxpackage

Windows PowerShell (Admin) - Now, press “Window + R”, type in “ms-windows-store://home” and press Enter on your keyboard.
- Search for “Microsoft Photos”, click on it and select the “Get” option to install it.
- Try saving an edited image again and see if the Oops We Couldn’t Save That One issue is resolved now.

If the issue is still not fixed, we recommend that you contact us for further troubleshooting.