What is Ntoskrnl.exe and How to Fix High CPU Usage
If you have been getting Crashes, BSOD or are facing High CPU/Memory usage due to the Ntoskrnl.exe process on your computer, you have come to the right place. Some of our users were facing this issue and we started investigating the matter as soon as it came to our attention. After some intense brainstorming sessions, we concluded some methods/solutions that were generally acceptable for fixing issues with the ntoskrnl.exe process.

We also set to find out what this process is and what it does on your computer and have listed the details below. Make sure to read through the whole article to be able to fix Ntoskrnl.exe High CPU usage and BSOD errors with the Ntoskrnl.exe process.
What is NTOSKRNL.EXE Process?
A kernel on your computer is basically a set of software-based instructions that are used to send signals to the hardware installed on your computer. On Windows, the Windows Kernel (NTOSKRNL.exe) is one of the most important processes which interacts with the computer to allot certain resources to different hardware on the computer.
The process is very critical to the proper functioning of the Computer and it is therefore vital that it runs on the computer and if you disable it or try to disable it, you might run into a Blue Screen of Death.
Fixing the NTOSKRNL.exe BSOD and Crashes:
Method 1: Check & Repair Windows System Files
- At the start, press the “Window + R” keys on the keyboard to launch into the Run prompt.
- Type “Powershell” and press the “Shift + Ctrl + Enter” key to launch it.

Launching Powershell - Type in the following command inside the Powershell window and press “Enter” to launch it.
sfc /scannow
- Once, the SFC scan has finished scanning and fixing the files on your system, run the check disk scan to get rid of any bad sectors on your Hard Drive. For that, follow the steps below.
chkdsk C:/r

Running chkdsk - After that, press “Y” to confirm that you want to check your drive for errors. Replace the drive letter with the drive that you are using as the system drive.
- In the end, restart the computer and let the scanning process complete upon starting up.
- Sign in to your account and check to see if doing so fixes the Ntoskrnl.exe BSOD or high CPU usage.


Method 2: Installing Windows System and Driver Updates
- Press “Windows + I” to launch into the settings.
- Click on the “Update and Security” option and from there, click on the “Windows Update” option.
- Select the “Check for Updates” button and let the system check for any available updates.

Check For Updates - From there, click on the “Download and Install” button to download the update on your computer and install it.
- Check to see if that fixes the ntoskrnl.exe BSOD error.

Method 3: Check for Viruses and Malware
- On your keyboard, press the “Windows + I” option to launch into the settings.
- From the settings, click on the “Update and Security” option and from there, select the “Windows Security” button from the left side.

Clicking on “Update and Security” - Click on the “Virus and Threat Protection Settings” option and from there, select the “Scan Options” button.
- From here, make sure to check the “Microsoft Defender Offline Scan” option and then press the “Scan Now” button.

Clicking on the “Scan Options” button - Wait for the scan to be completed and it will automatically locate the virus and malware on your computer and check to see if doing so fixes the ntoskrnl.exe BSOD issue.


Method 4: Troubleshoot Services and Installed Applications
- Press “Windows + R” on your keyboard to launch the run prompt, type in “msconfig” and press “Enter” to launch into the configuration panel.

Typing in “Msconfig” - From here, click on the “General” tab and check the “Selective Startup” option.
- After that, uncheck both “Load startup items” and “Load system services”.
- Click on “Apply” and then select “OK” to save your changes and reboot your computer.
- Now, launch into the task manager by pressing “Windows + X” and selecting the “Task Manager” option.

Open Task Manager - In here, check to see if you are still facing the high CPU usage issue with ntoskrnl.exe.
- If the issue has been fixed, it probably means that a non-Windows related service was interfering with certain aspects of the ntoskrnl.exe process due to which the issue was being triggered.
- Now, make sure to repeat the process up to the 2nd step and select the normal startup option to proceed with further troubleshooting.
- From the startup tab of the task manager, you can start enabling the services one by one by keeping the rest of them disabled to identify if a startup item is causing the issue.
- In addition to that, you can launch into the MSCONFIG panel again and from the “Services” tab, enable only a couple of services and restart the computer to check if the issue comes back.

Making Sure Microsoft Services aren’t hidden - In this way, you can isolate the service or the app that is actually causing this issue and then disable it permanently or reinstall it on your computer.


Method 5: Update Your Driver
- From the keyboard, press “Windows + R” to launch into the Run prompt.
- Type in “devmgmt.msc” and press “Enter” to launch into the device management window.

Typing devmgmt.msc in the Run prompt - From here, expand the “Network Adapters” option and right-click on the network driver that has been installed.
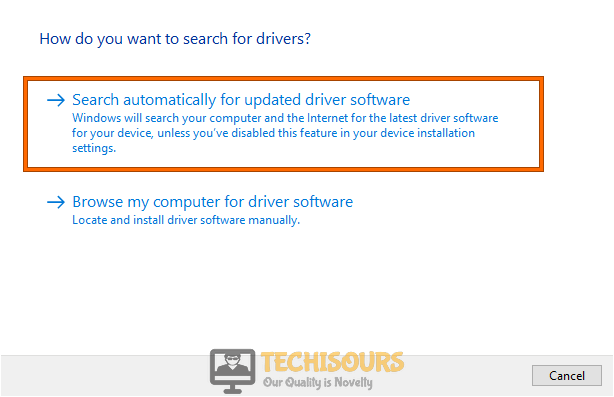
- Select the “Update Driver” option and from the next window, click on the “Search Automatically for updated driver software” option.

Search automatically for updated driver - Let Windows check the internet to see if there are any driver updates available and if there aren’t, click on the “Search for Updated Drivers on Windows Update” option.
- From there, check for Windows updates and any driver updates will be automatically installed on your computer.
- Restart your computer and check to see if the High CPU usage has been fixed for the ntoskrnl.exe process.

Method 6: Windows Memory Diagnostics Tool Scan
- By Pressing the “Window key + R” keys, launch the Run prompt on your computer.
- After that, type in “mdsched.exe” and press the “Enter” key to launch into the Windows Memory Diagnostic tool.
- Click on the “Restart Now and Check for Problems” option.

Clicking on the “Restart Now and Check for Problems” button - After the computer has been restarted, wait for the process to complete and check to see if doing so fixes the ntoskrnl.exe BSOD issue.

Method 7: Perform a Full Shutdown
- Press the “Windows” key on your keyboard and click on the “Power Symbol“.
- From here, press down the “Shift” key on your keyboard and click on the “Shutdown” option.

Shutting Down the Computer Completely - This will perform a complete shutdown of the system and will revert some launch cache.
- Turn on your computer and check to see if doing so has fixed the issue.

Method 8: Performing System Restore
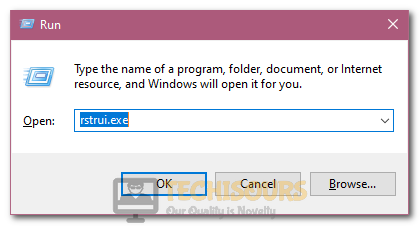
- Press “Windows + R” on your keyboard, type in “rstrui.exe” from there, click on the “Next” option.

Launching rstrui.exe to restore our computer - From the list of restore points, select one that falls before the date on which the issue started occurring.
- Click on “Next” to start restoring your computer.
- Check to see if doing so has fixed the ntoskrnl.exe issue.
Method 9: Check the Hardware
It is sometimes possible that the issue lies with the hardware instead of the software and therefore, we recommend that you try to verify that. Sometimes, issues with the RAM might be causing this spike in the resource usage by the ntoskrnl.exe process. Therefore, we suggest that you try to remove your RAM Sticks from the computer and insert only one of them if you have two installed. Check to see if that fixes the issue and then try to install the second one.
Method 10: Uninstall 3rd Party Antivirus Software
- Press “Window + R” keys from your keyboard, type in “appwiz.cpl” to launch into the application wizard.

Typing in “Appwiz.cpl” and pressing “Enter” - Right-click on the antivirus software and select the “Uninstall” button.
- Wait for the antivirus to be uninstalled from the computer and check to see if doing so fixes the issue.

Method 11: Update your Realtek Audio Driver
- Download the latest Realtek Audio Drivers from this website.
- After that, click on the downloaded executable and install them on your computer.
- Check to see if doing so fixes the ntoskrnl.exe high CPU usage.
Method 12: Turning off BlueStacks & Android emulators
- Press “Windows + R” to launch the Run prompt and type in “Notepad” and press “Enter”.
- Type the following statements in the “Notepad”.
C:Program Files (x86)BlueStacksHD-Quit.exe

net stop BstHdUpdaterSvc

net stop BstHdLogRotatorSvc

net stop BstHdAndroidSvc
- Click on the “File” option and from there, select the “Save As” option.

Clicking on the “Save As” option - Click on the “Save As Type” dropdown and from there, click on the “All Files” option.
- Type “script.bat” as the file name and select “Save”.
- Now, double click on this script.bat file that we have just created to run it.
- Check to see if doing so has fixed the High CPU usage by the ntoskrnl.exe process.

Method 13: Disable Runtime Broker
- Press “Windows” + “I” on your keyboard and click on the “System” option

Choose System Option - Select the “Notifications and Actions” option from the left side.
- Uncheck the “Show me tips about Windows” and “Get tips, tricks & suggestions as you use Windows” options.

Clicking on the “Get Tips, Tricks, and Suggestions as you use Windows” toggle to turn it off - Restart your computer and check to see if doing so fixes the ntoskrnl.exe high CPU usage issue.


Method 14: Changing Registry Settings
- Press “Windows + R” to launch into the Run prompt, type in “Regedit” and press “Enter” to launch into it.

Typing “regedit” - From here, navigate to the following address.
HKEY_LOCAL_MACHINE>SYSTEM>CurrentControlSet>Control>Session Manager>Memory Management
- In here, double click on the “Clear Page File Shutdown” registry and change the “Value Data” to “1”.
- Exit out of the registry and check to see is if doing so fixes the issue.

Method 15: Uninstall Problematic Windows Update
- Press “Windows” + “I” to launch into the settings
- Select the “Update and Security” option and select the “View Update History” option.
Clicking on “Update and Security” - Select “Uninstall updates” on the view history screen.
- Select any recently installed update that you feel might have caused this issue and uninstall it from your computer.
- Check to see if the ntoskrnl.exe blue screen of death error.
Method 16: Run Troubleshooter
- Press “Windows + I” to get into the Windows settings.
- Click on the “Update and Security” option and from the left side, select the “Troubleshoot” button.

Update and Security - Click on the “Additional Troubleshooters” option and from there, if available, run the “BSOD Error” troubleshooter.
- Check to see if doing so fixes the ntoskrnl.exe BSOD error.

Method 17: Increase Virtual Memory
- Press the “Window + R” keys on your keyboard and type in “sysdm.cpl”.

Clicking on the “sysdm.cpl” option - Press “Enter” to launch into the system properties panel.
- From there, click on the “Advanced” tab and select “Settings” under the “Performance” settings block.

Clicking on the “Settings” option under the Performance option - From the new window, click on the “Advanced” tab and then select the “Change” option under the “Virtual Memory” button.
- In here, make sure to uncheck the “Automatically manage paging file size for all drives” option.

Clicking on the “Automatically Manage Paging File Size for All Drivers” option - After doing that, make sure to click on the System Drive Letter on which the Windows has been installed and select the “Custom Size” button underneath it.
- In the end, make sure to enter the amount in Megabytes that you want to dedicate to the drive as virtual memory in the “Maximum size (MB)” box and make sure that you increase it more than the previously allotted size.
- Click on “OK” to save your changes and check to see if doing so fixes the ntoskrnl.exe high CPU usage issue.


Method 18: Disable Fast Startup
- Press the “Window + I” keys on your keyboard to open settings.
- Click on the “System” option from the menu and then select the “Power & sleep” button.
- From here, click on the “Additional power settings” button from the right side under the “Related Settings” option.
- After doing that, click on the “Choose what the power buttons do” option.

Choose what the power button does - If the “Shutdown settings” are highlighted grey, click on the “Change settings that are currently unavailable” to make sure that they become available to reconfigure.
- From there, make sure to uncheck the “Turn on fast startup” option and then click on the “Save Changes” button.
Method 19: Run Ccleaner
- Download and install the “Ccleaner” application on your computer.
- Run the program on your computer and follow through with the on-screen instructions to remove junk files from the computer.
- Wait for the process to be completed and check to see if doing so has fixed the ntoskrnl.exe high CPU usage.
Method 20: Ending Processes from the Resource Monitor
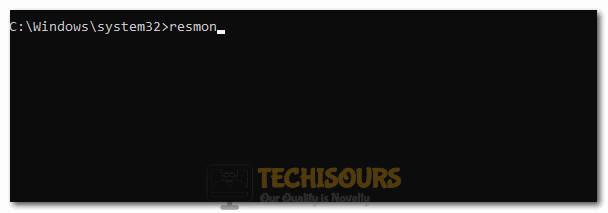
- Press “Windows + R“, type in “cmd” and press “Shift + Ctrl + Enter” to launch into the command prompt with admin permissions.
- Type in “resmon” and press “Enter” to run the command on your computer.

Typing in the Resmon Command - In the Resource Monitor Window, right-click on any process that is using excessive resources and select the “End Process” option.
- Check to see if doing so fixes the Ntoskrnl.exe high CPU Usage issue.
Method 21: Disk Cleanup
- Press “Windows + R“, type in “cmd” and press “Shift + Ctrl + Enter” to launch into the command prompt with admin permissions.
- Type in “cleanmgr” and press “Enter” to launch into the clean manager.

Running CleanMgr - From the new window, click on the dropdown and select the System Drive on which the OS is installed and click on “OK”.
- Check to see if doing so has fixed the ntoskrnl.exe BSOD Error.

Method 22: Scan/Restore Health
- Press “Windows + R“, type in “cmd” and press “Shift + Ctrl + Enter” to launch into the command prompt with admin permissions.

Typing in cmd - In here, paste the following command and press “Enter” to execute it on your computer.
DISM.exe /Online /Cleanup-image/ Restorehealth
- Check to see if doing so fixes the ntoskrnl.exe issue.

Method 23: Run Memtest86
- On another system, plug in a USB drive and download the “Windows Memtest86 Auto-Installer” on the computer.
- Run the downloaded executable and extract it on your computer.
- Launch into the folder in which it has been extracted and click on the “Memtest86+ USB Installer” option.
- From the next window, select the connected USB Drive to burn the Memtest86 software onto it.
- After the process is completed, plug this USB into the computer that is getting the Ntoskrnl.exe BSOD Error and make sure to set its Boot order to boot from the USB that we connected.
Note: This Boot Order setting can be changed from the Bios. - Restart the device and the Memtest86 software will scan your computer’s memory and fix any issues that can be fixed.
- Check to see if the BSOD errors with ntoskrnl.exe are fixed.
Method 24: Reset BIOS Settings
- Press “Windows + I” to launch into the settings.
- From there, click on the “Update & Security” option and select “Recovery” from the left side.
- Under the “Advanced Startup” option, click on the “Restart Now” button.

Advanced Startup - When your computer restarts, it should load a blue screen with advanced troubleshooting options.
- Select “Troubleshoot” from the list of options and then click on the “Advanced” button.

Choose Troubleshoot - Choose the “UEFI Firmware Settings” option and select the “Restart” option to continue.
- From there, make sure to find and select the reset Bios settings option.
- Check to see if resetting the Bios settings to default fixes the error.


Method 25: Reconfigure Power Settings
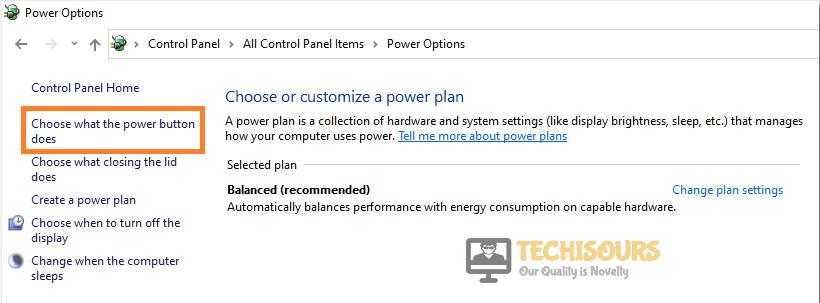
- Press the “Windows + X” keys from your keyboard and select the “Power Options” button.

Select Power Options - Click on the “Screen” dropdown and select “Never”.
- After that, select the “Sleep” dropdown and set it to “Never” as well.
- Check to see if doing so fixes the issue.

Method 26: Disable the Hardware Acceleration in Chrome
- Launch the Chrome browser on your computer, click on the “Three Dots” at the top right and select the “Settings” button from the menu.
- Scroll down to the bottom and click on the “Advanced” button.
- Under the “System” heading, make sure to toggle off the “Use hardware acceleration when available” option if it has been enabled.

Disabling Use hardware acceleration when available - Restart the computer and check to see if the BSOD Errors due to ntoskrnl.exe are fixed.

Method 27: Disable Superfetch Service
- Press the “Window + R” keys from your keyboard to start the Run prompt.
- In the Run prompt, type in “services.msc” and press “Enter” to launch into the service management window.

Typing in “services.msc” - In this window, right-click on the “Superfetch” service if you have it and select the “Stop” option.
- Check to see if doing so fixes the issue.

Method 28: Defragment the Hard Drive
- Press “Windows + S” keys to launch into the search bar and type “Defragment and Optimize Drives” into it.
- Click on the first option that appears and from there, click on your Drive letter and select the “Optimize” button.

Clicking on the Optimize Option - After optimizing the drive, make sure to check if the issue is fixed.

Method 29: Rollback Third-party Drivers
- Press “Windows + R” to launch the Run prompt, type in “devmgmt.msc” and press “Enter” to launch into it.
Typing devmgmt.msc in the Run prompt - Now, identify the Third-party drivers that have been installed on the computer.
- Right-click on the driver and then choose “Properties”.
- From here, click on the “Roll Back Driver” and follow the on-screen instructions to roll back the driver.

Rollback Driver - Finally, restart your device to check whether the “driver_irql_not_less_or_equal ntoskrnl.exe” error persists or not.
- If the above doesn’t work, click on the “Disable” option at the 4th line and even if that doesn’t work, go ahead with selecting the “Uninstall Driver” option.

Method 30: Remove External Hardware
If you have connected any extra hardware on the computer, try to remove it because it might be causing this issue. Sometimes, the External Hardware on the computer might be glitched due to which the error might be getting triggered.
Method 31: Update BIOS
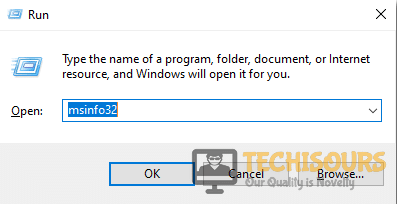
- Press “Windows + R” to launch the Run prompt and type in “msinfo32” and press “Enter”.

Type msinfo32 Command - From here, note down the Baseboard version and the Motherboard info.
- Paste the info into your browser and search for the Bios for that particular motherboard.
- Download this onto your computer and note down the location.
- After that, plug in a USB device and extract the downloaded file on the USB device.
- Now, restart the computer and boot into the Bios of the computer.
- Once you are in the BIOS you need to select the “Boot” tab enlisted on the top and enable “Launch CSM” and “Launch PXE OpROM”
- If you cannot find those options, there might be an Update Bios option inside the Bios. Therefore, we suggest that you also google the instructions for updating the Bios on that Motherboard.
- Make sure that you don’t face any power interruptions during this process because that could brick your board.
- After updating the Bios, check to see if you are able to fix the issue.
Method 32: Run Driver Verifier
- Press “Windows + R” to launch the Run prompt, type in “verifiergui” and press “Enter” to launch the Driver Verifier.
Typing in Verifiergui and pressing Enter - On the window that pops up, click on the “Create Standard Settings” option and from there, click on the “Automatically Select All Drivers Installed on this Computer” select the “Next” button from the bottom.

Clicking on the “Automatically Select all Drivers Installed on this Computer” option - After this, closeout of the Window and then, get back into this Driver Verifier window.
- Get back into the Driver Verifier window and select the “Display information about the currently verified drivers” option.
- If a driver is still not verified, try to update it or reinstall it on your computer.
- Check to see if doing so fixes the “driver_irql_not_less_or_equal ntoskrnl.exe” error.


Method 33: Hard Disk Drive Test
- Download the “Seatools for windows” software on the computer and install it on your device.
- After that, run the application and from there, check the drive that the Windows is installed on and from there, click on the “Basic Tests” tab enlisted on top.
- After this, a listed menu will appear with several different options and from here, select the “Fix All” option and wait for a while.
- After waiting for a while, the diagnosis result will appear.
- Check to see if the Drive is ok and if it isn’t, you will have to look into ways to fixing this.
Method 34: Disable Overclocking
In certain cases, it is possible that the overclocking settings that you have set on your computer are causing this issue. Therefore, we suggest that you try to disable the Overclock and then check to see if doing so fixes the issue.
Method 35: Disable XMP function from BIOS
- Click on the Windows logo on the lower left side and from there, select the “Power” button and then select the “Restart” option.

Triggering a computer restart - After this, press the “F2” or the “DEL” key to get into the Bios.
- In the Bios, look for the “XMP” function and change it to the “Disable” option.
- After this, make sure to save your settings and exit out of the Bios.
- Restart the computer and check to see if doing so fixes the ntoskrnl.exe BSOD error.

Method 36: Performing a System Reset
- Press “Windows + I” to launch Windows Settings, click on the “Update and Security” option and from there, select the “Recovery” option from the left side.
Clicking on “Update and Security” - After that, click on the “Get started” option under the “Reset this PC” option.
- Now, follow the instructions on the screen and let the process starts, it will take some time.
- Finally, your device would be reset, check if the “driver_irql_not_less_or_equal ntoskrnl.exe” error still exists or not.
Method 37: Track Verified Driver Status
- Press “Windows + R” to launch the Run prompt, type in “verifiergui” and press “Enter” to launch the Driver Verifier.
Typing in Verifiergui and pressing Enter - On the window that pops up, click on the “Create Custom Settings (For Developers)” option and select the “Next” button from the bottom
- On the next screen, if you are using Windows 8, select all the available options and if you are using Windows 10, remember not to select “DDI compliance checking” and “Randomized low resource simulation” options.

Selecting Appropriate Drivers in the Driver Verifier Window - After that, select the “Select driver names from a list” option and click on the next option.
- From here, select all the drivers that don’t come from Microsoft and restart your computer.
- Check to see if doing so fixes the error.

Method 38: Uninstall Drive Pool
- Press “Windows” + “R” to launch into the Run prompt, type in “Appwiz.cpl” and press “Enter” to launch the Application Wizard.
Typing in “Appwiz.cpl” in the Run box. - From there, search and right-click on the DrivePool Program.
- Click on the “uninstall” option and follow through with the on-screen instructions to completely uninstall this program from your computer.
- Check to see if doing so fixes this issue.

Method 39: Updating Drivers
In certain cases, the Outdated Drivers on your computer might be triggering these issues with the process. Therefore, we suggest that you try to update your drivers to the latest available versions and then check to see if you are able to fix this error once and for all.
Method 40: Disable Antivirus Software and Firewalls
- Press “Windows + S” to launch the search bar and from there, search for Windows Defender Firewall.
- Click on the First option and from there, click on the “Turn Windows Defender On or OFF“.

Clicking on the “Turn Windows Defender Firewall On or OFF” option - From here, make sure to select the “Turn Off Windows Defender Firewall” option for both the Private and the Public Networks.
- Click on “Ok” to save your changes and exit out of the Window.
- Check to see if doing so fixes the Blue Screen of Death with Ntoskrnl.exe.

Method 41: WinDBG for BSOD
- Press “Windows + R” to launch into the Run prompt, type in “msconfig” and press “Enter” to launch into the Microsoft Configuration panel.
Typing in “Msconfig” - Click on the “Boot” tab and then click on the “Advanced Options” button.
- In here, ensure that the “Maximum Memory” box has been checked.
- After doing that, exit out of the window and press the “Windows + R” button to launch the Run prompt.
- From there, type in “sysdm.cpl” and press “Enter” to launch into the system properties panel.
Clicking on the “sysdm.cpl” option - Click on the “Advanced” tab and select the “Settings” option under the “Startup and Recovery” box.
- Under the “Write Debugging Information” option, click on the dropdown and from it, select the “Small Memory Dump (256 KB)” option.
- Now click on “Settings” under the Startup and Recovery.
- Select “Small memory dump (256 KB)”, click on ok and restart your PC.
- After that, download and install the “WinDBG” app on your computer.
- Run it and follow the on-screen instructions to check for any issues on the computer.
- Check to see if you are able to fix the Ntoskrnl BSOD in this way.
Method 42: Disabling Windows Search Device
- Press “Windows” + “R” to launch into the Run prompt and from there, type in “services.msc” and press “Enter” to launch into the service management window.
Typing in “services.msc” - In the services list, right-click on the “Windows Search” option and select the “Properties” option.
- After that, click on the “Startup Type” dropdown and select “Disabled” from the list.
- Once that has been done, click on the “Stop” button and then on “Apply”.
- In the end, click on the “OK” button to exit out of the Window and check to see if the issue has been fixed.
Method 43: Repairing Windows Image
- Press “Windows + R“, type in “cmd” and press “Shift + Ctrl + Enter” to launch into the command prompt with admin permissions.
Typing in cmd - Type in the following command and press “Enter” to start the Windows Image Repair.
Dism/Online/Cleanup-Image /RestoreHealth
- Let the process be completed and check to see if you are able to fix the Ntoskrnl BSOD issue.
Method 44: Windows Performance Toolkit
- Download and install the “Windows Performance Analyzer” on your computer.
- Press “Windows + R” keys to launch into the Run prompt and type in “cmd”.
Typing in cmd - After doing that, press the “Ctrl + Shift + Enter” keys from your keyboard to run it with Admin permissions.
- After that, type in the following command.
xperf- on latency – stakwalk profile -buffersize 1024 – Maxfile 256 -Filemode Circular && timeout -1 && xperf -d cpuusage.etl
- A short report will be stored, and you can view it and see which programs were not properly working.
- Reinstall those programs and see if the issue is resolved.
Implement all of the aforementioned methods to avoid getting this error in the future but if you continue to face any difficulty then feel free to contact us for further help.