Easily Fix Nest won’t Connect to WiFi Issue
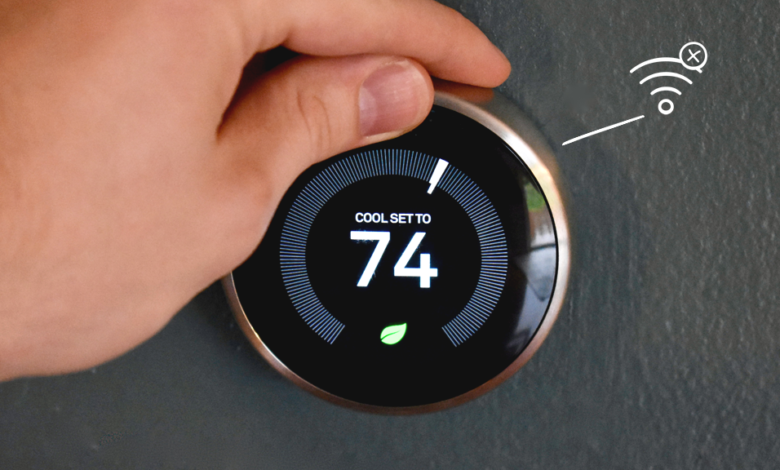
The Google Nest Learning Thermostat is a device solely designed to help save energy and optimize the temperature of your home. It is a programmable device that adjusts itself and sets the heating and cooling temperatures of your home according to your preferences. It is also able to create a personalized schedule for you to keep you comfortable as well as conserve energy effectively but a major problem that users encounter here is that if WiFi goes down, you’ll have trouble connecting your nest device to the internet.

This article will walk you through necessary tips and tricks in order to overcome nest won’t connect to wifi issue. If your WiFi connection doesn’t appear in the network connection list of your Google Nest then implement the solutions indexed below carefully and verify if you are able to solve the problem successfully.
Before You Start:
- Hold On for A While: The moment you come across this error the first step should be to wait for a while until the thermostat actively scans for the available WiFi networks. It’s because the Nest thermostat may show you the initial list of networks but may take a while to load your WiFi network into it. Simply wait for a few seconds until your network starts appearing and then you can connect to it easily.
- Monitor WiFi Signal Strength: A poor and unstable internet connection may also lead to connectivity issues just like this one. Therefore, you must have strong and stable network connection to avoid such issues.
- Check Your Internet Coverage Area: You need to make sure that the Nest device is within the range of your WiFi router as a considerate amount of distance between them can lead to unstable and weak network signals. This will eventually prevent your devices from connecting effectively, so in order to avoid this simply move it near to your WiFi router and if you can’t do this you can also use a WiFi range extender to boost your network signals.
- Inspect the Power Cables: Your WiFi may also not function properly if the cables are loosened. So, try checking the Ethernet cable and make sure it is connected properly to both ends. Meanwhile, also examine the power cords connected to the Nest device and see if they are properly attached and aren’t damaged as faulty cables can also lead to weak wireless signals. If the cables have deteriorated, it’s better to replace them with new cables. Moreover, also check if electrical sockets are working fine by connecting your router to an alternate socket and powering it through it.
- Validate the WiFi credentials: During the device set up process you need to ensure that you’ve put in the accurate network credentials including the network name (SSID) and password. Just cross check the network details and validate the information including any capitalized or special letters.
- Avoid Using Public WiFi Network: If you are attempting to connect your Nest device to a public WiFi network you probably may encounter such errors. So, avoid connecting to networks found in shared apartments, businesses etc and instead connect your Nest device to a private network.
- Use the Updated Password: If you’ve recently changed your WiFi password, the Nest device won’t be able to connect to the network until and unless you reconfigure the new password in thermostat as well. In order to reconnect Google Home to the WiFi do the following:
i: Proceed to the “Google Home App” on your mobile device and select the device you want to reconnect.
ii: Then select “Settings” represented by the gear icon and tap on the “Device Information”.
iii: In the pop-up window select “WiFi -> Forget Network” and then move back to the main screen of the Home application.
Tap on Forget Network option iv: On the main screen tap the “+” button to add a new device, and then follow the on screen instructions to set up the device with the new WiFi password.
- Restrict Other Devices on Your Network: Try limiting other devices which are on the same network as your Nest app as limited bandwidth can also be a cause of this error. If more devices are going around or are engaged in an activity of downloading movies or shows at the same time as your Nest application, it can also put a pause on your ongoing activity. In this case turn “OFF” all of the extra device on your internet and then try doing your required task or as an alternative you can also try upgrading your internet package to have more bandwidth available.
- Check For a Network Outage: Simply visit the official website of your internet service provider and look for any internet outages in your area. If internet is down in your area, you won’t be able to connect Nest to your WiFi. In such a scenario you’ll have to wait until the services get restored.
- Ensure Wireless Connectivity: In order to ensure the perfect network connection stand nearby your thermostat device and try connecting the WiFi network to a wireless interface such as your mobile phone. This will give you an insight on the connectivity and signal strength of your network. If the device isn’t able to connect you may need to contact the Internet Service Provider to ensure the services in your area.
- Examine Your Nest Device: Inspect your Nest thermostat carefully and if you see a display message like “No power to RC Wire”, it means that your device terminal isn’t getting enough power. In this case there must be an issue with your device, and you might need to consult the experts to put your device back to order.

No Power to RC Error - Check Whether Your Router is Compatible with Nest: You should also take a moment to ensure that your network and router model both are compatible with Google’s Nest thermostat. Simply head to the Google Nest support page and there you’ll find a list of compatible internet systems to work with Nest.
- Determine the Availability of Nest Services: Explore the availability of Nest services in your area to ensure that the services are available online. You can do this by visiting the official Nest website (nest.google.com) or contacting Nest support directly. If the services are down, the device won’t connect to your WiFi network. Hence in this case you’ll have to wait until the services get operational and Nest resolves issues on its end.


How to fix Nest Won’t Connect to WiFi After Power Outage Issue:
Solution 1: Check the Battery Level
The Nest won’t connect to WiFi if its battery level has been drained and falls below 3.6V. The low battery level can be due to some wiring issue as well, so unplug the device from the wall and then replug in for it to be able to charge properly. In order to check the battery level, go with the following steps:
- Launch the “Google Home” application on your smartphone and make sure it is connected to the same WiFi network as your Nest device.
- Locate the “Nest Device” for which you want to check the battery level and access the device “Settings”.

Choose NEST Device Settings - In the Settings window look for the “Battery Status” or “Information Section” (depending on the specific Nest device you are using).
- Here view the current “Battery Level” and you’ll get a better idea if it’s the device battery level that is causing the issue.

Monitor NEST Device’s Battery Settings


Solution 2: Restart the Router
There must be some launch error with your router and upon restarting it, the network might start to appear on your thermostat device. In order to restart the router, follow these steps:
- Locate the router and “Unplug” it from the power source. Alternatively, you can also use a “Power” button to turn the router “OFF”.
- If you have any devices connected to the router via an ethernet cable, make sure to plug them “OFF” as well.
- Now let the router remain “Unplugged” for a few seconds in order to clear the temporary configurations.
- Then reconnect the “Power Cable” back and let the router turn “ON” fully.

Unplug the Router - Once the router gets restarted you can plug back all of the devices via ethernet cable.
- Finally test your internet connection and check to see if nest can connect to WiFi now.

Solution 3: Restart the Nest Thermostat
You can try to restart the thermostat to help resolve any connectivity issues. In order to restart the Nest thermostat, proceed with the steps below:
- On your thermostat device press the “Display” button to bring up the main menu.
- Then scroll through the list to find the “Settings” option and click to select it.
Choose NEST Device Settings - Next move through the Settings menu to locate and select the “Reset” option.
- From the available reset options click to choose “Restart” in order to restart the device.

Choose Restart Option Nest Device - Confirm the restart and then wait for a while until the device sets up completely and after completing the setup, verify if the error got removed.

Solution 4: Check For a W5 Issue
If your thermostat is completely unable to see or scan any nearby WiFi networks including your home’s network connection it is quite probable that your device may have a W5 issue but keep in mind that this will only affect the third generation Nest thermostat or Nest Thermostat E. To check for this, you can follow a couple of steps listed below:
- On your thermostat device press the “Display” button to bring up the main menu.
- Then scroll through the list to find the “Settings” option and click to select it.
Choose NEST Device Settings - Here “Turn” the ring until your network starts appearing on the display. As soon as it happens you can quickly connect to it and then see if the device operates normally.
Solution 5: Tweak the Network Configuration
Both Google Nest and WiFi operate on DHCP protocol which is a prevalent and most commonly used protocol. But, if your service provider mandate on a different protocol such as static IPs or PPPoe or you yourself have modified the network settings then you’ll have to go to the configuration and tweak the static IP or PPPoe accordingly. This might help you to overcome nest won’t connect to wifi low battery problem.
Solution 6: Type In Your Invisible Network Name Manually
If your WiFi network is hidden so that it doesn’t broadcast the network name (SSID) you will have to enter the invisible network name manually. To do so, you can implement these steps:
- On your thermostat device press the “Display” button to bring up the main menu.
- Then scroll through the list to find the “Settings” option and click to select it.
Choose NEST Device Settings - Here scroll through the menu to find the “Network” option and click to select it.

Selecting Network Option Nest Device - Then look for “Add Network” or “Add Hidden Network” option and click to select it. Now you will be able to type in the hidden network name.
- Now type in the “Network Name” accurately and if you are prompted to enter the “Password” as well go ahead to enter it.
- Next select the “Connect” or “Join” option to connect to the network and then see if the error persists or not.

Solution 7: Check Thermostat’s Compatiblity with WiFi Network
In case you own a dual-band router and want to utilize the 5GHz network you need to make sure that the Nest device is compatible. If you encounter any difficulties connecting, try to connect to the 2.4GHz network first and then make a transition to the 5GHz network. Also, there exist some networks which aren’t recommended for Nest thermostats due to security concerns or device compatibility issues so avoid connecting with these networks. Some of them include mobile hotspots, public or guest networks, enterprise networks etc.
Solution 8: Check Network Connectivity Settings
Although it’s very rare that your WiFi router settings will cause the issue but it’s better that you cross check the settings once using the router’s manual. The settings must be set to activating the “2.4GHz” WiFi signal on your router, ensuring that “802.11 b/g/n” is enabled if you own a 802.11 ac router, adjusting your WiFi routers’s DHCP lease time to a minimum of two hours, and if you have a Nest thermostat enable the “Power Safe Mode” option on your router.
Solution 9: Turn Off Wireless Devices Temporarily
Most of the wireless devices operate on the same frequency range as that of WiFi so in order to avoid the wireless interference try shutting down any of such devices available in your home including but not limited to cordless phones, microwaves, baby monitors, security cameras, Bluetooth devices etc.
Solution 10: Reset the Nest Thermostat
In order to reset the Nest thermostat, follow the below-mentioned procedure:
- On your thermostat device press the “Display” button to bring up the main menu.
- Then scroll through the list to find the “Settings” option and click to select it.
Choose NEST Device Settings - Next move through the Settings menu to locate and select the “Reset” option.
- From the available reset options click to choose “Factory Reset” in order to initiate the reset process.
- A confirmation prompt will appear up on your screen, click to “Confirm” the reset and wait for a while until the reset gets completed.
Solution 11: Use Latest Version of the Nest Application
Another troubleshooting tip if you are experiencing difficulty in connecting thermostat to WiFi is that consider ensuring your phone or tablet has up to date version of the Nest application (for Nest Learning Thermostat or Nest Thermostat E) or the home app (for Nest Thermostat). While the Nest app will automatically install the latest updates when WiFi is working, but in order to manually install the updates follow the procedure below:
Nest Thermostat Home Application Users:
- Grab your phone or tablet, here locate and open the app store (“Google Play Store” for Android and “App Store” for iOS).
- Here use the search button to find the “Nest” application.
- When you get the app now look for an “Update” button in order to check for the latest updates available.
- Tap the “Update” button in order to initiate the download and installation of updates.
- Now wait for the update to be completed, open the updated application and verify if it functions normally.
Nest Thermostat E or Nest Learning Thermostat Users:
- Firstly, ensure that your Nest device is connected to a stable internet connection.
- On your thermostat device press the “Display” button to bring up the main menu.
- Then scroll through the list to find the “Settings” option and click to select it.
Choose NEST Device Settings - In the Settings menu look for the “Software” or “Update” option to check if there are available updates for your thermostat.
- If an update is available, click on the “Install” button and follow the on-screen instructions to automatically install the updates on your system.

Updating NEST Thermostat - Wait for the update to get completed and then you can verify the update by checking the software version in the Settings menu.

Solution 12: Adjust a Few Device Settings
Make sure that the airplane mode is turned “OFF” and the WiFi option is enabled on your Nest device. Open the WiFi settings on your device and make sure “Google WiFi” or “Google Nest WiFi” is selected. After that also ensure that your device is not configured to use a “Static IP Address”, and also isn’t paused in the Google Home application.
Solution 13: Contact Nest Support
If you’ve tried implementing all of the fixes indexed above and still got no useful results, then the ultimate resource left is that you contact the Google Nest Support team, and they will better address your issue. Launch an online chat with the team and they’ll provide you with necessary troubleshooting tips and tricks tailored to your situation.
For further detail and information feel free to reach out to us by clicking here.