How to Fix Windows Couldn’t Connect to the ProfSvc Service Error on Windows 10?
A number of Windows users encounter a very common error that states “Windows couldn’t connect to the profSVC service. User Profile cannot be loaded”. This error usually arises when the user tries to log in to his user account and it normally happens due to corrupt user profile or if the user profile service fails, at least according to Microsoft techs. If this happens on your computer, don’t worry because this error can be solved easily.

What prevents the Windows to connect to ProfSvc Service?
Different reasons are considered to be the reason behind this problem in different cases but it has been observed that it mostly occurs only on Windows 10 and isn’t seen much on Windows 7 or 8. Some of these reasons are listed below:
- This error might arise due to a corrupted user profile which prevents you from being able to connect to the ProgSvc service.
- Windows might also face difficulties while connecting to the progSVC service because the User Profile Service fails.
- Your corrupted System files can also trigger this error.
Pre Tips
If you are the only user in your system and you encounter this message on Windows 10, try to edit the registry and resolve this issue. Follow the steps to carry this task out.
- On the login screen, press and hold the Shift key.
- You will be taken to the Advanced Options Windows.
- From those options, choose Troubleshoot.
- Now select Advanced Options.
- Now select Command Prompt.

Command Prompt - In the command prompt, type the following command to open the registry.
-
regedit
- Now, on the left pane, go to HKEY_LOCAL_MACHINE -> SYSTEM -> CurrentControlSet -> Services -> ProfSvc.
- On the right pane, double click on Start.

Editing Registry - Enter 2 in the Value data.
- Now reboot your computer and check if the problem is resolved or not.


What to do if Windows 10 Couldn’t Connect to the profsvc service?
Solution 1: Restore your System
If you still can’t get rid of this error, try to perform a system restore by following the steps given below:
- On the login screen, press and hold the Shift key.
- You will be taken to the Advanced Options Windows.
- From those options, choose Troubleshoot.
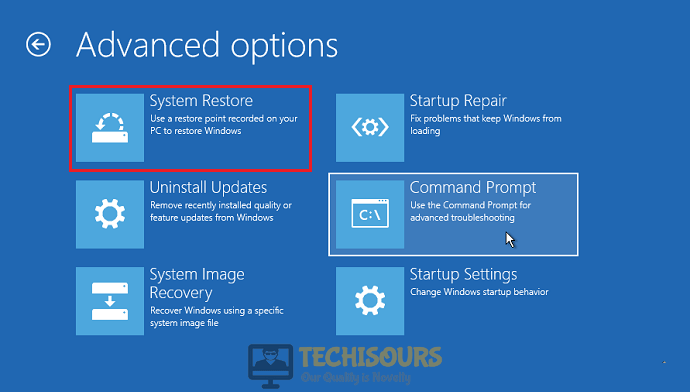
- Now select Advanced Options.
- Now select System Restore.
System Restore - Select a point where you were not getting this error and restore your PC.
Solution 2: Restore the original ProfSvc service
If you are still getting this error, try to restore the original ProfSvc services from windows 10 by following the steps given below:
- In the taskbar, click the search button and type Command Prompt.
- Right-click the icon and click Run as Administrator.
- Type the following commands one by one and check if the issue is resolved.
sc config ProfSvc start= auto
sc start ProfSvc
Solution 3: Create a new user account
If none of the solutions, explained above, works, make a new user account and try to log in to it.
- On the login screen, press and hold the Shift key.
- You will be taken to the Advanced Options Windows.
- From those options, choose Troubleshoot.
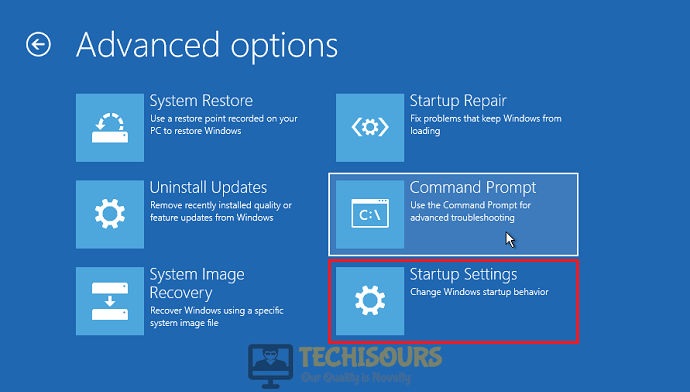
- Now select Advanced Options and then click on Startup Settings.
Startup Settings - From the list appeared n the screen, select Enable Safe Mode with Command prompt.
- Now type the following command and press enter.
-
net user administrator /active:yes
- Log in to your user profile and create a new profile with administrator privileges.
- Lock your screen and then log in to your administrator account.
- Now open the command prompt as an administrator and disable the built-in administrator account by typing the following command.
-
net user administrator /active:no
- Open the command prompt again as administrator and type the following commands one by one and press enter. After this restart your computer and check if the problem remains.
-
net user NewAccount password /add
net localgroup Administrators NewAccount /add
If you want further assistance, contact here.