How to Fix Wolfenstein 2 Could not Write Crash Dump Error [Complete Guide]
Wolfenstein 2: The New Colossus is a fairly well-rated game and it has been a while since its release. However, Wolfenstein 2 Could not Write Crash Dump Error is certainly as old as the game itself and it hasn’t been fixed by the developers either. Therefore, we intended to take it upon ourselves and compiled a comprehensive guide of fixes, workarounds, and solutions to help you eradicate this error from your computers completely.

What Causes the Wolfenstein 2 Could not Write Crash Dump Error?
Before we start implementing the solutions on your computer, we think it is important that you are aware of the triggers that actually cause this issue in the first place and we have compiled some of the most common ones as follows.
- Compatibility Issues: There are cases where the game and the operating system aren’t completely compatible with each other and this gives rise to Wolfenstein 2 Could not Write Crash Dump Error. A resourceful way to circumvent this is to just try running the game in a compatibility setting which should eliminate this potential trigger.
- Game File Integrity: It is important that all of the game files are present and have been arranged in the specific manner in which the developers intended, If that is not the case then this error will be seen while trying to launch Wolfenstein 2 and the game will simply not launch.
- Config File Corruption: The Wolfenstein 2 config file contains important user data, settings, and other instructions that determine the launch point of the game. If this file has been corrupted, Wolfenstein 2 will not launch properly and you will probably get the ‘Could not Write Crash Dump’ Error on your computer.
- GPU Drivers: The Graphics Card Drivers might also be responsible for this issue if they have been outdated or if they aren’t installed properly on the system. The GPU drivers are primarily responsible for allocating GPU resources to the game and if they fail to do so, it will be unable to launch properly.
- Integrated GPU: Sometimes, this error is also triggered if the game sets to launch and run its GPU models from the integrated graphics installed on the system instead of the dedicated ones and this can end up causing the Wolfenstein 2 could not write crash dump issue on Windows.
- Steam Overlay: Overlays and other add-ons that add more functionality to your game screen can sometimes end up preventing certain game features from running properly which ends up causing this error on your computer. Therefore, it is important that you try toggling these overlays and gadgets to make sure that they aren’t causing this issue.
- Overclocking: Many performance-conscious users tend to try and get the most out of their hardware by overclocking their CPU, GPU, and other parts to a higher setting than the factory clock and as we see it, there isn’t any harm in it but that is not always the case with game developers. Some games tend not to run as smoothly on an overclocked system then they do on a factory configured one so it is best to tune those overclock settings back down to the factory ones and check to see if doing so fixes your issue.
Now that you are aware of most of the reasons that trigger this issue on your computer, we can move on towards implementing fixes to combat this issue.
Before we start:
- If you have just encountered this error on Wolfenstein 2, we recommend you to run a previously saved game and see the error persists.
- If the error is not resolved, press “Win + R” keys simultaneously on the keyboard to open the run box and search for the “%localappdata%” command.

Tying in “%localappdata%” - From here, open the “Temp” folder to delete everything inside that folder and restart the game to see if the error is removed.

Delete Temp files - Lastly, it is also recommended to disable “Async Compute” from your graphic card’s control panel in order to minimize the chance of encountering this error.


Fixing the Wolfenstein Could Not Write Crash Dump Issue:
Solution 1: Run the game in compatibility mode
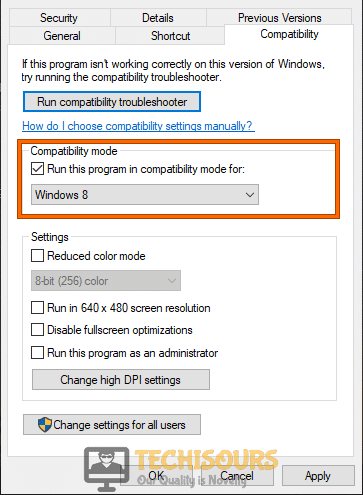
- Navigate to the desktop, right-click on the game’s desktop shortcut, and select “Properties”.
- Now move to the “Compatability” mode and check the box that is associated with “Run this program in compatibility mode for” option.

Running in compatibility mode - Select a version of Windows older than the version you are currently using on your computer and apply the settings.
- Now check the box parallel to “Run this program as an administrator” and click on “OK”.

Running Wolfenstein 2 as an administrator - After making the changes, run the game to see if the Wolfenstein 2 error persists.

Solution 2: Verify the integrity of the game files
- Double-click on the Steam shortcut located at your desktop to open it and navigate to “Library”.
- Now right-click on Wolfenstein 2 and select “Properties” from the pop-up menu.
- Navigate to the “Local files” tab and select “Verify Integrity of the Game Files”.

Verify Integrity of the Game Files - When the verification process is completed, hopefully, the error would be rectified but if the issue still persists proceed to the next potential fix indexed below.

Solution 3: Tweak compatibility settings
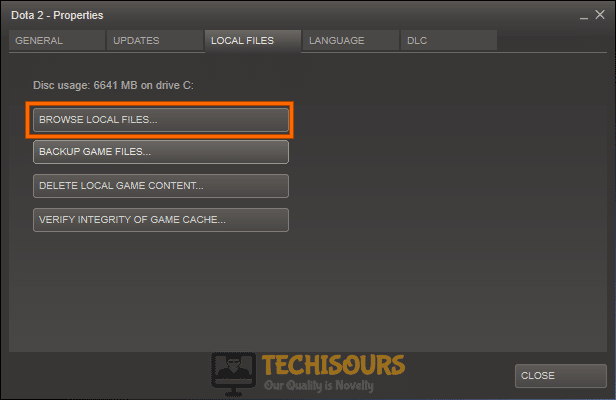
- Double-click on the Steam’s shortcut located at your desktop to open it and navigate to “Library”.
- Now right-click on Wolfenstein 2 and select “Properties” from the pop-up menu.
- Navigate to the “Local files” tab and select “Browse Local Files” to go to its location in the directory.

Click on Browse Local files - Now right-click on the game’s executable file and select “Properties” from the pop-up menu.
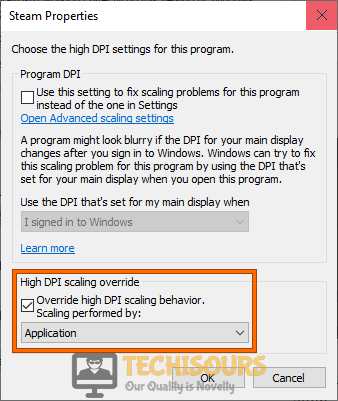
- Navigate to the “Compatability” tab and click on the “Change high DPI settings” button.
Change high DPI settings - Check the box parallel to “Override high DPI scaling behavior” and select “Applications” from the drop-down menu located below the checkbox.

Override high DPI scaling behavior - Apply the settings and see if the game is now able to write the crash dump.

Solution 4: Remove the config file
- Press the “Win + E” keys simultaneously to open the “File Explorer” and navigate to the following location on the drive.
C:\Users\Username\Saved Games\MachineGames\Wolfenstein II The New Colossus\base\Wolfenstein II The New ColossusConfig.local
- Now select the “Wolfenstein II The New ColossusConfig.local” config file and hit the “Delete” key on your keyboard to remove this file from the directory.
Note: You can also cut-paste it to another location if you want to make a backup. - Now launch the game again and see if you encounter the same error again on your PC.
Solution 5: Rollback or Update graphics drivers
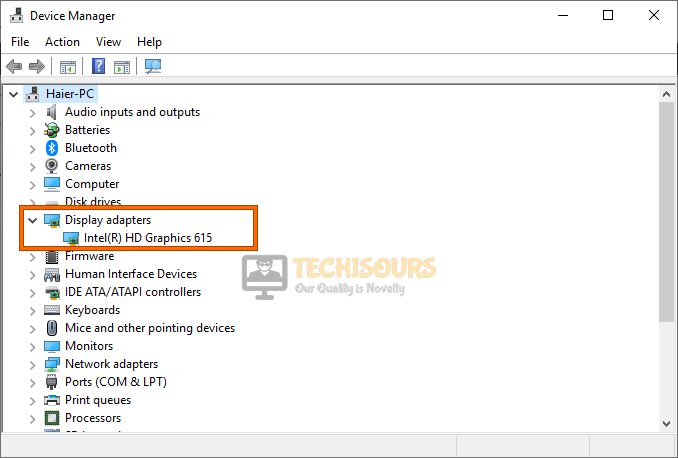
- Hit “Windows + X” keys simultaneously on the keyboard and select “Device Manager”.

Choosing Device Manager - Now click on “Display Adapters” to expand the list and double-click on the graphic card driver.

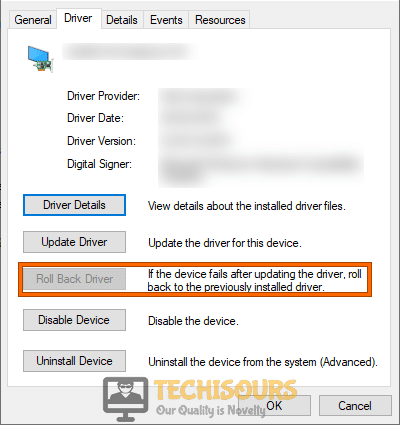
Selecting Display Adapters - Navigate to the “Drivers” tab and click on “Roll back driver” to revert to the previous version of the driver.

Rollback Driver - If the “Rollback Driver” button is greyed out, click on the “Update device” to install the latest version of the driver on your computer.

Update Driver - After carrying this task out, check if you encounter Wolfenstein 2 could not write crash dump issue again while playing the game.


Solution 6: Disable iGPU
- Press “Windows + X” keys simultaneously on the keyboard and select “Device Manager”.
Choosing Device Manager - Now click on “Display Adapters” to expand the list and double-click on the “INTEL” graphic card driver. Note: If you have any other integrated GPU, select that.
- Go to the “Drivers” tab and click on the “Disable device” to disable this device completely.
Disable device Driver - After disabling the integrated GPU, launch your game again and see if it shows an error while writing the crash dumps.

Solution 7: Install the GeForce Hotfix driver in safe mode
- Launch your favorite browser and download Display Driver Uninstaller.
- Double-click on the downloaded file and follow the on-screen instructions to install it on your computer.
- On your keyboard, press “Windows + I” keys simultaneously to open “Settings” and select “Update and Security”.

Choose Update and Security - From the left pane, click on “Recovery” and then select “Restart Now” under the heading of Advanced Startup.

Clicking Restart now - Click on “Troubleshoot” and then select “Advanced Options”.

Click on Advanced Options - Now select “Startup Settings” and click on “Restart”.
- Now select “Safe mode with networking” before the system restarts and wait while it reboots.
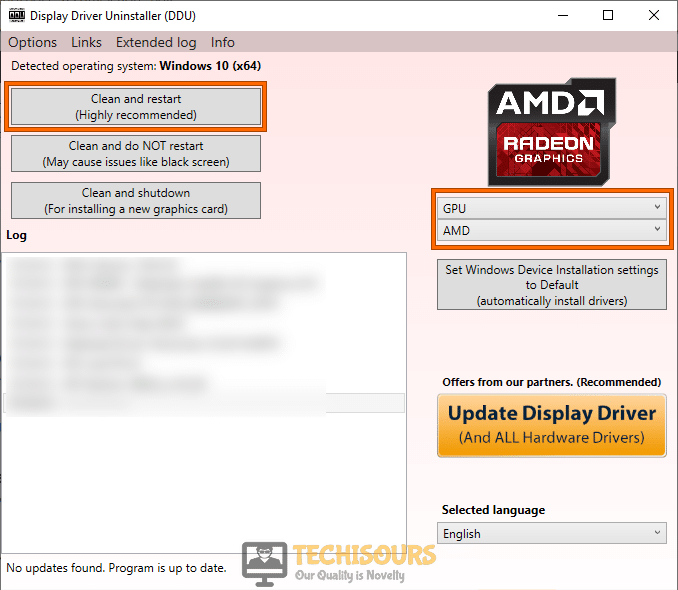
- Now launch DDU and set the “Device Type” and select the “Device” from the drop-down list displayed on the screen.
- Now click on “Clean and Restart” to uninstall the current and previous drivers installed on your computer and install the latest version of the driver automatically.

Click Clean and Restart - When the clean and restart process has been completed, reboot your computer and download the GeForce Hotfix driver on your computer.
- Now install the driver on your computer and reboot it once again.
- Now launch the game and see if the same problem occurs again while writing the crash dump.


Solution 8: Disable Steam Overlay
- Launch “Steam” and navigate to the “Library” tab. Now, from the left pane, locate the game you are having trouble with.
- Right-click on the faulty game and select “Properties” from the pop-up menu.
- Now proceed to the “General” tab and uncheck the box parallel to “Enable the Steam overlay while in-game”.

Disabling Steam Overlay - Now restart the Steam application and check whether the error has been removed.

Solution 9: Disable third-party antivirus software
- Click on the “^” button located at the bottom right of the taskbar and then right-click on the Avast icon.
- Hover over the “Avast Shield Control” and select the “Disable Permanently” option to disable your antivirus software.

Disabling antivirus

Note: If you have any other Anti-virus installed, like AVG or BitDefender disable it by following the same steps as indexed above.
Solution 10: Delete some Vulkan files
- Press “Win + E” keys simultaneously on the keyboard to open the File Explorer and go to the following location on the disk.
C:\Windows\System32
- Here locate and delete the “amd_vulkan64.json” and “amdvlk64.dll” files.
- After deleting these files, launch the game again to see whether wolfenstein 2 could not write crash dump issue is resolved.
Solution 11: Tweak NVIDIA settings
- Right-click on the desktop and select “NVIDIA control panel” from the menu.

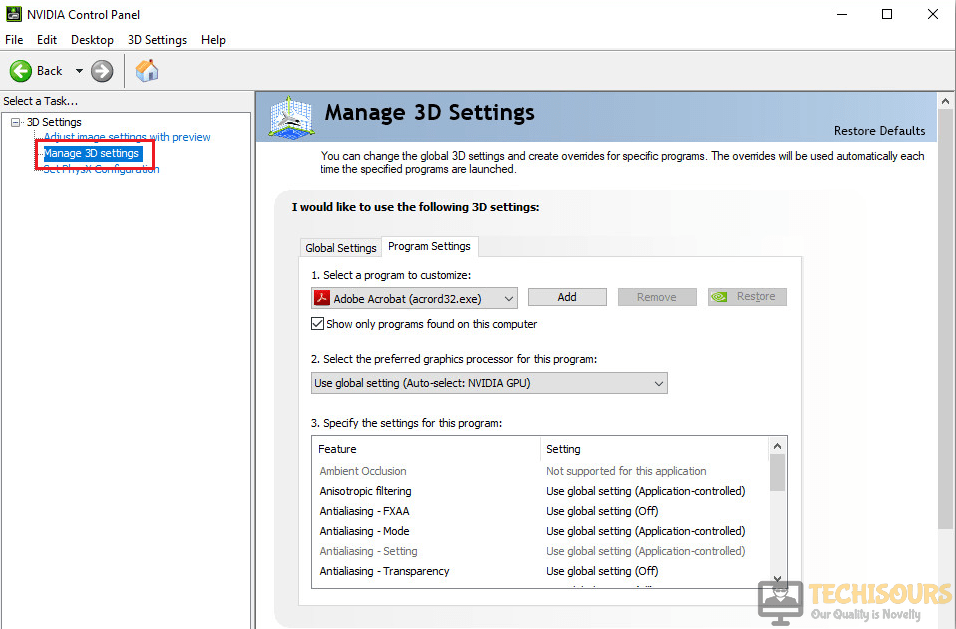
Clicking on the Nvidia Control Panel - From the left pane, click on the “3D Settings” option to expand its list and choose “Manage 3D settings”.

Manage 3D Settings - Have a look at the right side of the screen and from there click on the “Program Settings” tab.
- Now select “Wolfenstein 2” from the list of programs to customize and “Integrated Graphics” as the preferred processor for the program.
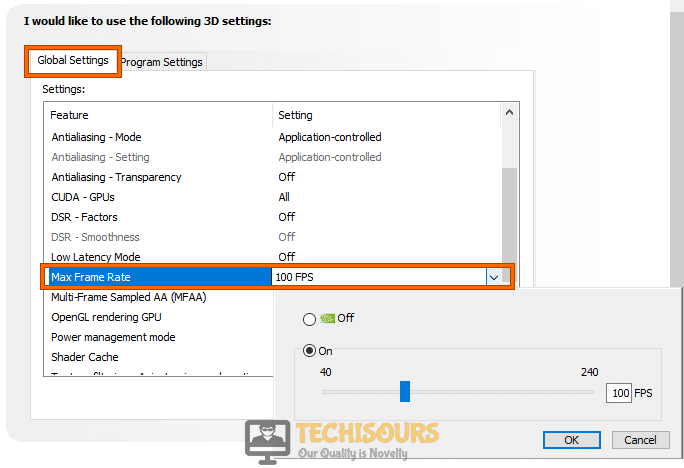
- Now navigate to the “Global Settings” tab and set the value of “Maximum Frame Rate” equal to “60 fps”.

Setting FPS - Scroll down and select “OFF” from the drop-down list parallel to “Vertical Sync” to disable V-sync.
- After waiting for a couple of minutes, enable V-sync and launch the game to see if the error has been resolved.

Re-enable Vertical Sync


Solution 12: Re-Install Vulkan API
- Press “Win + R” keys on the keyboard to open the Run box and search for “appwiz.cpl”.
Typing “appwiz.cpl” - Now right-click on ” Vulkan Run Time Libraries” and select “Uninstall” from the pop-up menu.

Uninstall Vulkan Run Time Libraries - Now launch your browser and download the Vulkan Run Time libraries on your computer.
- When the libraries are downloaded, double click on the “VulkanRT-Installer.exe” file and follow the onscreen instructions to install the libraries on your PC.

Solution 13: Tweak In-game settings
- Launch the game and navigate to its “Settings”.
- Now, select “Video” and then navigate to “Advanced”.
- Here, set the “Image Streaming” to “Low” and disable the “Shadowplay” mode.

Tweak In-game settings - We also recommend you to disable “Desktop Capture” and “Async Compute” options and use a single monitor to play the game.
- Save the settings and restart your game client to see if the Wolfenstein 2 error persists.

Solution 14: Disable Overclocking
- On your keyboard, press “Windows + I” keys simultaneously to open “Settings” and select “Update and Security”.
Choose Update and Security - From the left pane, click on “Recovery” and then select “Restart Now” under the heading of Advanced Startup.
Restart now - Click on “Troubleshoot” and then select “Advanced Options”.
Choose Advanced Options - Now select “UEFI Firmware Settings” and click on “Restart”.

Click on UEFI Firmware Settings - Press the BIOS boot key as soon as the machine’s logo appears on the screen.
Note: Different computers/Laptops have different BIOS boot keys like DEL, F2, ESC, etc. - After entering the BIOS, go to the “Advanced” tab and select “Performance”.
- Locate the “Overclocked” option and disable it, hit “F10” on the keyboard to save and exit the settings and restart your PC.

Solution 15: Reinstall the client
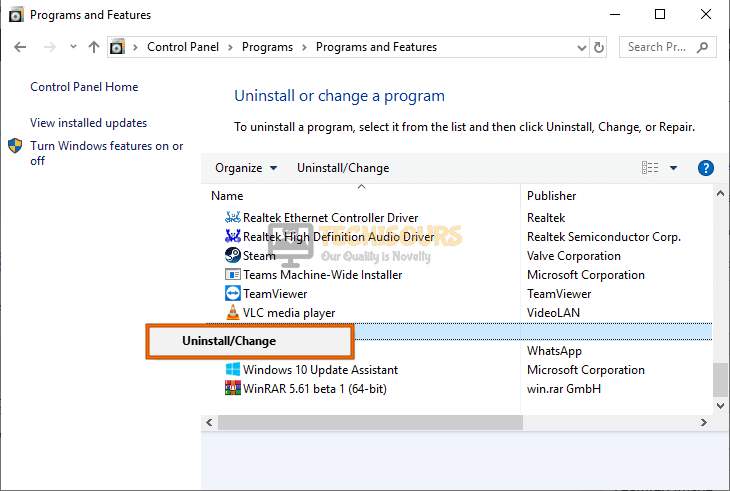
- Press “Windows key + I” keys simultaneously on the keyboard to open the run box and search for the “appwiz.cpl” command.
Typing “appwiz.cpl” Command - Now right-click on the “Wolfenstein 2” and select “Uninstall” to uninstall the game completely from your PC.
Uninstall Killing Floor 2 - When the game is uninstalled completely, launch Steam client and proceed to the “Store” to download “Wolfenstein 2” again on your PC.
- When the game is installed, launch the game and check if you still encounter wolfenstein 2 could not write crash dump issue.
Solution 16: Clean install Windows
Create installation media:
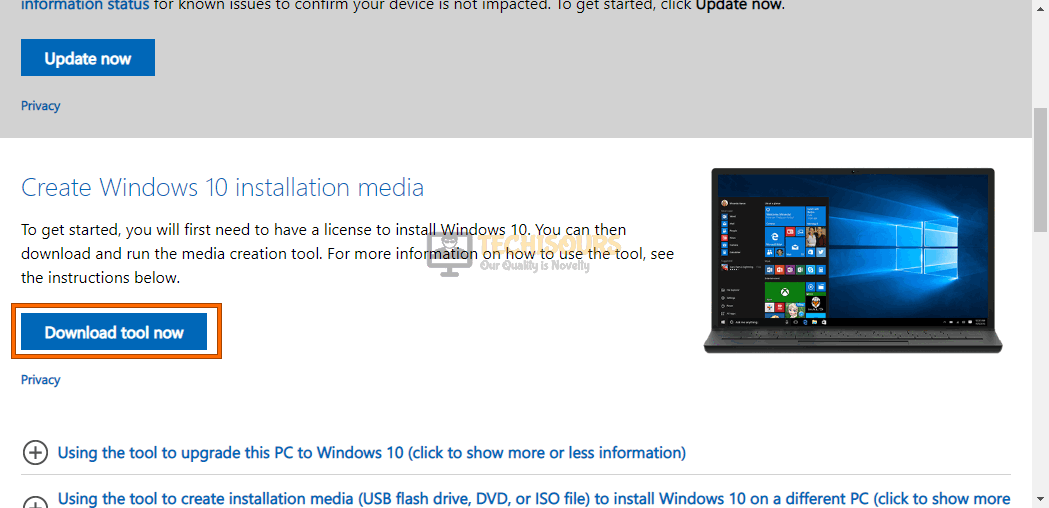
- Launch your favorite browser and download the Windows Media creation tool by Microsoft.

Media creation tool - Insert a formatted USB drive into your PC.
- Now double-click on the downloaded executable to run the Media Creation Tool.
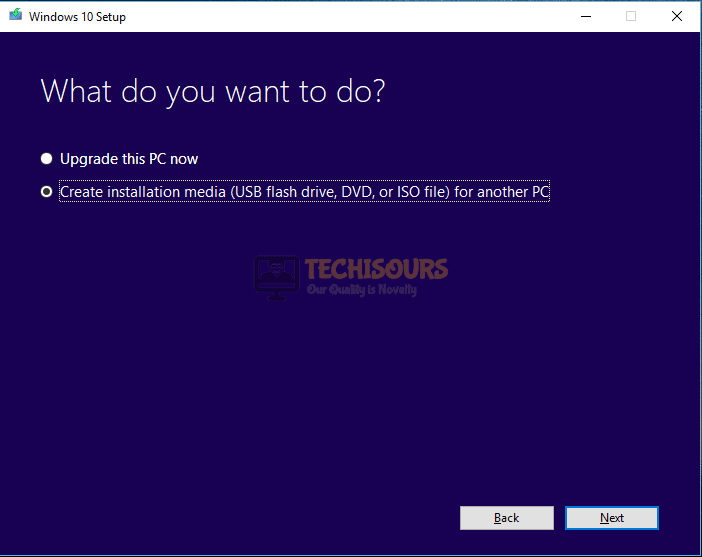
- Click on the “Accept” option located in the user agreement and select “Create installation media (USB flash drive, DVD, or ISO file for another PC”. Now click on “Next”.

Create installation media (USB flash drive, DVD, or ISO file) for another PC - Now un-check the box parallel to “Use the recommended options fort his PC” and set your language, edition, and architecture.

Use the recommended options for this PC - Now check the box parallel to “USB flash drive” and click on “Next”.

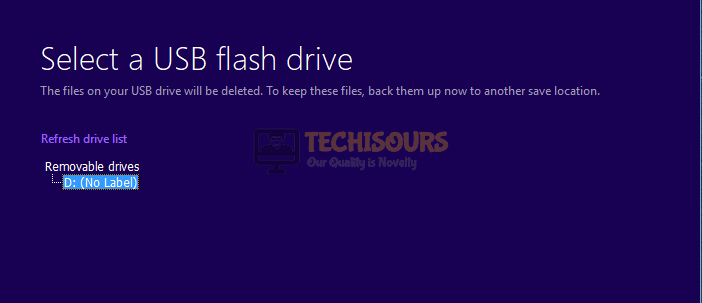
USB flash drive - Now select the USB on which you want to burn the installation media and click on “Next”.

Selecting the USB - Wait patiently while the Media creation tool downloads Windows 10 and installs it on the USB drive.

Installation in progress


Clean install Windows:
- Insert the USB in your system and restart it.
- While the computer is restarting, press and hold the ESC button to enter the BIOS settings.
Note: Different computers have different buttons to enter BIOS settings e.g, ESC, F2, F12 or Delete Key. - In the Bios, set the USB key as the first boot priority and restart your system.
- Boot from the installation media to start the installation process.
- Now click on “Install now” and type the authorized product key.

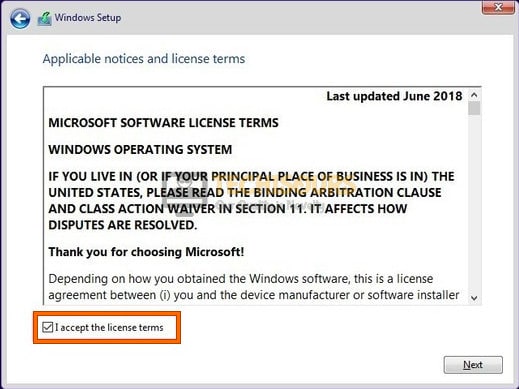
Type the authorized product key - Click on “Accept the license term ” checkbox and choose “Next”. Accept the license terms.

Accept the license agreement - Now select the partitions that were previously created and delete them to reallocate the available memory space.

Delete partitions - Now follow the onscreen instructions to clean install Windows 10 on your computer.


If you are still unable to fix this issue, you can contact us for any further assistance.