Fix: OBS Dropping Frames, Stuttering and Lagging while Streaming
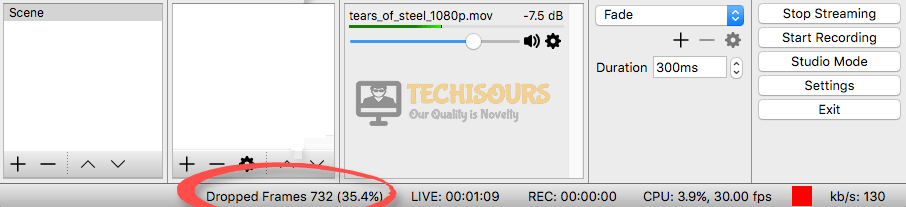
OBS Studio is a very popular software that allows you to stream live and record videos. It is free and mostly used by the gaming community all around the globe. However, recently many users have reported that while streaming a video, the amount of dropped frames increases and they also face stuttering and lag while pushing content on OBS. The OBS dropping frames issue is mostly triggered by Network related redundancies and can be fixed by tweaking the network and OBS settings minutely.
What Causes Frame Drops in OBS?
There are different triggers that might be causing this problem under different circumstances but we have listed the most common ones below:
- OBS might be dropping frames if your connection with the server is weak.
- You might also experience dropped frames if your Network adapter drivers are outdated.
- Your frames might drop in OBS if Windows Firewall or the antivirus software is blocking certain features of OBS.
- This problem might also occur if you have opted for a very high streaming resolution.
- If the Blind to IP settings are not properly configured, you might experience dropped frames while streaming.
Pre-Tips:
If your stream is dropping frames, the first thing to do is to completely Power-cycle your Internet router and then run a speed test to determine the speed of the internet connection so that we can later adjust the stream settings accordingly.
- Unplug your internet router and wait for at least 2 minutes.
- After waiting, insert the plug inside the socket and wait for the router to power up.
- Now open your favorite browser and navigate to the Speed test site.
- Click on the Go button and check if your internet speed is up to the mark.

Check internet speed

What can you do if you are dropping frames in OBS?
Solution 1: Switch to another server
If your internet speed is good enough then there might be a chance that the connection to your server is weak. If you have connected to the closest server it doesn’t mean that it will provide you the most efficient connection therefore, it is always a good idea to change the server.
- Click on the File menu on the top-left of the screen and select Settings.

Settings - Now select the Stream tab and choose another server of your choice from the server menu.
- Now click on the Advanced tab from the left side of the screen and update the x264 CPU to superfast.

Solution 2: Use Twitch Test
If you consistently use Twitch for streaming purposes then you can find the best server by using Twitch Test. It will help you find a server with maximum bitrate and wider bandwidth. From the list of servers that it provides you with, chooses a server with the highest quality rating. Rating around 78-84 is usually considered the best.

Solution 3: Upgrade your network adapter driver
Sometimes outdated network adapter drivers fail to help maintain a good frame rate while streaming. Therefore, as a solution, update them by following the steps given below.
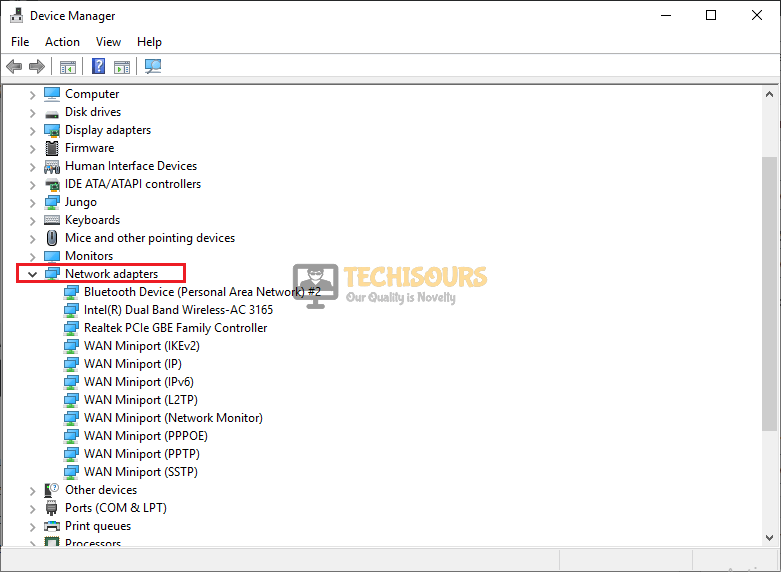
- Click on the search button in the taskbar, type in Device Manager and open it.

Device Manager - Now locate and expand the Network Adapter option.

Network Adapter - Now right-click on the network adapter driver you think is causing trouble, and select Update Driver.

Update Driver - From the window appeared on the screen, select Search automatically for updated driver software and follow the onscreen instructions.


Solution 4: Enable Dynamic Bitrate
Dynamic bitrate is a feature in OBS that will automatically detect your internet connection strength and will reduce the bitrate accordingly. Enable this feature to resolve the dropped frames issue.
- Click on the File menu on the top-right of the screen and select Settings.
Settings - Now select the Advanced tab from the left pane and locate the Network section on the right side of the window.

Network - Check the box parallel to Dynamically change the bitrate to manage congestion.
Dynamically change the bitrate to manage congestion - In addition to that, click on the “Bind to IP” dropdown and select the “[Ethernet] (Your IP)” option if you are streaming over a wired connection.
- Make sure to also check the “Enable Network Optimizations” button.
- Check to see if OBS is still dropping frames.


Solution 5: Adjusting Stream Settings
There are a few settings that you can tweak to get things up to mark and to prevent OBS from dropping frames. Therefore, in this step, we will be adjusting these settings. In order to do so, follow the guide below.
- Open “OBS” and then click on “Settings”.

Opening OBS Settings - Click on the “Output” option and set the “Output Mode” to “Advanced”.
- Set the “Encoder” to “Nvidia NVENC h.264” if you have a powerful graphics card that can support the stream, if not, you can use the traditional “h.264” setting to offload the resource usage on CPU.
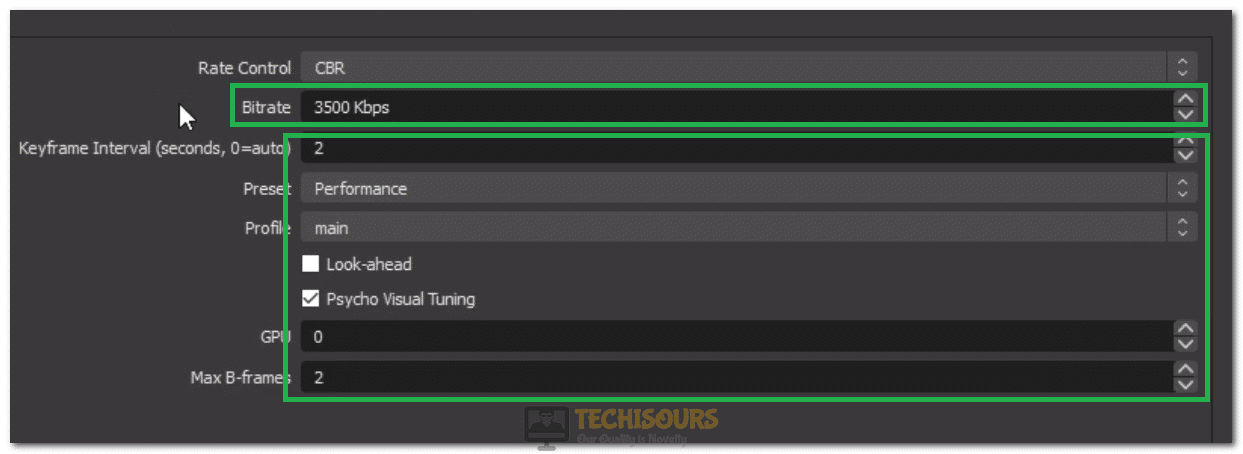
- Click on the “Bitrate” dropdown and select “3000” if you plan on streaming in 720p and “6000” for 1080p.
Note: This setting allocated 3MB of your Network speed to streaming on 720p and 6MB for 1080p. Therefore, be mindful of your network speed provided by your ISP and remember not to choke your internet connection.
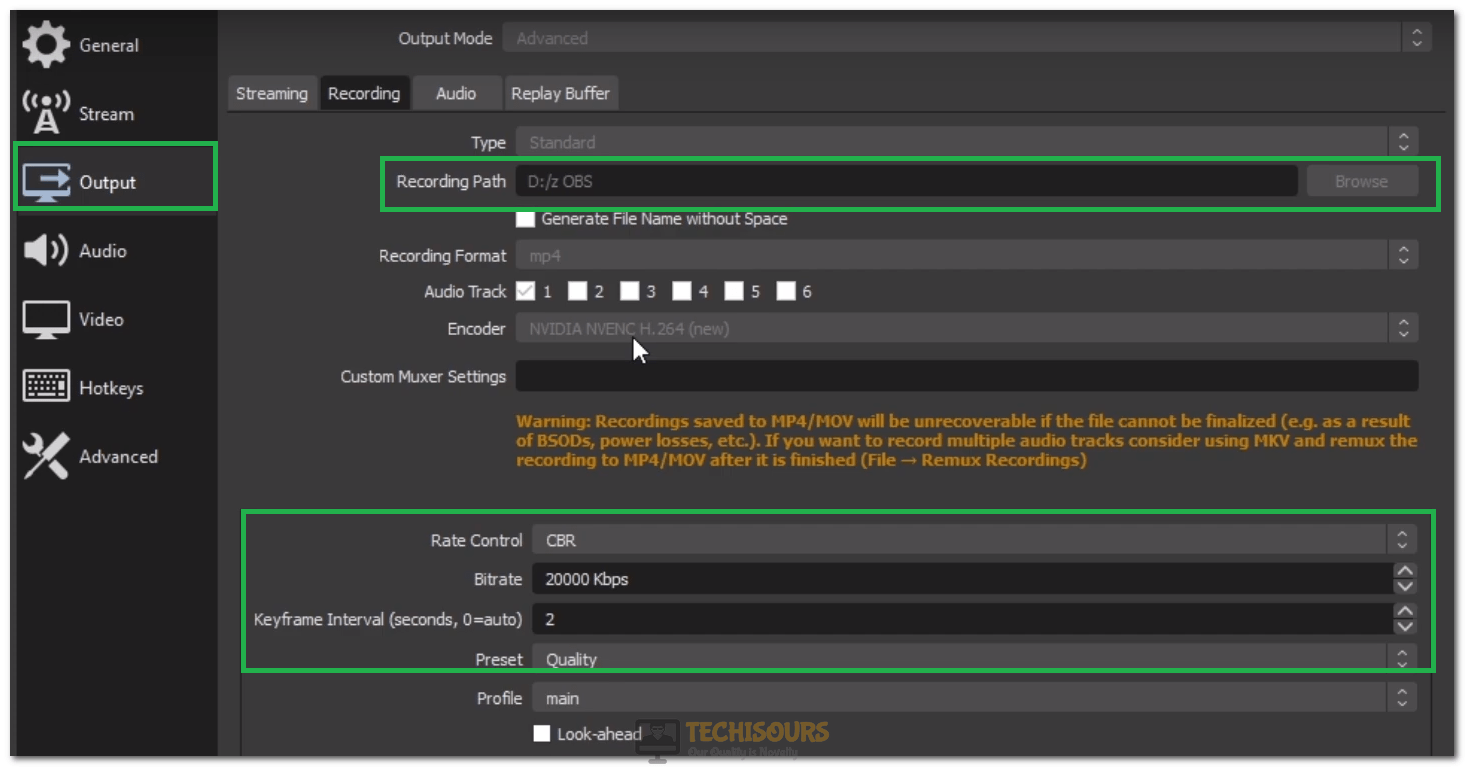
Setting Bitrate and configuring other options - Click on the “Recording” tab and select the “Location” option. From here, set a location to an SSD so that your write speed isn’t choked on your HDD.
- It is advised that you set the “Recording Format” to mp4 but that isn’t a necessity.
- Also, configure the “Encoder” in this dropdown as well just like we adjusted in the third step.
- Adjust the “Bitrate” in this tab as well, we recommend setting it to “10000” in this tab.
- Set the “Keyframe interval” to “2” and Preset to “Quality”.

Configuring Options - Also, remember to set your “Rate Control” to “CBR” and “Profile” to “Main”.
- Set the “Max-B frames” to “2”.
- Click on the “Video” option from the left menu and then set the base resolution to the recommended one that you are using in your monitor.
- Select the “Downscale Filter” to “Lanczos”.
- Also, make sure to set the FPS to “60”.

Configuring Other Options - Go to the “Advanced” tab from the menu and set the “Process Priority” to “Above Normal”.
- Check to see if the issue persists.


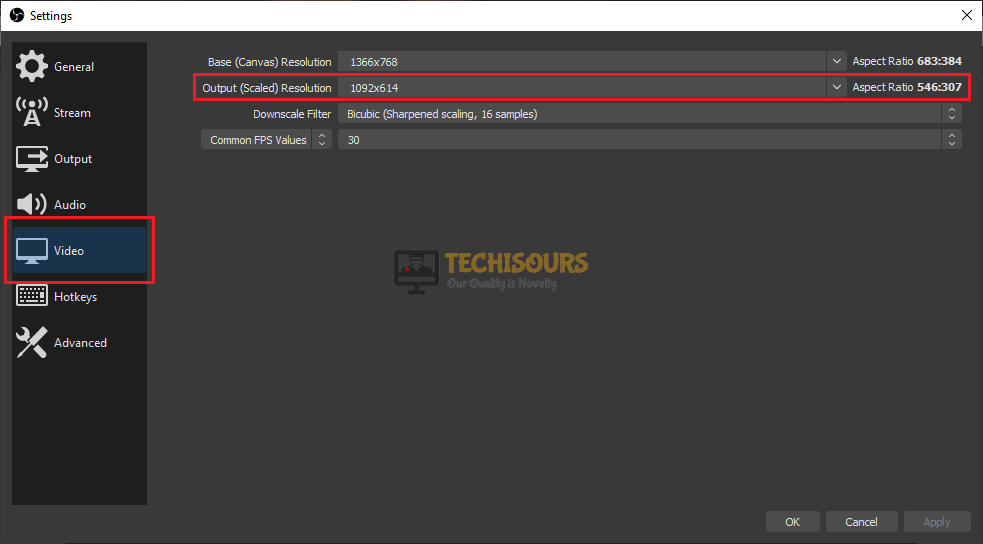
Solution 6: Reduce the resolution of your stream
If you are streaming in a very high-resolution mode and your frames drop, then you can try reducing the resolution by following the steps given below.
- Click on the File menu on the top-right of the screen and select Settings.
Settings - Now select the Video tab from the left pane and, from the right side of the window, reduce the Output Resolution to a point at which your frames do not reduce any more.

Reduce the Output Resolution
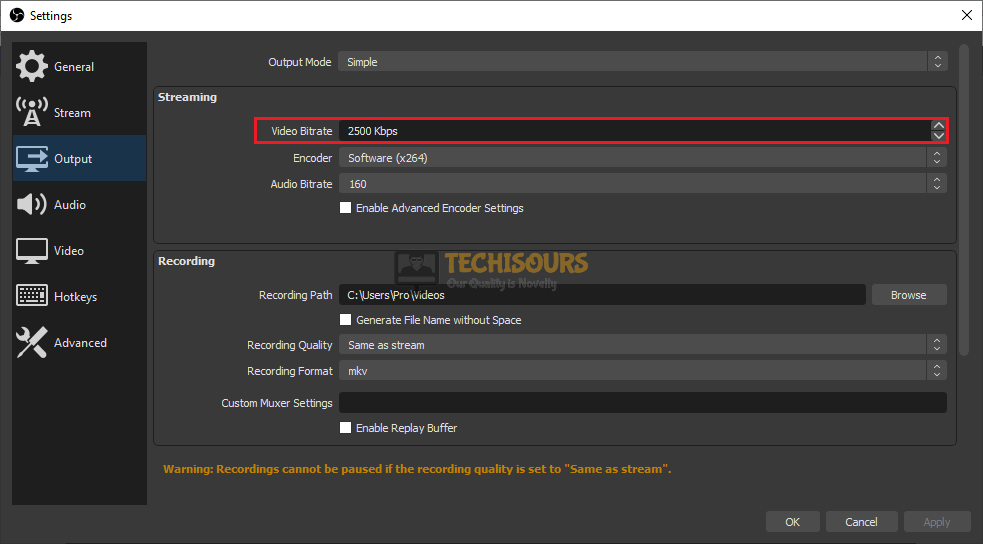
Solution 7: Reduce your bitrate
If you face the dropped frames issue due to a poor internet connection, then to compensate that, you should try to reduce the bitrate in your OBS studio. Follow the steps below to carry this task out.
- Click on the File menu on the top-right of the screen and select Settings.
Settings - Now select the Output tab from the left pane and locate the Streaming section on the right side of the window.
- Lower the bitrate in the Video Bitrate option and see if the issue is resolved.
reduce the video bitrate
Solution 8: Toggle Bind to IP settings
The problem might also arise if your network settings in OBS aren’t set properly to recognize your IP address, therefore, set Blind to IP settings to default and check if the problem is resolved.
- Click on the File menu on the top-right of the screen and select Settings.
Settings - Now select the Advanced tab from the left pane and locate the Network section on the right side of the window.
- Make sure you set the Blind to IP as Default.
Bind to IP

Solution 9: Enable New Network Code
In many situations, enabling the new network code in OBS has been proven to rectify this problem. Follow the steps below to enable this feature and see if the issue is resolved.
- Click on the File menu on the top-right of the screen and select Settings.
Settings - Now select the Advanced tab from the left pane and check the checkbox parallel to New Network Code.
- Check to see if the issue persists.
Solution 10: Allow OBS through the Windows Firewall
If your frames are still dropping then makes sure that your connection is established through the TCP port number 1935 and your firewall is not blocking OBS executables such as obs32.exe and obs64.exe. You can check this by following the steps given below.
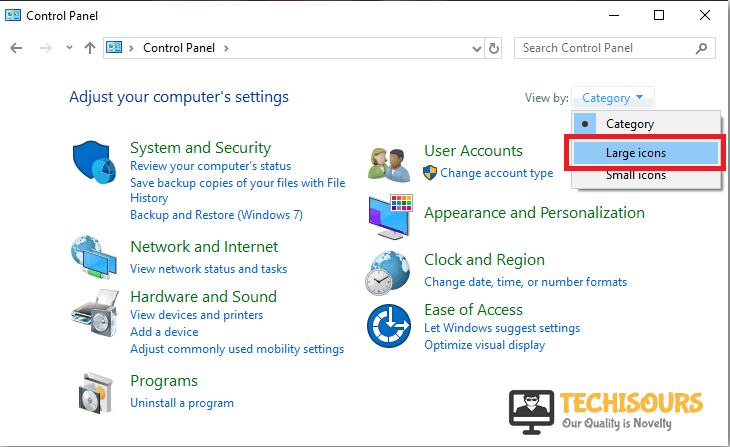
- Click on the search button in the taskbar, type Control Panel and open it.

Search For Control Panel - In the View by dropdown menu on the top-right of the screen, select Large icons.

Select Large icons for better Readability - Now locate and select Windows Defender Firewall.

Navigate to Windows Defender Firewall - On the left side of the window, select Allow an App or Feature Through Windows Firewall Defender from the list of options.

Firewall causing Dropped frames issue - Now locate and click Change Settings.

Change Settings - Now look for Streamlabs OBS, obs64, and NetTek NDI Scan Converter and check both private and public checkboxes parallel to them.

Let OBS through the firewall


Solution 11: Use another Streaming Service
Sometimes this problem arises because of the service provider you are using in OBS. Switch to another service and check if the issue is resolved.
- Click on the File menu on the top-right of the screen and select Settings.
Settings - Now go to the Stream tab from the left pane and switch to another service of your choice from the Service drop-down menu. You can stream on YouTube.com or Hitbox.tv to see if you have the same problem on those servers also.

Switch to another service

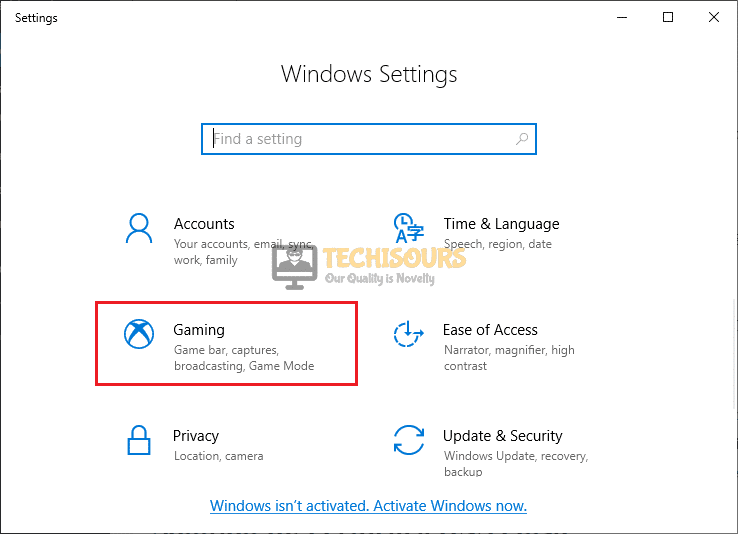
Solution 12: Disable the Gaming Mode on Windows 10
If you are still dropping frames on OBS, disable the gaming mode in Windows 10 by following the steps given below.
- Click the search button in the taskbar, type and open Settings.

Settings - Now locate and select the Gaming option.

Gaming - From the left pane of the screen, go to the Game Mode and disable the toggle button to turn off the Gaming mode.
Disable Game Mode - Also, click on the “Game Bar” option and turn off the “Record in the background while I am playing a game” toggle.


Solution 13: Restart your LAN Adapters
In certain cases, restarting the LAN adapters can kick start the functionality of the OBS service and get it up and running once again. In order to do so, follow the guide below.
- Click the search button in the taskbar, type and open Settings.
Settings - Now locate and select the Network & Internet option.
Network & Internet; Internet - From the left pane, click on Status and then select Change adapter options.
Change adapter options - Right-click the network adapter your computer is connected to and select Disable.

Disable - After a delay of 5 minutes, right-click on the same network adapter to and select Enable.

Enable


Solution 14: Flush the DNS
If your frames are still dropping then Flush your DNS and check if that fixes the problem. Follow these steps below to carry this task out.
- Click the search button in the taskbar and type Command Prompt.
- Right-click on command prompt and select Run as Administrator.

Command Prompt - Write the following commands in cmd one by one and hit enter to execute them.
ipconfig /release
ipconfig /renew
ipconfig /flushdns

Flush DNS


Solution 15: Forward Ports using Network Utilities
Forwarding the required ports is always recommended because it closes the door on the issue where OBS is blocked by your ISP/router either partially or completely which can cause it to drop frames due to delay in the authentication.
- Go to your browser and download Port Forward Network Utilities Suite.
- Double-click the downloaded executable file and install it by following the on-screen instructions.

Installing Software - Run the router detector to locate your router on the network.

Router detector - Now ensure that your PC has a static IP address because some routers refuse to forward a port to a dynamic IP address.

PC has a static IP address - Set up a port forward in your router by running the PFConfig.
PFConfig - Now use the Port Checker to see if your TCP port number 1935 is open.
Port Checker


Solution 16: Free-up Some Space on the HDD
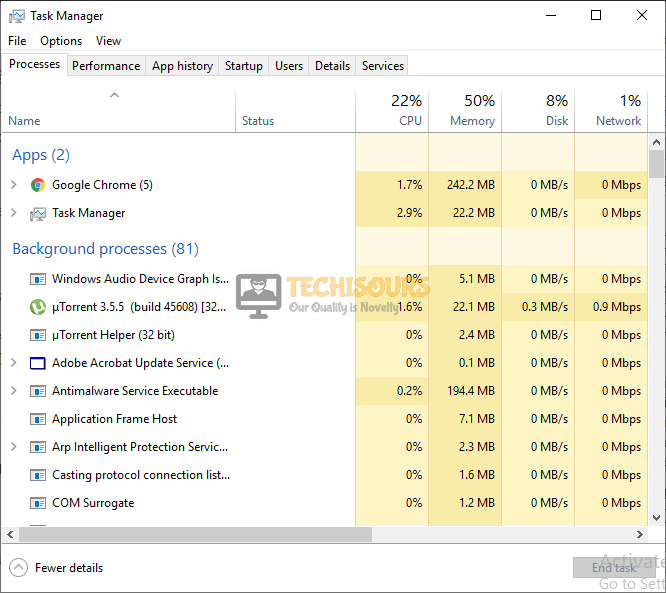
Sometimes unwanted software runs in the background and consumes most of the bandwidth in the harddrive. This slows down the hard drive and prevents OBS from streaming properly. Therefore, in order to resolve this issue follow the steps below.
- Hit ctrl+alt+delete on your keyboard and open Taskmanager.
- See if any unwanted software is running in the background.

Task manager - Close all the unwanted software that is running in the background and see if the issue is resolved.
Solution 17: Use an Alternate Encoder
If this issue still persists on OBS, try to switch to another streaming software. We recommend you to use Filmora screen recorder, which is a very popular software to record and edit videos. It is user friendly and is compatible with both Mac and Windows.
Solution 18: Disable third-party antivirus software
If you still encounter this problem, the reason might be that antivirus is blocking some features of OBS. Third-party antiviruses are good to some extent but sometimes they create a problem by blocking some features of the system. So to resolve this error, turn-off your third party antiviruses and reboot the system to check if this problem is resolved.
Solution 19: Uninstall unwanted network software
Many people use optimization Softwares to enhance or optimize their network connection. In some cases, instead of enhancing the network connection, these softwares cause trouble with the network. In some cases, network cards come with custom configuration utilities that cause many problems by blocking some features of the network. So to resolve this issue with the dropping frames, try to uninstall or disable any additional software that you have installed on your computer to assist your network card.
Solution 20: Stream over wired networks
If your frames drop down a certain level while streaming a video on OBS, there might be a chance that the strength of your local internet connection is not strong enough. You can resolve this issue by turning off the WiFi and connecting your computer directly to the modem or the router with the help of an ethernet cable.
Solution 21: Replace your hardware
If you still can’t get rid of the OBS Dropping Frames problem, there might be a chance that your modem/router or the ethernet cable connecting to it, is not working properly or there is a problem with the network card. You can check for any problem with the network card by plugging it into the modem, If you suspect that the problem is with the hardware you are using, then the best thing you can do is replace it with a new one.
Solution 22: Contact your Internet Service Provider
If none of the solutions above fix the OBS Dropping Frames issue, make sure that your ISP is not running any maintenance or having a problem at their end. Contact your ISP and explain to them the exact problem you are facing so that they help you fix this problem more efficiently.
If you need further assistance, contact here.