Fix: File and Print Sharing Resource is Online but isn’t Responding to Connection Attempts
If you are getting the “File and Print Sharing Resource is Online but isn’t Responding to Connection Attempts” error, you have come to the right place. Not only have we managed to fix this issue for most of our users, but we have also compiled the reasons due to which the error occurs. Make sure to follow through with them properly and stop only when you have managed to fix the issue.

What Causes the File and Print Sharing Resource is Online but isn’t Responding to Connection Attempts Error?
Before resorting to the implementation of the solutions, we should learn what are the reasons due to which this error message is being triggered in the first place. After careful investigation, we concluded that the following are the primary reasons due to which the error message is being seen.
- Non-Discoverable computers: It is possible that the computer has been configured in such a way that it hasn’t been made discoverable. Therefore, we suggest that you check to see if the “File and Print Sharing Resource is Online but isn’t Responding to Connection Attempts” error is fixed by making the computer discoverable to the other computers on the network.
- Outdated Windows: In certain cases, it is recommended that you try and update your Windows to the latest available version in order to be able to fix the issue. This is because with every new release of Windows, certain bugs, and glitches are fixed and the compatibility is generally increased to make sure that Windows works well with the latest hardware out in the market.
- Windows Firewall: The Windows Firewall installed by default on your computer is responsible for filtering internet packets to and from your computer to make sure that any malicious code or viruses don’t affect your computer. Therefore, we suggest that you try and check if the File and Printer sharing has been blocked from there due to which the “File and Print Sharing Resource is Online but isn’t Responding to Connection Attempts” error is being triggered.
- Outdated Router Firmware: The Router that your ISP has installed at your location might not be properly configured with the latest available firmware due to which this error might be getting triggered. Therefore, we strongly suggest that you try and install the latest available firmware from your ISP in order to be able to fix the error.
- Windows Installation: If the Windows installation on your computer didn’t process correctly or if it has been corrupted, you will be getting the “File and Print Sharing Resource is Online but isn’t Responding to Connection Attempts” error while trying to make the connection. Therefore, we suggest that you try to install Windows from scratch in order to get everything configured correctly as we have mentioned in the solution below.
Now that we have taken you through some of the most common triggers behind this issue, we can finally move on towards implementing the fixes.
Fixing the File and Print Sharing Resource is Online but isn’t Responding to Connection Attempts Error:
Solution 1: Make the Computers Discoverable
To begin with, you need to check if the computers are discoverable across the local shared network. To check this proceed with the steps below:
Connect Via Ethernet:
- Press the “Windows + I” keys on your keyboard to open the settings.
- In the Settings Panel, select “Network and Internet” and then select “Ethernet” from the left window pane.
- Then click on the network that you are connected to and under the “Network Profile” option click to select “Private”.

Changing Network to Private - Next, repeat the same steps listed above with all of the computers connected across the network.

Connect Via WiFi Adapter:
- Press the “Windows + I” keys on your keyboard to open the settings.
- In the Settings window select “Network and Internet” and then click on “WiFi” from the left window pane.
- In the following window click on your “WiFi Network” and in the next window select “Private” under the Network Profile heading.
Changing Network to Private - Now repeat the same steps with all of the computers connected across the network.
Solution 2: Check For Windows Updates
- Press the “Windows + I” keys on your keyboard to open the settings.
- From the settings window, click on the “Updates and Security” option.
- From here, select the “Check For Updates” option under the Windows Update heading.

Check For Updates - If any latest updates are available click to “Download” and “Install” them on your PC by following the on-screen instructions.
- After updating your system then proceed to check if the error exists or not.

Solution 3: Disable Windows Defender Firewall
Sometimes the Windows Defender might block your connections and consider them insecure. Therefore, try disabling the Firewall temporarily and then check if it helps remove the issue easily. Follow the steps mentioned below:
- Press the “Windows + I” keys on your keyboard to open the settings.
- In the pop-up window click on “Update and Security” and then click on “Windows Security” from the left menu pane.
- Then select “Firewall and Network Protection” under the Protection Areas menu.

Turning Firewall off for Private Network - In the following window click on the “Private Network” and then press the toggle button under “Microsoft Defender Firewall” to turn it “OFF”.
- After performing your required task then make sure to turn “ON” the Windows Defender again.

Solution 4: Disable Any Third-Party Software
Quite a lot of users have also reported that the third-party software installed on their PC also causes hindrance and can give rise to this error. Therefore, you must uninstall any such software which can block connections on your PC. Proceed with the steps below to uninstall any such program:
- Press the “Window + R” keys together to open up the “Run” dialogue box.
- Here type in “appwiz.cpl” in the textbox and press “Enter”.

Typing in “Appwiz.cpl” in the Run box. - In the pop-up Programs and Features window go through the list of installed applications to locate any such suspected third-party software.
- Right-click on the program and select “Uninstall” from the drop-up menu. Then follow the on-screen instructions to uninstall the program completely from your computer.

Uninstalling the app - After completing these steps now check to see if the error got removed.


Solution 5: List the Connected Computers In the Credential Manager
A lot of users told that by adding the usernames and passwords of all the associated computers in the credential manager they were able to access the shared files and also helped them resolve the error easily. To do so you need to carry out these steps:
- Press “Windows + R” to open the Run prompt, type in “control panel” and press “Enter”.

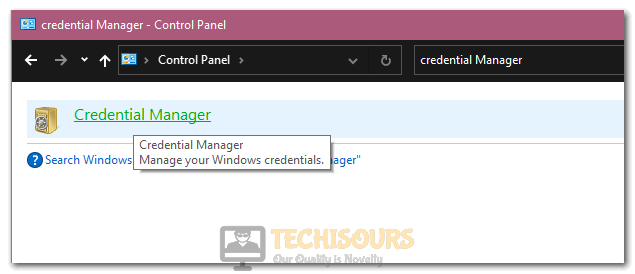
Open Control panel - Here type “Credential Manager” in the search box located at the top right corner and click to open it from the search results.

Clicking on the Credential Manager Option - From here select “Windows Credentials” and then click on “Add a Windows Credential”.
- In the following window type in the “Network Address”, “UserName”, and “Password” of each connected computer and then hit the “OK” button.
- Finally, “Restart” your PC and check to see if the error got fixed now.

Solution 6: Verify If All Required Services Are Running
In order to share the file and printing resource, there must be a few important services running on your computer, which if not enabled will give rise to this error. So, you need to ensure that all of these services are running. Here’s how to check this:
- Press the “Window + R” keys simultaneously to open up the “Run” dialogue box.
- Here type “services.msc” in the textbox and hit the “Enter” key.

Typing in “services.msc” - In the Services window go through the complete list to check if the below-listed services are running:
DCHP Client

Homegroup Listener

Homegroup Provider

Link-Layer Topology Discovery Mapper

NetTcp Port Sharing Service

Network Connections

Network List Service

Network Location Awareness

TCP/IP NetBIOS Helper
- If any of these services are not enabled just right-click on it and select “Start”.
- Lastly, run the “Network Diagnostics Tool” and see if the problem has been solved.

Solution 7: Reconfigure NetBIOS Settings via TCP/IP
- Press the “Window + R” keys together to open up the “Run” dialogue box.
- Here type “control” in the textbox to open up the Control Panel window.
Open Control panel - In the following window select “Network and Internet > Network and Sharing Center” respectively.
- Now click on your internet connection and next select “Properties” from the bottom.
- In the WiFi Properties window select “Internet Protocol Version 4 (TCP/IPv4)” and then select “Properties” from beneath.

Internet Protocol Version 4 (TCP/IPv4) - In the next window click on “Advanced” and then click on “WINS” in the Advanced TCP/IP Settings window.
- Here find the “NetBIOS Setting” menu and beneath it select “Enable NetBIOS Over TCP/IP”.
- Lastly, click on “OK” and close all of the windows.

Solution 8: Toggle Advanced Sharing Settings
- Press the “Windows + I” keys on your keyboard to open the settings.
- In the Settings window click on “Network and Internet” and in the following window scroll to the bottom to select “Network and Sharing Center”.

Network and Internet - In the following window select “Change Advanced Sharing Settings” from the left menu pane.
- Now expand “All Networks” and under Password Protected Sharing switch between “Turn On Password Protected Sharing and Turn Off Password Protected Sharing”.
- In the end, select “Turn Off Password Protected Sharing” and then click on the “Save Changes” button.

Switching between the “Turn on Password Protected Sharing” - Check to see if doing so fixes the “File and Print Sharing Resource is Online but isn’t Responding to Connection Attempts” error.


Solution 9: Reconfigure Some Windows Features
- Press the “Window + R” keys together to open up the “Run” dialogue box.
- Here type in “optionalfeatures” in the textbox and press “Enter”.

Typing in “Optional Features” in the Run prompt - In the Windows Features tab scroll down to “SMB 1.0/CIFS File Sharing Support” and click to expand it.
- Then checkmark the “SMB 1.0/CIFS Client” and untick both “SMB 1.0/CIFS Automatic Removal” and “SMB 1.0/CIFS Server” options.

Selecting the Appropriate options to enable the optional features - Finally click “OK”, restart your PC and check to see if you are now able to overcome the error.


Solution 10: Check If Desktop Is Already Configured For File and Printer Sharing
- Press the “Window + R” keys together to open up the “Run” dialogue box.
- Here type in “Control” in the dialogue box and hit the “Enter” key.

Typing in “Control” - In the Control Panel window click on “Network and Internet” and then click on “Network and Sharing Center”.
- Now select “Change Advanced Sharing Settings” from the left menu pane.
- In the following window select “Turn On File And Printer Sharing” under the File and Printer Sharing option.

Solution 11: Update Your Router Firmware
- Open up your browser and here type in your router’s “IP Address” in the browser’s search bar.

Typing in IP Address - Next, enter your login credentials including the “Username” and “Password”.
- Now locate the “Firmware” or “Update” option in the “Advanced”, “Administration” or “Management” section. The location may vary according to your router’s model.
- Next, proceed to your router’s manufacturer website, and here search for the firmware update files by entering the “Model Number” of your router.
- Move on to “Download” the firmware update file which is usually contained in a “.Zip Folder”.
- Afterwards, “Extract” the files from the zip folder and move them to the desktop.
- Then proceed to the “Update” section and click to select “Choose File” or “Browse”.
- Next, select the router update file on your desktop which is usually the largest file in the zip folder.
- Click on the “Update” button to start the update process and wait until the process gets finished.
- When the firmware gets updated manually “Reboot” the router if not done automatically.
- Finally, check to see if you have been able to get rid of the error now.

Solution 12: Reset TCP/IP Using NetShell Utility
- In the search bar near the Start menu type in “Run” and press “Enter”.
- In the Run dialogue box, type in “cmd” and on your keyboard press and hold the “Ctrl + Shift + Enter” buttons in order.

Typing in cmd - This should run the Command Prompt window as “Administrator”.
- Once the Command Window opens up, execute the following commands in order. Press “Enter” after each:
netsh winsock reset

netsh int ip reset

Solution 13: Perform A Clean Windows Install
If so far you are unable to get through the error one last remedy is to perform a clean Windows install. This will automatically erase all of the data from your hard disk and it will get formatted. So before doing this you must prepare a backup of your important data and then perform a fresh Windows installation.
Some Common Workarounds:
- Try turning “OFF” all of the computers and the network gear down for some time.
- Disable “IPv6” on your computer.
- Enable the “Function Discovery Provider Host” and “Function Discovery Resource Publication” services.
- Enable “Network Discovery” in the Windows Explorer Network.
Follow the above-mentioned procedures in order to get rid of this error and in case of any further queries you can Contact Us here.