Easily Fix Faulty Hardware Corrupted Page Error on Windows [Complete Guide]
A lot of users have been running into the Faulty Hardware Corrupted Page BSOD which prevents them from being able to log in to the computer and get their work done. In this article, we have concluded the reasons due to which this error message arises on Windows and have also listed the solutions in a step-by-step manner which you can apply on your computer to completely get rid of the issue.

Keep in mind to follow the steps in the same order in which they have been presented and also to follow each step carefully. Certain instructions may vary from computer to computer as each hardware configuration is different but you can check for specific instructions on your Board Manufacturer’s website as well.
What Causes the Faulty Hardware Corrupted Page BlueScreen on Windows?
Basically, the Faulty Hardware Corrupted page error is triggered if the system is unable to load important files during startup and it presents this error for the user to diagnose as to what is causing that issue. Some possible reasons have been listed as follows.
- Damaged System Files: Some System files on your computer might have been damaged due to which it is unable to load important operating system files to ensure the login. Therefore, the Faulty Hardware Corrupted Page error is displayed when this happens. The best alternative is to check if any important system files or drivers are in a damaged state.
- Outdated Drivers: If certain drivers on your computer are outdated or damaged, you will run into the error message when trying to use the computer. The best alternative to this is just checking and installing updates for the damaged or outdated drivers which ensures that you are running the latest available software for each hardware device attached to your computer.
- Fast Startup: Sometimes the Fast Startup feature that writes certain launch configurations to the System’s RAM causes the Stop Code Faulty Hardware Corrupted Page Error because the launch configurations get corrupted when the system is booted back up. Turning this feature off and checking if the error message goes away is a good way to ensure that the Fast Startup isn’t the culprit behind this error message.
- Memory Failure: The Storage devices installed on your computer and the System’s RAM is very important to ensure complete functionality. However, if they are in a faulty state or have been misconfigured by the operating system, you will be unable to launch into Windows. The best approach that you can adopt in this case is to just perform a memory diagnostics test and check to see what seems to be causing this error.
- Outdated Windows: It is also possible that the Windows installed on your computer has been outdated and isn’t running the latest version due to which you are getting the Faulty Hardware Corrupted Page error while trying to run the computer. We recommend that you follow the steps below and ensure that you install the latest updates to the operating system.
- Disk Errors: Some Storage device errors on your computer might be preventing Windows from being able to load all of its files properly due to which the error message is being triggered. We recommend that you check the storage devices for any bad sectors using the default Windows disk checking facility and then see if doing so helps in fixing the error.
- Outdated Bios: The Bios is the pre-installed software for Motherboard which allows it to boot the system up and run it in an efficient manner. Without the bios, your computer won’t even be able to start properly so it serves a very vital role on the computer. However, sometimes, the Bios might get outdated due to which the error message might be seen. We recommend that you try and install a Bios update but be very careful while doing so because one wrong step, and you will end up with a dead motherboard.
Now that you have understood the depth of the Stop Code Faulty Hardware Corrupted Page Error, you can finally move on and start implementing the solutions below.
Before You Start:
Before carrying out to implement some of the advanced fixes listed below try to simply restart your system as it might help you to fix the issue effortlessly. To restart your system press the “Alt + F4” keys simultaneously on your keyboard and when the shutdown windows pop up on your screen choose to select the “Restart” option from the drop-down menu and hit Enter.
If you believe that a recently installed software might be the problem, it is recommended to reinstall it or delete it completely. If restarting the device doesn’t help you completely overcome the problem then continue on with implementing some of the advanced fixes listed below.
Fixing the blue screen faulty hardware corrupted page issue:
Solution 1: Running an SFC Scan
- Open the Start menu on your PC and press the “Window + S” keys simultaneously on your keyboard.
- Type in “cmd” in the address bar and hit Enter to open up the “Command Prompt Window” and click on “YES” if you come across any permission prompts.

Run Command Prompt - In the command prompt window type or paste the following command in the command window and don’t forget to give a single space between sfc and /scannow and remove the quotation marks.
sfc /scannow
- Press Enter to run this command on your system.
- Finally, restart your system and check to see if the faulty hardware corrupted page windows issue still persists or not.

Solution 2: Update Drivers Automatically
- Open your browser and download and install Driver Talent by following the on-screen instructions.
- After installation open the software and click on “Scan” to detect all the outdated drivers on your PC.

Click on Scan Button - Then click on “Repair” to fix faulty drivers or click on “Uninstall” to get rid of any newly installed problematic drivers on your system. Or otherwise, you can also choose to update the drivers by hitting the “Update All” button located at the bottom of your screen.
- Once the drivers get updated successfully restart your computer and see if the error got fixed now.

Solution 3: Disabling Fast Startup
- Press the “Window + S” keys on your keyboard and type in “Control Panel” in the search bar.

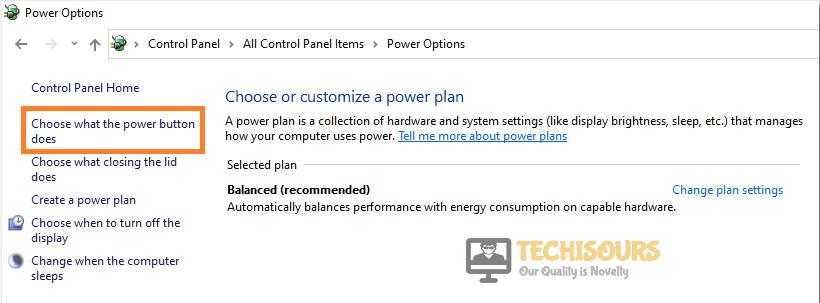
Choose Control Panel - Navigate to the “Power Options” respectively. Here choose to select the “Choose What the Power Button Does” option in the left menu pane.

Choose what the power button does - Select the “Change Settings that are Currently Unavailable” option in the “System Settings” dialogue box.
- Click on the box adjacent to the “Turn On Fast Startup” option to uncheck it. Click on “Save Changes” and restart your computer.

Disable Fast Startup - Lastly, check to see if you have been able to resolve the issue.


Solution 4: Running Windows Memory Diagnostic
- Press the “Window + R” keys together on your keyboard to open up the “Run” command prompt. In the Run dialogue box, type or paste “mdsched.exe.”

Typing in “mdsched.exe” - Select “Restart Now and Check for Problems (Recommended)” from the “Windows Memory Diagnostic” dialogue box.

Restart now and check for problems - Wait for the scan to finish and restart your computer so that the changes may have their effect.


Solution 5: Resetting Your Operating System
Only proceed with this solution if you feel comfortable and are familiar with the computer settings. Before you start, back-up all your important data and files to be on the safe side.
- Open your computer and go to the “Start Menu” located on the bottom left of the screen. Search for and click to open “Settings”.
- Then navigate to open “Update and Security” and you would be directed to the “Windows Update” window.

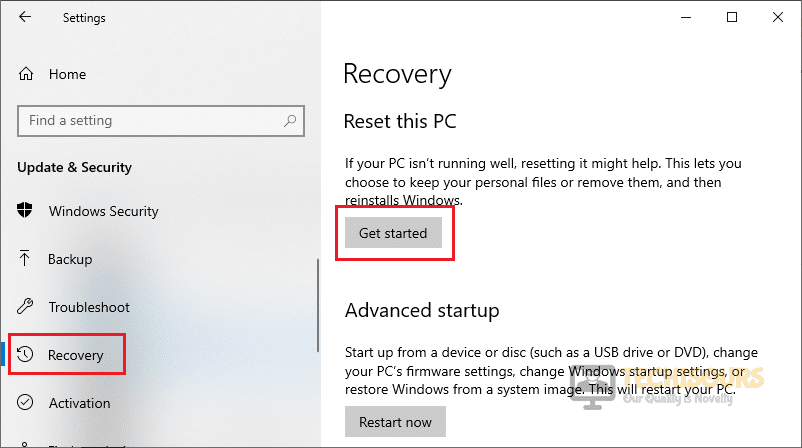
Update and Security - Select “Recovery” from the left menu pane. Click on the “Get Started” option under the “Reset this PC section”.

Reset this PC - In the pop-up window select “Choose Remove Everything” and make sure that you have backed-up all your data before this.
- In the following window select “Just Remove My Files” and then click on “Reset” in the “Ready to Reset this PC” dialogue box.
- Windows will be installed automatically once the procedure gets completed and finally observe if you have been able to overcome the error.

Solution 6: Update Your Windows
- Proceed to the “Start Menu” located on the bottom left of the screen. Search and click to open up “Settings”.
- Navigate to the “Update and Security” section and you would be directed to the “Windows Update” window.
Update and Security - Click on the “Check For Updates” option available at the top of the page. Install any updates if they are present and restart your computer.

Check for updates - Now check to see if the error still persists or not.

Solution 7: Reset Your Hardware
If you are familiar with computers and hardware, you are recommended to reset your RAM, Graphics Card, and storage devices. We do not recommend a total newbie to follow this solution.
7.1: Manual Testing:
If you have spare RAM, swap out the existing installed RAM with a new or spare one to see if the error is resolved. Make sure the RAM is compatible with your motherboard and is in working condition. Alternatively, you can try removing the RAM stick and cleaning the gold strip with an eraser, and installing it back.
Solution 8: Run Command to Check Disk Error
- Right-click on the “Windows icon” and select “Windows PowerShell (Admin)” from the drop-down menu.
- Paste the following command into the Powershell and hit Enter.
chkdsk /f /r
- Restart your computer and check to see if the faulty hardware corrupted page 2020 problem got solved now.
Solution 9: Update Intel Management Engine Interface (MEI)
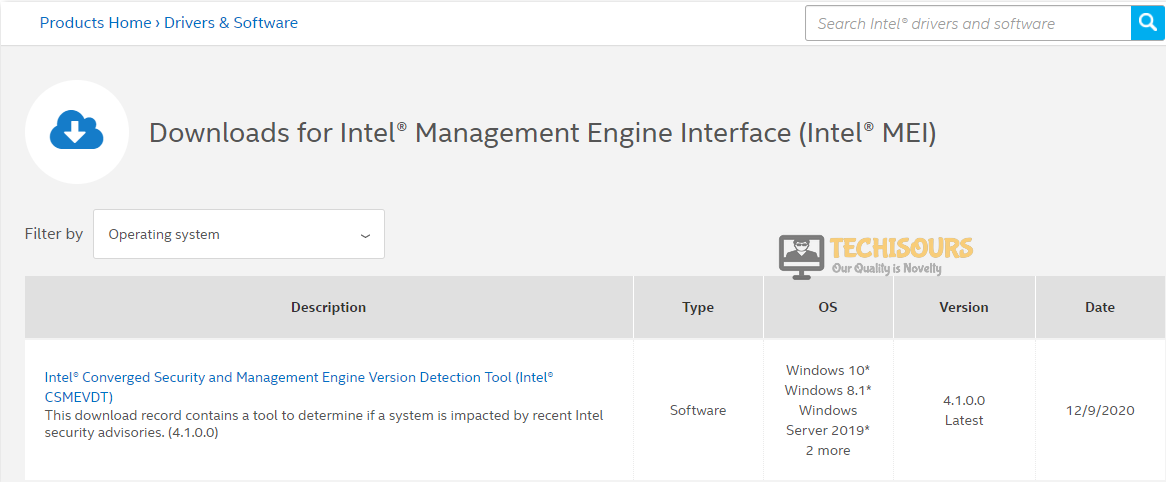
- Open the Intel MEI support page on your browser and filter the results by selecting your “Operating System” from the drop-down menu.

Check Intel management Interface - Select the “Latest Available Driver” and click on the “Download” button.
- Install the updated drivers as per instructions and restart your system for the updates to take effect.
Solution 10: Updating the BIOS
As a disclaimer, this method should only be followed by users already familiar. You are not recommended to follow this if you are not a computer geek. First, you need to know the manufacturer and model of your Motherboard. To do this:
- Open the “Start Menu” on your PC or press the “Windows icon” on your keyboard to open it.
- In the search bar located at the bottom, type or paste “System Information”.

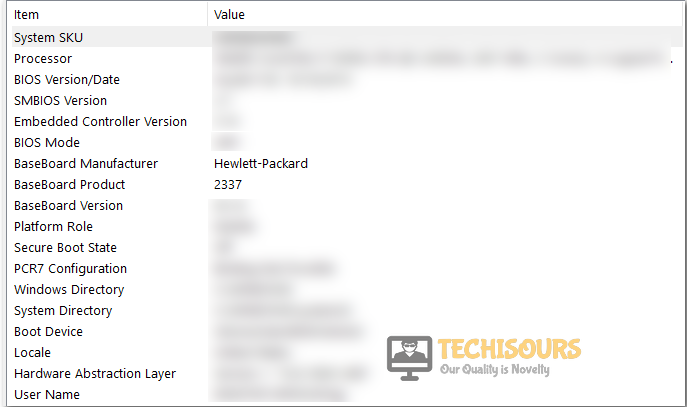
System Information - In the “System Information” dialogue box, locate “Motherboard Manufacturer or BaseBoard Manufacturer” in the “System Summary Tab”.

Motherboard Manufacturer option - Then note down the “Baseboard Manufacturer and Baseboard Product”.
- Combine these two entries and search them in your browser in the “Address Bar”. Proceed to the first link in the search results.
- Once you are on the “Manufacturers’ website,” navigate to the “Drivers and Utility” tab and “Download” the latest drivers present in the list. Make sure to download the files in a “USB” thumb drive!
- Restart your computer and keep the USB drive plugged in. Keep smashing the “Delete” key once you see the splash screen on your monitor. You would be directed in the “BIOS” of your motherboard. Head on to the “Tools Tab”.
- Under the “UEFI Update Utility” select “Instant Flash”. Your system will search for the BIOS file in the USB drive.
- Click on “Update” once it discovers the BIOS file. Click on “YES” to confirm your decision.
- The system will take a few minutes to update the BIOS. “Do not turn off your system” under any condition, even if it appears to be stuck. Doing so can result in a dead motherboard.
- Once done, press “Enter” to reboot. Your system would be up and running on the latest version of BIOS.
- Once completing the whole procedure now check to see if the error got fixed.

Solution 11: Disable Overclocking From BIOS
If you have recently overclocked your RAM or relevant hardware from the BIOS, you are recommended to disable overclocking. For this, you would have to manually enter your BIOS and disable it the same way you had enabled it before the BSOD.
Solution 12: Uninstalling your Antivirus
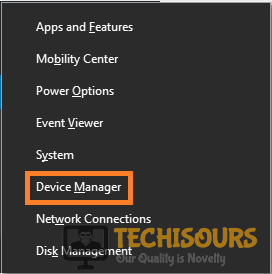
- Press the “Window + X” keys simultaneously on your keyboard. In the pop-up menu, click to select “Apps and Features/Programs and Features”.

Choose Apps and features - In the “Apps and Features/Programs and Features” window, scroll down to locate your antivirus (McAfee, Avast, Sophos, etc.). Right-click on it and select “Uninstall” or “Uninstall/Change”.

Select “Uninstall” - Click on YES on the permission prompt to “Uninstall” the antivirus.
- If you get free from the error and BSOD, your antivirus is the reason for it. You can try a different Antivirus or simply disable it at the time of use.


12.1: Turning Off Windows Defender Firewall
- Open the “Start Menu” on the bottom left corner of your screen or simply press the “Windows” icon on your keyboard. Type in and click to open “Settings“.
- Once in the Settings tab locate and click the “Update and Security” option. In the Update and Security dialogue box, find and open “Windows Security”.

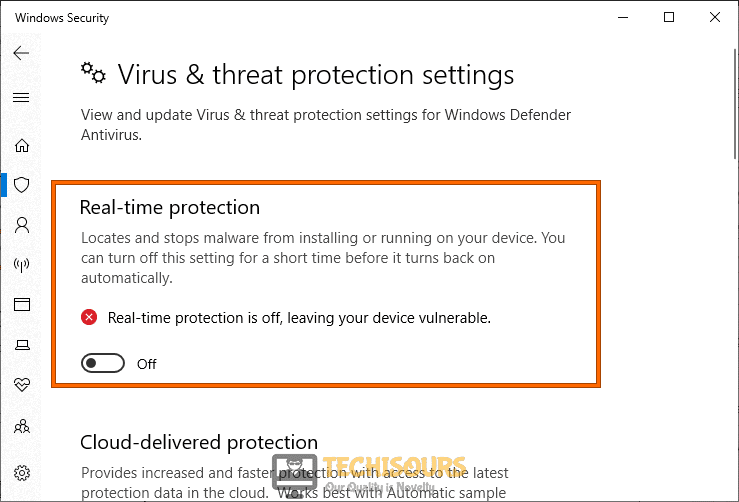
Choose Windows Security - Proceed to “Virus and Threat Protection” under the “Protection Areas” section. In the new dialogue box, navigate to “Virus and Threat Protection Settings” and click on “Manage Settings”.
- Now turn off the button located under the “Realtime Protection”. Click to select “YES” when the permission dialogue box pops up, and you’re good to go.

Disable Real-time protection - Check to see if disabling the Real-Time protection gets rid of the Faulty Hardware Corrupted page error.

Solution 13: Updating Your Graphics Card Driver
In order to carry out this fix, you have to know the graphics card you are using on your PC. If you already know this, skip step 1 and 2 and carry out the procedure from step 3:
- Press the “Window + R” keys together on your keyboard to open up the “Run” command prompt. In the Run dialogue box, type in or paste “devmgmt.msc” to open the “Device Manager” window.

Open Device Manager - In here locate the “Display Adapters” option and double click on it to expand it. This will show you the Graphics Card installed on your PC.
- Once you know your graphics card, open your browser and type “[Your Graphics Card Name] Drivers”. Fill in the bracket with the name of your graphics card. When you are directed to your “Graphics Card Manufacturer site,” navigate to the “Drivers & Utility” or “Drivers & Support”. Browse for your Graphics Card and “Download” the latest driver present.
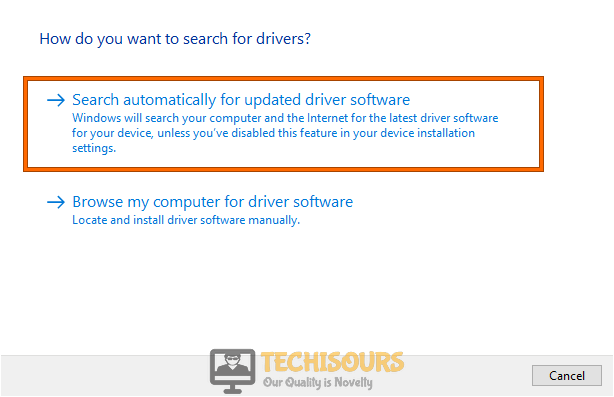
- Once downloaded, get back to the “Device Manager” window, right-click on your “Graphics Card” and proceed by clicking on the “Update Drivers” in the menu. Then carry on by clicking on the “Search Automatically For Drivers”. Wait for a while until the computer finds and installs the updated drivers automatically.

Search automatically for updated driver - It is recommended to restart your computer and try running the game afterward. Also, observe if the Faulty Hardware Corrupted page error got removed now.
Hopefully, the aforementioned fixes would help you get through the error successfully but for any further queries or help you may Contact Us here.