15 fixes for the Netflix Error Code m7111-5059 Issue
The Netflix Error Code m7111-5059 is most commonly triggered when certain apps or extensions installed on your computer or browser interfere with the signals. Therefore, we suggest that you read through this article in detail and implement all the steps that we have listed here to be able to fix this issue completely. Also, go through the reasons that we have mentioned that are commonly behind this error.

What Causes the Netflix Error Code m7111-5059 while Streaming?
After having to go through a regiment of fixes and solutions, we came to the conclusion that the following must be the paramount reasons behind its occurrence.
- Cookies/Cache: In some cases, it is possible that the browser that you are using has cookies or cached data that prevents it from being able to properly stream content. Therefore, we suggest that you try to clear out the caches and the cookies in order to fix the Netflix Error Code m7111-5059 issue.
- Outdated browser: If the browser that you are using has been outdated or is very old, the streaming service might not be able to properly satisfy all the security protocols due to which the issue might get triggered. Therefore, we suggest that you try to update the browser to the latest possible version.
- Connection Area: In certain scenarios, the connection area might be causing the issue because the streaming service might have banned the content in certain regions of the world and if you are attempting to connect from there, the error might get triggered.
Now that you have been taken through most of the reasons behind the error, we can finally move on towards implementing the fixes.
Before You Start:
- Restarting the Netflix app or your browser might resolve your issue.
- Some users reported that resetting the network settings and restoring the router to the internet provider’s default settings fixed their issue.
- Netflix works fine with an IPv6 connection and if you have an internet connection other than IPv6, then it might create an issue in accessing the Netflix app.
- Some users suggested that running an IP test leak program can fix this issue as it guarantees that your IP address isn’t being revealed and that the detected location and IP address are those of the VPN you’re connected to.
- Many users reported that disabling the Unblocker or Proxy resolved their issue.
- Sometimes Netflix’s server is down due to routine maintenance or internet disruption. You can check the status of the Netflix server by clicking on this link.
- Some users reported that using a Wi-Fi Extender can generate this error hence to fix this issue, disable the Wi-Fi Extender.
- Many users suggested that disabling the IPv6 proxy tunnel services over the IPv4 network can fix this issue.
- Using the ExpressVPN DNS MediaStreamer can also resolve your issue.
How to Fix Netflix Error Code m7111-5059:
Solution 1: Clear Cache & Cookies
Cookies and temporary internet files can sometimes take up quite a big storage space in the browser’s cache memory. Corrupt cache cookies present in your browser can lead to this error. Clearing out the browser’s cache memory can help in this matter. Follow the instructions given below to successfully clear cache memory:
Method 1: For PC Users
For Firefox Users:
- Launch Firefox and navigate to the “Options” menu, located at the top right corner of your browser window.
- Click on the “Settings” option and then locate the “Privacy and Security” tab in the left pane.
- Now, scroll down the window and click on the “Clear Data” option located under the “Cookies and Site Data” section.

Choose Clear Data Option - Clear Data window prompt will appear in front of you, afterward select both options i.e. “Cookies and Site Data” and “Cached Web Content”, and then click on the “Clear” option.

Clearing Firefox Cache Memory - Finally, close the Firefox window and relaunch it.


For Chrome Users:
- Launch Google Chrome, click on the “Options” menu, navigate to the “More Tools” option and then click on the “Clear Browsing Data” option.
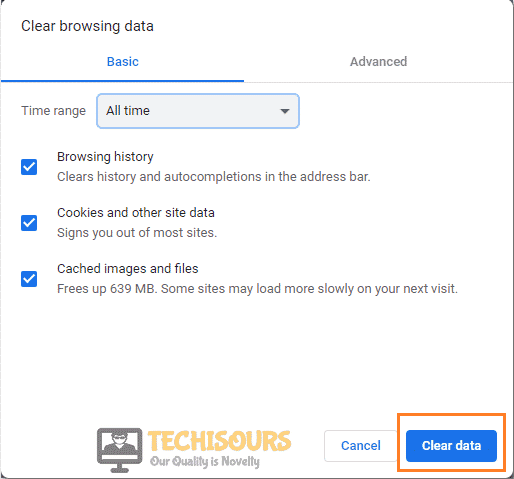
- A Clear Browsing Data window will appear in front of you, set the time range to “All Time”, select all boxes and click on the “Clear Data” option.

Clear Browsing Data - Now close your browser window, launch it again.
Method 2: For Mobile App Users
- Navigate to the app menu of your phone, locate the “Netflix” app, and long-press the app icon. An options menu will appear in front of you, tap on the “App Info” option.
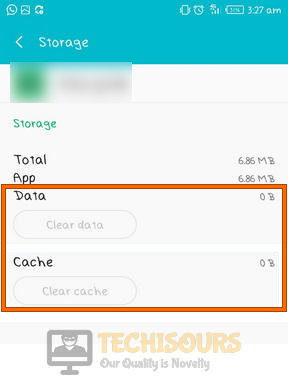
- In the App Info window, locate the “Storage” option and tap on it. All of the app’s storage information will be displayed in front of you. Select the “Clear Data” option, which will present you with two choices. i.e. “Clear Data” and “Clear Cache”.

Tapping On Clear Data Option - Select both options one by one and tap on “OK”. This will clear the cache of the application.
Method 3: For Smart TV users
- From the home screen of your Android TV, navigate to the “Settings” option.
- Head to the “Applications” section, locate the Netflix App, select it and then choose the option “Clear Cache” followed by “Clear Data”.

Clear cache on Android TV - After clearing the cache memory, restart the application and check if the error still exists.

Solution 2: Disable Browser’s Extensions
For Firefox Users:
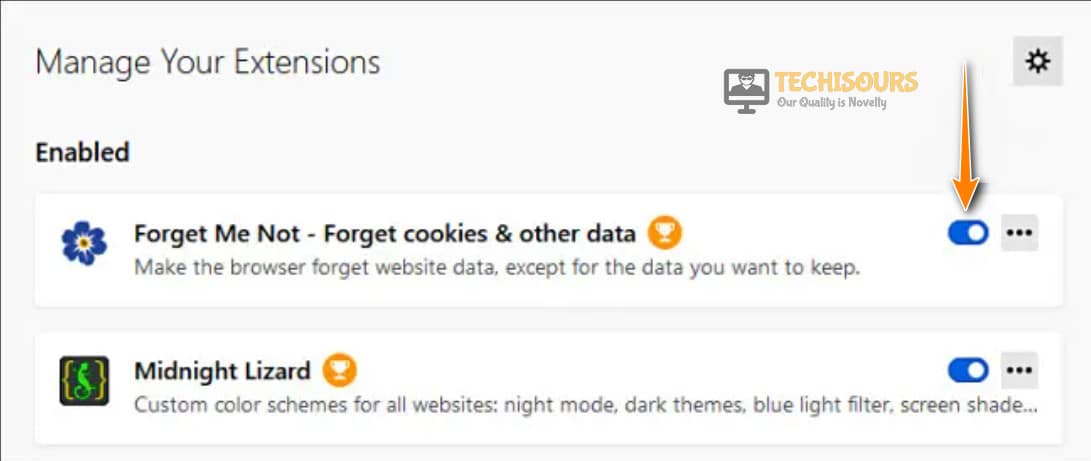
- Launch “Mozilla Firefox” and in the top right corner, click on the menu icon and select the option “Add-ons and Themes”.
- Now click on the “Extensions” option in the left pane and “Disable” all the extensions that appear in front of you.

Disable Firefox Extensions - Close the browser window, launch it again, log in to your Netflix account and check if the issue is resolved.
For Google Chrome Users:
- Launch “Google Chrome” and in the top right corner, click on the menu icon and afterward choose the “Settings” option.

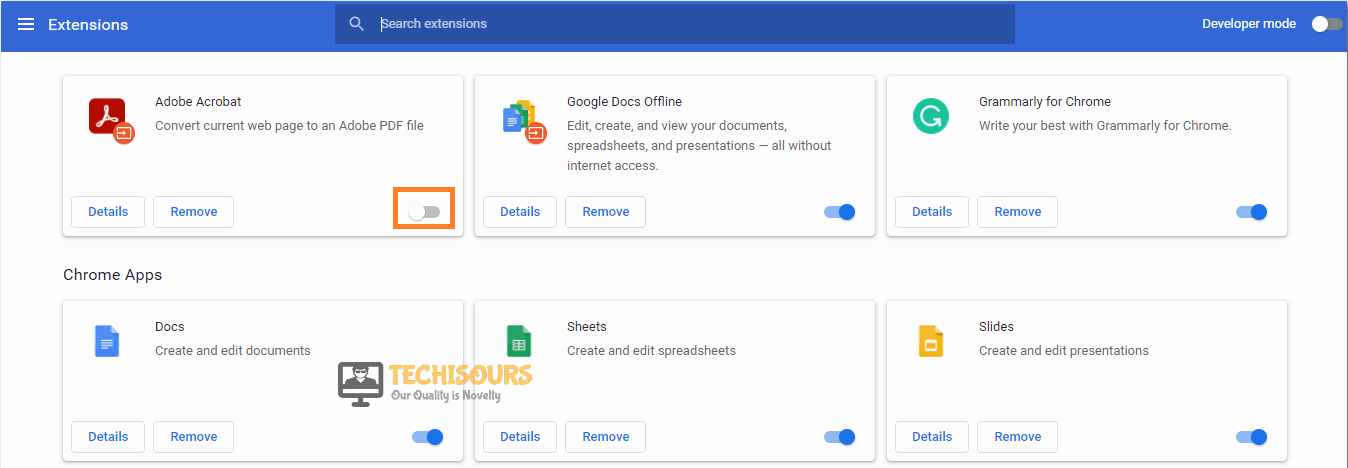
Click on Settings - Click on the “Extensions” option in the lower-left menu and “Disable” all the extensions that appear in front of you by clicking on the “Toggle” button.

Disable Chrome Extensions - Close the browser window, relaunch it, and afterward login to your Netflix account.

Solution 3: Update the Browser
Sometimes, this issue arises due to an outdated version of your browser or when you have turned off the browser’s automatic update feature. Updating your browser to the latest available update can fix this issue. Follow the below-mentioned procedure to successfully update your browser:
For Firefox Users:
- Firstly, launch Firefox, navigate to the “Options” menu and select the option “Settings” located at the bottom of the options menu.

Clicking on “Options” in Firefox - Type “Update” in the search box and then click on the “Check for Updates” option.

Check for Firefox Updates - The browser will check for the latest updates and afterward it’ll let you know if any updates are available. If any updates are available then follow the on-screen instructions to install them on your system.


For Google Chrome Users:
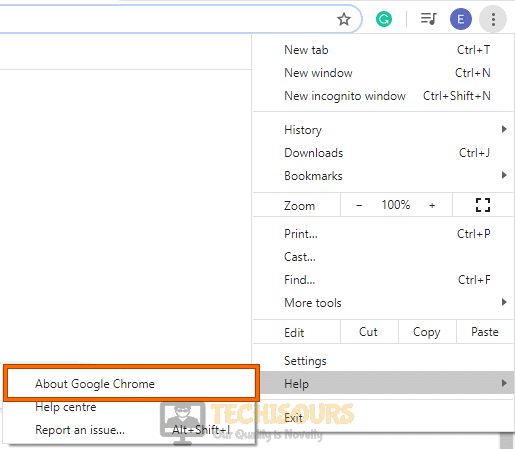
- Launch Google Chrome, click on the “Options” menu, navigate to the “Help” option and then click on the “About Google Chrome” option.

Accessing About Google Chrome Option - The browser’s settings window will appear in front of you and it’ll check and download if any latest updates are available and afterward, click on the “Relaunch” button.
Solution 4: Use A VPN
Many users access the Netflix application through a VPN to access the geo-restricted content as Netflix has blocked some content for several countries due to copyright and legal issues. Using a trusted and reliable VPN can fix this issue. Follow the instructions given below to successfully use a VPN on your system:
- Firstly, sign up and download any of the below-mentioned VPN’s from their respective websites.
- NordVPN
- Surfshark
- CyberGhost
- ExpressVPN
- PrivateVPN
- Launch the VPN application and afterward choose a server located in the country that’s in the Netflix restricted countries list.
- When the VPN is successfully connected through that server, launch Netflix and then stream the content of your choice.
Solution 5: Switch VPN Server
If you are already using a VPN and still facing this error, then switching servers within the VPN might resolve your issue. Below mentioned guide is for ExpressVPN users hence follow the instructions given below to switch VPN servers:
- Firstly, launch the VPN app, click on the options menu and select the “VPN Locations” option from the list.

Choose VPN Location Option - Type the desired location in the search box and when the location appears in the search results, click on it.
- A list of various servers will appear in front of you belonging to that specific location, select any one of them, and afterward, click on the “Connect” option.

Connecting VPN - If the Netflix app shows the same error, then try a different server from the same location and if that doesn’t help then change the server location from the VPN app, select a server from the list, click connect, and then try accessing the Netflix content.
- Repeat the whole procedure whenever you encounter this error as Netflix blocks the IP addresses that it finds suspicious after some time.


Solution 6: Restart VPN & App
Some users suggested that if you are using Netflix through VPN and still facing the issue, then restarting all apps may help fix this issue.
- Firstly, disable the VPN, close Netflix, all browser windows and applications.
- Restart your PC, connect with the VPN server and then sign in to your Netflix account afterward.
- Stream the content on Netflix and check if the issue is resolved.
Solution 7: Update VPN Application (ExpressVPN Users)
This error can arise due to an outdated version of the ExpressVPN on your smartphone or Smart TV. Updating the application to the latest available update can fix this issue. Follow the below-mentioned procedure to successfully update the app.
Method 1: For Android / Tablet Users
- Firstly, open “Play Store” from the app menu, then type “ExpressVPN” in the search box, tap on the “ExpressVPN” application from the search results and check if the updates are available for this application.

Download Express VPN - If updates are available, tap on the “Update” button and wait until the updating process is completed.
- When your device is done installing the latest update package, relaunch the app.

Method 2: For Smart TV Users
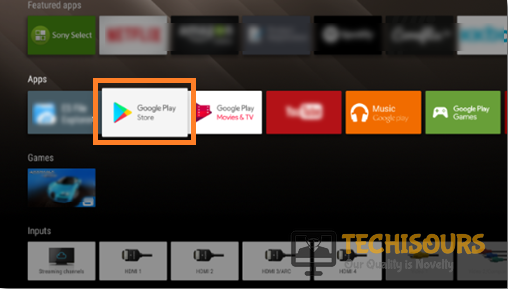
- Locate the “Applications” icon from the menu, find the “Google Play” app and open it.

Choose Google PlayStore - Access the “My Apps” section and locate the “ExpressVPN” application in the list. Tap on the update button and wait for your TV to download and install the latest update files to your Smart TV.
Solution 8: Disable The Proxy Server
- Firstly, click on the windows start button, type “Internet Options” in the search box, and hit the “Enter” button.

Internet Options - The Internet Properties window will appear in front of you, navigate to the “Connections” tab, and click on the “LAN Settings” button located at the bottom of the window.

Choose LAN Settings Option - A new window will appear in front of you, uncheck the option “Use a proxy server for your LAN” and click on the “OK” button.

Turn OFF Proxy Server - Finally, click on the “Apply”, then the “OK” button, launch the Netflix application and check if the issue has been fixed.


Solution 9: Turn Off The IPv6 Option
- Firstly, click on the windows start button, type “Network and Sharing Center” in the search box, and hit the “Enter” button.
- Click on the “Network & Internet” option and afterward click on the option “Change Adapter Options”.

Change adapter settings - The Network Connections window will open in front of you, right-click on the LAN or Wi-Fi connection and then select the “Properties” option.
- Locate the “Internet Protocol Version 6” option from the list and uncheck it.

Internet Protocol Version 6 (TCP/IPv6) - Finally, click on the “OK” button and check if the issue is resolved.


Solution 10: Install VPN On Router
You don’t have to install a VPN on each device individually as you can simply set it up just on your router. Below mentioned guide is for the Surfshark VPN and ASUS router users. Follow the instructions given below to install VPN on your router:
- Firstly, click on the windows start button, type “cmd” in the search box, and hit the “Enter” button.
- A command prompt window will appear in front of you, type the following command and press the “Enter” button:
ipconfig
- Your router’s IP address will appear in front of you in the Default Gateway section:

Default Gateway and IPv4 Address - Navigate to this link, log in using your Surfshark VPN account and then click on the “Credentials” tab where Surfshark service credentials will appear in front of you.
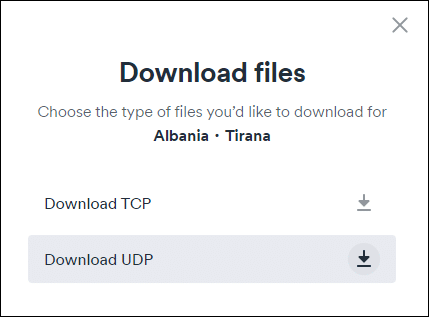
- Now, click on the “Locations” tab where all Surfshark servers will be shown, type the location of your choice in the search box, and press the “Enter” button.
- A dialog box will appear in front of you, click on the “Download UDP” option.

Choose Download UDP Option - Now open the browser window and in the address bar, type the following address to open your router’s control panel:
192.168.1.1
- Your router’s sign-in prompt window will appear in front of you, sign in using your router’s account ID.

Logging In Router - After signing in, navigate to the “VPN” tab located in the “Advanced Settings” section and click on the “VPN Client” tab afterward.
- Click on the “Add Profile” button located at the bottom of the window.
- A new window will appear in front of you, navigate to the “OpenVPN” tab, and afterward type the Surfshark Username service credentials and Password that you already generated in “Step-4”. Click on the “Choose File” button and upload the file that you downloaded in “Step-6”.
- Click on the “Upload” button, uncheck the option “Import the CA file or edit the .ovpn file manually” and when the process is complete, click on the “OK” button.

Click on Upload Option - Finally, click on the “Activate” button and a blue checkmark will appear in the Connection Status column following a successful connection.


Solution 11: Disable VPN
For PC Users:
- Firstly, click on the windows start button, type “Network and Sharing Center” in the search box, and hit the “Enter” button.
- Click on the “Network & Internet” option and afterward click on the option “Change Adapter Options”.

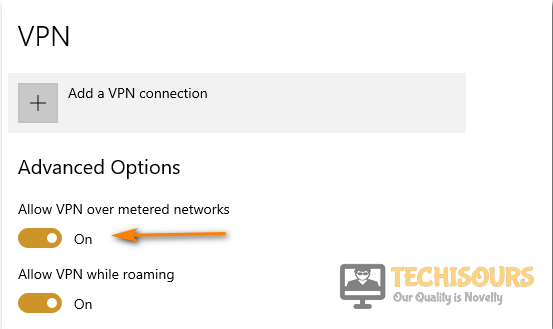
Change adapter options - The Network Connections window will open in front of you, right-click on the VPN and select the “Delete” option.

Turn OFF VPN - After doing so, check if the Netflix Error Code m7111-5059 issue is fixed.

For Cellphone/Android Users:
- Swipe down the notification bar from the top of the screen and tap on the “Settings” option.
- In the search box, type “VPN” and afterward, toggle the VPN button “OFF”.
- Check to see if this fixes the Netflix Error Code m7111-5059 issue.
Solution 12: Disable Proxy Server On Browsers
For Firefox Users:
- Firstly, launch Firefox, navigate to the “Options” menu and select the option “Settings” located at the bottom of the options menu.
Clicking on “Options” in Firefox - Type “Network Settings” in the search box and then click on the “Settings” option.

Choose Network Settings - In the newly opened window, select the option “No Proxy” located at the top of the list and click on the “OK” button.
- Close the browser window and relaunch it.

For Google Chrome Users:
- Launch Google Chrome, click on the “Options” menu, and navigate to the “Settings” option located at the bottom of the options menu.
- A new tab will open in front of you, locate the “Advanced” option in the left pane and expand it, afterward click on the option “System” situated at the bottom of the menu.
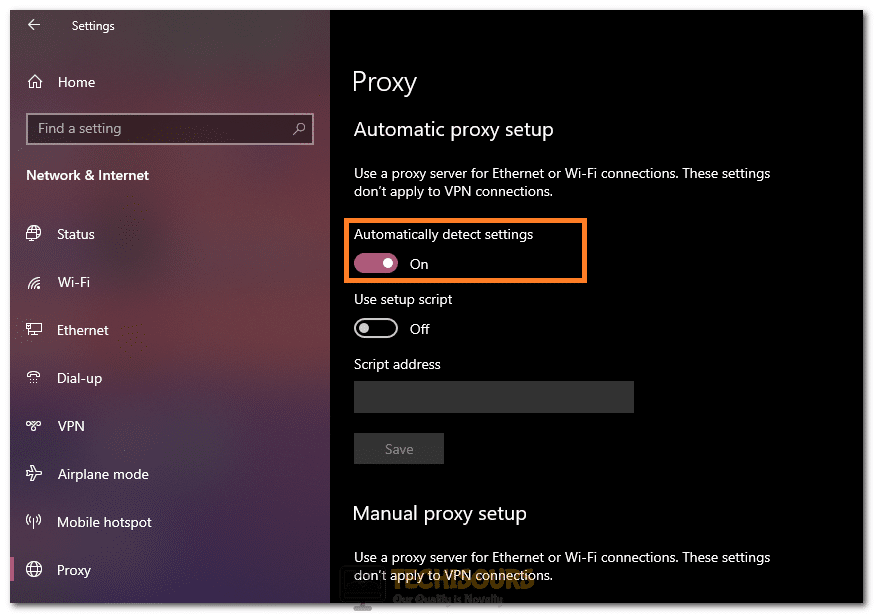
- Click on the “Open your computer’s proxy settings” option, a proxy settings window will appear in front of you.
- Under the Automatic Proxy Setup section, toggle the “Automatic detect settings” button “OFF” and in the Manual proxy setup section, toggle the “Use a proxy server” button “OFF”.

Clicking on the “Automatically Detect Settings” option - Verify if this fixes the Netflix Error Code m7111-5059 issue.
Solution 13: Update Netflix Application
Sometimes, this issue arises due to an outdated version of the Netflix application on your smartphone or Smart TV. Updating the application to the latest available update can fix this issue. Follow the below-mentioned procedure to successfully update the app:
Method 1: For Android / Tablet Users
- Firstly, open “Play Store” from the app menu and then type “Netflix” in the search box.
- Tap on the “Netflix” application from the search results and check if the updates are available for this application.
- If updates are available, tap on the “Update” button and wait until the updating process is completed.
- When your device is done installing the latest update package, relaunch the app and check to see if you have been able to fix the Netflix Error Code m7111-5059 error.
Method 2: For Smart TV Users
- Locate the “Applications” icon from the menu, find the “Google Play” app and open it.
- Access the “My Apps” section and find the “Netflix” application in the list. Tap on the update button and wait for your TV to download and install the latest update files to your Smart TV.
- Restart your device and check if the Netflix Error Code m7111-5059 issue still persists.
Solution 14: Temporarily Disable Antivirus
Many antivirus software offers online web protection service that prevents you from accessing harmful websites but sometimes this feature starts blocking legit websites due to some glitch. Turning “OFF” this feature can help you to resolve this error hence to turn off this feature follow the below-mentioned procedure:
- First of all, navigate to the “Show Hidden Icons” option on the right side of the taskbar, locate your antivirus, and right-click on it.
- Select the option “Pause Protection” or “Disable Antivirus” (the option may vary depending upon your antivirus).

Disable antivirus - A warning prompt window will appear and click on the “OK” button.
- Now the antivirus has been disabled, launch the Firefox browser and check if the Netflix Error Code m7111-5059 issue is resolved.

Solution 15: Reinstall Netflix App
If none of the above-mentioned solutions work for you, then try reinstalling the application. For this purpose, follow the below-mentioned procedure:
Method 1: For Mobile / Tablet Users
- Locate the “Netflix” app on your device, tap and hold the app’s icon, an options menu will appear in front of you, select the “Uninstall” option.
- When the app has been uninstalled, navigate to Play Store and type “Netflix” in the search section.
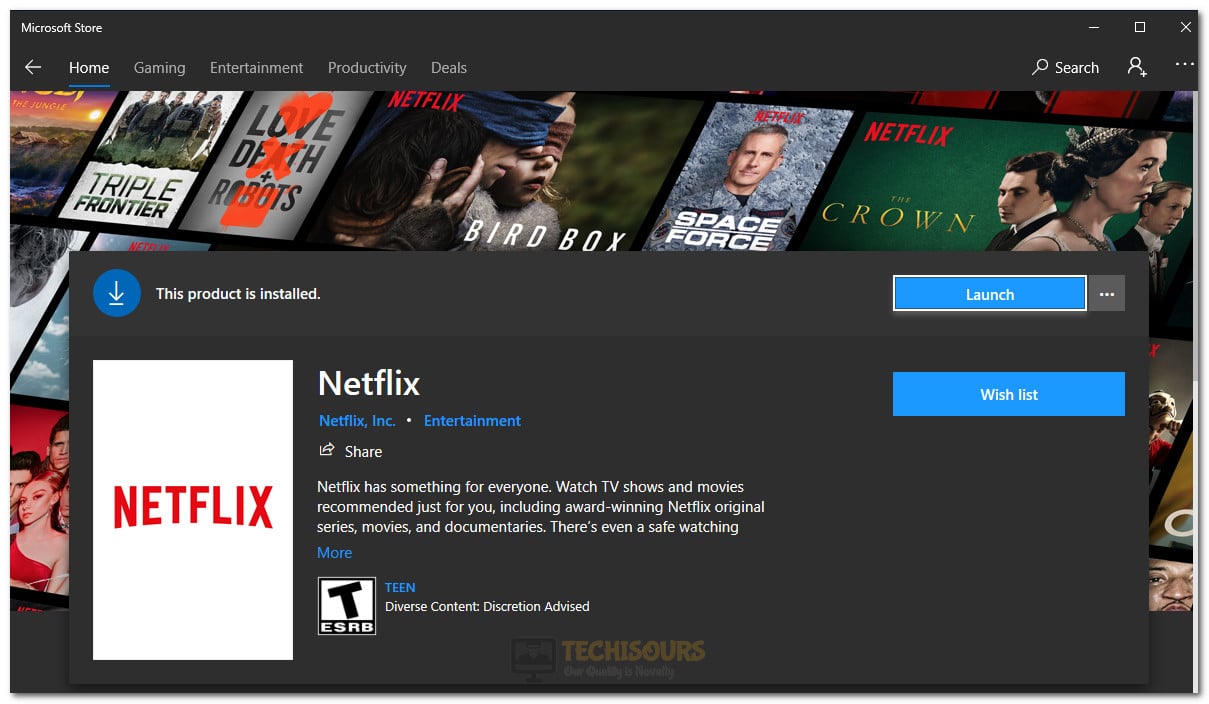
- Tap on the “Netflix” application, select the “Install” option, and when the app has been successfully installed on your device, launch the application, and check if it is working properly.

Installing Netflix via Microsoft Store
Method 2: For Smart TV Users
- From the home screen of your Android TV, navigate to the “Settings” option.
- Head to the “Applications” section, locate the Netflix App, select it and then choose the option “Uninstall”.

Uninstall Netflix Application - Afterward, in the applications section, locate the “Google Play” app, open it, and in the search box, type “Netflix”.
- Select the “Install” option and when the app has been successfully installed on your device, launch the application, and check if the Netflix Error Code m7111-5059 is fixed.

Workaround:
If none of the above-mentioned solutions work for you, then there might be some sort of restriction implemented by your Internet Service Provider on your connection. To sort out this issue, we suggest you contact your Internet Service Provider and brief them about your situation.
If you still can’t figure out how to fix this issue, Contact Us for further troubleshooting.