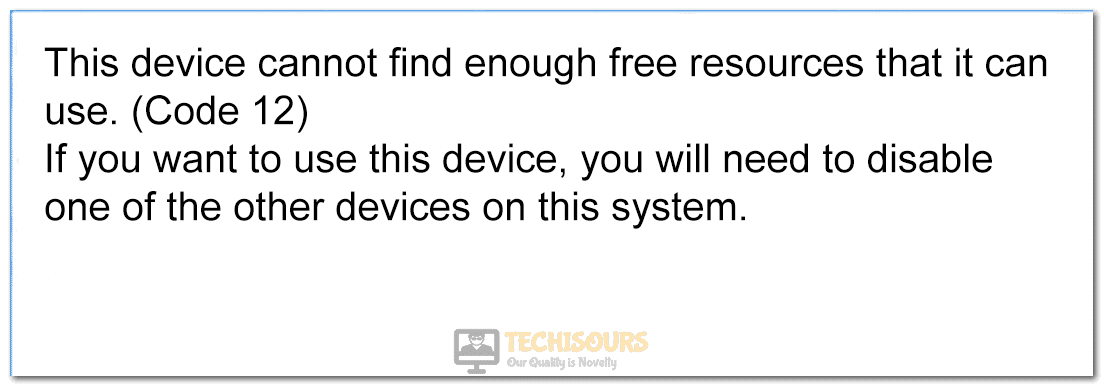
Fix: Error Code 12: This Device Cannot Find Enough Free Resources that it can Use
A lot of Windows users have been getting the “This Device Cannot Find Enough Free Resources that it can Use (Code 12)” error while trying to view their hardware statistics in the device manager. Basically, the error message originates from the conflict between the usage of the I/O ports or the Input Output Ports that multiple devices might have been assigned by the BIOS. This prevents the hardware driver from functioning and causes the Error code 12 issue.
In addition to that, this error can also be triggered if the computer hasn’t allocated enough resources to actually make the hardware work on your computer. Basically, this is a glitch with the BIOS because it is responsible for most part of that allocation. Therefore, in this article, we have compiled different fixes and solutions that will help you completely rid yourself of this problem.
What Causes Error Code 12 on Windows Computer?
There can be a lot of potential reasons due to which the This Device Cannot Find Enough Free Resources that it can Use (Code 12) error might be triggered on your computer and we have compiled some of them into the list below.
- I/O Port Conflict: There have been some incidents where this issue was being caused because multiple devices on the computer were trying to use the I/O port due to which the error code 12 was being triggered and the device driver was unable to properly work with the hardware. Therefore, you can get around this issue by troubleshooting for conflicts.
- Version Issue: If a newer version of the driver has been installed for the hardware, it is possible that this newer version isn’t properly equipped to handle the I/O port conflict or that it is buggy and is causing the error message. Therefore, downgrading to the previous version as mentioned in the solutions below can get rid of the “This Device Cannot Find Enough Free Resources that it can Use (Code 12)” issue.
- Improper Installation: Certain drivers on your computer might not have been installed properly or there might have been a storage failure while they were being installed due to which certain aspects of their installation might have gotten corrupted. Therefore, we suggest that you go for a reinstall to get around this issue.
- Network Issue: The network that you are using might be glitched due to which you might be running into the “This Device Cannot Find Enough Free Resources that it can Use (Code 12)” error. Therefore, we suggest that you try and get around the network error and move on towards implementing the solutions for it that we have compiled for you below.
- Outdated Bios: If the Bios installed on your motherboard has been outdated, it is possible that some hardware won’t work with it properly. Therefore, we suggest that you try and install an update for the Bios and then check to see if doing so fixes the error code 12.
Now that we have taken you through almost all of the potential triggers behind it, you can finally start implementing the fixes that are mentioned below.
Fixing the This Device Cannot Find Enough Free Resources that it can Use Error on Windows:
Solution 1: Troubleshoot Hardware and Devices
- Press “Windows” + “R” to open the Run prompt, type in “cmd” and press “Enter” to launch into it.

Typing in cmd - Then type the following command in the command prompt window and press “Enter”:

msdt.exe -id DeviceDiagnostic
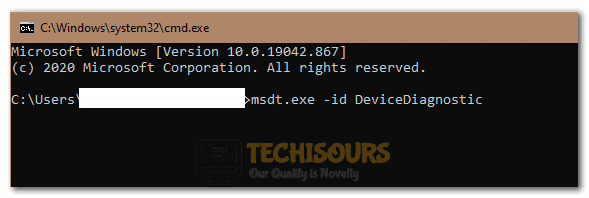
- Now select “Next” and wait till the windows troubleshoot the problem.
- After that, follow the onscreen instructions to complete the process and then check to see if the error got removed.
Solution 2: Restore Problematic Driver to Its Older Version
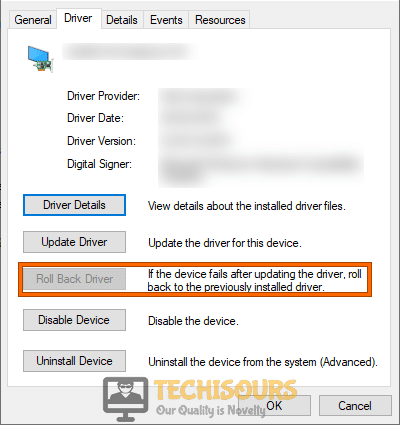
- Press “Windows” + “R” to open the Run prompt, type in “Devmgmt.msc” and press “Enter” to launch the device manager.

Typing devmgmt.msc in the Run prompt - Now navigate to the “Driver” which is causing the problem and right-click on it.
- After that click on Properties and go to the “Driver” tab.
- Now click on the “Roll Back Driver” button to restore it to the previously installed version.

Rollback Driver to fix Error Code 12 - Next “Restart” the computer and check to see if the Error Code 12 issue has been fixed.

Solution 3: Reinstall the Drivers
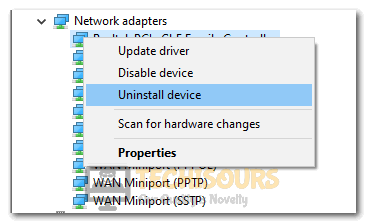
- Right-click on the “Windows” logo on the left side of the taskbar and from the drop-up menu click to select “Device Manager”.
- Now navigate to the “Driver” which is causing the problem and right-click on it.
- Then select “Uninstall device” and from the following window click to select the “Delete the Driver” option.
- Next press the “Uninstall” button.

Clicking on the “Uninstall Device” option - Now “Restart” the computer and check if the problem is fixed or not. Usually, windows automatically install the drivers upon booting.
- If the drivers are not automatically installed, you can also download DriverFix software and run it to install drivers.
- Once done with all of the above-listed steps now proceed to check if the “This Device Cannot Find Enough Free Resources that it can Use (Code 12)” got removed.
Solution 4: Update Drivers
- Press “Windows + R“, type in “devmgmt.msc” and press “Enter”
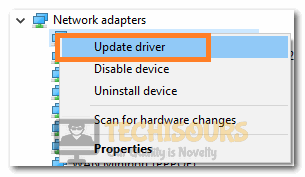
Typing devmgmt.msc in the Run prompt - Navigate to the device that is causing the problem and click on it to expand it. The problematic device driver has a yellow exclamation mark on it. Now right-click on it and select “Update Driver Software” from the dropdown menu.

Clicking on the Update Drivers option - After that select “Search automatically for the drivers”. This will search for the drivers online and will update it automatically.
Note: If this doesn’t work then download any software. Install that software and follow the instructions to detect if any updates are required or not. After that click on “Update All”.
Solution 5: Check Hidden Files
- Right-click on the “Windows” logo on the left side of the taskbar and from the drop-up menu click to select “Device Manager”.
- Now click to select the “View” tab from the top and then click on “Show Hidden devices”.

Show hidden devices - Now look for devices having a yellow exclamation mark on them. Right-click on it and select “Disable” to disable that specific device.
- Once done then check to see if the error got fixed.

Solution 6: Reset the Network
- Go to the “Start menu”, type “Network Status” in the search bar, and press “Enter” to open the Network Status Window.
- Then click on “Network Reset” under Advanced Network Settings and afterwards select the “Reset now” option.

Reset Now to fix error code 12 - Finally, proceed to check whether the “This Device Cannot Find Enough Free Resources that it can Use (Code 12)” error is fixed.

Solution 7: Restore Windows using Restore Points
- Press “Windows” + “R” to launch Run, type in “rstrui” in the textbox and hit the “Enter” key.

Typing in “rstrui” - Click on “Next” and then select “Show more restore points” to open a list of dates.
- Select any “Restore Point” that predates the Windows Update restore point.
- Then press the “Next” and “Finish” buttons and check if the error code 12 got fixed.

Solution 8: Change TOLUD (Top Of Lower Usable DRAM) and Above 4G Decoding Option (For Miners with multiple GPUs)
- Turn “OFF” your computer completely for a while and then turn it back “ON” again. While booting press the “BIOS” key which is usually one from the “F1, F2, Del, Esc, or F10” keys.
- The “TOLUD (Top Of Lower Usable DRAM)” option could be located under any tab, and you will have to go to each tab to find it. This is because the location of the TOLUD option is different for different BIOS.
- Once you locate it, change it from “Automatic” or “Disabled” to “5GB”.
- Now the next thing you need to change is “Above 4G Decoding”. Again this can be present in any tab and you will have to check every tab for this.

Changing the option - Once you find it, change it to “Enabled”.
- Check to see if doing so fixes the error code 12.

Solution 9: Regedit Fix (For Miners with Multiple GPUs Setups)
- Press the “Windows logo + R” keys at the same time or go to the “Start menu” and search for “Run”. Then press “Enter” to open the run dialog box.
- Now type the following command in the textbox and press “Enter”:
regedit

- In the pop-up Registry Editor window navigate to the following key:
HKEY_LOCAL_MACHINE\SYSTEM\CurrentControlSet\Control\PnP\Pci
- Now select the “PCI” key and right-click on the blank space. Then select “New” and click on “DWORD(32-Bit) Value” or “QWORD (64-Bit) Value” depending on which architecture you have.
- Then right-click on the newly added key and select “Rename”. Rename it to right-click on it again and choose “Modify”. Under the “Value data” set it to “600” and change the “Base” option to “Hexadecimal”.
- Click on the “OK” button and “Restart” the computer to check if the error is still there or not.
Solution 10: Upgrade BIOS
- First, note down the “Serial Number” of your PC, you can get this from your PC or check it in your manual.
- Go to your manufacturer’s website(Different Board Manufacturers will have different websites) and search using your “serial number”. Then select and download the “BIOS”.
- Now click on the downloaded file and “Run” it. It will start the process, follow the on-screen instructions and upgrade the BIOS.
- After the upgrade, check if the error got resolved now.
Solution 11: Update your Windows
- Press “Windows” + “I” to open the settings.
- In the Settings window click on the “Update and Security” option.

Update and Security - Next click on the “Check for Update” button, Windows will start to check for any latest updates available and it will download and install any available updates on your computer.
- After updating, check if the error got removed now.

Solution 12: Delete Driver File for PCMCIA Card
- Press the “Window + E” keys together to open up the “File Explorer” window. Here navigate to the following location:
C:\WINDOWS\System32
Or you can also proceed to the below-mentioned location:
C:\windows\system32\drivers\
- Here look for a folder with the name “sys”. Right-click on it and select “Properties”. Now go to the “Security” tab and click on the “Advanced” button.
- The “Advanced Security Settings” window will appear up. Now click on “Change” next to “Owner”. Type in your username and press “Enter”.

Change Permission - Right-click on the folder again and click on “Properties”. Then go to the “Security” tab and click on the “Add” button. Click the “Set Principle” button and select your username, also set permissions to “Full control”.
- Click “OK” to save the changes.
- Now right-click on “sys” and select “Rename”. Rename it to “pcmcia.old.sys”.
- Finally, “Restart” the computer and check to see if the error code 12 has now been fixed.

Solution 13: Remove Motherboard Resources
- Press “Windows + R“, type in “devmgmt.msc” and press “Enter” to launch the device manager.
Typing devmgmt.msc in the Run prompt - Click on the “View” tab at the top and next click on “Show Hidden devices”.
Show hidden devices - Remove all the “Motherboard Resources” from the system device.
- Then remove “Display Adapter” by right-clicking on it and selecting “Remove”.
- After that remove “Ati PCI (3GIO) filter driver”. This will freeze your system.
- Now shut down the system by using the “Power” button.
- After restarting, check if the problem is resolved or not.
- If still you are facing the problem start again and open the “Device Manager” by following steps 1 and 2. This time also remove all “PCI standard PCI-to-PCI bridge” and also “PCI Bus”.
- Lastly “Restart” your PC and check if the “This Device Cannot Find Enough Free Resources that it can Use (Code 12)” got fixed.
Hopefully, now you must have been able to get rid of the error but if you are still facing any issue then feel free to Contact Us here.