Easily Fix the Error 1005 Access Denied Issue with Website
The Error 1005 Access Denied error is usually seen by users on Cloudflare and on Hostinger as well as some other hosting providers. Therefore, in this article, we have dedicated our efforts towards performing solutions and implementing fixes to completely get rid of them.

Make sure to follow all the steps carefully and accurately in order to avoid further escalation of the issue. Also, ensure that you proceed in a step by step manner as the solutions have been listed to ensure that it doesn’t arise again.
What Causes the Error 1005 Access Denied Issue?
After going through the set of solutions that have been listed below, we came to the conclusion that the following must be some of the most crucial reasons behind its occurrence.
- Proxied Connection: In certain cases, if you are using a proxied connection, the website might not be able to load properly because your connection becomes suspicious if detected by the server. Therefore, we recommend that you temporarily turn off the proxy on your connection and then check to see if doing so fixes the Error 1005 Access Denied issue.
- Corrupted Cache: Sometimes the cache that you have implemented on your browser or the cache been implemented by the website can be corrupted due to which the error message is being seen. Therefore, we recommend that you try and clear out the cache temporarily and then check to see if doing so fixes the error message.
- DNS Issue: If configured incorrectly, the DNS server that you are using on your computer might not be fully equipped to resolve the DNS address and this can sometimes cause the Error 1005 Access Denied issue while loading certain websites.
- Blocked IP Issue: The IP address that you use can sometimes be blocked by the server due to suspicious activity and that can cause the Error 1005 Access Denied to appear on your computer. Therefore, we recommend that you check to see if your IP address has been blacklisted in certain areas of the world.
Now that you have gone through the reasons, we recommend that you start implementing the solutions to rid yourself of the Error 1005 Access Denied error.
How to rectify the error 1005 access denied Cloudflare:
Solution 1: Turning Proxy OFF
- Click on the “Windows” icon on your keyboard to open the “Start Menu” and then click on the “Settings” button.
- In the “Windows Settings” dialog box, navigate to the “Network and Internet” option.

Choose Network and Internet - Proceed to the “Internet Properties” and locate the “Connections” option there. Now, click on the “LAN Settings” option located at the bottom-right corner of the window.

Choose LAN Settings Option - Switch over to the “Proxy” tab in the left menu pane and click on the “Use a proxy server” option to turn it “OFF”.
- Close the window and launch origin to check whether error 1005 access denied hostinger has been fixed.


Solution 2: Uninstall VPN
- Press the “Window + X” keys together on your keyboard. In the pop-up menu, click to select “Apps and Features/Programs and Features”.

Choose Apps and features - In the “Apps and Features/Programs and Features” window, locate any kind of VPN application installed on your computer.
- Right-click on it and select “Uninstall or Uninstall/Change”. Also, click to select “YES” on the “Permission Prompt” to uninstall it.

Uninstalling VPN


Solution 3: Clear the Browser Cache
- Open your browser and click on the “Customize and Control Google Chrome” depicted as the “3 vertical dots” on the left of your address bar.
- Navigate to the “Settings” option from the drop-down menu. Scroll all the way down and click to select the “Advanced” option.

Choosing Advanced Option - In the “Privacy and Security” tab, click on “Clear Browsing Data”.
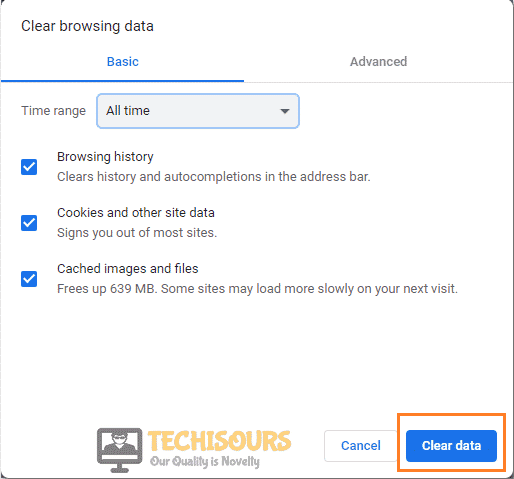
- Next, go to the “Advanced” tab of the new pop-up window and select the time range to “All Time”.
- Make sure to check the box for “Cookies and Other Site Data” and uncheck everything else and then click on “Clear Data”.

Clear Data - Once done now check to see if the error still persists or not.

Solution 4: Add Your Browser As An Exclusion
- Go to the “Start Menu” located on the bottom left of the screen and then proceed to “Settings”.
- Navigate to the “Updates and Security” option and move to the “Windows Security” tab from the left menu pane.

Choose Windows Security Option - Click on “Virus and Threat Protection” under the “Protection Areas” section.
- Under the “Virus and Threat Protection Settings” sections, click to select “Manage Settings”.
- Then scroll down and locate “Add or Remove Exclusions” under the “Exclusion Section”.
- Next click on the “Add An Exclusion” and select “Folder” from the context menu.

Add an Exclusion - Browse to select your web browser from the list and click on “OK” to add it as an exclusion.
Note: Similarly, you can add exceptions or whitelist your browser taking the relevant steps for your particular antivirus.


Solution 5: Using A VPN
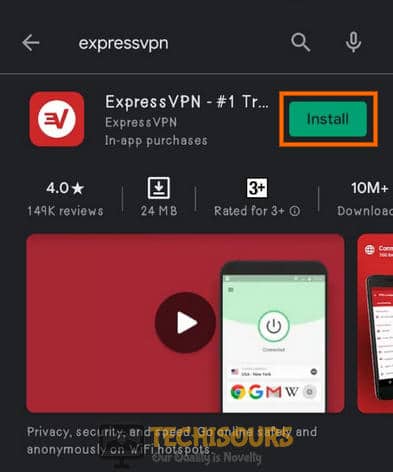
- Start with downloading a “VPN service” to change your IP address. You can use Nord, Express, or any such VPN service.
- Then “Install” the setup on your system and connect the server to the nearest location available.

Install the VPN - Quit the game and relaunch it from the desktop to see if everything works fine now.
Solution 6: Disable/Remove A VPN
If trying a VPN doesn’t prove effective for you then it is better to disable a VPN because it proved to be beneficial for several users, therefore, follow the steps throughout to disable VPN on your system:
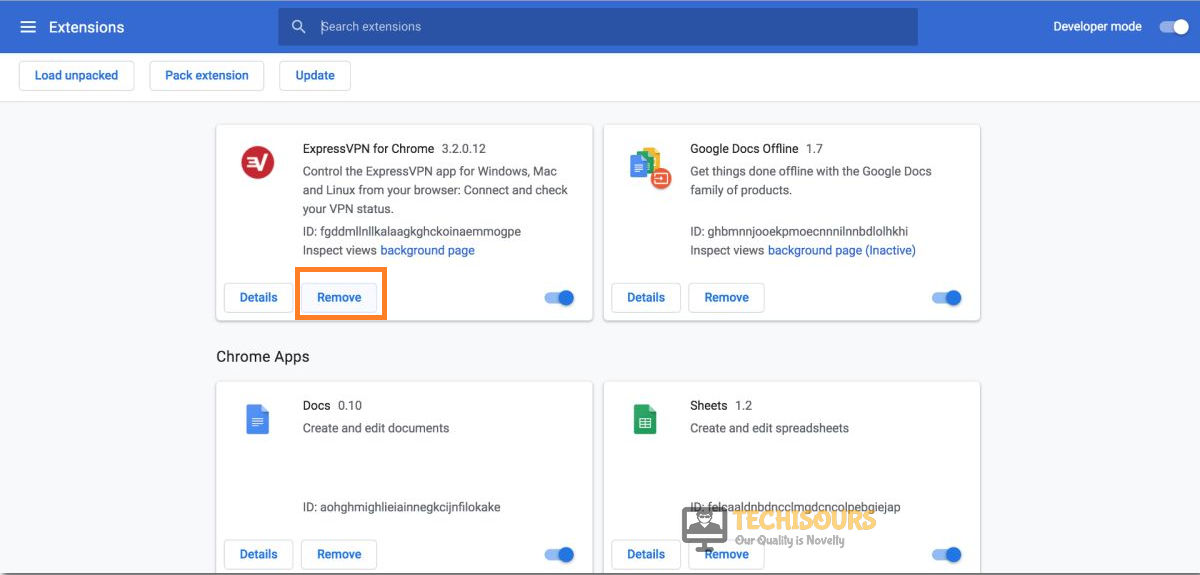
- Open your browser and type in “chrome://extensions/” or “about:addons” for Chrome and Firefox respectively.
- Press “Enter” and click on “Remove” or press on the “OFF” option for your VPN extension.

Disabling VPN - Restart your browser and try performing the task again to see if error 1005 access denied is fixed or not.
Solution 7: Configure Time Settings to Auto
- Press the “Window + S” keys simultaneously on your keyboard and type in “Date and Time” in the search bar. Click to select the “Change the Date and Time” option.

Change date and time - Then set the “Set Time Automatically” option to “ON”.
- Lastly proceed to check if you have been able to get rid of the issue.

Solution 8: Change Current DNS to the Google DNS
Sometimes, changing your DNS can also result in solving the problem. To flush/change the current DNS to the Google DNS follow this procedure:
1. Press the “Window + R” keys simultaneously on your keyboard and type “ncpa.cpl” in the “Run” prompt and afterward hit the “Enter” button.

2. On the new window select the “Network Connection” dialogue box and right-click on it to select the “Properties” option from the context menu.
3. Next click on the “Internet Protocol Version 4(TCP/IPv4)” to enter a new window. Here change the DNS to either of the server addresses.

4. You need to alter the “Preferred DNS Server” to “8.8.8.8” and “Alternate DNS Server” to “8.8.4.4” respectively.
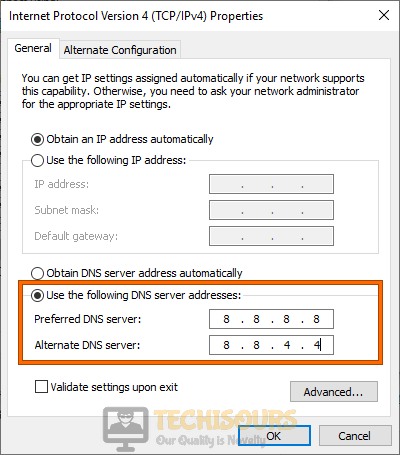
5. Next, click on the “OK” option and then wait for the changes to have their effect.
Solution 9: Check Your IP Status
You need to check your IP status in order to see if it hasn’t been blacklisted or flagged which is causing you this quite error. To do so simply proceed to the Akamai website, perform the Captcha and click on the “Go” button.
Solution 10: Contact the Website Admin
If none of the solutions work you can also opt to contact the website admin directly if your access has been blocked by the particular page. Navigate to the “Forms” or “About Us” section and here locate the contact information of the page. From here send an email addressing your problem and what you have tried in order to solve it.
Hopefully, all of the above-listed fixes would be enough for taking you through the error successfully but for any further queries or assistance you may Contact Us here.