Easily Fix Your PC Ran into a Problem and needs to Restart [Complete Guide]
There have been some reports of people getting the “Your PC Ran into a Problem and needs to Restart” error being faced by a lot of users and we have inquired about this issue and listed some fixes, workarounds and solutions to get rid of this issue completely and boot into our computer normally.

Most often than not, the login screen gets stuck or users get into a ” Your PC Ran into a Problem and needs to Restart Loop” which prevents them from being able to sign in. You should also go through the reasons due to which this issue occurs in the first place because it will help you better understand as to why the error occurs.
Why are you getting the ” Your PC Ran into a Problem and needs to Restart” Message while trying to start your Windows PC?
After going through some troubleshooting guides, we came to the conclusion that the following must be the paramount reasons due to which this error occurs.
- Background Applications: In some cases, the background services and applications that are set up to run at startup might trigger this error while you are trying to launch the operating system and due to this, the ” Your PC Ran into a Problem and needs to Restart” message might be seen.
- Disk Errors: Sometimes the hard disk might contain some bad sectors due to which it might not be able to load the operating system properly. Therefore, we recommend that you scan your HDD for any bad sectors and then fix them using various scans as highlighted in the solutions below.
- Outdated OS: If the Operating system has been outdated or this error occurs after trying to install updates, we recommend that you try and check for updates again from the safe mode if you are able to boot up and then check to see if you are able to fix the ‘ Your PC Ran Into a Problem and needs to Restart’ error.
- Recently Installed Applications: In certain cases, some recently installed applications might end up causing the error because they might be conflicting with some system services that are responsible for loading the computer up. Therefore, we recommend that you try to remove any recently installed apps and then check again.
- Outdated Drivers: If the Drivers on your computer have been outdated, we seriously recommend that you try and check for updates and then check to see that if by applying those updates you are able to fix the ” Your PC Ran into a Problem and needs to Restart” issue.
- Computer Temperature: The Compute temperature can also sometimes prevent the operating system from being able to boot up, therefore, we recommend that you check to see if the heatsink installed on your system is connected and running properly. Also, check to see if the thermal paste hasn’t worn out on the heatsink which can also sometimes trigger this issue.
- Memory Issues: The RAM is one of the most important components of the computer and if it hasn’t been installed properly, you might run into the ” Your PC Ran into a Problem and needs to Restart” error from time to time. Therefore, we recommend that you perform a memory test and then check to see if the issue goes away.
- Registry Configurations: Some Registry configuration that you changed recently or an application installed on your computer changed might have broken your computer due to which you are running into this error. Therefore, we recommend that you try and revert the registry back to its unchanged state and then check to see if you are able to fix this error.
Now that you have gone through almost all the major reasons, it is about time that we start implementing the fixes.
Fixing your pc ran into a problem and needs to restart stuck problem:
Solution 1: Boot Into Safe Mode
Most of the time it happens that the other programs installed on your PC can interfere with your files, so booting into the safe mode will only run important window programs and will help fix the issue too. To boot into the safe mode implement these steps:
- In the search bar near the Start menu type in “Settings” and press “Enter”.
- In the pop-up Settings window click on “Update and Security” and then proceed to select “Recovery” from the left pane.

Choose Update and Security - Proceed to the “Advanced Startup” section to select “Restart Now”.
- Once after the Restart, choose the “Troubleshoot” option and then click on “Advanced Options”.
- Click to select “Startup Settings” and then click on “Restart”.
- After the Restart, you will see the “Startup Settings” screen. From here you can choose from various “Safe Mode” types, choose the appropriate option for you.
- Lastly, restart your computer and check whether your pc ran into a problem and needs to restart windows 10 issue persists.

Solution 2: Check the Disk
The Blue Screen Of Death (BSOD) is many times caused due to hardware issues and for this, you can check your drive for errors. To do so perform these steps:
- Locate the “This PC” option and right-click on it to select the “Open” option.

Click on This PC - In the pop-up window right-click on your “Windows Drive” and from the drop-down menu choose to select “Properties”.
- Then click on the “Tools” tab at the top of the window and here select “Check” in the “Error Checking” section.

Clicking on the Check Button - Afterward, select “Scan Drive” and let the process complete.
- Once it gets completed now proceed to verify if the error still persists or not.


Solution 3: Run the CHKDSK Command
- In the search bar near the Start menu search for “Command Prompt” and from the list of search results right-click on it to select “Run As Administrator”.
- In the command prompt window type in the following command and press “Enter”:
chkdsk C: /f /r /x
- Once the command gets executed completely restart your computer and check whether the error is solved now.
Solution 4: Leave Sufficient Space On Windows Drive
Having no or very little space on your Windows drive can become very problematic in turn giving rise to several errors as windows require extra space for updates and other processes. Make sure you delete any junk files from your Windows drive which may lead to error fixing for you.
Solution 5: Check For Updates
Make sure you have all the latest updates installed on your computer, as it is necessary to help your computer run smoothly and without any bugs. In order to check for updates on your system proceed with these steps:
- In the search bar near the Start menu type in “Check For Updates” and press “Enter”.
- In the pop-up Windows Update window click on “Check For Updates”.

Check For Updates - Windows will now start searching for uninstalled or out-of-date updates, if found they will be “Downloaded” and “Installed” automatically on your PC.
- Once your system gets updated now check if the error stays or not.

Solution 6: Uninstall Recently Installed Applications
Newly installed corrupt applications on your Windows can cause certain issues and can also interfere with other processes. Therefore try uninstalling any recently installed applications hence follow the procedure indexed below in order to do so:
- In the search bar near the Start menu type in “Control Panel” and press “Enter”.

Typing in Control Panel - In the pop-up window scroll down to look for the “Programs” option and click to select it.
- In the following window select “Programs And Features” and here scroll down through the list of applications to find those you have installed recently and select to “Uninstall” them.

Uninstalling Latest Installed Applications Note: While uninstalling a program in the safe mode, you may get an error message saying “The Windows Installer Service Could Not Be Accessed” don’t worry about this and follow the steps below:
- In the search bar type in “Command Prompt” and from the list of search results right-click on it to select “Run As Administrator”.
- In the pop-up command prompt window type in the following command and press “Enter”:
REG ADD "HKLM\SYSTEM\CurrentControlSet\Control\SafeBoot\Minimal\MSIServer" /VE /T REG_SZ /F /D "Service
- Next type in the following command and hit “Enter” again:
net start msiserver
- Once done close cmd and try uninstalling the program again.


Solution 7: Tweak Startup and Recovery Settings
This particular solution proved to be useful for quite a lot of users and to implement this you need to carry out the following steps:
- Right-click on “This PC” on your desktop and select “Properties” from the drop-down menu.
Click on This PC - Then select “Advanced System Settings” in the right vertical tab and from the window displayed click on the “Advanced” tab at the top.
- In the Startup and Recovery section click on “Settings” and in the “System Failure” section uncheck the box in front of “Automatically Restart”.

Uncheck the Automatically Restart Option - Now click on the drop-down menu under Write debugging information and select the “Complete memory dump” option.

Choose Complete Memory Dump Option - Click on “OK” and allow the computer to Restart so that your pc ran into a problem and needs to restart cause could be rectified.


Solution 8: Run the SFC Scan
System File Checker of the SFC scan helps find and fix corrupt system configuration files. In order to run an SFC scan on your computer follow these steps:
- In the search bar near the Start menu search for “Command Prompt” and from the list of search results right-click on it to select “Run As Administrator”.
- In the pop-up command prompt window type in the following command and press “Enter”:
sfc /scannow
- Let the process get complete and then check if the error got eradicated.
Solution 9: Run A DISM Scan
- In the search bar near the Start menu search for “Command Prompt” and right-click on it to select “Run As Administrator”.
- In the command prompt window type in the following command and hit “Enter”:
DISM /Online /Cleanup-image /RestoreHealth
- The scan may take a few minutes and once completed now observe if you got rid of windows 10 your pc ran into a problem and needs to restart loop error.
Solution 10: Check the System Log In Event Viewer
The system logs list errors and the problematic device/driver which can be very helpful in solving PC problems. To view the system logs follow this procedure:
- In the search bar near the Start menu type in “Event Viewer” and from the list of search results right-click on it to select “Run As Administrator”.
- In the pop-up Event Viewer window expand the “Windows Logs” section in the left vertical tab.
- Then click on “System” and check for the errors that occurred with the blue screen error and fix them accordingly to the information.

Select System Option in Event Viewer

Solution 11: Disconnect All External Devices
The blue screen error is often hardware-related a lot of times, as the peripherals connected to your computer can also be problematic. Try disconnecting all the devices from your PC when turned on and afterward restart your PC and plug them one at a time to see which particular device is causing the issue.
Solution 12: Update Your Drivers
Device Drivers are the translators between your hardware and software and making sure they are all up to date should be on the priority list of every user. To update drivers do the following steps:
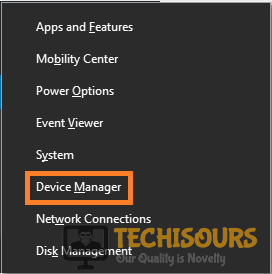
- In the search bar near the Start menu type in “Device Manager” and press “Enter”.

Choose Device Manager - In the Device Manager window, you will see a list of all the connected hardware and from here click on the drop arrow beside the list to expand it.
- Now you can uninstall each driver one by one by right-clicking and selecting “Uninstall” from the drop-down menu.
- Also, make sure to “Restart” your computer after each uninstalls, this will help in ruling out options.
- To update afterward right-click on the device and select “Update Driver”.
- Then choose to select “Automatically Search Online For Drivers”.
- Finally, the latest drivers will then be downloaded and installed automatically on your PC, and once done now check if you got rid of the error easily.

Solution 13: Rolling Back Drivers/Disabling Drivers
You can also roll back/disable drivers instead of uninstalling them and to do so proceed with the below-mentioned steps:
- On your keyboard press the “Window + X” keys together and from the drop-up menu choose to select “Device Manager”.

Open Device Manager - Then expand the device sections and right-click on the particular device that you think is problematic.
- From the drop-down menu click to select “Properties” and then click on the “Driver” tab at the top.
- From here select “Roll Back Driver” or “Disable Device” and then click on “OK” to save the changes made.
Solution 14: Check For Computer Temperature
If your computer components are overheating the PC will go into an error state and will shut down to prevent hardware loss. You can monitor your PC temperatures using different third-party applications like HWmonitor. HWmonitor helps monitor temperatures of all PC components from processors to hard drives. Make sure your temperatures are way below a hundred depending on your component. If any of the components are exceeding limits you may need to get in touch with the manufacturer on what to do next.
Solution 15: Uninstall Recent Updates
Any recent defective update that got installed on your computer can cause the issue and therefore to uninstall any recent updates you should do the following:
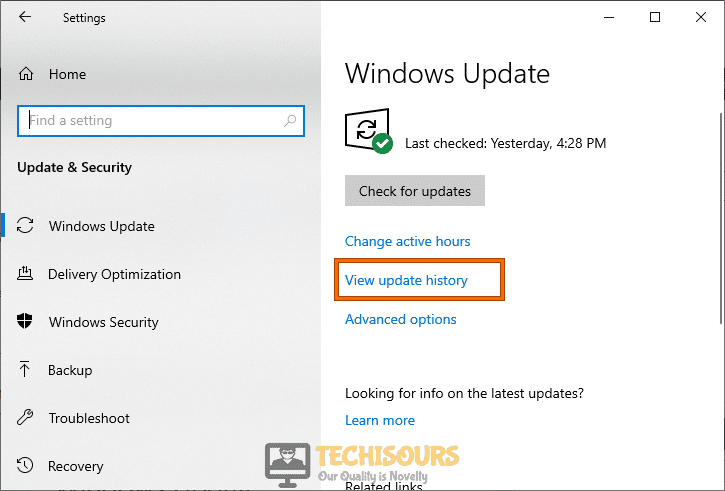
- On your keyboard press the “Window + I” keys together to open up “Settings”.
- In the Settings window click on “Update and Security” and then select “View Update History”.

View update history - In the following window click on “Uninstall Updates” and then locate the most recent updates.
- Next right-click on the Update and select “Uninstall” and once uninstalled, “Restart” your computer and check if your pc ran into a problem and needs to restart windows 10 error persists or not.
Solution 16: Revert Registry Configurations
You can reset your registry configurations to default by using the following method:
- In the search bar near the Start menu search for “Command Prompt” and right-click on it to select “Run As Administrator”.
- In the new command prompt window type in the following commands and hit “Enter” after each:
C:

CD Windows\System32

CD config

DIR

CD regback

DIR

CD..

REN default default1

ren sam sam1

ren security security1

ren software software1

ren system to system1

CD regback

copy * c:\windows\system32\config
3. Once done the above commands will replace system32 configuration files that have been altered or corrupted.
Solution 17: Run A Full Windows Defender Scan
To run a complete system scan using Windows Defender follow the steps below:
- In the search bar near the Start menu type in “Virus and Threat Protection” and press “Enter”.
- In the new window click to select the “Scan Options” and then click on “Full Scan”.
- Next press the “Scan Now” button and let the defender take its time, once the scan finishes and malware are found you will be asked to perform actions against the virus.

Perform a full scan

Solution 18: Run A Memory Test
This solution may solve the blue screen on your PC. Proceed as follows:
- Press the “Window + R” keys together on your keyboard to open up the “Run” command prompt. In the Run dialogue box, type or paste “mdsched.exe.”
- Select “Restart Now and Check for Problems (Recommended)” from the “Windows Memory Diagnostic” dialogue box.

Restart now and check for problems - Wait for the scan to finish and restart your computer so that the changes may have their effect and when it is completed now check to see if your pc ran into a problem and needs to restart error got resolved or not.

Solution 19: Restore Your System Using Restore Points
- On your keyboard press the “Window + R” keys together to open up the “Run” dialog box.
- In the Run prompt type in “rstrui.exe” and press “Enter”.

Typing in “rstrui” - In the proceeding “System Restore” window click on the “Recommended Restore” option and then check the box in front of “Show More Restore Points”.

Select Recommended Restore Option - Now choose a “Restore Point” to a date when your computer ran perfectly and afterward click on “Next”.
- Finally, confirm your Restore by clicking on “Finish” and afterward verify if the error got eradicated.


Follow the Solutions below if your System won’t Boot:
Solution 1: Run Startup Repair
- Insert the “Bootable USB” or “Windows Installation Drive” into your computer and press any key when prompted by the computer to boot from the installation media.
- Now when you see the options to install Windows, click on the “Repair” option.
- Then click on “Troubleshoot” and afterward select “Advanced Options”.
- Next select “Startup Repair”, Windows will now start the repair process.

Choose Startup Repair Option - When it gets completed see if everything works fine now.

Solution 2: Perform A System Restore
You can also perform a system restore even if your system won’t boot. Follow these steps to do so:
- Insert the “Bootable USB” or “Windows Installation Drive” into your computer and press any key when prompted by the computer to boot from the installation media.
- Now when you see the Options to install Windows, click on “Repair”.
- Next click on “Troubleshoot” and afterward select “Advanced Options”.

Choose Troubleshoot Option - Click on “System Restore” and then choose an “Account” to continue.
- Now select a “Restore” when your PC was running fine and then click on “Next”.
- Lastly, press “Finish” and then “YES” to restore Windows.

Solution 3: Perform A System Image Recovery
You can also perform a system image recovery if you have created a system image before the issue arose. Proceed with the below-mentioned procedure:
- Connect the drive that contains the “System Image” to your computer and in the Windows Boot options select “Troubleshoot”.
- Then click on “Advanced Options” and select “System Image Recovery”.
- Now choose the “System Image” you want to recover and click on “Next”.
- Then follow the on-screen instructions to format the disks and once done restart your computer to let the changes have their effect.
Solution 4: Restore Registry Configurations
- Insert the “Bootable USB” or “Windows Installation Drive” into your computer and press any key when prompted by the computer to boot from the installation media.
- Now when you see the Options to install Windows, click on the “Repair” option.
- Then click on “Troubleshoot” and select “Advanced Options”.
- Next, select “Command Prompt” and enter the following commands one by one followed by pressing the “Enter” key:
C:

CD Windows\System32

CD config

DIR

CD regback

DIR CD..

REN default default1

ren sam sam1

ren security security1

ren software software1

ren system to system1

CD regback

copy * c:\windows\system32\config
- In the end type in “Exit” and press “Enter”, followed by restarting your PC.
Note: Solution 16 from above can also be used when the System would not boot.
Solution 5: Reinstall Windows
If none of the solutions mentioned above worked for you then the last option left with you is to perform a clean Windows Install. For this follow the procedure listed below:
- Insert the “Bootable USB” / “Windows Installation Media” into your computer and restart your PC.
- On the first startup, your computer will ask you to press a key in order to boot from the installation media, press any “Key” on the keyboard to “Continue”.
- Once Windows installation is accessed, select a “Language” and click on “Next”.

Select Language, Edition, and Architecture - In the following window click to select “Install Now”.
- Now the installation will ask you for a “Product Key”, it can be found on the back of the DVD pack, you can also skip this step and enter your code once the installation is complete.

Enter Product Key - In the next step click on “Custom”. “Install Windows Only (Advanced)”.
- In the next window, you will be shown all of your partitions, and windows will ask you to select a partition for window installation, click to select the “Appropriate Partition”.
- Then click on “Next” to start the Windows installation, this may take a while so sit back patiently, and once done now observe if you got rid of the issue successfully.


Hopefully, the list of detailed solutions indexed above will be helpful for you in solving the problem but if you still have any further queries or questions then feel free to Contact Us here.