Easily Fix Rust Keeps Crashing Issue
Ever since the update, Rust has gotten more and more glitchy and error-prone. The game is one of the favorite for a lot of people and remains an enjoyable game nonetheless. However, if Rust Keeps crashing when loading into server or while normal gameplay, we recommend that you go through this guide which delves deep into fixing this issue once and for all.

If Rust Keeps Crashing on PS4/PS5/Xbox or PC, don’t worry, in this guide, we have compiled fixes for all of the consoles. In addition to that, we have also listed the reasons due to which it occurs in the first place. Make sure to go through all of the solutions and implement them all in order to fix the issue.
Why Rust Keeps Crashing?
After going through most of the messages from users that got this issue, we started researching and concluded that the following must be the most important reasons due to which it occurs.
- Outdated Drivers: In certain conditions, it is possible that the drivers on your computer have been outdated due to which Rust keeps crashing. Therefore, we suggest that you try and check if updating the drivers fixes the error.
- Admin Permissions: Sometimes, the admin permissions that the game needs to read and write in certain files/folders, might not have been granted to it. Therefore, we suggest that you try and provide the required admin permissions to the game and check to see if doing so fixes the error.
- Steam Beta: Steam might not be running as intended because you have enabled the Steam beta updates which try out some experimental new features on your app that might not be as stable as the normal builds. Therefore, we suggest that you try and disable Steam beta and check to see if doing so prevents Rust from crashing.
- Background Programs: In certain cases, the background programs running on your computer might be preventing the game from running properly. Therefore, we suggest that you try and minimize the number of background programs running on your computer and check to see if doing so fixes the Rust keeps crashing issue.
- Game File Integrity: Game files and configurations are held together in a specific order, therefore, we suggest that you try and check if the file integrity of the game on your computer is intact. Therefore, we suggest that you scan the game file integrity on your computer and check to see if doing so fixes the Rust keeps crashing issue.
- Less Available RAM: The RAM available on your computer might not be enough to run the game properly and some of its components. Therefore, we suggest that you try and free up more RAM in order to ensure that the game has all the resources that it needs and to make sure that Rust crashing randomly issue is fixed.
- Outdated Windows: If you are gaming on a PC, it is recommended that you try and update Windows in order to ensure that it isn’t outdated which can sometimes cause certain issues due to which Rust keeps crashing. Therefore, we suggest that you follow the solution below to allow yourself to check for updates.
- Power Options: The power option configuration on your computer might not have been properly set due to which the Rust keeps crashing issue might be triggered. Therefore, we suggest that you reconfigure them as we have listed as below.
Now that you have been taken through most of the reasons due to which the error occurs, we can finally start implementing the solutions that we compiled.
Before You Start:
To begin with, you need to start with a pretty simple fix that is to “Restart” your game and if this doesn’t work then “Restart” your game and check if it fixes the problem easily for you.
Also, initially, you need to check the minimum requirements of your PC that might be causing the Rust issues. If your PC does not meet these requirements, then try upgrading it to the minimum specs listed below. Following is the list of some minimum PC requirements which must be met in order to avoid having this error:
Requires a 64-bit processor and operating system.

OS: Windows 8.1 64-bit

Processor: Intel Core i7-3770 / AMD FX-9590 or better

Memory: 10 GB RAM

Graphics: GTX 670 2GB / AMD R9 280 better

DirectX: Version 11

Network: Broadband Internet connection

Storage: 20 GB available space.
Fixing the Rust keeps Crashing when loading into server problem:
Solution 1: Update Graphics Drivers Automatically
- Download and install “Driver Easy” from your browser.
- When the installation is completed launch Driver Easy and click on “Scan Now”.

Click on Scan Now - Driver Easy will scan your computer and will look for any problem drivers, it may take few seconds.
- Next, click on the “Update” button which is next to the graphics driver, and it will download the latest version of drivers automatically.
- Finally “Restart” your PC to check if the Rust Keeps Crashing error got resolved or not.

For updating the drivers manually follow the procedure below:
- Press the “Window + R” keys simultaneously to open the “Run” dialog box and here type “devmgmt.msc” in the textbox.

Typing devmgmt.msc in the Run prompt - Now click on the “Display Adapters” option and right-click on your graphics card to select “Update driver”.

Update Graphics Driver - Then select “Search automatically for updated driver software”. It will take few seconds to search online for drivers.
- In the end, select “Update Driver” and afterward “Restart” your device to see whether the issue is resolved or not.
- Check to see if the Rust Keeps Crashing error is fixed.


Solution 2: Run Steam In Admin Mode
- Firstly, launch “Steam” on your PC and then go to your taskbar.
- Right-click on the Steam icon and select “Exit”.
- Now right-click on the Steam icon and click to select “Properties”.
- Navigate to the “Compatibility” tab and then click on the “Run this program as an administrator” option.

Run this program as an administrator - Finally, click on “Apply” and then hit the “OK” key.
- Relaunch Rust from Steam afterward to check whether the rust keeps crashing xbox issue got settled.

Solution 3: Opt Out Of Steam Beta
- Launch “Steam” on your PC, on the left corner, click on “Steam” and then click on the “Settings” option.
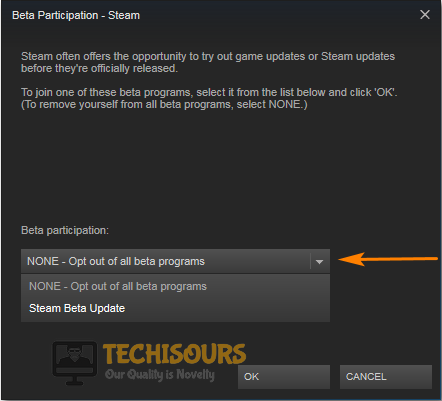
- After that select “Change”, then below “Beta participation” select “NONE – Opt-out of all beta programs” and click on “OK”.

Opt-Out Of All Beta Programs - At last “Restart” Steam and Rust to check if the issue got settled.
Solution 4: Shutdown Background Programs
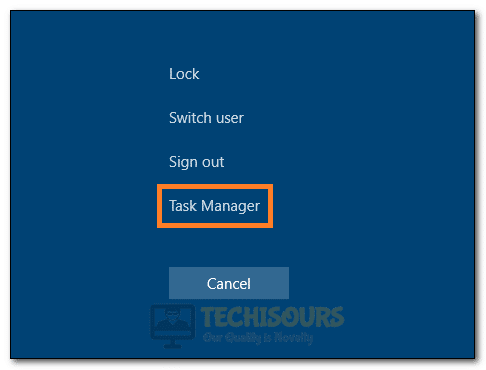
- Press the “Ctrl + Alt +Delete” keys simultaneously and from the pop-up menu choose to select “Task Manager”.

Launching Task Manager - Now check the “CPU” and “Memory” columns in the Performance tab and look at which processes are consuming most of the resources.
- Right-click on the processes which are consuming most of the resources and then select “End task”.
- At last “Restart” Rust to see if everything works fine now.
Solution 5: Verify Integrity Of Game Files
- Launch “Steam” on your PC and then select the “Library” option next to Store.

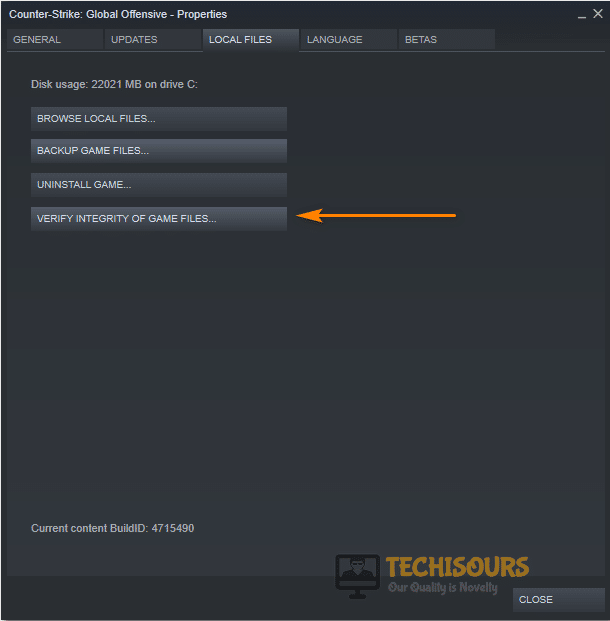
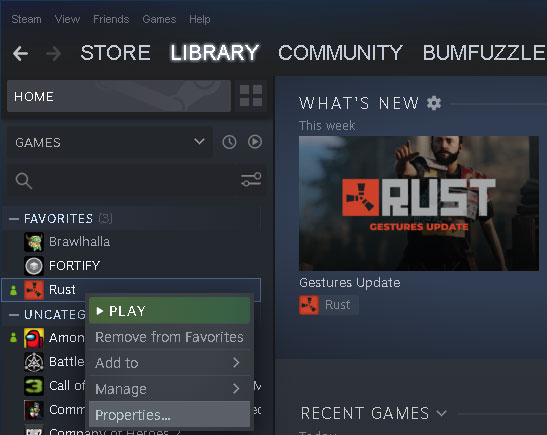
Opening Steam Library - Now right-click on “Rust” and then select “Properties”.
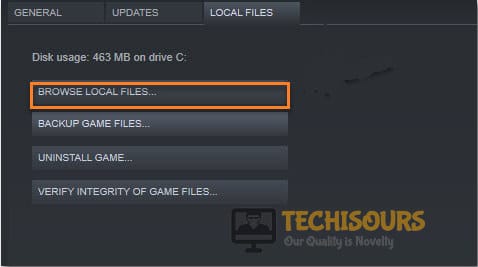
- From the top options click on the “Local files” tab and then from the available list of options click on “Verify Integrity Of Game Files”.

Verify Integrity of Game Files - At last wait for a few seconds for the scan to be completed and then relaunch Rust.

Solution 6: Set Process Affinity For The Game
- Press the “Ctrl + Alt +Delete” keys simultaneously and from the pop-up menu click to select “Task Manager”.
Launching Task Manager - Now come back on the desktop and launch “Rust” and after that open the “Task Manager” window and go to “Details”.
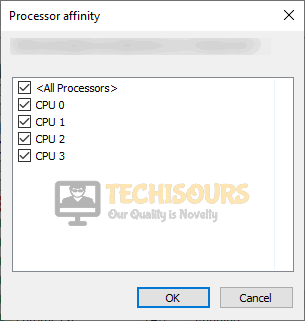
- A list of options will appear up, here right-click on “Rust” and then click on “Set Affinity”.
- Now, checkmark the given boxes and click on “OK”.

Setting Affinity - Finally, “Restart” your game to check if the rust keeps crashing on server join issue got removed.
Solution 7: Tweak Rust Launch Options
- First of all, launch “Steam” on your PC and then click on “Library”.
- After that right-click on “Rust” and select “Properties”.

Choose RUST Properties - Then click on “Set launch options…” and now remove any launch options if currently shown.
- Next type the following command in the search bar and click on “OK”.
-high -maxMem=X -malloc=system -force-feature-level-11-0 -cpuCount=X -exThreads=X -force-d3d11-no-singlethreaded
- Now, restart the game and check whether the issue still persists.

Solution 8: Adjust Virtual Memory
- Press the “Windows” key on your keyboard, type “View Advanced System Settings” in the search bar, and click to select it from the search results.

View Advanced System Settings - Now click on “Advanced” and after that, navigate to the “Performance” tab and then click on “Settings”.
- Look for “Advanced” option here too and select the “Change” option located under the Virtual Memory.
- In the next window that appears, uncheck the box associated with the “Automatically manage paging file size for all drives” option and click on the “C“ drive.
- Select “Custom Size” and then type “4096” in “Initial size (MB)” and “Maximum size (MB)”, then click on “Set” and hit “OK”.
- Finally, “Restart” your PC and check to see if the rust keeps crashing ps4 error got solved.

Solution 9: Reinstall Rust
- First of all, launch “Steam” on your PC and then proceed to click on “Library”.
- After that right-click on “Rust” and then select “Properties” from the context menu.

Click on RUST Properties - Now click to select the “Uninstall” option.
- On your taskbar, right-click on “Steam” and then click on “Exit”.
- Now press the “Window + E” keys simultaneously to open up the file explorer window.
- Here paste the following command in the address bar and press the “Enter” key:
C:\Program Files (x86) \Steam\steamapps\common
- Then click on the Rust folder and press the “Delete” button on your keyboard.
- Finally, launch Steam again and reinstall Rust by following the on-screen instructions.
Solution 10: Tweak RUST Launch Options
- First of all, launch “Steam” on your PC and then click on “Library”.
- After that right-click on “Rust” and select “Properties”.
Click on RUST Properties - Click on “Set launch options…” and now remove any launch options if currently shown.
- Type “-dx9” and hit the “OK” button.
- Check to see if Rust Keeps crashing issue is fixed.
Solution 11: Upgrade Your RAM
Another potential cause due to which this error might also occur on your system is that your PC may not have enough RAM. If you have “8 GB” RAM upgrade to “16 GB” RAM, and also upgrade the processor if the error does not get removed.
Solution 12: Free Hard Drive Space
- Press the “Window + R” keys together to open up the “Run” dialog box.
- In the textbox type in “cleanmgr” and hit the “OK” button.

Typing in “Cleanmgr” - A Disk Cleanup window will appear up, here select the drive and click on “OK”.
- After that click on the “Delete Files” option and most probably rust keeps crashing on server join issue would be rectified.

Solution 13: Perform A Clean Boot
- Press the “Window + R” keys combination to open up the “Run” dialog box and type “msconfig” in the search bar and click on “OK”.

Typing in “Msconfig” - In the pop-up System Configuration window click on the “Services” tab.
- After that select “Hide all Microsoft Services” at the bottom of the window, and then click on “Disable All”.

Hide all Microsoft services - Afterward, click on the “Startup” tab and press “Open Task Manager”.
- A new task manager window will open up, here select every item right-click on it, and select “Disable”.
- Finally, close the task manager window and click on “OK” in the system configuration window.
- Now “Restart” your computer and check if the error got solved.


Solution 14: Check Windows Updates
- Press the “Window + I” keys simultaneously to open up the “Settings” window.
- Here select the option of “Update and Security” and in the pop-up Windows Update tab click on the “Check For Updates” button.

Check for updates - If there are any updates available, they will automatically be downloaded and installed on your system.

Solution 15: Configure In-Game Video Settings
- Launch “Rust” on your computer and click on the “Settings” icon on the top.
- Then click on the “Graphics” option on your left and change the graphic settings according to your requirement and then click on the “Save” button.
- Lastly “Restart” Steam to check if the issue got resolved or not.
Solution 16: Change the Power Options
- First of all, if you have “Razer Synapse 3” installed on your machine, right-click on it and “Uninstall” it.

Uninstalling Razer Synapse - Now press the “Window + R” keys together to open the Run dialog box and type “control” in the search bar and click on “OK”.
- From the pop-up window click to choose “Hardware and Sound” and then select “Power Options”.

Choose Power Options - Next select “Create a power plan” from the left vertical pane and afterward select the “High Performance” option.
- Finally, “Restart” your PC and see if the Rust keeps Crashing issue got resolved.


Solution 17: Troubleshoot Compatibility
- Launch “Steam” on your PC, right click on “Rust” and then choose “Properties”.
- Now select “Local Files” from the top and then choose “Browse Local Files”.

Browse Local Files - Afterward, right-click on ”Rust.exe”, click on “Troubleshoot Compatibility” and then choose “Try Recommended Settings”.
- Finally, double click on “Test the program” and then click on “OK”.
Solution 18: Update BIOS
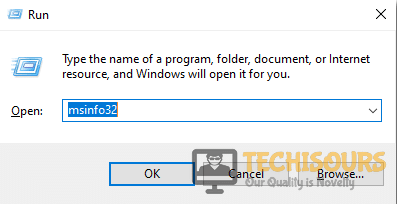
- Press the “Window + R” keys combination to open up the “Run” dialog box and here type “msinfo32” in the search bar and click on “OK”.

Type msinfo32 Command - In the list of System Information window scroll through the list of options to check the “BIOS Version/Date”.
- After that check your “Motherboard-specific” model.
- Now taking help from the browser write the model of your PC and manufacturer name. Then proceed to open the related manufacturer’s website.
- From here “Download” and “Install” the update for your bios.
Follow the aforementioned fixes in order to get rid of the error but if the problem continues to exist then feel free to Contact Us here.