Fixing the Kindle Fire not Showing Up on PC Issue [Complete Guide]
Kindles are an affordable and great way to consume your favourite content and are used by thousands of users daily to stream their favourite shows. However, quite recently, we have been getting complaints about the Kindle Fire not Showing Up on PC issue which prevents users from connecting their Kindles to their PCs. In this article, we have completely addressed this issue using some basic steps, fixes and workarounds that you can apply right now.

Before You Start:
- If you have enabled PIN code encryption on your Kindle Fire, then do remember to enter the PIN code on your Kindle Fire when you connect it to your PC. As the device gets recognized on your PC after unlocking it and you’ll be able to transfer files on PC.
- Sometimes this issue arises due to the incompatibility of the USB port with your Kindle Fire. Your Kindle Fire might not connect with the USB 3.0 port due to a compatibility issue. Try connecting the device with a USB 2.0 port and observe if it fixes your issue.
- Some users stated that after leaving the Kindle Fire connected to the PC for some time, the PC recognized the device and they were able to access it.
- Some users reported that connecting the Kindle Fire to the PC as a camera worked for them. For this purpose, simply connect your Kindle Fire to your PC, and from the prompt window, select the option “Connect as camera” from the list. If you are unable to find this option, you can locate it by navigating to your “Settings” option of your Kindle Fire and then tapping on the “Storage” option. Here you can select the option “Connect as Camera” to connect the device to your PC.
- If your Kindle Fire isn’t getting recognized on your PC through a USB cable, consider transferring your files wirelessly using a Wi-Fi network. Some popular file transfer applications for your Kindle Fire are listed below:
1. Amazon Cloud Drive
2. File Manager
3. Send to Kindle - Some users claimed that using a USB Hub to connect their Kindle Fire device to the PC resolved their issue.
- Sometimes the Kindle Fire isn’t connecting to your PC due to an internally damaged USB cable. Replacing the USB cable with a new one might resolve your issue.
Fixing the Kindle fire not showing up on PC windows 10 issue:
Solution 1: Download Latest Version of Kindle Application
Sometimes, this issue arises due to an outdated version of the Kindle Fire Application. Updating Kindle Fire Application to the latest available update can fix this issue. Follow the below-mentioned procedure to download the latest version of the Kindle application:
- Launch your browser and navigate to this link to download the latest version of the Kindle application for PC.
- On the webpage, select the “Download for PC” option, an installer prompt window will open in front of you, click on the “Save File” button.

Download Kindle For PC - When the file is finished downloading, launch the setup file and then follow the on-screen instructions to install the latest version of the Kindle application on your PC.

Solution 2: Update Your Kindle Fire Software
- Swipe down the notification bar from the top of the screen and tap on the “Settings” option.

Kindle Settings Icon - Navigate to “Device Options” and tap on it, afterwards locate the “System Updates” option and select it.

Locating System Updates Option - In the system updates window, tap on the “Check Now” button to see if any updates are available.

Tap Check Now Option - If any latest firmware update is available, it’ll let you know and you can choose when to download and install that update on your Kindle Fire device


Solution 3: Manually Update Your Kindle Fire Software
If your Kindle Fire device does not have internet access, then you can manually update the operating system of your device using your computer. Follow the instructions given below to successfully perform the system update of your device:
- Firstly, navigate to this link, select the Model and Generation of your device and afterwards download the “Software Update” file on your PC.
- Now connect the Kindle Fire device to your PC, a notification will appear on your screen, tap on the notification and select the option “Transfer Files”.

Selecting Transfer Files Option - Navigate to the “This PC” folder on your computer, double-click on the “Fire Tablet” drive, and afterwards open the “Internal Storage” drive.

Accessing Internal Storage Drive - Copy the latest downloaded software update file from your PC to the “Internal Storage” drive of your Kindle Fire device.
- When the file is copied to your Kindle Fire device, disconnect the device from the computer.
- On the Kindle Fire’s main menu, swipe down the notification bar from the top of the screen and tap on the “Settings” icon.
Kindle Settings Icon - Navigate to “Device Options” and tap on it, afterwards locate the “System Updates” option and select it.
Locating System Updates Option - In the system updates window, tap on the “Check Now” button, and the update will be installed afterwards on your device.
Tap Check Now Option


Solution 4: Restart Your PC While Kindle is Connected
Some users reported that restarting their PC while Kindle is connected to it, resolved their issue. Perform these below-mentioned steps to fix this issue:
- Firstly, connect the “Kindle Fire” with your PC and then restart your PC with the device being connected to it.
- You’ll hear a toggle sound if the device is connected to your PC but if it doesn’t connect, keep restarting your PC again until it detects the Kindle Fire.
- When the device is connected to your PC, navigate to the “This PC” folder, locate the Fire Drive and click on it. You’ll be able to access the data stored on your Fire Drive.
- Some users reported that their Kindle Fire is detected on their PC only when it’s charging at low capacity due to a known bug in kindle software.
Solution 5: Use Calibre Software To Detect Kindle Fire
According to some users, using calibre software when connecting the Kindle Fire with PC fixed their issue. Follow the instructions given below to perform this procedure:
- Shut down your PC and afterwards power off your Kindle Fire.
- Now turn “ON” your PC, launch the Calibre software and then connect your Kindle Fire with the PC.
- Power On the Kindle Fire, you’ll notice that it gets connected to your PC and you’ll be able to transfer your files.
NOTE: Make sure to remove the Kindle Fire device from the Calibre’s Ignore List.
Solution 6: Reinstall the Kindle Fire Driver
If none of the above-mentioned solutions works for you, consider performing a fresh reinstallation of the Kindle Fire Driver. Follow the instructions given below to successfully perform a clean reinstallation of the Kindle Fire Driver:
- Firstly, connect your Kindle Fire to the PC and afterwards click on the Start button, type “Device Manager” in the search box, and open it. In the device manager window, expand the “Portable Devices” section, select the “Kindle Fire” device, right-click on it and select the option “Uninstall device”.

Uninstall Device - A warning prompt window will appear in front of you, click on the “Uninstall” option.
- When the driver is successfully uninstalled, remove the Kindle Fire device from your PC and then reconnect it again with the PC.
- Your computer will now automatically install the necessary drivers.

Solution 7: Reinstall USB Mass Storage Device Driver
- Click on the Start button, type “Device Manager” in the search box, and open it. In the Device Manager window, navigate to the “View” tab and select the option “Show hidden devices”.

Show hidden devices - Expand the “Universal Serial Bus controllers” section, select the “USB Mass Storage Device”, right-click on it, and select the option “Uninstall device”.

Uninstall USB Mass Storage Device - A warning prompt window will appear in front of you, click on the “Uninstall” option.
- When the driver is successfully uninstalled, restart your PC and connect the Kindle Fire with the PC and hopefully, the Kindle fire not showing up on PC windows 10 issue will be resolved.


Solution 8: Install MTP USB Device Driver
- Click on the Start button, type “Device Manager” in the search box, and open it. In the Device Manager window, navigate to the “View” tab and select the option “Show hidden devices”.
Show hidden devices - Afterward, expand the “Portable Devices” section, select the “Kindle Fire” device, right-click on it and select the option “Update driver”.

Update Kindle Fire Driver - A window will appear in front of you, select the option “Browse my computer for driver software” and in the next window, click on the option “Let me pick from a list of available drivers on my computer”.

Selecting Driver - Locate the “Portable Devices” option from the list and hit the “Next” button.
- Uncheck the “Show compatible hardware” option and afterwards select the model “MTP USB Device” and click on the “Next” button.

Selecting MTP USB Device - Now windows will install the MTP USB Device driver and hopefully, your issue will be resolved.


Solution 9: Update Drivers Through DriverFix
There is another way to fix these driver issues by simply installing a popular driver update assistant named DriverFix.
- After installing the software, simply launch the software, click on the Scan option and wait for it to scan and detect all your computer’s faulty drivers. When the scanning is complete, simply select the ones that need fixing and wait for the software to download and install the latest files.

Scan Using DriverFix - Restart your PC and try reconnecting the Kindle Fire with your PC again.

Solution 10: Disable the USB Selective Suspend Option
USB selective suspend feature is integrated into windows of your PC which helps conserve power and battery life by disabling the USB port. Follow the instructions given below to disable the USB Selective Suspend option on your PC:
- Click on the windows start menu, type the control panel in the search box, and then click on the “Control Panel” option.

Typing Control Panel - Change the “View By” type to “Category” and select the “Hardware and Sound option”.

Selecting Hardware and Sound option - Select the “Power Options” and then click on the “Change Plan Settings” option.

Select Change Plan Settings option - Afterwards, click on the “Change Advanced Power Settings” option, a window will appear in front of you, expand the “USB Settings” category and then expand the “USB Selective Suspend Setting” category.

Select Change Advanced Power Settings - Change the setting to “Disabled” and if you are using a laptop then change both settings i.e. “On battery” and “Plugged In” to “Disabled”. Finally, click on the “Apply” and then on the “OK” button to apply these settings.

Change USB Selective Suspend Setting


Solution 11: Enable Android Debug Bridge
Enabling the ADB option on your Kindle device can help resolve this issue. Follow the instructions given below to enable this option on your Kindle Fire device:
- Swipe down the notification bar from the top of the screen and tap on the “Settings” icon.
Kindle Settings Icon - Navigate to “Device Options” and tap on it, afterward locate the “Enable ADB” option and switch the toggle button to “ON”.

Turn On Enable ADB Option

Solution 12: Run the wpdmtp.inf file
- Open “This PC” folder on your computer, navigate to “C Drive” and open it, afterwards double-click on the “Windows” folder and then on the “INF” folder. Locate the “wpdmtp.inf” file, right-click on it and select the “Install” option.

Locate wpdmtp.inf File - When the installation is complete, restart your PC and check if the issue is resolved.

Solution 13: Modify Drive’s Identification Letter
Sometimes this issue arises when the computer identifies the Kindle Fire device as a storage device instead of a multimedia tablet due to some software glitch. For this purpose, just assign the Kindle Fire device a new drive letter from the disk management option. Follow the instructions given below to execute this procedure:
- Click on the windows start menu, type the “Disk management” in the search box, and press Enter button. A disk management window will appear in front of you:

Disk Management Window - Now, right-click on the Kindle Fire device and select the option “Change Drive Letter and Paths”.

Change Drive Letter and Paths - In the newly opened window, click on the “Change” option and then assign a new letter to the Kindle Fire device from the list.

Assign a New Letter to Kindle - Click on the “OK” button, close the Disk Management window and afterward check if the Kindle Fire is showing up on your PC.


Solution 14: Install the Kindle Fire Driver Using Command Prompt
- Firstly, connect the Kindle Fire with your PC and then restart your PC with the device being connected to it.
- Afterwards, disconnect the Kindle device and connect it again to your PC through a USB cable.
- Now, click on the Start button, type “Device Manager” in the search box, and open it. In the Device Manager window, navigate to the “View” tab and select the option “Show hidden devices”.
Show hidden devices - Afterwards, expand the “Portable Devices” section, select the “Kindle Fire” device, right-click on it and select the option “Update driver”.
Update Driver - A window will appear in front of you, select the option “Browse my computer for driver software” and in the next window, click on the option “Let me pick from a list of available drivers on my computer”.
Selecting Driver - Select the “Android Phone” and then pick the newest “Android Composite ADB Interface” from the list.

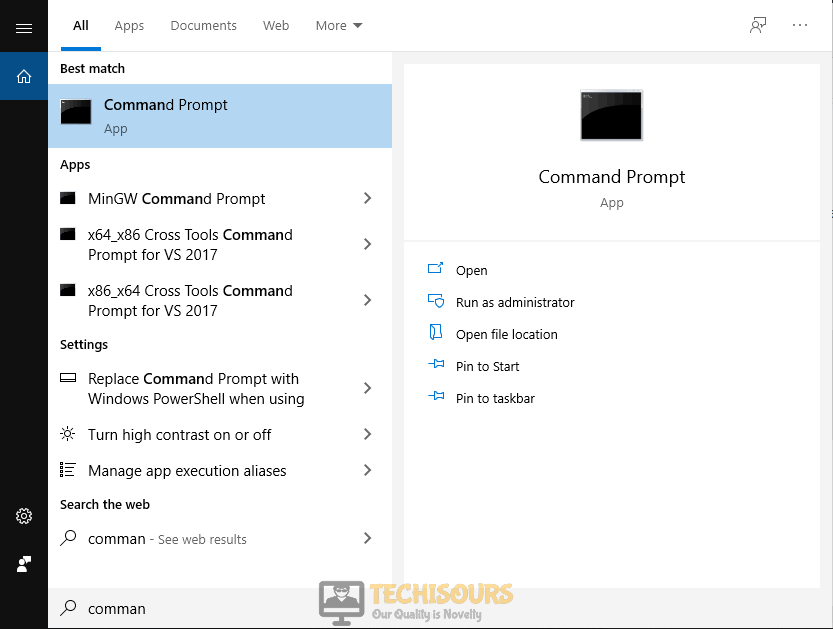
Android Composite ADB Interface - Afterwards, click on the Start button, type “Command Prompt” in the search bar, and run it as administrator.

Typing Command Prompt - Now type the below-mentioned command in the command prompt window.

fastboot -i 0x1949 oem idme bootmode 4000

fastboot -i 0x1949 reboot
Solution 15: Factory Reset The Kindle Fire
If none of the above-mentioned solutions work, consider performing a factory reset to your device. Follow the instructions given below to successfully perform a factory reset procedure:
Method 1: Perform Reset Through Device Settings
- Swipe down the notification bar from the top of the screen, a menu will appear in front of you listing various options, tap on the “Settings” icon.
Kindle Settings Icon - In the Settings window, locate the “Device Options” and tap on it.

Choose Device Options - Scroll down the list and select the option “Reset to Factory Defaults” located at the bottom of the list.

Reset to Factory Defaults - A warning prompt window will appear in front of you with the message stating that all your data will be wiped off, select the “Reset” option.
- Now your device will restart and it’ll take several minutes to complete the reset procedure.


Method 2: Perform Reset Through Device Recovery Mode
- Power off your Kindle Fire device by pressing and holding the Power button until it turns off completely.
- Now press and hold the “Volume Up + Power” button simultaneously until the system recovery screen appears in front of you.
- Use the “Volume Down” key to navigate through the options menu, select the option “Wipe Data / Factory Reset” and press the “Power” button.

Select the Wipe Data / Factory Reset Option - A warning screen will appear in front of you, select the option “Yes – delete all user data” and press the “Power” button.

Select user data option


Workaround:
If you need to urgently transfer a file to your PC from Kindle Fire and the file size is not too big, then you can do it by sending that file as an email attachment.
If you still can’t figure out how to fix this issue, Contact Us for further troubleshooting.