How to Fix ‘iPhone could not be Synced because the Sync Session Failed to Start’ Error
iTunes is Apple’s famed application which backs up all Apple devices and syncs them across the board. However, users have sometimes been getting the “iPhone could not be synced because the sync session failed to start” Error message while trying to sync their iPhone. Therefore, in this article, we have compiled all possible solutions, fixes, and workarounds that you can deploy to get rid of the iTunes sync session failed to start message.

It is important that you follow this guide carefully and read through each step to ensure that you understand the scope of this problem properly. We have also compiled the reasons due to which the error message is triggered in the first place so that you can better wrap your head around as to why this issue is being seen while syncing your iPhone with iTunes.
What Causes the “iPhone could not be synced because the sync session failed to start” Error?
There are actually a couple of reasons due to which the Sync Session cannot start on iTunes and we have compiled some of the most prominent ones as follows.
- Background Applications: Mostly, the “iPhone could not be synced because the sync session failed to start” error message is triggered because the phone has too many active applications that prevent the iTunes app from being able to recognize the iPhone. Therefore, according to the steps listed below, closeout of any background applications and iTunes should start the sync session normally.
- Outdated Software: It is possible that either your iTunes application or the iPhone itself doesn’t have the latest version of Software being provided by Apple due to which you are running into the iTunes session failed to start issue. You can circumvent this issue by following the method below to successfully update both your iTunes application and the iPhone that you are using.
- Corrupted Backup Files: The backup that iTunes has taken might have been corrupted due to which this error message is being shown while trying to sync the iPhones. Therefore, it is recommended to try and regenerate the backup and check to see if the “iPhone could not be synced because the sync session failed to start” error is fixed by doing so.
- Apple Music Application: The iTunes sync session failed to start error is often triggered because of the Apple Music application installed on the iPhone and disabling it from the general settings can fix this error message completely. Therefore, follow the guide below to disable the Apple Music app on your iPhone.
- Defected Ports: The charging port of the iPhone or the USB port of the computer that you are using might have been defected due to which you are running into this issue. You can try to replug the devices and check if that fixes the issue but if the problem persists, you will have to get the phone or computer in for service.
Now that you have been made familiar with most of the reasons due to which this error message is triggered, we can finally move on towards implementing the fixes.
Before You Start:
Restarting the device can resolve almost the majority of the issues in such cases. Shutdown your PC properly and wait for a few minutes before restarting it again. Restart your PC after the suggested time and try syncing your iPhone again to see if it starts or not. If restarting PC didn’t come in handy then try restarting your iTunes application, whether in windows or Mac, while iPhone is connected to your device. Furthermore, you can perform a soft reset by holding the “Home” and “Sleep” buttons together until the Apple logo appears. Then return to the Home screen and connect your device and try syncing your iPhone again.
Fixing the iTunes Sync Session Failed to Start Issue:
Solution 1: Remove Background Applications
- Navigate to your Home Screen by pressing the “Home” button.
- Double press the home button to open any recently used applications or the applications running in the background.
- For iPhone X and its further latest versions, swipe up from the bottom mid of the screen and stop finger in the middle of the screen.
- Keep swiping up each running application one by one until no applications remain unclosed.

Swiping Up to close the applications - Try syncing again and check to see whether the iPhone could not be synced because the sync session failed to start issue is resolved.

Solution 2: Update iTunes
- Open your iTunes app on Mac or PC and navigate to the “Help” tab from the ribbon located at the top.

Clicking on the Help tab in iTunes - Next select “Check for Updates” from the menu and it will start checking for any available updates.
- If a newer version is available, it will get downloaded and installed automatically.
- Restart your device and try to sync the iPhone again.

Solution 3: Restore your iOS Device Using DFU mode
- Launch iTunes on your PC or Mac and connect your iDevice via USB cable so that it pops up on the list of connected devices.

Connected Devices on iTunes - After that, press the volume up button, immediately followed by the volume down button. Press and hold the power button until your screen becomes dark.
- Now release the power button, press and hold the volume down button and power button together until iTunes displays “iTunes has detected an iPhone in recovery mode. You must restore this iPhone before it can be used with iTunes.”.

iTunes has detected an iPhone in recovery mode. You must restore this iPhone before it can be used with iTunes - Click “OK” and follow the on-screen instructions for a complete restore.
- Once your device is completely restored, proceed to Exit from DFU mode.
- For this purpose, keep your iDevice connected to your PC and force restart your device.
Pro-Tip: (For iPhone 6s and lower versions: Press and hold the “Home + Power” buttons. For iPhone 7: Press and hold the “Volume down + Power” buttons. For iPhone 8 and above: Press and hold the “Power + Tap Volume UP + Tap Volume Down” buttons.) - Press and hold these buttons until the Apple logo appears on your iPhone. After that release the buttons so your device disconnects from iTunes.
- Finally, restart your device and see if the issue gets resolved.


Solution 4: Delete the Old Backups and Reset Sync
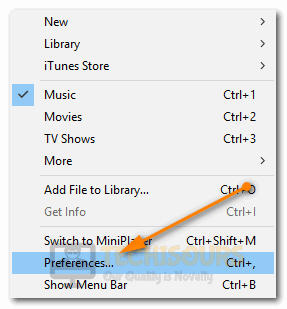
- Open your iTunes app on Mac or PC and navigate to the “File” tab from the ribbon at the top and select “Preferences”.

Clicking on Preferences from the File Tab - After that, choose your device giving the error and click on the “Delete Backup” option.
- Finally, select “Reset Sync History” and click “OK” and check to see if the “this iPhone could not be synced because the sync session failed to start” issue has been fixed.

Reset Sync History iTunes

Solution 5: Reinstall iTunes
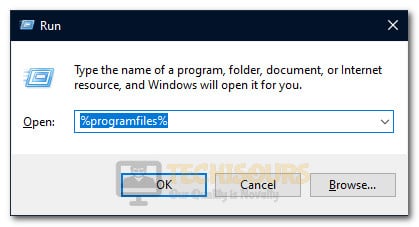
- Press the “Window + R” keys simultaneously on your keyboard to open the Run Prompt.
- Type the “%programfiles%” in the Run Prompt and hit the Enter key.

Typing in %ProgramFiles% into the Run prompt - After that, locate the “iTunes, iPod, Bonjour” folders in the newly opened window and select to delete them.
- Next, open the “Common files” folder first and then “Apple”. Here delete the “Mobile Device Support”, “Apple Application” and “CoreFP” folders.
- Again Press the “Window + R” keys combination from your keyboard, type the following command in the Run Prompt, and hit the Enter key:
C:\Program Files (x86)
- Now look for “iTunes, iPod, Bonjour” folders here and delete them and after that open, the “Common files” folder then “Apple” and delete “Mobile Device Support”, “Apple Application” and “CoreFP” folders completely.
- Once the uninstallation process is completed, proceed to the reinstallation process.
- Click here to download the latest version of iTunes.
- Finally, install the software and see if the “iPhone could not be synced because the sync session failed to start” issue gets resolved.
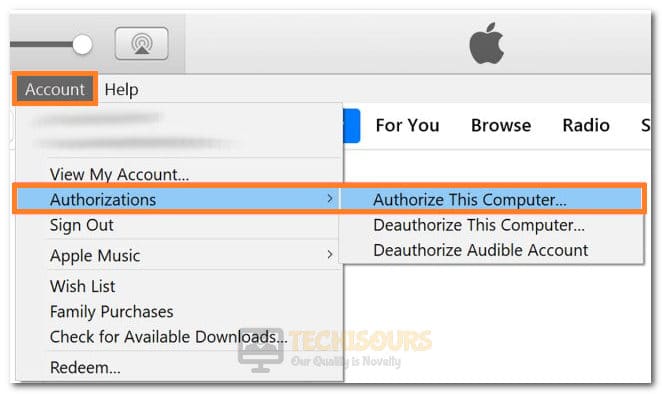
- Launch iTunes and sign in using your login credentials.
- Then select “Accounts –>Authorizations –> Authorize this Computer” respectively.

Selecting Authorize this Computer option - After that, re-enter your password and click to confirm the dialogue box, and check if the problem still persists.
Solution 7: Update iTunes
- Open the Microsoft Store and click on the three-dots icon located at the top-right corner of the screen.
- Then select “Downloads and Updates”, find iTunes in the list of applications here, and click to select it.

Clicking on Download and Updates option - Finally, click on the “Update” button and see if the iPhone could not be synced because the sync session failed to start iOS 11 issue gets resolved after the update.

Solution 8: Reinstall macOS
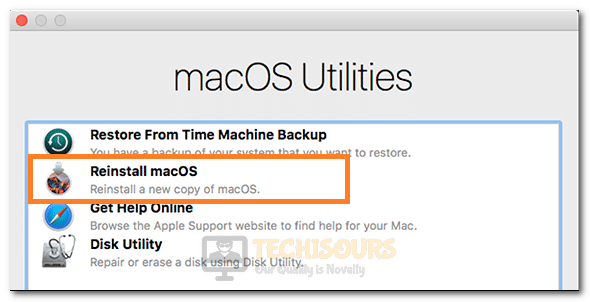
- Hold the “Command + R” keys simultaneously until the Apple logo appears and enter your firmware password if you have set any on your Macbook.
- After that, select the “Reinstall macOS” option from the “macOS Utilities” window.

Selecting the “Reinstall macOS” option - Wait for reinstallation to finish and see if it fixes the iPhone could not be synced because the sync session failed to start iOS 11 issue.
Solution 9: Disable the Apple Music on iPhone
- Open Settings of your iPhone and go to “General –> Apps –> Apple Music” respectively.
- Inside Apple music settings, select the “Disable App” option, and after that, open iTunes on your PC or Mac and navigate to the “General” tab.
- Here uncheck the box associated with “Show Apple Music” and restart your mobile.
Solution 10: Update Your Gadgets
iPhone, iPod, IPad Users:
- Open your device “Settings” and first go to “General” and then “Software Update” option.

Clicking on the “Software Update” option - Wait for a while and let the device check for any available updates.
- If any updates are available, then download and install them on your device.

Mac Users:
- Navigate to the Apple menu and first select “Preferences” and then “Software Update”.
- If any updates are available, then click on “Upgrade Now” and it will start downloading updates.

Selecting Upgrade Now in macOS - Once updates are downloaded, make sure to install them and finally, restart your device and see if the issue gets fixed.

Windows Users:
- Press the “Window + I” keys simultaneously to open the Windows settings.
- Next, select the “Update & Security” option and click on “Check Updates”.

Check for updates - If an update is available, click to “Download” and then install it.

Solution 11: Update Drivers
- Press the “Window + R” keys simultaneously on your keyboard to open the Run Prompt.
- Now type “devmgmt.msc” in the Run Prompt and hit the Enter key.

Typing devmgmt.msc in the Run prompt - Next, find the “iOS device” on the list and right-click to select the “Update Drivers”.
- Once drivers are updated, try syncing your device again to see if this solution works.

Solution 12: Sync Wirelessly
- Open your iTunes app and click on the “Summary” option and then navigate to the “Options” tab.
- Here activate “Sync with This iPhone Over Wi-Fi” and make sure you save the changes made.

Clicking on the Sync with This iPhone Over Wi-Fi option - Most probably after applying this fix you will get rid of the “this iPhone could not be synced because the sync session failed to start” error.

Solution 13: Factory Reset Device
- Open the Settings of your iPhone and proceed to the “General” and “Reset” tab respectively.
- After that, select “Erase All Content and Settings” and make sure you don’t keep any backup because we have to give a fresh start.

Clicking on the Erase All Content and Settings option - Now select “Erase iPhone” and wait while the iPhone restarts after the Reset.
- Once iPhone restarts, select “Set up a New iPhone” and make sure you select “Set up a New iPhone” because, without it, this solution won’t work.

Solution 14: Utilize iTunes Repair Tool
- First of all, click here to download and install the “TunesCare” repairing tool by following the on-screen instructions.
- When it gets installed, connect your iOS device with PC or Mac via USB cable and launch the iTunes repair tool.
- After that, select “Fix iTunes sync problems” and it will automatically start looking for issues and repair them.

Clicking on the Fix iTunes Sync Problems option - Once the repairing process is finished, try syncing using iTunes to see if this iPhone could not be synced because the sync session failed to start the issue still exists or not.

Solution 15: Use An Alternate Application
In case if none of the above fixes worked for you then this method will surely do the best. You can use an alternative application instead of iTunes. The “iOS Data Manager” is a similar application to iTunes that can be used to sync data, proceed to this link in order to download and install software on your device by following on-screen instructions.
Solution 16: Monitor Your iPhone Ports
Before you start to sync your iPhone, it is necessary to make sure that your connections are tight enough and the ports are working fine. You can check this by connecting your device with Mac and check to see if it shows up in Mac. Otherwise, you can try making your hardware connections tight. Even if this doesn’t work, then either alter your data cable or change the ports.
One of these solutions will surely help you fix the problem but if the error still pertains you can Contact Us here for further help.