What is IDP.Generic and How to Remove it [Complete Guide]
IDP.Generic warning on Avast, AVG and other antiviruses is a common thing to encounter among users. Therefore, we got down to writing this guide in order to provide you with a complete guide that contains accurate information about the circumstances around which the IDP.Generic Virus originates and if it in fact is a virus.
What is idp.generic? Is it a Virus?
IDP.generic is a threat name and could be displayed for a vast number of Trojans. The IDP.Generic threat is commonly experienced by Avast Anti-Virus users, and it commonly occurs when users try to run a Game or opening a Python file. Although, it can occur for other files as well. The IDP.Generic is not exactly a Virus as it is more commonly a false positive, meaning, your Anti-Virus program confuses it for a Virus and shows it in the Threat department. Even if it is a false positive you shouldn’t ignore it and check the file out cause you never know.
If you aren’t sure if the File is an actual virus or a false positive you can try the below method.
Checking if the File is a Virus:
Click here and upload the file causing threats and when the file is uploaded check for any Viruses. If no threats are reported just simply ignore the error, in other cases if threats are reported we recommend you carry out a full system scan using a powerful Anti-Virus.
Fixing the idp.generic avast issue completely:
Solution 1: Run A Full System Scan
- In the Windows search bar near the Start menu type in “Virus and Threat Protection” and press “Enter”.

Virus and Threat protection - In the pop-up window click on “Scan Options”.
- Now select “Full Scan” among the scan options and then hit the “Scan Now” button below.

Perform a full scan - Check to see if doing so removes the idp.generic virus.


Note: Some users also suggest carrying out a full system scan whilst in Safe Mode.
For Getting Into Safe Mode:
- Restart your PC as you would do normally, as soon as it is about to Shutdown start spamming the “F8 key” on your keyboard.
- You will now be taken into the “Boot menu”, here select the “Safe Mode” with Networking option and boot into it.

Boot into Safe Mode - Check to see if doing so removes the idp.generic virus.

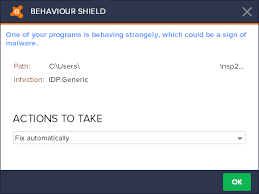
What to do if a False Positive is detected:
When a false positive is detected your Anti-Virus blocks the file, in such case you have to unblock the file:
- Open up the “Avast Antivirus” application from the Windows icon tray on the taskbar.
- Then click on the “Protection” tab and select “Virus Chest” in the Protection menu.

Restore file - Now for the file click on “Restore” and then make sure to “Add Excursion”.

Solution 2: Update Your Anti-Virus
You can try updating your Anti-Virus to the latest version and then see if false positives are detected:
- Open up your “Avast” application and click on the “Menu” icon at the top right.
- From the drop-down menu click on “Settings” and then move on to select “Update” in the left pane.
- Lastly click on “Check for Updates” from the right window pane.

Update Your Antivirus

Solution 3: Uninstall Any Suspicious Programs
If you’ve started facing the idp.generic virus issue after recently installing a new program, try uninstalling it and then check for errors. Follow the steps below in this regard:
- Open up the “Run” dialogue box using the “Window + R” keys together, in the Run dialogue type in “appwiz.cpl” and press “Enter”.

Typing “appwiz.cpl” - In the pop-up “Control Panel” window scroll down to locate the program you wish to uninstall, once located right-click on the program and select “Uninstall” from the drop-down menu.

Solution 4: Perform A System Restore
- In the Windows search bar near the Start menu type in “Create a Restore point” and press “Enter”.

Create a Restore Point - In the pop-up System Properties window click on “System Restore”, now select a Restore point, and then hit the “Next” button to start the process.
Note: Don’t perform this step unless you’re a computer geek or you have enough knowledge regarding how to restore your computer to its factory state. In case you aren’t so please consult a computer technician and ask him/her to do this job for you.

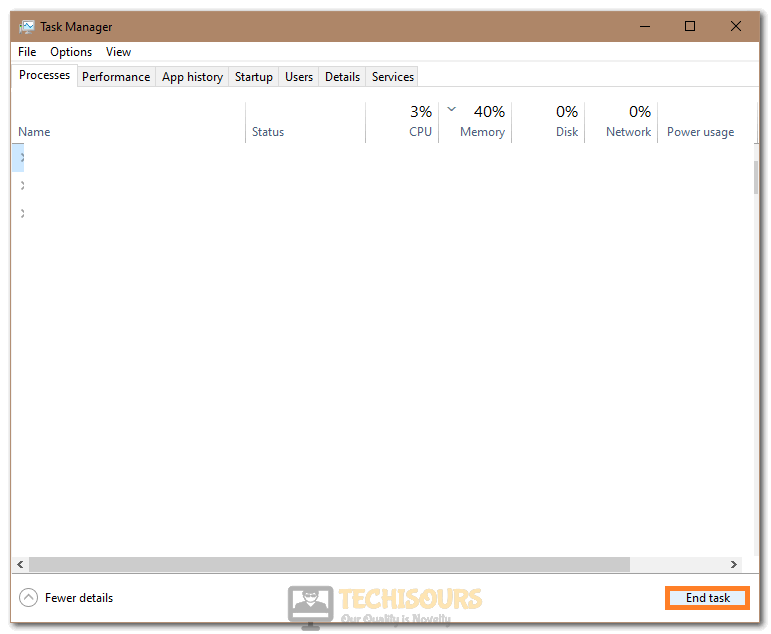
Solution 5: End Any Suspicious Tasks
- Right-click on the “Taskbar” and select “Task Manager” from the drop up menu.
- In the Task Manager window scroll down in the “Processes” tab to locate any suspicious programs, once located right-click on the process and select “End Task” from the drop-down menu.

Clicking on the “End Task” button - Now click on the “Startup” tab and look for any suspicious programs, once located select the program and then click the “Disable” button at the bottom.
Solution 6: Reset Browser Settings
If you receive the error due to any of your browser’s you can try resetting them using the method below:
- Launch “Google Chrome” on your device and click on the “Three vertical dots” in the top right corner of the window.
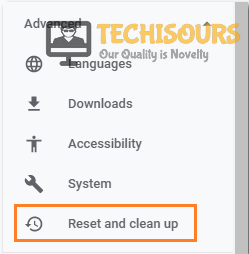
- From the drop up menu choose to select “Settings”, scroll down to the bottom, and select the “Advanced” option.
- Now locate “Reset and Cleanup”, once located click on “Restore Settings to their original defaults” and hit the “Reset Settings” button to complete the process.

Choose Reset and Cleanup Option
Solution 7: Update Java
Sometimes you receive the error if you have an old version of Java installed hence to upgrade to the latest version follow the steps below:
- In the Windows search bar near the Start menu type in “Apps and Features” and press “Enter”.
- In the new window scroll down to locate the “Java” application.
- Once located select Java and press the “Uninstall” button.

Uninstall Java - With Java uninstalled, download the latest version of this app from their official website and run the installation file by following the on-screen instructions.

Solution 8: Perform Disk Cleanup
- Open up “This PC”, then right-click on your “Windows Drive”, mainly “C:”.
- From the drop-down menu click to select “Properties” and in the following window click on “Disk Cleanup”.

Run Disk Cleanup - In the next window click on “Clean Up System Files”, now in the files to delete section make sure to check all the files except “Downloads” and then press “OK”.

Clicking on the “Cleanup System Files” option


Solution 9: Delete Temporary Files
- Press the “Window + R” keys together to open up the “Run” dialogue box, in the Run dialogue type in the following commands one by one:
%AppData%

%LocalAppData%

%ProgramData%

%WinDir%
- Open one folder at a time, once launched delete all the files permanently inside the folders. Once done proceed to “Restart” your PC afterwards.
- Check to see if the idp.generic virus is fixed.
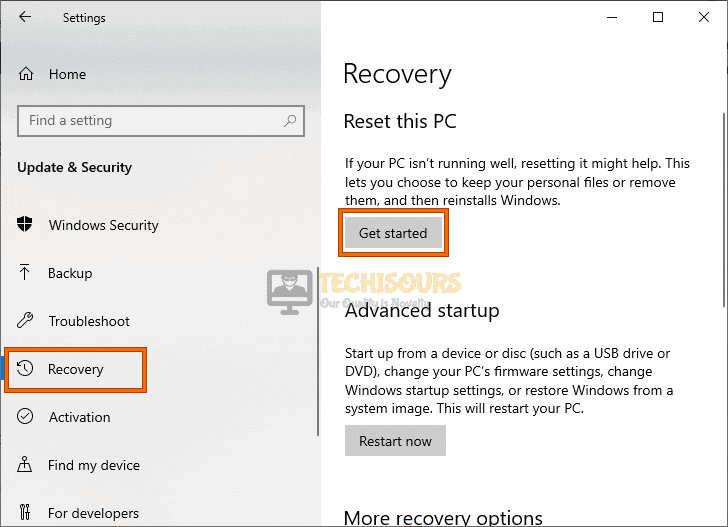
Solution 10: Reset Your Computer
- In the Windows search bar near the Start menu type in “Reset this PC” and press “Enter”.
- In the new window click on “Get Started” below Reset this PC option.

Reset this PC - Next, select the appropriate settings you want and follow the on-screen instructions to complete the process.
Note: Don’t perform this step unless you’re a computer geek or you have enough knowledge regarding how to restore your computer to its factory state. In case you aren’t so please consult a computer technician and ask him/her to do this job for you.
Solution 11: Uninstall Avast
If none of the solutions listed above worked then all you can do is to uninstall Avast, this will help get rid of all the false positives:
- Press the “Window + R” keys together to open up the “Run” dialogue box, in the Run dialogue type in “appwiz.cpl” and press “Enter”.
Typing “appwiz.cpl” - In the Programs and Features window scroll down now to locate “Avast”, once located right-click on it and select “Uninstall” from the drop-down menu.
Follow the above-mentioned procedures in order to get rid of this issue successfully but if you continue to face any error feel free to reach us out here for more help.