HP Printer: Missing or Failed Printhead Error [Fixed Completely]
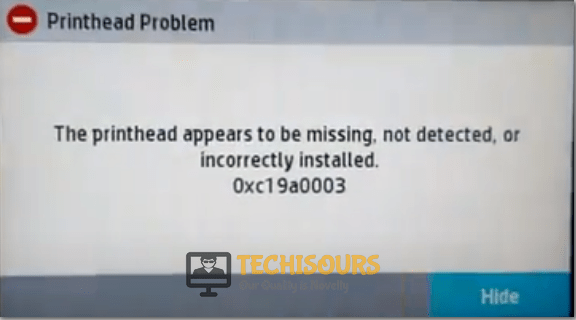
With the passage of time, the quality and functionality of the printers have improved a lot because the latest models keep intervening in the market day by day. The latest printer models have replaced the orthodox method of printing but lately, the printer users have reported hp printhead error on the display screen that illustrates: The printhead appears to be missing, not detected or incorrectly installed. If you have unexpectedly encountered this error message, don’t panic and follow this guide throughout to eliminate this error from your printer.
What Causes the Printhead Error?
There can be numerous reasons that can cause the printhead problem and we have indexed the most common ones below:
- The alignment problem of the printhead might have occurred after changing the cartridge.
- Dirt might be accumulated onto the ink cartridge that can affect its functionality and the error can be triggered.
- The outdated HP firmware can cause the printer to malfunction resulting in this issue.
Pre-Tips:
If you encounter the printhead error display on your printer, before you proceed towards the major solutions, reset your printer so that this issue might be resolved at this stage:
- Power OFF the printer if it is currently powered ON and pull the power cord out from the back of your printer.
- Unplug the power cord from the main socket, remain calm for a couple of minutes.
- Plug the power cord back into the printer and restart your printer by plugging the switchback into the main socket.
- Switch ON the printer and check whether the error still persists.
This procedure will reset the printer and error might be eliminated but if the error still persists follow the guide below.
How can you fix the “Missing or Failed” Printhead Error on HP Printer?
Solution 1: Adjust the printhead
This error usually arises when the printhead is not aligned properly. It is necessary for a printhead to be seated accurately so that it can work in the right way. Hence, to eliminate hp 8610 printhead issue adjust the printhead in a proper manner by following the steps indexed below:
- Turn ON the printer if it is currently turned OFF. If the printer is turned off then the cartridges will be tucked on the corners and they would not slide at front of you.
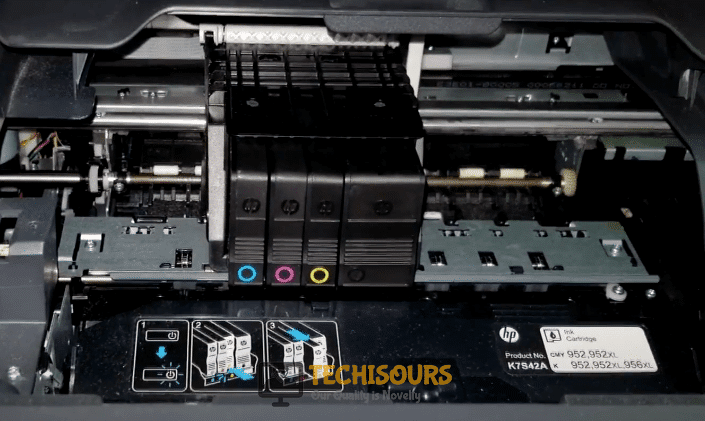
- Open up the cover door of the printer to access the cartridges and pay special attention while disassembling the cartridges because you can undergo an electric shock.

Printhead inside the printer - On the right side of the printhead, you’ll find a flip tab, and before pulling out the printhead flip-up the flip tab so that the entire print head could slide out easily.

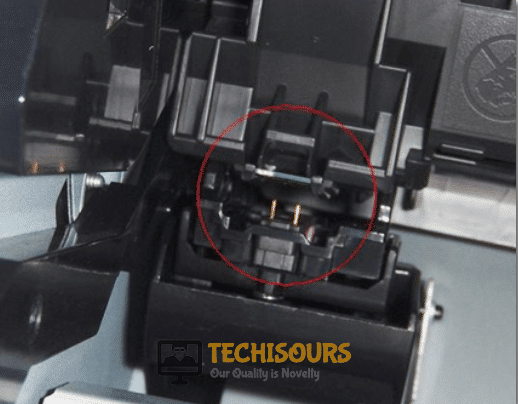
Flip-tab of the printhead - Pull the print head assembly out and try cleaning the gold contacts with some isopropyl alcohol and a cotton swab. Sometimes a bit of gunk on one or 2 of the contacts can cause that issue but still allow you to print.
- After cleaning re-insert the assembly into the printer and turn it ON.

If the error still persists on your printer repeat this procedure three times because company advises repeating this procedure repeatedly to get rid of this issue.
Solution 2: Monitor the inside circuitry
If you possess the HP laser printer then keep one thing in mind that it has a microchip inside that makes the cartridge connected with the printer. If the chip of the cartridge and the pins present inside the printer have a loose connection then the circuit becomes incomplete and hp 8600 printhead error is displayed on the screen. In order to make sure that the connection is secure inside, follow the steps stated below:
- Power OFF the printer and pull the plug of your printer out from the main socket.
- Open up the cover door of the printer and take the cartridge out from it.
- Locate the microchips present on the cartridge toner and check if they are clean or not.
- Remove the excessive carbon accumulated on chips with the help of an eraser and make sure they are clean.

Monitor the microchip - Now locate the metal pins present inside the printer, inspect them thoroughly clean them with an eraser too.

Clean the metal pins - Now put the cartridge back into the printer and remember one thing that the pins and the microchip should have a firm connection because if the connection is loose then the cartridge won’t be detected by the printer.
- Close the cover door and restart your printer by plugging the switchback to the main socket.
- Turn the printer ON and observe that the error still persists or not.

Solution 3: Update The Firmware
The outdated software can trigger a lot of errors in the printer including the hp printhead error. The printer manufacturers mostly release the updates regularly and you should configure your printer to download them on time but in case if you’ve missed the latest updates then follow the steps stated below to update your printing software manually.
- Connect your printer to the internet and make sure that the Wifi icon is turned ON.

Turn On Wifi - Hit the Settings icon present at the top left corner of your screen.

Choose Settings - Scroll down and select the Printer maintenance option from the dropdown menu.

Choose Printer maintenance - Select the Update printer button in order to update the software and choose Check for printer updates now and check whether any updates are available.
- Wait until the updating process is complete and afterward restart the printer so that the updates can take effect.


Solution 4: Perform a factory reset
It is better to restore your printer to its factory settings to eliminate hp printhead error and in order to do so press the back button 4 times until you see the Support menu. Scroll down until you see the Reset Menu. Under the reset menu, you will find different types of resetting options. The partial reset, semi-full reset, full reset. You can try all of these ones in a row and see which one fixes your issue.
- The partial Reset: The partial reset basically just refreshes the Printer and clears out unused memory from the printer. This type of resets fixes minor printing issues such as slow printing, cartridge errors, etc. Hopefully, performing this reset would resolve this glitch but if it doesn’t proceed further.
- The Semi-Full Reset: The Semi-Full Reset is the most useful type of reset. This clears out all the custom settings from your printer and returns if to its default factory settings. Use this reset if the partial reset does not fix your issue.
- Full Reset: The full reset is the most powerful reset and if all other reset procedures fail to terminate this problem you can opt for this reset. However, it is not recommended as it flushes all of the settings from your printer, and any interruption during the reset process may result in making the printer unusable.
Solution 5: Purchase a new printhead
If all the above-mentioned solutions didn’t prove effective for you then it’s the time to get your hands on the pocket and replace the printhead. Before purchasing a new one check whether your printhead’s warranty is still valid or not. If it is valid then visit the HP Printer Support in order to claim it but if not, order a new printhead from here. If you are using an HP product it is advised to use the genuine HP printhead for the best results.
Workaround:
If the hp printhead error isn’t resolved yet then the best thing to do is to call the HP Customer Support helpline on 0845 365 3605 so that they can find your account and arrange for replacements if required to be sent out to you. In many cases, the only way to resolve a printhead failure is to replace the printhead, if it is replaceable. If the printhead is not replaceable, the entire printer must be replaced or serviced.
Hopefully, the error must be gone till now. For further detail and information click here.