How to Fix Macrium Reflect Error 9 during Backup?
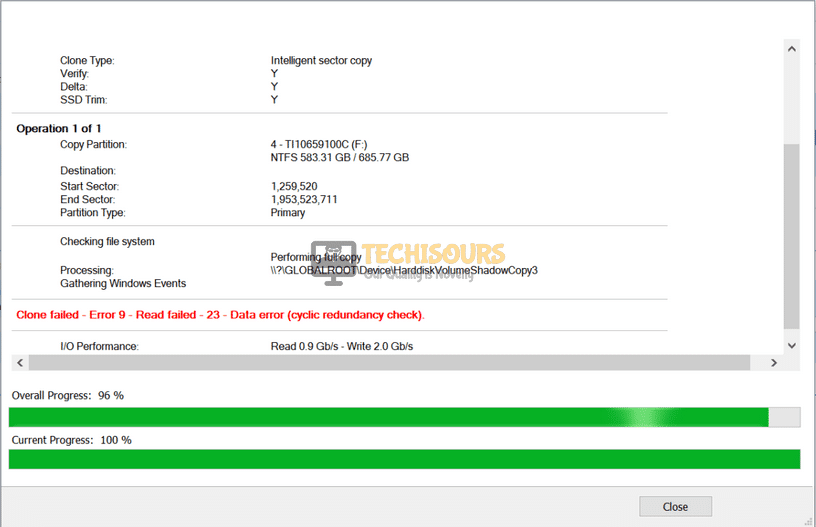
Macrium Reflect is a backup tool for Microsoft Windows. Many users have encountered an error while cloning their HDD to an SSD or a new HDD. This error states “Clone failed – Error 9” and it prevents you to clone your drive. The “macrium reflect error 9″ can be solved easily by going through the solutions explained in this article.
What causes the error 9 in Macrium Reflect?
There are different reasons that cause the macrium reflect error 9 in different situations. Some of the most common reasons are listed below:
- Improper cable connection might cause this issue.
- Bad Sectors in the storage device can cause this error.
- Your antivirus software might be blocking some of the features.
- This error might occur if the disk has a file system error.
Pre tips:
The error 9 might be encountered by anyone anytime. In most of the cases, the physical connection between both of the drives is loose, that is why you see this error. So if this error pops up on your screen, make sure you have connected the drive properly. If it doesn’t help, try to replace the connecting cable because the cable might get damaged easily if it is used excessively.
What to do if you get the “Macrium Reflect Error 9” on backup?
Solution 1: Disable or Uninstall Third-party Antivirus Softwares
If the error 9 appears, the reason might be that antivirus is blocking some features of the system. Third-party antiviruses are good to some extent but sometimes they create a problem by blocking some features of the system. So to resolve this error, turn-off your third party antiviruses and reboot the system to check if this problem is resolved.
Solution 2: Clean the Target Disk to Resolve macrium reflect error 9
If you still encounter the macrium reflect error 9, run a disk cleanup of the destination disk. Follow the steps below to carry this task out.
- Click the search button in the taskbar. Type and open Diskpart.

Diskpart - Write the following commands one by one and hit enter to execute them. (Note that X represents the Number of your Target drive)
-
list disk
select disk X
clean

Disk cleanup - Restart your computer and check if the issue is resolved.


Solution 3: Run CHKDSK Utility for terminating macrium reflect error 9
Running the CHKDSK utility has been reported as the most efficient solution to error 9. Follow the steps given below to perform this task.
- Click the search button in the taskbar and type Command Prompt.
- Right-click on it and click Run as administrator.

Clicking on “Run as Administrator” - Enter the following command and hit enter to execute it. (Note that X represents the letter of your source drive)
-
chkdsk X: /f /r

Running chkdsk - Restart your PC and see if the error occurs again.


Solution 4: Create Image instead of Cloning
If you still can’t get rid of the error 9, try to make a disk image with Macrium Reflect. Follow the steps below to create this image and check if the error is resolved.
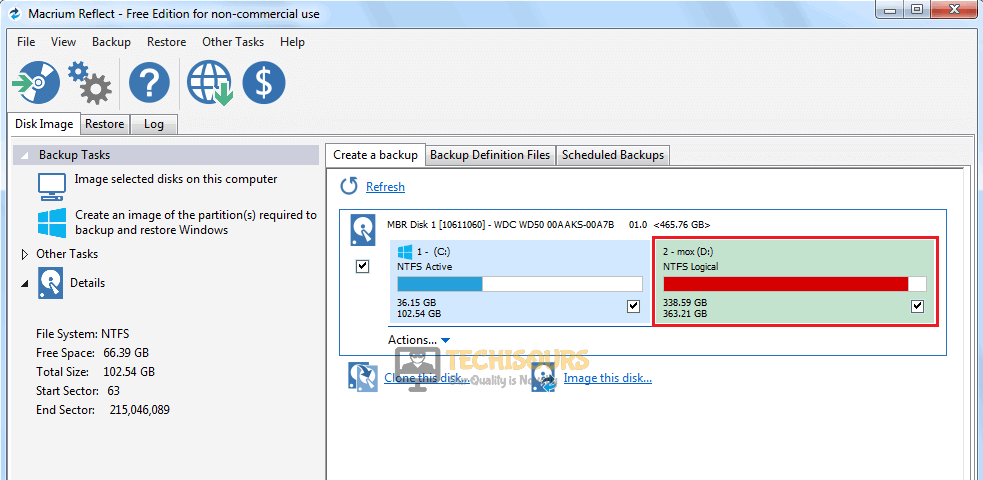
- Open Macrium and wait while it populates all the drives connected.
- Now select the drive which you want to image.

Select disk - Near the bottom bar, click Image this disk.

Image this disk - Now click the browse button and select aa location to create this image.
- Select OK, then select Next and then select None when it asks to choose a template.
- Now press Finish.

Finishing up


Solution 5: Ignore Bad Sectors
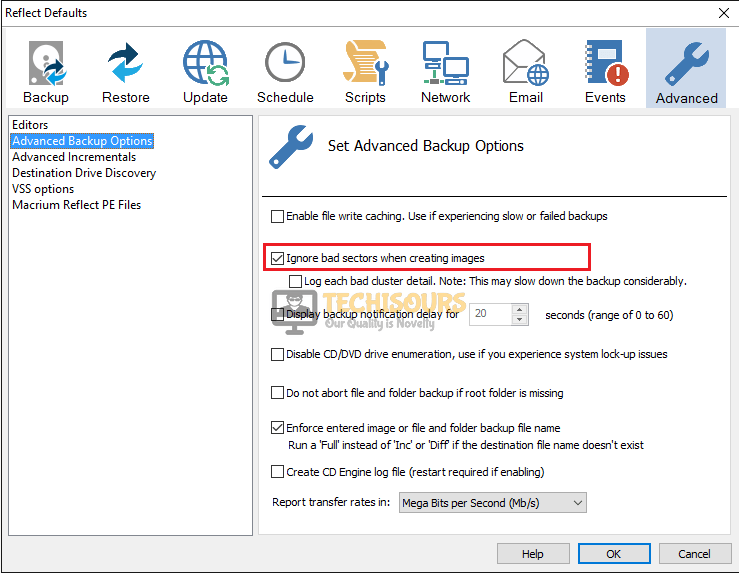
If macrium reflect error 9 appears on the screen while you are creating the image, try to ignore the bad sectors to resolve this issue. Follow the steps given below:
- Open Macrium.
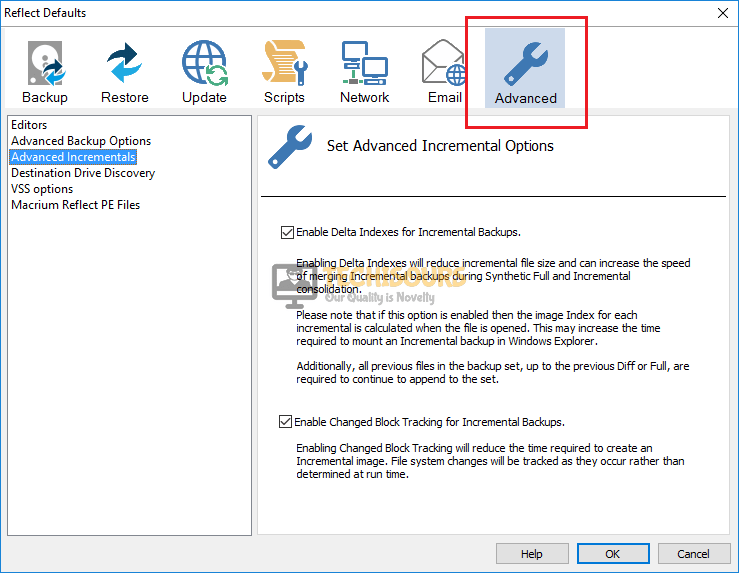
- At the top of the screen, click on Advanced.

Advanced - Now on the left pane, click on Advanced Backup Options.

Advanced Backup Options - Now check the box parallel to Ignore bad sectors when creating images.
Ignore bad sectors when creating images - Now press OK.

Solution 6: Use EaseUS
If none of the solutions explained above works, try to use another third-party software to carry your task out.
- Download EaseUS from your favorite browser.
- Install the tool by following the on-screen instructions and launch it.

Launch the tool - Select the partition that you want to clone.
Select the partition - Now select the destination disk to save your clone.
- Click Proceed.
Proceed


If you need further assistance, contact here.